Documentation — August 20, 2026
232 files changed, 1551 insertions, 588 deletions — view the commit on the mirror.
233 Cortex XSIAM pages restyled for search; SaaS section renamed; 18 compliance standards added
- Every changed file is in the Cortex XSIAM book: 192 modified and 41 renamed, with no page added or deleted.
- Mostly an authoring pass — 97 pages changed only by gaining a
description:frontmatter line, and 12 page titles were rewritten into keyword-rich forms. - The SaaS Security onboarding section moved from
onboard-a-supported-saas-applicationtoconnect-a-saas-application, taking 40 application pages with it. - The one substantive change is the compliance standards catalog, which gained 18 standards including CIS benchmarks for Ubuntu 24.04 LTS, Debian 13 and AWS Foundations v7.0.0.
- Egress, inbound and engine IP tables, supported regions, retention periods and licence tiers were all re-headed, but no value in them changed.
Highlights
-
The SaaS Security onboarding section was renamed, moving 41 pages
`onboard-a-supported-saas-application` became `connect-a-saas-application`; 40 of the 41 pages moved at 100% similarity, and the parent page's own per-app link table was left untouched and still points at the old segment.
-
The compliance standards catalog gained 18 standards
New CIS benchmarks for Alibaba Cloud 2.0.0, Debian 13, Ubuntu 24.04 LTS, Red Hat OpenShift 1.9.0, EKS 1.8.0, AWS Foundations v7.0.0 and Azure Foundations v6.0.0, each at Level 1 and Level 2, plus NIST SP 800-190.
-
The allowlist and region reference pages changed only in their headings
The egress, inbound, engine-IP and FedRAMP resource pages were retitled and given real `###` headings in place of bold labels, but every IP address, FQDN, port and App-ID in their tables is unchanged.
-
97 pages changed only by gaining a search description
Each added a four- or six-line `description:` frontmatter block and nothing else — zero deletions, no body text touched.
-
12 page titles were rewritten and the navigation manifest followed
`.meta/xsiam.json` records the new titles: "Engine IP addresses (outbound)" became "Cortex XSIAM engine outbound IP addresses", "Use the interface" became "Use the Cortex XSIAM interface", and "Limitations & supported regions" became "FedRAMP limitations and supported government cloud regions".
-
Role-based access control hub pages now link to their children
Plain-text component lists became cross-links — configuration permissions went from 8 bare names to 19 linked sub-pages, and cloud security and posture management gained links to its 9.
Changes
232 files listed, 14 written up and shaded below.
-
▸ ▾ Management audit log messages modified +6 −0
xsiam/onboard-cortex-xsiam/post-deployment/data-and-log-forwarding/data-and-log-notification-formats/management-audit-log-messagesRead it on the Cortex docs portal ↗ Read it here → This file's diff on GitHub ↗
Before After@@ -1,8 +1,14 @@---description: >-Reference Cortex XSIAM Management Audit Log message types for administrative,authentication, automation, endpoint, policy, and integration activity.---# Management audit log messages# Management audit log messagesCortex XSIAM management audit log messages are sent based on the various log types, for example, Action Center, Issue Rules, or Authentication.Cortex XSIAM management audit log messages are sent based on the various log types, for example, Action Center, Issue Rules, or Authentication.List of log typesList of log typesShow markdown source
@@ -1,8 +1,14 @@
+---
+description: >-
+  Reference Cortex XSIAM Management Audit Log message types for administrative,
+  authentication, automation, endpoint, policy, and integration activity.
+---
+
 # Management audit log messages

 Cortex XSIAM management audit log messages are sent based on the various log types, for example, Action Center, Issue Rules, or Authentication.

 <details>

 <summary>List of log types</summary>
-
▸ ▾ Management Audit log notification format modified +6 −0
xsiam/onboard-cortex-xsiam/post-deployment/data-and-log-forwarding/data-and-log-notification-formats/management-audit-log-notification-formatRead it on the Cortex docs portal ↗ Read it here → This file's diff on GitHub ↗
Before After@@ -1,8 +1,14 @@---description: >-Reference Cortex XSIAM Management Audit Log notification formats for email andsyslog, including CEF field mappings and payload examples.---# Management Audit log notification format# Management Audit log notification formatCortex XSIAM forwards the Management Audit log to these external data sources:Cortex XSIAM forwards the Management Audit log to these external data sources:• Email account: Sent according to the settings you configured. For more information, see Configure notification forwarding.• Email account: Sent according to the settings you configured. For more information, see Configure notification forwarding.• Syslog receiver: Sent in a CEF format RFC 5425 according to the following mapping:• Syslog receiver: Sent in a CEF format RFC 5425 according to the following mapping:Section│DescriptionSection│DescriptionShow markdown source
@@ -1,8 +1,14 @@ +--- +description: >- + Reference Cortex XSIAM Management Audit Log notification formats for email and + syslog, including CEF field mappings and payload examples. +--- + # Management Audit log notification format Cortex XSIAM forwards the Management Audit log to these external data sources: * **Email account:** Sent according to the settings you configured. For more information, see [Configure notification forwarding](../forward-logs-and-data-from-cortex-xsiam-to-external-services/configure-notification-forwarding). * **Syslog receiver:** Sent in a [CEF format RFC 5425](https://tools.ietf.org/html/rfc5425) according to the following mapping: | Section | Description | -
▸ ▾ Forward logs and data from Cortex XSIAM to external services modified +6 −0
xsiam/onboard-cortex-xsiam/post-deployment/data-and-log-forwarding/forward-logs-and-data-from-cortex-xsiam-to-external-servicesRead it on the Cortex docs portal ↗ Read it here → This file's diff on GitHub ↗
Before After@@ -1,8 +1,14 @@---description: >-Forward Cortex XSIAM logs, cases, and issues to email, Slack, syslog, Splunk,Amazon SQS, Amazon S3, or webhooks.---# Forward logs and data from Cortex XSIAM to external services# Forward logs and data from Cortex XSIAM to external servicesYou can forward logs, cases, and issues from Cortex XSIAM to an external service. By forwarding logs and data, you can manage alerts and investigations in external systems and meet data retention requirements. Available services include the following:You can forward logs, cases, and issues from Cortex XSIAM to an external service. By forwarding logs and data, you can manage alerts and investigations in external systems and meet data retention requirements. Available services include the following:• Slack channel and/or syslog receiver: Configure the external application with Cortex XSIAM. After the application is configured, configure notification forwarding, specifying the data/log type you want to forward.• Slack channel and/or syslog receiver: Configure the external application with Cortex XSIAM. After the application is configured, configure notification forwarding, specifying the data/log type you want to forward.• Email distribution list: Configure notification forwarding, specifying the data/log type you want to forward.• Email distribution list: Configure notification forwarding, specifying the data/log type you want to forward.• Splunk, Amazon SQS, Amazon S3, and Webhook: Only cases and issues can be forwarded to these services. The external application must be configured in Cortex XSIAM and egress configured in the Cortex Gateway before forwarding to these services.• Splunk, Amazon SQS, Amazon S3, and Webhook: Only cases and issues can be forwarded to these services. The external application must be configured in Cortex XSIAM and egress configured in the Cortex Gateway before forwarding to these services.Show markdown source
@@ -1,8 +1,14 @@
+---
+description: >-
+  Forward Cortex XSIAM logs, cases, and issues to email, Slack, syslog, Splunk,
+  Amazon SQS, Amazon S3, or webhooks.
+---
+
 # Forward logs and data from Cortex XSIAM to external services

 You can forward logs, cases, and issues from Cortex XSIAM to an external service. By forwarding logs and data, you can manage alerts and investigations in external systems and meet data retention requirements. Available services include the following:

 * **Slack channel and/or syslog receiver:** Configure the external application with Cortex XSIAM. After the application is configured, configure notification forwarding, specifying the data/log type you want to forward.
 * **Email distribution list:** Configure notification forwarding, specifying the data/log type you want to forward.
 * **Splunk, Amazon SQS, Amazon S3, and Webhook:** Only cases and issues can be forwarded to these services. The external application must be configured in Cortex XSIAM and egress configured in the Cortex Gateway before forwarding to these services.
-
▸ ▾ Configure external applications for forwarding modified +10 −1
xsiam/onboard-cortex-xsiam/post-deployment/data-and-log-forwarding/forward-logs-and-data-from-cortex-xsiam-to-external-services/configure-external-applications-for-forwardingRead it on the Cortex docs portal ↗ Read it here → This file's diff on GitHub ↗
Before After@@ -4,10 +4,19 @@ Cases, issues, and logs can be forwarded to third-party external services. The eOnly cases and issues can be forwarded to Slack, Amazon S3, Amazon SQS, Splunk, and Webhook. Before forwarding cases or issues to Splunk, Amazon S3, Amazon SQS, or Webhook, you need to configure egress in the Cortex Gateway.Only cases and issues can be forwarded to Slack, Amazon S3, Amazon SQS, Splunk, and Webhook. Before forwarding cases or issues to Splunk, Amazon S3, Amazon SQS, or Webhook, you need to configure egress in the Cortex Gateway.You do not need to configure egress for email, Slack, or syslog forwarding. No prior configuration is required to send data or logs to an email distribution list.You do not need to configure egress for email, Slack, or syslog forwarding. No prior configuration is required to send data or logs to an email distribution list.hint infohint info### Note### NoteThere are two options for configuring external applications. To configure relevant external applications before you begin creating forwarding notifications, follow the steps in the following topics using the menu path Settings → Configurations → Integrations → External Applications. You can also configure an external application as part of the workflow for configuring notification forwarding found at Settings → Configurations → General → Notifications → Add Forwarding Notifications. After defining the configuration and setting the scope of the notifications, you can select an existing external application or Add Application. After you choose Add Application, the steps are identical to those described in the following topics.You can configure external applications using either of these methods:• Pre-configuration: Navigate to Settings → Configurations → Integrations → External Applications and follow the setup guide for your specific service:• forward-notifications-to-amazon-sqs• forward-notifications-to-amazon-s3• forward-notifications-to-splunk• forward-notifications-to-webhook• integrate-a-syslog-receiver• integrate-slack-for-outbound-notifications• In-workflow configuration: Navigate to Settings → Configurations → General → Notifications → Add Forwarding Notifications. Define the configuration and notification scope, then click Add Application and complete the setup steps for your chosen service.endhintendhintShow markdown source
@@ -4,10 +4,19 @@ Cases, issues, and logs can be forwarded to third-party external services. The e Only cases and issues can be forwarded to Slack, Amazon S3, Amazon SQS, Splunk, and Webhook. Before forwarding cases or issues to Splunk, Amazon S3, Amazon SQS, or Webhook, you need to configure egress in the Cortex Gateway. You do not need to configure egress for email, Slack, or syslog forwarding. No prior configuration is required to send data or logs to an email distribution list. {% hint style="info" %} ### Note -There are two options for configuring external applications. To configure relevant external applications before you begin creating forwarding notifications, follow the steps in the following topics using the menu path **Settings** → **Configurations** → **Integrations** → **External Applications**. You can also configure an external application as part of the workflow for configuring notification forwarding found at **Settings** → **Configurations** → **General** → **Notifications** → **Add Forwarding Notifications**. After defining the configuration and setting the scope of the notifications, you can select an existing external application or **Add Application**. After you choose **Add Application**, the steps are identical to those described in the following topics. +You can configure external applications using either of these methods: + +* Pre-configuration: Navigate to **Settings → Configurations → Integrations → External Applications** and follow the setup guide for your specific service: + * [forward-notifications-to-amazon-sqs](configure-external-applications-for-forwarding/forward-notifications-to-amazon-sqs "mention") + * [forward-notifications-to-amazon-s3](configure-external-applications-for-forwarding/forward-notifications-to-amazon-s3 "mention") + * [forward-notifications-to-splunk](configure-external-applications-for-forwarding/forward-notifications-to-splunk "mention") + * [forward-notifications-to-webhook](configure-external-applications-for-forwarding/forward-notifications-to-webhook "mention") + * [integrate-a-syslog-receiver](configure-external-applications-for-forwarding/integrate-a-syslog-receiver "mention") + * [integrate-slack-for-outbound-notifications](configure-external-applications-for-forwarding/integrate-slack-for-outbound-notifications "mention") +* In-workflow configuration: Navigate to **Settings → Configurations → General → Notifications → Add Forwarding Notifications**. Define the configuration and notification scope, then click **Add Application** and complete the setup steps for your chosen service. {% endhint %} -
▸ ▾ Forward notifications to Amazon S3 modified +13 −7
xsiam/onboard-cortex-xsiam/post-deployment/data-and-log-forwarding/forward-logs-and-data-from-cortex-xsiam-to-external-services/configure-external-applications-for-forwarding/forward-notifications-to-amazon-s3Read it on the Cortex docs portal ↗ Read it here → This file's diff on GitHub ↗
Before After@@ -1,34 +1,40 @@---description: >-Configure Cortex XSIAM notification forwarding to Amazon S3 with CortexGateway egress, AWS IAM roles, bucket permissions, and file rollup.---# Forward notifications to Amazon S3# Forward notifications to Amazon S3Create the S3 Bucket### Create the S3 Bucket1. Log in to your AWS Management Console.1. Log in to your AWS Management Console.2. Navigate to S3 and click Create bucket.2. Navigate to S3 and click Create bucket.3. Enter a unique bucket name and select the AWS Region. Note the region, as you will need it later.3. Enter a unique bucket name and select the AWS Region. Note the region, as you will need it later.4. Verify Block all public access is turned on for security.4. Verify Block all public access is turned on for security.Configure egress in Cortex Gateway### Configure egress in Cortex GatewayBefore forwarding cases or issues to Amazon S3, you need to configure egress. Only a user with Account Admin or Instance Admin permissions can configure egress.Before forwarding cases or issues to Amazon S3, you need to configure egress. Only a user with Account Admin or Instance Admin permissions can configure egress.To configure egress, you must enter the bucket name. For example, if the full path iss3://parent-bucket-name/child-bucket/, enterparent-bucket-name.To configure egress, you must enter the bucket name. For example, if the full path iss3://parent-bucket-name/child-bucket/, enterparent-bucket-name.1. In the Cortex Gateway, go to Permission Management → Egress Configurations → Path.1. In the Cortex Gateway, go to Permission Management → Egress Configurations → Path.2. Select the account name and tenant.2. Select the account name and tenant.3. In the Flow field, select External Storage: AWS S3.3. In the Flow field, select External Storage: AWS S3.4. Enter the exact<bucket_name>. For example,my-example-bucket. Do not include subfolders.4. Enter the exact<bucket_name>. For example,my-example-bucket. Do not include subfolders.5. Add the configuration.5. Add the configuration.Generate the authorized party ID### Generate the authorized party ID1. In Cortex XSIAM, go to Settings → Configurations → Integrations → External Applications → Add Application and select Amazon S3.1. In Cortex XSIAM, go to Settings → Configurations → Integrations → External Applications → Add Application and select Amazon S3.2. Enter the S3 URI.2. Enter the S3 URI.3. Click Verify. If egress has not been configured in the Cortex Gateway, verification will fail and a message will display that the endpoint does not match any approved routes.3. Click Verify. If egress has not been configured in the Cortex Gateway, verification will fail, and a message will display that the endpoint does not match any approved routes.4. After verification is successful, an authorized party ID is generated. Copy this ID for your AWS configuration.4. After verification is successful, an authorized party ID is generated. Copy this ID for your AWS configuration.5. Leave this page open to complete the application configuration after configuring the IAM role and permissions in AWS.5. Leave this page open to complete the application configuration after configuring the IAM role and permissions in AWS.Configure the IAM Role and permissions in AWSConfigure the IAM Role and permissions in AWSCortex XSIAM needs permission to assume a role in your account.Cortex XSIAM needs permission to assume a role in your account.1. In AWS, go to IAM → Roles → Create role, select Custom trust policy, and enter the Trusted Entity JSON, replacing the sub condition with your Authorized party ID. The following is an example:1. In AWS, go to IAM → Roles → Create role, select Custom trust policy, and enter the Trusted Entity JSON, replacing the sub condition with your Authorized party ID. The following is an example:@@ -49,17 +55,17 @@ Cortex XSIAM needs permission to assume a role in your account.}}}}}}]]}}``````2. Create and attach a policy granting permissions.2. Create and attach a policy granting permissions.<div data-gb-custom-block data-tag="hint" data-style="info" class="hint hint-info"><h3>Note</h3><p>The policy must allow <code>s3:PutObject</code> and <code>s3:ListBucket</code>. Verify the resource matches your exact bucket name, formatted as <code>arn:aws:s3:::your-bucket-name/*</code>. The following is an example:</p><pre class="language-programlisting"><code class="lang-programlisting">{<div data-gb-custom-block data-tag="hint" data-style="info" class="hint hint-info"><p>The policy must allow <code>s3:PutObject</code> and <code>s3:ListBucket</code>. Verify the resource matches your exact bucket name, formatted as <code>arn:aws:s3:::your-bucket-name/*</code>. The following is an example:</p><pre class="language-programlisting"><code class="lang-programlisting">{"Version": "2012-10-17","Version": "2012-10-17","Statement": ["Statement": [{{"Sid": "Statement1","Sid": "Statement1","Effect": "Allow","Effect": "Allow","Action": ["Action": ["s3:PutObject","s3:PutObject","s3:ListBucket""s3:ListBucket"@@ -67,21 +73,21 @@ Cortex XSIAM needs permission to assume a role in your account."Resource": ["Resource": ["arn:aws:s3:::<your-bucket-name>/*""arn:aws:s3:::<your-bucket-name>/*"]]}}]]}}</code></pre></div></code></pre></div>Complete external application configuration in Cortex XSIAM### Complete external application configuration in Cortex XSIAM1. Go back to Cortex XSIAM and enter the instance name and an optional description.1. Go back to Cortex XSIAM and enter the instance name and an optional description.2. Select **IAM Role** as the connection method and paste the Role ARN (Amazon Resource Name) from the role you created.2. Select **IAM Role** as the connection method and paste the Role ARN (Amazon Resource Name) from the role you created.3. Enter the AWS region. The region you select must exactly match the bucket's region in AWS.3. Enter the AWS region. The region you select must exactly match the bucket's region in AWS.4. Select the file rollup time to collect data (cases or issues) before sending. The default is one hour. This is the maximum duration the system collects data before writing to a new file in Amazon S3.4. Select the file rollup time to collect data (cases or issues) before sending. The default is one hour. This is the maximum duration the system collects data before writing to a new file in Amazon S3.<div data-gb-custom-block data-tag="hint" data-style="info" class="hint hint-info"><h3>Note</h3><p>The first message is always sent immediately, and the selected rollup time applies to all subsequent data</p></div><div data-gb-custom-block data-tag="hint" data-style="info" class="hint hint-info"><h3>Note</h3><p>The first message is always sent immediately, and the selected rollup time applies to all subsequent data</p></div>5. Click **Test** to verify Cortex XSIAM can write a test object, then click **Connect**.5. Click **Test** to verify Cortex XSIAM can write a test object, then click **Connect**.Configure notification forwarding### Configure notification forwardingFollow the instructions for [Configure notification forwarding](../configure-notification-forwarding).Follow the instructions for [Configure notification forwarding](../configure-notification-forwarding).Show markdown source
@@ -1,34 +1,40 @@ +--- +description: >- + Configure Cortex XSIAM notification forwarding to Amazon S3 with Cortex + Gateway egress, AWS IAM roles, bucket permissions, and file rollup. +--- + # Forward notifications to Amazon S3 -Create the S3 Bucket +### Create the S3 Bucket 1. Log in to your AWS Management Console. 2. Navigate to S3 and click **Create bucket**. 3. Enter a unique bucket name and select the AWS Region. Note the region, as you will need it later. 4. Verify **Block all public access** is turned on for security. -Configure egress in Cortex Gateway +### Configure egress in Cortex Gateway Before forwarding cases or issues to Amazon S3, you need to configure egress. Only a user with Account Admin or Instance Admin permissions can configure egress. To configure egress, you must enter the bucket name. For example, if the full path is `s3://parent-bucket-name/child-bucket/`, enter `parent-bucket-name`. 1. In the Cortex Gateway, go to **Permission Management** → **Egress Configurations** → **Path**. 2. Select the account name and tenant. 3. In the Flow field, select **External Storage: AWS S3**. 4. Enter the exact `<bucket_name>`. For example, `my-example-bucket`. Do not include subfolders. 5. Add the configuration. -Generate the authorized party ID +### Generate the authorized party ID 1. In Cortex XSIAM, go to **Settings** → **Configurations** → **Integrations** → **External Applications** → **Add Application** and select **Amazon S3**. 2. Enter the S3 URI. -3. Click **Verify**. If egress has not been configured in the Cortex Gateway, verification will fail and a message will display that the endpoint does not match any approved routes. +3. Click **Verify**. If egress has not been configured in the Cortex Gateway, verification will fail, and a message will display that the endpoint does not match any approved routes. 4. After verification is successful, an authorized party ID is generated. Copy this ID for your AWS configuration. 5. Leave this page open to complete the application configuration after configuring the IAM role and permissions in AWS. Configure the IAM Role and permissions in AWS Cortex XSIAM needs permission to assume a role in your account. 1. In AWS, go to **IAM** → **Roles** → **Create role**, select Custom trust policy, and enter the Trusted Entity JSON, replacing the sub condition with your Authorized party ID. The following is an example: @@ -49,17 +55,17 @@ Cortex XSIAM needs permission to assume a role in your account. } } } ] } ``` 2. Create and attach a policy granting permissions. - <div data-gb-custom-block data-tag="hint" data-style="info" class="hint hint-info"><h3>Note</h3><p>The policy must allow <code>s3:PutObject</code> and <code>s3:ListBucket</code>. Verify the resource matches your exact bucket name, formatted as <code>arn:aws:s3:::your-bucket-name/*</code>. The following is an example:</p><pre class="language-programlisting"><code class="lang-programlisting">{ + <div data-gb-custom-block data-tag="hint" data-style="info" class="hint hint-info"><p>The policy must allow <code>s3:PutObject</code> and <code>s3:ListBucket</code>. Verify the resource matches your exact bucket name, formatted as <code>arn:aws:s3:::your-bucket-name/*</code>. The following is an example:</p><pre class="language-programlisting"><code class="lang-programlisting">{ "Version": "2012-10-17", "Statement": [ { "Sid": "Statement1", "Effect": "Allow", "Action": [ "s3:PutObject", "s3:ListBucket" @@ -67,21 +73,21 @@ Cortex XSIAM needs permission to assume a role in your account. "Resource": [ "arn:aws:s3:::<your-bucket-name>/*" ] } ] } </code></pre></div> -Complete external application configuration in Cortex XSIAM +### Complete external application configuration in Cortex XSIAM 1. Go back to Cortex XSIAM and enter the instance name and an optional description. 2. Select **IAM Role** as the connection method and paste the Role ARN (Amazon Resource Name) from the role you created. 3. Enter the AWS region. The region you select must exactly match the bucket's region in AWS. 4. Select the file rollup time to collect data (cases or issues) before sending. The default is one hour. This is the maximum duration the system collects data before writing to a new file in Amazon S3. <div data-gb-custom-block data-tag="hint" data-style="info" class="hint hint-info"><h3>Note</h3><p>The first message is always sent immediately, and the selected rollup time applies to all subsequent data</p></div> 5. Click **Test** to verify Cortex XSIAM can write a test object, then click **Connect**. -Configure notification forwarding +### Configure notification forwarding Follow the instructions for [Configure notification forwarding](../configure-notification-forwarding). -
▸ ▾ Forward notifications to Amazon SQS modified +7 −7
xsiam/onboard-cortex-xsiam/post-deployment/data-and-log-forwarding/forward-logs-and-data-from-cortex-xsiam-to-external-services/configure-external-applications-for-forwarding/forward-notifications-to-amazon-sqsRead it on the Cortex docs portal ↗ Read it here → This file's diff on GitHub ↗
Before After@@ -1,35 +1,35 @@# Forward notifications to Amazon SQS# Forward notifications to Amazon SQSCreate the SQS queue### Create the SQS queueLog in to your AWS Management Console and create a new Standard SQS queue.Log in to your AWS Management Console and create a new Standard SQS queue.Configure egress in Cortex Gateway### Configure egress in Cortex GatewayBefore forwarding cases or issues to Amazon SQS, you need to configure egress. Only a user with Account Admin or Instance Admin permissions can configure egress.Before forwarding cases or issues to Amazon SQS, you need to configure egress. Only a user with Account Admin or Instance Admin permissions can configure egress.To configure egress, you need to enter the queue name. For example, if the full URL is https://sqs.region.amazonaws.com/account-id/queue-name, enter onlyqueue-name.To configure egress, to enter the queue name. For example, if the full URL is https://sqs.region.amazonaws.com/account-id/queue-name, enter onlyqueue-name.1. In the Cortex Gateway, go to Permission Management → Egress Configurations → Path.1. In the Cortex Gateway, go to Permission Management → Egress Configurations → Path.2. Select the account name and tenant.2. Select the account name and tenant.3. In the Flow field, select External storage: AWS SQS.3. In the Flow field, select External storage: AWS SQS.4. Enter the exact <queue_name>. For example,my-example-queue. Note that the path does not include HTTP or HTTPS.4. Enter the exact <queue_name>. For example,my-example-queue. Note that the path does not include HTTP or HTTPS.5. Add the configuration.5. Add the configuration.Generate the authorized party ID### Generate the authorized party ID1. In Cortex XSIAM, go to Settings → Configurations → Integrations → External Applications → Add Application and select Amazon SQS.1. In Cortex XSIAM, go to Settings → Configurations → Integrations → External Applications → Add Application and select Amazon SQS.2. Enter the queue URL from Amazon SQS. Use the URL format rather than the ARN for this specific field.2. Enter the queue URL from Amazon SQS. Use the URL format rather than the ARN for this specific field.3. Click Verify. If egress has not been configured in the Cortex Gateway, verification will fail and a message will display that the endpoint does not match any approved routes.3. Click Verify. If egress has not been configured in the Cortex Gateway, verification will fail and a message will display that the endpoint does not match any approved routes.4. After verification is successful, an authorized party ID is generated. Copy this ID for your AWS configuration.4. After verification is successful, an authorized party ID is generated. Copy this ID for your AWS configuration.5. Leave this page open to complete the application configuration.5. Leave this page open to complete the application configuration.Configure the IAM role and permissions in AWS### Configure the IAM role and permissions in AWSCortex XSIAM needs permission to assume a role in your account.Cortex XSIAM needs permission to assume a role in your account.You can authenticate using either an IAM role or IAM access keys.You can authenticate using either an IAM role or IAM access keys.• IAM role:• IAM role:• In AWS, go to IAM → Roles → Create role, select Custom trust policy, and enter the Trusted Entity JSON, replacing the sub condition with your Authorized party ID. The following is an example:• In AWS, go to IAM → Roles → Create role, select Custom trust policy, and enter the Trusted Entity JSON, replacing the sub condition with your Authorized party ID. The following is an example:@@ -70,19 +70,19 @@ You can authenticate using either an IAM role or IAM access keys."arn:aws:sqs:<region>:<account_id>:<queue_name>""arn:aws:sqs:<region>:<account_id>:<queue_name>"]]}}]]}}``````* **IAM access keys**: Verify the user associated with the access key and secret key has related permissions to accept the data.* **IAM access keys**: Verify the user associated with the access key and secret key has related permissions to accept the data.Complete external application configuration in Cortex XSIAM### Complete external application configuration in Cortex XSIAM1. Go back to Cortex XSIAM and enter the instance name and an optional description.1. Go back to Cortex XSIAM and enter the instance name and an optional description.2. Select either **IAM Role** or **IAM Access Keys**.2. Select either **IAM Role** or **IAM Access Keys**.* For IAM role, paste the role ARN (Amazon Resource Name) from the role you created.* For IAM role, paste the role ARN (Amazon Resource Name) from the role you created.* For IAM access keys, enter the access key and secret key.* For IAM access keys, enter the access key and secret key.3. Click **Test** to verify Cortex XSIAM can write a test object, then click **Connect**.3. Click **Test** to verify Cortex XSIAM can write a test object, then click **Connect**.Configure notification forwarding### Configure notification forwardingFollow the instructions for [Configure notification forwarding](../configure-notification-forwarding).Follow the instructions for [Configure notification forwarding](../configure-notification-forwarding).Show markdown source
@@ -1,35 +1,35 @@ # Forward notifications to Amazon SQS -Create the SQS queue +### Create the SQS queue Log in to your AWS Management Console and create a new **Standard SQS queue**. -Configure egress in Cortex Gateway +### Configure egress in Cortex Gateway Before forwarding cases or issues to Amazon SQS, you need to configure egress. Only a user with Account Admin or Instance Admin permissions can configure egress. -To configure egress, you need to enter the queue name. For example, if the full URL is https://sqs.region.amazonaws.com/account-id/queue-name, enter only `queue-name`. +To configure egress, to enter the queue name. For example, if the full URL is https://sqs.region.amazonaws.com/account-id/queue-name, enter only `queue-name`. 1. In the Cortex Gateway, go to **Permission Management** → **Egress Configurations** → **Path**. 2. Select the account name and tenant. 3. In the Flow field, select **External storage: AWS SQS**. 4. Enter the exact \<queue\_name>. For example, `my-example-queue`. Note that the path does not include HTTP or HTTPS. 5. Add the configuration. -Generate the authorized party ID +### Generate the authorized party ID 1. In Cortex XSIAM, go to **Settings** → **Configurations** → **Integrations** → **External Applications** → **Add Application** and select **Amazon SQS**. 2. Enter the queue URL from Amazon SQS. Use the URL format rather than the ARN for this specific field. 3. Click **Verify**. If egress has not been configured in the Cortex Gateway, verification will fail and a message will display that the endpoint does not match any approved routes. 4. After verification is successful, an authorized party ID is generated. Copy this ID for your AWS configuration. 5. Leave this page open to complete the application configuration. -Configure the IAM role and permissions in AWS +### Configure the IAM role and permissions in AWS Cortex XSIAM needs permission to assume a role in your account. You can authenticate using either an IAM role or IAM access keys. * **IAM role**: * In AWS, go to **IAM** → **Roles** → **Create role**, select Custom trust policy, and enter the Trusted Entity JSON, replacing the sub condition with your Authorized party ID. The following is an example: @@ -70,19 +70,19 @@ You can authenticate using either an IAM role or IAM access keys. "arn:aws:sqs:<region>:<account_id>:<queue_name>" ] } ] } ``` * **IAM access keys**: Verify the user associated with the access key and secret key has related permissions to accept the data. -Complete external application configuration in Cortex XSIAM +### Complete external application configuration in Cortex XSIAM 1. Go back to Cortex XSIAM and enter the instance name and an optional description. 2. Select either **IAM Role** or **IAM Access Keys**. * For IAM role, paste the role ARN (Amazon Resource Name) from the role you created. * For IAM access keys, enter the access key and secret key. 3. Click **Test** to verify Cortex XSIAM can write a test object, then click **Connect**. -Configure notification forwarding +### Configure notification forwarding Follow the instructions for [Configure notification forwarding](../configure-notification-forwarding). -
▸ ▾ Forward notifications to Splunk modified +11 −5
xsiam/onboard-cortex-xsiam/post-deployment/data-and-log-forwarding/forward-logs-and-data-from-cortex-xsiam-to-external-services/configure-external-applications-for-forwarding/forward-notifications-to-splunkRead it on the Cortex docs portal ↗ Read it here → This file's diff on GitHub ↗
Before After@@ -1,30 +1,36 @@---description: >-Configure Cortex XSIAM notification forwarding to Splunk with firewall access,Cortex Gateway egress, HTTPS Event Collector, and authentication tokens.---# Forward notifications to Splunk# Forward notifications to SplunkConfigure access in your firewall### Configure access in your firewallAdd the IP addresses for your tenant region to your firewall. For more information, refer to the list of ingress IPs in Enable access to required PANW resources.Add the IP addresses for your tenant region to your firewall. For more information, refer to the list of ingress IPs in Enable access to required PANW resources.Configure egress in Cortex Gateway### Configure egress in Cortex GatewayBefore forwarding cases or issues to Splunk, you need to configure egress. Only a user with Account Admin or Instance Admin permissions can configure egress.Before forwarding cases or issues to Splunk, you need to configure egress. Only a user with Account Admin or Instance Admin permissions can configure egress.To configure egress, you need to enter the FQDN (fully qualified domain name), without including the port or the path. For example, if the full URL ishttps://splunk..mycompany.com:8088/services/collector, you would entersplunk.mycompany.com.To configure egress, enter the FQDN (fully qualified domain name), without including the port or the path. For example, if the full URL ishttps://splunk..mycompany.com:8088/services/collector, you would entersplunk.mycompany.com.1. In the Cortex Gateway, go to Permission Management → Egress Configurations → Path.1. In the Cortex Gateway, go to Permission Management → Egress Configurations → Path.2. Select the account name and tenant.2. Select the account name and tenant.3. In the Flow field, select Splunk.3. In the Flow field, select Splunk.4. Enter the FQDN (full qualified domain name) of the Splunk instance. For example,splunk.mycompany.com. Note that the path does not include HTTP or HTTPS.4. Enter the FQDN (full qualified domain name) of the Splunk instance. For example,splunk.mycompany.com. Note that the path does not include HTTP or HTTPS.5. Add the configuration.5. Add the configuration.Complete external application configuration in Cortex XSIAM### Complete external application configuration in Cortex XSIAM1. Go to Settings → Configurations → Integrations → External Applications → Add Application and select Splunk.1. Go to Settings → Configurations → Integrations → External Applications → Add Application and select Splunk.2. Enter the Splunk HTTP event collector URL. The URL can include a port, but the connection must be HTTPS.2. Enter the Splunk HTTP event collector URL. The URL can include a port, but the connection must be HTTPS.3. Click Verify. If egress has not been configured in the Cortex Gateway, verification will fail.3. Click Verify. If egress has not been configured in the Cortex Gateway, verification will fail.4. After verification is successful, enter the instance name and optional description.4. After verification is successful, enter the instance name and optional description.5. Enter the authentication token for secure access to your Splunk instance.5. Enter the authentication token for secure access to your Splunk instance.6. Click Test to verify the connection, then click Connect.6. Click Test to verify the connection, then click Connect.Configure notification forwarding### Configure notification forwardingFollow the instructions for Configure notification forwarding.Follow the instructions for Configure notification forwarding.Show markdown source
@@ -1,30 +1,36 @@
+---
+description: >-
+  Configure Cortex XSIAM notification forwarding to Splunk with firewall access,
+  Cortex Gateway egress, HTTPS Event Collector, and authentication tokens.
+---
+
 # Forward notifications to Splunk

-Configure access in your firewall
+### Configure access in your firewall

 Add the IP addresses for your tenant region to your firewall. For more information, refer to the list of ingress IPs in [Enable access to required PANW resources](../../../../deployment-steps/activate-cortex-xsiam/enable-access-to-required-panw-resources).

-Configure egress in Cortex Gateway
+### Configure egress in Cortex Gateway

 Before forwarding cases or issues to Splunk, you need to configure egress. Only a user with Account Admin or Instance Admin permissions can configure egress.

-To configure egress, you need to enter the FQDN (fully qualified domain name), without including the port or the path. For example, if the full URL is `https://splunk..mycompany.com:8088/services/collector`, you would enter `splunk.mycompany.com`.
+To configure egress, enter the FQDN (fully qualified domain name), without including the port or the path. For example, if the full URL is `https://splunk..mycompany.com:8088/services/collector`, you would enter `splunk.mycompany.com`.

 1. In the Cortex Gateway, go to **Permission Management** → **Egress Configurations** → **Path**.
 2. Select the account name and tenant.
 3. In the Flow field, select **Splunk**.
 4. Enter the FQDN (full qualified domain name) of the Splunk instance. For example, `splunk.mycompany.com`. Note that the path does not include HTTP or HTTPS.
 5. Add the configuration.

-Complete external application configuration in Cortex XSIAM
+### Complete external application configuration in Cortex XSIAM

 1. Go to **Settings** → **Configurations** → **Integrations** → **External Applications** → **Add Application** and select **Splunk**.
 2. Enter the Splunk HTTP event collector URL. The URL can include a port, but the connection must be HTTPS.
 3. Click **Verify**. If egress has not been configured in the Cortex Gateway, verification will fail.
 4. After verification is successful, enter the instance name and optional description.
 5. Enter the authentication token for secure access to your Splunk instance.
 6. Click **Test** to verify the connection, then click **Connect**.

-Configure notification forwarding
+### Configure notification forwarding

 Follow the instructions for [Configure notification forwarding](../configure-notification-forwarding).
-
▸ ▾ Forward notifications to webhook modified +13 −9
xsiam/onboard-cortex-xsiam/post-deployment/data-and-log-forwarding/forward-logs-and-data-from-cortex-xsiam-to-external-services/configure-external-applications-for-forwarding/forward-notifications-to-webhookRead it on the Cortex docs portal ↗ Read it here → This file's diff on GitHub ↗
Before After@@ -1,39 +1,43 @@---description: >-Configure Cortex XSIAM case and issue notifications to HTTPS webhooks withfirewall access, Gateway egress, authentication, and JSON payload support.---# Forward notifications to webhook# Forward notifications to webhookYou can forward issues and cases to webhook.You can forward issues and cases to a webhook.hint infohint info### NoteCortex sends webhook notifications using its own predefined payload format. If your webhook endpoint requires the payload to be structured in a specific way — for example, the format expected by Google Chat or another third-party service — the notification will not be delivered successfully. Only endpoints that accept arbitrary JSON payloads are supported.Cortex sends webhook notifications using its own predefined payload format. If your webhook endpoint requires the payload to be structured in a specific way — for example, the format expected by Google Chat or another third-party service — the notification will not be delivered successfully. Only endpoints that accept arbitrary JSON payloads are supported.endhintendhintConfigure access in your firewall### Configure access in your firewallAdd the IP addresses for your tenant region to your firewall. For more information, refer to the list of ingress IPs in Enable access to required PANW resources.Add the IP addresses for your tenant region to your firewall. For more information, refer to the list of ingress IPs in Enable access to required PANW resources.Configure egress in Cortex Gateway### Configure egress in Cortex GatewayBefore forwarding cases or issues to Splunk, you need to configure egress. Only a user with Account Admin or Instance Admin permissions can configure egress.Before forwarding cases or issues to Splunk, you need to configure egress. Only a user with Account Admin or Instance Admin permissions can configure egress.To configure egress, you need to enter the FQDN (fully qualified domain name), without including the port or the path. For example, if the full URL ishttps://webhook..mycompany.com/target_resource, you would enterwebhook.mycompany.com.To configure egress, enter the FQDN (fully qualified domain name), without including the port or the path. For example, if the full URL ishttps://webhook..mycompany.com/target_resource, you would enterwebhook.mycompany.com.1. In the Cortex Gateway, go to Permission Management → Egress Configurations → Path.1. In the Cortex Gateway, go to Permission Management → Egress Configurations → Path.2. Select the account name and tenant.2. Select the account name and tenant.3. In the Flow field, select Webhook.3. In the Flow field, select Webhook.4. Enter the FQDN (full qualified domain name) of the webhook endpoint. For example,webhook.mycompany.com. Note that the path does not include HTTP or HTTPS.4. Enter the FQDN (fully qualified domain name) of the webhook endpoint. For example,webhook.mycompany.com. Note that the path does not include HTTP or HTTPS.5. Add the configuration.5. Add the configuration.Complete external application configuration in Cortex XSIAM### Complete external application configuration in Cortex XSIAM1. Go to Settings → Configurations → Integrations → External Applications → Add Application and select Webhook.1. Go to Settings → Configurations → Integrations → External Applications → Add Application and select Webhook.2. Enter the webhook URL. The URL can include a port, but the connection must be HTTPS.2. Enter the webhook URL. The URL can include a port, but the connection must be HTTPS.3. Click Verify. If egress has not been configured in the Cortex Gateway, verification will fail.3. Click Verify. If egress has not been configured in the Cortex Gateway, verification will fail.4. After verification is successful, enter the instance name and optional description.4. After verification is successful, enter the instance name and optional description.5. Show advanced settings to add HTTPS headers if required.5. Show advanced settings to add HTTPS headers if required.6. Enter the authentication token for secure access to your Splunk instance.6. Enter the authentication token for secure access to your Splunk instance.7. Click Test to verify the connection, then click Connect.7. Click Test to verify the connection, then click Connect.Configure notification forwarding### Configure notification forwardingFollow the instructions for Configure notification forwarding.Follow the instructions for Configure notification forwarding.Show markdown source
@@ -1,39 +1,43 @@ +--- +description: >- + Configure Cortex XSIAM case and issue notifications to HTTPS webhooks with + firewall access, Gateway egress, authentication, and JSON payload support. +--- + # Forward notifications to webhook -You can forward issues and cases to webhook. +You can forward issues and cases to a webhook. {% hint style="info" %} -### Note - Cortex sends webhook notifications using its own predefined payload format. If your webhook endpoint requires the payload to be structured in a specific way — for example, the format expected by Google Chat or another third-party service — the notification will not be delivered successfully. Only endpoints that accept arbitrary JSON payloads are supported. {% endhint %} -Configure access in your firewall +### Configure access in your firewall Add the IP addresses for your tenant region to your firewall. For more information, refer to the list of ingress IPs in [Enable access to required PANW resources](../../../../deployment-steps/activate-cortex-xsiam/enable-access-to-required-panw-resources). -Configure egress in Cortex Gateway +### Configure egress in Cortex Gateway Before forwarding cases or issues to Splunk, you need to configure egress. Only a user with Account Admin or Instance Admin permissions can configure egress. -To configure egress, you need to enter the FQDN (fully qualified domain name), without including the port or the path. For example, if the full URL is `https://webhook..mycompany.com/target_resource`, you would enter `webhook.mycompany.com`. +To configure egress, enter the FQDN (fully qualified domain name), without including the port or the path. For example, if the full URL is `https://webhook..mycompany.com/target_resource`, you would enter `webhook.mycompany.com`. 1. In the Cortex Gateway, go to **Permission Management** → **Egress Configurations** → **Path**. 2. Select the account name and tenant. 3. In the Flow field, select **Webhook**. -4. Enter the FQDN (full qualified domain name) of the webhook endpoint. For example, `webhook.mycompany.com`. Note that the path does not include HTTP or HTTPS. +4. Enter the FQDN (fully qualified domain name) of the webhook endpoint. For example, `webhook.mycompany.com`. Note that the path does not include HTTP or HTTPS. 5. Add the configuration. -Complete external application configuration in Cortex XSIAM +### Complete external application configuration in Cortex XSIAM 1. Go to **Settings** → **Configurations** → **Integrations** → **External Applications** → **Add Application** and select **Webhook**. 2. Enter the webhook URL. The URL can include a port, but the connection must be HTTPS. 3. Click **Verify**. If egress has not been configured in the Cortex Gateway, verification will fail. 4. After verification is successful, enter the instance name and optional description. 5. Show advanced settings to add HTTPS headers if required. 6. Enter the authentication token for secure access to your Splunk instance. 7. Click **Test** to verify the connection, then click **Connect**. -Configure notification forwarding +### Configure notification forwarding Follow the instructions for [Configure notification forwarding](../configure-notification-forwarding). -
▸ ▾ Integrate a syslog receiver modified +16 −10
xsiam/onboard-cortex-xsiam/post-deployment/data-and-log-forwarding/forward-logs-and-data-from-cortex-xsiam-to-external-services/configure-external-applications-for-forwarding/integrate-a-syslog-receiverRead it on the Cortex docs portal ↗ Read it here → This file's diff on GitHub ↗
Before After@@ -1,15 +1,21 @@---description: >-Integrate a syslog receiver for Cortex XSIAM notifications with regionalfirewall access, TCP or UDP transport, TLS certificates, and troubleshooting.---# Integrate a syslog receiver# Integrate a syslog receiverA syslog receiver can be a physical or virtual server, a SaaS solution, or any service that accepts syslog messages.A syslog receiver can be a physical or virtual server, a SaaS solution, or any service that accepts syslog messages.To send Cortex XSIAM notifications to your syslog receiver, you first need to define the settings for the syslog receiver. After this is complete, you can configure notification forwarding.To send Cortex XSIAM notifications to your syslog receiver, you first need to define the settings for the syslog receiver. After this is complete, you can configure notification forwarding.Enable access### Enable accessBefore you begin, enable access to the following Cortex XSIAM IP addresses for your region in your firewall.Before you begin, enable access to the following Cortex XSIAM IP addresses for your region in your firewall.tabstabstab Americastab AmericasRegion│Log Forwarding addressRegion│Log Forwarding address| ----------------------------- | ------------------------------ || ----------------------------- | ------------------------------ |United States - Americas (US)│35.232.87.9, 35.224.66.220United States - Americas (US)│35.232.87.9, 35.224.66.220@@ -45,29 +51,29 @@ Before you begin, enable access to the following Cortex XSIAM IP addresses for yIndonesia (ID)│34.101.248.99, 34.101.176.232Indonesia (ID)│34.101.248.99, 34.101.176.232Japan (JP)│34.84.88.183, 35.243.76.189Japan (JP)│34.84.88.183, 35.243.76.189Singapore (SG)│35.240.192.37, 34.87.125.227Singapore (SG)│35.240.192.37, 34.87.125.227South Korea (KR)│34.64.198.58, 34.47.86.20South Korea (KR)│34.64.198.58, 34.47.86.20Taiwan (TW)│35.234.2.208, 35.185.171.91Taiwan (TW)│35.234.2.208, 35.185.171.91endtabendtabendtabsendtabsHow to send issues or logs to a syslog receiver### How to send issues or logs to a syslog receiver1. Go to Settings → Configurations → Integrations → External Applications → Add Application and select Syslog.1. Go to Settings → Configurations → Integrations → External Applications → Add Application and select Syslog.2. Define the following parameters:2. Define the following parameters:Parameter│DescriptionParameter│Description| ----------- | --------------------------------------------------------------------------------------------------------------------------------------------------------------------------------------------------------------------------------------------------------------------------------------------------------------------------------------------------------------------------------------------------------------------------------------------------------------------------------------------------------------------------------------------------------------------------------------------------------------------------------------------------------------------------------------------------------------------------------------------------------------------------------------------------------------------------------------------------------------------------------------------------------------------------------------------------------------------------------------- || ----------- | ----------------------------------------------------------------------------------------------------------------------------------------------------------------------------------------------------------------------------------------------------------------------------------------------------------------------------------------------------------------------------------------------------------------------------------------------------------------------------------------------------------------------------------------------------------------------------------------------------------------------------------------------------------------------------------------------------------------------------------------------------------------------------------------------------------------------------------------------------------------------------------------------------------------------------------------------------------- |Name│Unique name for the server profile.Name│Unique name for the server profile.Destination│IP address or fully qualified domain name (FQDN) of the syslog receiver.Destination│IP address or fully qualified domain name (FQDN) of the syslog receiver.Port│Port number to send syslog messages.Port│Port number to send syslog messages.Facility│Select one of the syslog standard values. The value maps to how your syslog server uses the facility field to manage messages. For details on the facility field, see RFC 5424.Facility│Select one of the syslog standard values. The value maps to how your syslog server uses the facility field to manage messages. For details on the facility field, see RFC 5424.Protocol│Method of communication with the syslog receiver:
- TCP: No validation is made on the connection with the syslog receiver. However, if an error occurred with the domain used to make the connection, the Test connection will fail.
- UDP: No error checking, error correction, or acknowledgment. No validation is done for the connection or when sending data.
- TCP + SSL: Cortex XSIAM validates the syslog receiver certificate and uses the certificate signature and public key to encrypt the data sent over the connection.
Protocol│Method of communication with the syslog receiver:
- TCP: No validation is made on the connection with the syslog receiver. However, if an error occurred with the domain used to make the connection, the Test connection will fail.
- UDP: No error checking, error correction, or acknowledgment. No validation is done for the connection or when sending data.
- TCP + SSL: Cortex XSIAM validates the syslog receiver certificate and uses the certificate signature and public key to encrypt the data sent over the connection.
Certificate│The communication between Cortex XSIAM and the syslog destination can use TLS. In this case, upon connection, Cortex XSIAM validates that the syslog receiver has a certificate signed by either a trusted root CA or a self-signed certificate. You may need to merge the Root and Intermediate certificate if you receive a certificate error when using a public certificate.If your syslog receiver uses a self-signed CA, upload your self-signed syslog receiver CA. If you only use a trusted root CA leave the certificate field empty.
Note
- Up to TLS 1.3 is supported.
- Verify the self-signed CA includes your public key.
You can ignore certificate errors. For security reasons, this is not recommended. If you choose this option, data and logs will be forwarded even if the certificate contains errors.
Certificate│The communication between Cortex XSIAM and the syslog destination can use TLS. In this case, upon connection, Cortex XSIAM validates that the syslog receiver has a certificate signed by either a trusted root CA or a self-signed certificate. You may need to merge the Root and Intermediate certificate if you receive a certificate error when using a public certificate.If your syslog receiver uses a self-signed CA, upload your self-signed syslog receiver CA. If you only use a trusted root CA leave the certificate field empty.
- Up to TLS 1.3 is supported.
- Verify the self-signed CA includes your public key.
You can ignore certificate errors. For security reasons, this is not recommended. If you choose this option, data and logs will be forwarded even if the certificate contains errors.
3. Test the parameters to ensure a valid connection, and click Connect when ready.3. Test the parameters to ensure a valid connection, and click Connect when ready.You can define up to five syslog receivers. Upon success, the table displays the syslog servers and their status.You can define up to five syslog receivers. Upon success, the table displays the syslog servers and their status.After you integrate with your syslog receiver, configure your forwarding settings. For more information, see [Configure notification forwarding](../configure-notification-forwarding).After you integrate with your syslog receiver, configure your forwarding settings. For more information, see [Configure notification forwarding](../configure-notification-forwarding).Show markdown source
@@ -1,15 +1,21 @@ +--- +description: >- + Integrate a syslog receiver for Cortex XSIAM notifications with regional + firewall access, TCP or UDP transport, TLS certificates, and troubleshooting. +--- + # Integrate a syslog receiver A syslog receiver can be a physical or virtual server, a SaaS solution, or any service that accepts syslog messages. To send Cortex XSIAM notifications to your syslog receiver, you first need to define the settings for the syslog receiver. After this is complete, you can configure notification forwarding. -Enable access +### Enable access Before you begin, enable access to the following Cortex XSIAM IP addresses for your region in your firewall. {% tabs %} {% tab title="Americas" %} | Region | Log Forwarding address | | ----------------------------- | ------------------------------ | | United States - Americas (US) | 35.232.87.9, 35.224.66.220 | @@ -45,29 +51,29 @@ Before you begin, enable access to the following Cortex XSIAM IP addresses for y | Indonesia (ID) | 34.101.248.99, 34.101.176.232 | | Japan (JP) | 34.84.88.183, 35.243.76.189 | | Singapore (SG) | 35.240.192.37, 34.87.125.227 | | South Korea (KR) | 34.64.198.58, 34.47.86.20 | | Taiwan (TW) | 35.234.2.208, 35.185.171.91 | {% endtab %} {% endtabs %} -**How to send issues or logs to a syslog receiver** +### **How to send issues or logs to a syslog receiver** 1. Go to **Settings** → **Configurations** → **Integrations** → **External Applications** → **Add Application** and select **Syslog**. 2. Define the following parameters: - | Parameter | Description | - | ----------- | --------------------------------------------------------------------------------------------------------------------------------------------------------------------------------------------------------------------------------------------------------------------------------------------------------------------------------------------------------------------------------------------------------------------------------------------------------------------------------------------------------------------------------------------------------------------------------------------------------------------------------------------------------------------------------------------------------------------------------------------------------------------------------------------------------------------------------------------------------------------------------------------------------------------------------------------------------------------------------------- | - | Name | Unique name for the server profile. | - | Destination | IP address or fully qualified domain name (FQDN) of the syslog receiver. | - | Port | Port number to send syslog messages. | - | Facility | Select one of the syslog standard values. The value maps to how your syslog server uses the facility field to manage messages. For details on the facility field, see [RFC 5424](https://tools.ietf.org/html/rfc5424). | - | Protocol | <p>Method of communication with the syslog receiver:</p><ul><li><strong>TCP:</strong> No validation is made on the connection with the syslog receiver. However, if an error occurred with the domain used to make the connection, the <strong>Test</strong> connection will fail.</li><li><strong>UDP:</strong> No error checking, error correction, or acknowledgment. No validation is done for the connection or when sending data.</li><li><strong>TCP + SSL:</strong> Cortex XSIAM validates the syslog receiver certificate and uses the certificate signature and public key to encrypt the data sent over the connection.</li></ul> | - | Certificate | <p>The communication between Cortex XSIAM and the syslog destination can use TLS. In this case, upon connection, Cortex XSIAM validates that the syslog receiver has a certificate signed by either a trusted root CA or a self-signed certificate. You may need to merge the Root and Intermediate certificate if you receive a certificate error when using a public certificate.</p><p>If your syslog receiver uses a self-signed CA, upload your self-signed syslog receiver CA. If you only use a trusted root CA leave the certificate field empty.</p><div data-gb-custom-block data-tag="hint" data-style="info" class="hint hint-info"><p><strong>Note</strong></p><ul><li>Up to TLS 1.3 is supported.</li><li>Verify the self-signed CA includes your public key.</li></ul></div><p>You can ignore certificate errors. For security reasons, this is not recommended. If you choose this option, data and logs will be forwarded even if the certificate contains errors.</p> | + | Parameter | Description | + | ----------- | ----------------------------------------------------------------------------------------------------------------------------------------------------------------------------------------------------------------------------------------------------------------------------------------------------------------------------------------------------------------------------------------------------------------------------------------------------------------------------------------------------------------------------------------------------------------------------------------------------------------------------------------------------------------------------------------------------------------------------------------------------------------------------------------------------------------------------------------------------------------------------------------------------------------------------------------------------------- | + | Name | Unique name for the server profile. | + | Destination | IP address or fully qualified domain name (FQDN) of the syslog receiver. | + | Port | Port number to send syslog messages. | + | Facility | Select one of the syslog standard values. The value maps to how your syslog server uses the facility field to manage messages. For details on the facility field, see [RFC 5424](https://tools.ietf.org/html/rfc5424). | + | Protocol | <p>Method of communication with the syslog receiver:</p><ul><li><strong>TCP:</strong> No validation is made on the connection with the syslog receiver. However, if an error occurred with the domain used to make the connection, the <strong>Test</strong> connection will fail.</li><li><strong>UDP:</strong> No error checking, error correction, or acknowledgment. No validation is done for the connection or when sending data.</li><li><strong>TCP + SSL:</strong> Cortex XSIAM validates the syslog receiver certificate and uses the certificate signature and public key to encrypt the data sent over the connection.</li></ul> | + | Certificate | <p>The communication between Cortex XSIAM and the syslog destination can use TLS. In this case, upon connection, Cortex XSIAM validates that the syslog receiver has a certificate signed by either a trusted root CA or a self-signed certificate. You may need to merge the Root and Intermediate certificate if you receive a certificate error when using a public certificate.</p><p>If your syslog receiver uses a self-signed CA, upload your self-signed syslog receiver CA. If you only use a trusted root CA leave the certificate field empty.</p><div data-gb-custom-block data-tag="hint" data-style="info" class="hint hint-info"><ul><li>Up to TLS 1.3 is supported.</li><li>Verify the self-signed CA includes your public key.</li></ul></div><p>You can ignore certificate errors. For security reasons, this is not recommended. If you choose this option, data and logs will be forwarded even if the certificate contains errors.</p> | 3. Test the parameters to ensure a valid connection, and click **Connect** when ready. You can define up to five syslog receivers. Upon success, the table displays the syslog servers and their status. After you integrate with your syslog receiver, configure your forwarding settings. For more information, see [Configure notification forwarding](../configure-notification-forwarding). <details> -
▸ ▾ Integrate Slack for outbound notifications modified +6 −0
xsiam/onboard-cortex-xsiam/post-deployment/data-and-log-forwarding/forward-logs-and-data-from-cortex-xsiam-to-external-services/configure-external-applications-for-forwarding/integrate-slack-for-outbound-notificationsRead it on the Cortex docs portal ↗ Read it here → This file's diff on GitHub ↗
Before After@@ -1,8 +1,14 @@---description: >-Integrate Cortex XSIAM with Slack to forward issue and report notifications todedicated workspace channels.---# Integrate Slack for outbound notifications# Integrate Slack for outbound notificationsIntegrate Cortex XSIAM with your Slack workspace to manage and highlight your issues and reports. Creating a Cortex XSIAM Slack channel ensures that defined issues are exposed on laptop and mobile devices using the Slack interface. Unlike email notifications, Slack channels provide dedicated spaces where you can contact specific members regarding your issues.Integrate Cortex XSIAM with your Slack workspace to manage and highlight your issues and reports. Creating a Cortex XSIAM Slack channel ensures that defined issues are exposed on laptop and mobile devices using the Slack interface. Unlike email notifications, Slack channels provide dedicated spaces where you can contact specific members regarding your issues.How to integrate Slack with Cortex XSIAMHow to integrate Slack with Cortex XSIAM1. Go to Settings → Configurations → Integrations → External Applications → Add Application and click Slack.1. Go to Settings → Configurations → Integrations → External Applications → Add Application and click Slack.2. Click Ok to go to an external Slack page to install Cortex XSIAM on your Slack workspace.2. Click Ok to go to an external Slack page to install Cortex XSIAM on your Slack workspace.Show markdown source
@@ -1,8 +1,14 @@
+---
+description: >-
+  Integrate Cortex XSIAM with Slack to forward issue and report notifications to
+  dedicated workspace channels.
+---
+
 # Integrate Slack for outbound notifications

 Integrate Cortex XSIAM with your Slack workspace to manage and highlight your issues and reports. Creating a Cortex XSIAM Slack channel ensures that defined issues are exposed on laptop and mobile devices using the Slack interface. Unlike email notifications, Slack channels provide dedicated spaces where you can contact specific members regarding your issues.

 How to integrate Slack with Cortex XSIAM

 1. Go to **Settings** → **Configurations** → **Integrations** → **External Applications** → **Add Application** and click **Slack**.
 2.  Click **Ok** to go to an external Slack page to install Cortex XSIAM on your Slack workspace.
-
▸ ▾ Configure notification forwarding modified +9 −3
xsiam/onboard-cortex-xsiam/post-deployment/data-and-log-forwarding/forward-logs-and-data-from-cortex-xsiam-to-external-services/configure-notification-forwardingRead it on the Cortex docs portal ↗ Read it here → This file's diff on GitHub ↗
Before After@@ -1,8 +1,14 @@---description: >-Configure Cortex XSIAM forwarding notifications for issues, cases, and auditlogs with scoped filters, formats, grouping, and external destinations.---# Configure notification forwarding# Configure notification forwardingAfter you integrate with an external service such as Slack, a syslog server, Amazon S3, Amazon SQS, Webhook, or Splunk, create a forwarding configuration that specifies the data or log type you want to forward. You can configure notifications for issues, cases, and logs. To send reports to email or Slack, see Run or schedule reports.After you integrate with an external service such as Slack, a syslog server, Amazon S3, Amazon SQS, Webhook, or Splunk, create a forwarding configuration that specifies the data or log type you want to forward. You can configure notifications for issues, cases, and logs. To send reports to email or Slack, see Run or schedule reports.hint warninghint warning### Prerequisite### PrerequisiteBefore you can select an external service for notification forwarding, you must integrate the external service with Cortex XSIAM. For more information, see Configure external applications for forwarding. No prior configuration is required to send data to an email distribution list.Before you can select an external service for notification forwarding, you must integrate the external service with Cortex XSIAM. For more information, see Configure external applications for forwarding. No prior configuration is required to send data to an email distribution list.@@ -11,22 +17,22 @@ Before you can select an external service for notification forwarding, you mustHow to configure notificationsHow to configure notifications1. Select Settings → Configurations → General → Notifications → Add Forwarding Configuration.1. Select Settings → Configurations → General → Notifications → Add Forwarding Configuration.2. Enter a name for the configuration.2. Enter a name for the configuration.3. Select the data or log type you want to forward:3. Select the data or log type you want to forward:• Issues: Send notifications for specific issue types.• Issues: Send notifications for specific issue types.<div data-gb-custom-block data-tag="hint" data-style="info" class="hint hint-info"><h3>Note</h3><ul><li><strong>Forwarding destinations</strong>: Only issues and cases can be forwarded to Slack, Splunk, Amazon SQS, Amazon S3, or Webhook.</li><li><strong>Notification forwarding by domain</strong>: To configure notification forwarding for issues by domain, select <strong>Issues</strong> and filter the Issues table by <strong>Issue Domain</strong>.</li><li><p><strong>Alert vs. issue format</strong>:By default, new configurations use the issue format, but you can select the alert format if needed, when forwarding to email, Slack, or a syslog server. You cannot forward issues in the alert format to Splunk, Amazon SQS, Amazon S3, or Webhook.</p><p>Existing legacy configurations are not automatically updated and continue to send notifications in the alert format. To use the issue format, edit the existing configuration.</p></li></ul></div><div data-gb-custom-block data-tag="hint" data-style="info" class="hint hint-info"><h3>Note</h3><ul><li><strong>Forwarding destinations</strong>: Only issues and cases can be forwarded to Slack, Splunk, Amazon SQS, Amazon S3, or Webhook.</li><li><strong>Notification forwarding by domain</strong>: To configure notification forwarding for issues by domain, select <strong>Issues</strong> and filter the Issues table by <strong>Issue Domain</strong>.</li><li><p><strong>Alert vs. issue format</strong>: By default, new configurations use the issue format, but you can select the alert format if needed when forwarding to email, Slack, or a syslog server. You cannot forward issues in the alert format to Splunk, Amazon SQS, Amazon S3, or Webhook.</p><p>Existing legacy configurations are not automatically updated and continue to send notifications in the alert format. To use the issue format, edit the existing configuration.</p></li></ul></div>• Agent Audit Logs: Send notifications for audit logs reported by your Cortex XDR agents.• Agent Audit Logs: Send notifications for audit logs reported by your Cortex XDR agents.• Management Audit Logs: Send notifications for audit logs about events related to your Cortex XSIAM tenant.• Management Audit Logs: Send notifications for audit logs about events related to your Cortex XSIAM tenant.• Cases—Send notifications for specific cases.• Cases: Send notifications for specific cases.<div data-gb-custom-block data-tag="hint" data-style="info" class="hint hint-info"><h3>Note</h3><p>Not all data and log types can be sent to all external services. For more information, see <a href="">Forward logs and data from Cortex XSIAM to external services</a>.</p></div><div data-gb-custom-block data-tag="hint" data-style="info" class="hint hint-info"><p>Not all data and log types can be sent to all external services. For more information, see <a href="">Forward logs and data from Cortex XSIAM to external services</a>.</p></div>4. (Optional) Enter a description of the forwarding configuration.4. (Optional) Enter a description of the forwarding configuration.5. Click Next, and under Scope, filter which issues, cases, or logs you want included in a notification.5. Click Next, and under Scope, filter which issues, cases, or logs you want included in a notification.For example, for a filter set to `Severity = Medium, Category = Configuration`, Cortex XSIAM sends the issues or events matching this filter as a notification.For example, for a filter set to `Severity = Medium, Category = Configuration`, Cortex XSIAM sends the issues or events matching this filter as a notification.6. Click Next.6. Click Next.7. Select email or the external service you want to forward to.7. Select email or the external service you want to forward to.Show markdown source
@@ -1,8 +1,14 @@ +--- +description: >- + Configure Cortex XSIAM forwarding notifications for issues, cases, and audit + logs with scoped filters, formats, grouping, and external destinations. +--- + # Configure notification forwarding After you integrate with an external service such as Slack, a syslog server, Amazon S3, Amazon SQS, Webhook, or Splunk, create a forwarding configuration that specifies the data or log type you want to forward. You can configure notifications for issues, cases, and logs. To send reports to email or Slack, see Run or schedule reports. {% hint style="warning" %} ### Prerequisite Before you can select an external service for notification forwarding, you must integrate the external service with Cortex XSIAM. For more information, see [Configure external applications for forwarding](configure-external-applications-for-forwarding). No prior configuration is required to send data to an email distribution list. @@ -11,22 +17,22 @@ Before you can select an external service for notification forwarding, you must How to configure notifications 1. Select Settings → **Configurations** → **General** → **Notifications** → **Add Forwarding Configuration**. 2. Enter a name for the configuration. 3. Select the data or log type you want to forward: * **Issues:** Send notifications for specific issue types. - <div data-gb-custom-block data-tag="hint" data-style="info" class="hint hint-info"><h3>Note</h3><ul><li><strong>Forwarding destinations</strong>: Only issues and cases can be forwarded to Slack, Splunk, Amazon SQS, Amazon S3, or Webhook.</li><li><strong>Notification forwarding by domain</strong>: To configure notification forwarding for issues by domain, select <strong>Issues</strong> and filter the Issues table by <strong>Issue Domain</strong>.</li><li><p><strong>Alert vs. issue format</strong>:By default, new configurations use the issue format, but you can select the alert format if needed, when forwarding to email, Slack, or a syslog server. You cannot forward issues in the alert format to Splunk, Amazon SQS, Amazon S3, or Webhook.</p><p>Existing legacy configurations are not automatically updated and continue to send notifications in the alert format. To use the issue format, edit the existing configuration.</p></li></ul></div> + <div data-gb-custom-block data-tag="hint" data-style="info" class="hint hint-info"><h3>Note</h3><ul><li><strong>Forwarding destinations</strong>: Only issues and cases can be forwarded to Slack, Splunk, Amazon SQS, Amazon S3, or Webhook.</li><li><strong>Notification forwarding by domain</strong>: To configure notification forwarding for issues by domain, select <strong>Issues</strong> and filter the Issues table by <strong>Issue Domain</strong>.</li><li><p><strong>Alert vs. issue format</strong>: By default, new configurations use the issue format, but you can select the alert format if needed when forwarding to email, Slack, or a syslog server. You cannot forward issues in the alert format to Splunk, Amazon SQS, Amazon S3, or Webhook.</p><p>Existing legacy configurations are not automatically updated and continue to send notifications in the alert format. To use the issue format, edit the existing configuration.</p></li></ul></div> * **Agent Audit Logs:** Send notifications for audit logs reported by your Cortex XDR agents. * **Management Audit Logs:** Send notifications for audit logs about events related to your Cortex XSIAM tenant. - * **Cases**—Send notifications for specific cases. + * **Cases:** Send notifications for specific cases. - <div data-gb-custom-block data-tag="hint" data-style="info" class="hint hint-info"><h3>Note</h3><p>Not all data and log types can be sent to all external services. For more information, see <a href="">Forward logs and data from Cortex XSIAM to external services</a>.</p></div> + <div data-gb-custom-block data-tag="hint" data-style="info" class="hint hint-info"><p>Not all data and log types can be sent to all external services. For more information, see <a href="">Forward logs and data from Cortex XSIAM to external services</a>.</p></div> 4. (Optional) Enter a description of the forwarding configuration. 5. Click **Next**, and under **Scope**, filter which issues, cases, or logs you want included in a notification. For example, for a filter set to `Severity = Medium, Category = Configuration`, Cortex XSIAM sends the issues or events matching this filter as a notification. 6. Click **Next**. 7. Select email or the external service you want to forward to. <details> -
▸ ▾ Monitor administrative activity modified +6 −0
xsiam/onboard-cortex-xsiam/post-deployment/data-and-log-forwarding/forward-logs-and-data-from-cortex-xsiam-to-external-services/monitor-administrative-activityRead it on the Cortex docs portal ↗ Read it here → This file's diff on GitHub ↗
Before After@@ -1,8 +1,14 @@---description: >-Monitor Cortex XSIAM administrative and investigative activity with ManagementAudit Logs, filters, 365-day retention, and notification forwarding.---# Monitor administrative activity# Monitor administrative activityFrom Settings → Management Audit Logs, you can track the status of all administrative and investigative actions. Cortex XSIAM stores audit logs for 365 days (instead of 180 days, which was the retention period in the past). Use the page filters to narrow the results or manage tables to add or remove fields as needed.From Settings → Management Audit Logs, you can track the status of all administrative and investigative actions. Cortex XSIAM stores audit logs for 365 days (instead of 180 days, which was the retention period in the past). Use the page filters to narrow the results or manage tables to add or remove fields as needed.To ensure you and your colleagues stay informed about administrative activity, you can configure notification forwarding to forward your Management Audit log to an email distribution list, Syslog server, or Slack channel.To ensure you and your colleagues stay informed about administrative activity, you can configure notification forwarding to forward your Management Audit log to an email distribution list, Syslog server, or Slack channel.The following table describes the default and optional fields that you can view in alphabetical order.The following table describes the default and optional fields that you can view in alphabetical order.Show markdown source
@@ -1,8 +1,14 @@
+---
+description: >-
+  Monitor Cortex XSIAM administrative and investigative activity with Management
+  Audit Logs, filters, 365-day retention, and notification forwarding.
+---
+
 # Monitor administrative activity

 From **Settings** → **Management Audit Logs**, you can track the status of all administrative and investigative actions. Cortex XSIAM stores audit logs for 365 days (instead of 180 days, which was the retention period in the past). Use the page filters to narrow the results or manage tables to add or remove fields as needed.

 To ensure you and your colleagues stay informed about administrative activity, you can configure notification forwarding to forward your Management Audit log to an email distribution list, Syslog server, or Slack channel.

 The following table describes the default **and optional fields** that you can view in alphabetical order.
-
▸ ▾ Set up email notifications for tenant updates modified +6 −0
xsiam/onboard-cortex-xsiam/post-deployment/data-and-log-forwarding/forward-logs-and-data-from-cortex-xsiam-to-external-services/set-up-email-notifications-for-tenant-updatesRead it on the Cortex docs portal ↗ Read it here → This file's diff on GitHub ↗
Before After@@ -1,8 +1,14 @@---description: >-Set up Cortex XSIAM email notifications for tenant upgrades, hotfixes,downtime warnings, and Management Audit Log events.---# Set up email notifications for tenant updates# Set up email notifications for tenant updatesYour Cortex tenant generates Management Audit Logs throughout the tenant update lifecycle. This includes version upgrades and hotfixes, covering both the pending (before) and completed (after) phases of a scheduled update.Your Cortex tenant generates Management Audit Logs throughout the tenant update lifecycle. This includes version upgrades and hotfixes, covering both the pending (before) and completed (after) phases of a scheduled update.Using log forwarding, you can automatically receive an email whenever one of these events occurs, ensuring your team is notified the moment a change is scheduled or completed on your tenant.Using log forwarding, you can automatically receive an email whenever one of these events occurs, ensuring your team is notified the moment a change is scheduled or completed on your tenant.hint warninghint warningPrerequisitesPrerequisitesShow markdown source
@@ -1,8 +1,14 @@ +--- +description: >- + Set up Cortex XSIAM email notifications for tenant upgrades, hotfixes, + downtime warnings, and Management Audit Log events. +--- + # Set up email notifications for tenant updates Your Cortex tenant generates Management Audit Logs throughout the tenant update lifecycle. This includes version upgrades and hotfixes, covering both the pending (before) and completed (after) phases of a scheduled update. Using log forwarding, you can automatically receive an email whenever one of these events occurs, ensuring your team is notified the moment a change is scheduled or completed on your tenant. {% hint style="warning" %} **Prerequisites** -
▸ ▾ Manage user roles and access management modified +7 −15
xsiam/onboard-cortex-xsiam/post-deployment/manage-user-roles-and-access-managementRead it on the Cortex docs portal ↗ Read it here → This file's diff on GitHub ↗
Before After@@ -4,90 +4,82 @@ description: >-Sign-On (SSO) for users on a specific Cortex XSIAM tenant.Sign-On (SSO) for users on a specific Cortex XSIAM tenant.------# Manage user roles and access management# Manage user roles and access managementhint warninghint warning### Prerequisite### PrerequisiteManaging users, roles, scopes, user groups, authentication settings in Cortex XSIAM Access Management requires View/Edit RBAC permissions for Access Management (under Configurations). Account Admin and Instance Administrator roles are granted this permission by default. For more information, see Predefined user roles in Set up users and roles.Managing users, roles, scopes, user groups, and authentication settings in Cortex XSIAM Access Management requires View/Edit RBAC permissions for Access Management (under Configurations). Account Admin and Instance Administrator roles are granted this permission by default. For more information, see Predefined user roles in Set up users and roles.endhintendhintAccess management enables you to control who can access the different parts of your organization's resources. It ensures only authorized users can interact with sensitive data.Access management enables you to control who can access the different parts of your organization's resources. It ensures only authorized users can interact with sensitive data.Cortex XSIAM uses a combination of Role-Based Access Control (RBAC) and Scope-Based Access Control (SBAC) to ensure scalability and granular control.Cortex XSIAM uses a combination of Role-Based Access Control (RBAC) and Scope-Based Access Control (SBAC) to ensure scalability and granular control.What is the difference between RBAC and SBAC?What is the difference between RBAC and SBAC?RBAC assigns permissions based on a user's organizational role, such as Investigator or Responder, establishing a clear hierarchy and set of capabilities for each role and simplifying management by linking access to job functions. RBAC does this by helping to manage access to Cortex XSIAM components and Cortex Query Language (XQL) datasets, so that users, based on their roles, are granted minimal access required to accomplish their tasks.RBAC assigns permissions based on a user's organizational role, such as Investigator or Responder, establishing a clear hierarchy and set of capabilities for each role and simplifying management by linking access to job functions. RBAC does this by helping to manage access to Cortex XSIAM components and Cortex Query Language (XQL) datasets, so that users, based on their roles, are granted the minimal access required to accomplish their tasks.SBAC refines RBAC by granting access only to the relevant data that the user requires for their designated role. Users with Access Management permission apply scopes to limit the data and content that users can be granted access to in Cortex XSIAM, which are divided into different scoping areas. The scoping areas include Assets, Cases and Issues, Endpoints, and Datasets Rows, which can be applied as relevant to the enforcement area, entity, or dataset.SBAC refines RBAC by granting access only to the relevant data that the user requires for their designated role. Users with Access Management permission apply scopes to limit the data and content that users can be granted access to in Cortex XSIAM, which are divided into different scoping areas. The scoping areas include Assets, Cases and Issues, Endpoints, and Dataset Rows, which can be applied as relevant to the enforcement area, entity, or dataset.For example, an Investigator role might have access to asset information based on the RBAC permissions, but SBAC granular scoping could limit that investigator's view and control to only assets within a particular scoping area. This hybrid approach ensures scalability and granular control, significantly strengthening system security.For example, an Investigator role might have access to asset information based on the RBAC permissions, but SBAC granular scoping could limit that investigator's view and control to only assets within a particular scoping area. This hybrid approach ensures scalability and granular control, significantly strengthening system security.</details></details>Understanding more about access management conceptsUnderstanding more about access management conceptsYou can manage access for users, and create and assign user roles and user groups for a specific tenant. When Single Sign-On (SSO) is enabled, you can manage SSO for users.You can manage access for users and create and assign user roles and user groups for a specific tenant. When Single Sign-On (SSO) is enabled, you can manage SSO for users.UsersUsersYou can manage access permissions and activities for users allocated to a specific Customer Support Portal account and tenant. All users must belong to a user group or have an assigned role.You can manage access permissions and activities for users allocated to a specific Customer Support Portal account and tenant. All users must belong to a user group or have an assigned role.hint infohint info### NoteTo remove users added to your CSP account, you must do so in the CSP, not in Cortex Gateway.To remove users added to your CSP account, you must do so in the CSP, not in Cortex Gateway.endhintendhintUser rolesUser rolesUser roles enable you to define the type of access and actions a user can perform. User roles are assigned to users, user groups, or API keys.User roles enable you to define the type of access and actions a user can perform. User roles are assigned to users, user groups, or API keys.hint infohint info### NoteFor more information on assigning user roles when generating an API key, see Manage API keys.For more information on assigning user roles when generating an API key, see Manage API keys.endhintendhintPredefined user rolesPredefined user rolesCortex XSIAM provides predefined built-in user roles that provide specific access rights that cannot be modified. You can also create custom, editable user roles. To view the predefined permissions for each default role, go to Settings → Configurations → Access Management → Roles.Cortex XSIAM provides predefined built-in user roles that provide specific access rights that cannot be modified. You can also create custom, editable user roles. To view the predefined permissions for each default role, go to Settings → Configurations → Access Management → Roles.Dataset access permissionsDataset access permissionsYou can also set dataset access permissions using user roles or set specific permissions using role-based access control (RBAC). Configuring administrative access depends on the security requirements of your organization. Dataset permissions control dataset access for all components, while RBAC controls access to a specific component. By default, dataset access management is disabled, and users have access to all datasets. If you enable dataset access management, you must configure access permissions for each dataset type, and for each user role. When a dataset component is enabled for a particular role, the Issues and Cases pages include information about datasets. For more information on how to set dataset access permissions, see Manage user roles.You can also set dataset access permissions using user roles or set specific permissions using role-based access control (RBAC). Configuring administrative access depends on the security requirements of your organization. Dataset permissions control dataset access for all components, while RBAC controls access to a specific component. By default, dataset access management is disabled, and users have access to all datasets. If you enable dataset access management, you must configure access permissions for each dataset type and for each user role. When a dataset component is enabled for a particular role, the Issues and Cases pages include information about datasets. For more information on how to set dataset access permissions, see Manage user roles.Be aware that even with scoped access to dataset rows applied, users can still indirectly access unauthorized dataset rows through dataset views and correlation rules. You can prevent this by ensuring that users don't have access to these dataset views and are unable to write correlation rules based on these datasets by enabling dataset access management for the relevant user roles, and limiting access to the applicable datasets. You may also want to consider not allowing these dataset-scoped users to write correlation rules, which we recommend as a best practice. For more information on how to set dataset access permissions, see Manage user roles. For more information on row-level scoping, see Manage user scope.Be aware that even with scoped access to dataset rows applied, users can still indirectly access unauthorized dataset rows through dataset views and correlation rules. You can prevent this by ensuring that users don't have access to these dataset views and are unable to write correlation rules based on these datasets by enabling dataset access management for the relevant user roles, and limiting access to the applicable datasets. You may also want to consider not allowing these dataset-scoped users to write correlation rules, which we recommend as a best practice. For more information on how to set dataset access permissions, see Manage user roles. For more information on row-level scoping, see Manage user scope.hint infohint info### NoteSome features are license-dependent. Accordingly, users may not see a specific feature if the feature is not supported by the license type or if they do not have access based on their assigned role or scope.Some features are license-dependent. Accordingly, users may not see a specific feature if the feature is not supported by the license type or if they do not have access based on their assigned role or scope.endhintendhintUser groups and scoping areasUser groups and scoping areasYou can use user groups to streamline configuration activities by grouping together users whose access permission requirements are similar. Import user groups from Active Directory, or create them from scratch in Cortex XSIAM.You can use user groups to streamline configuration activities by grouping together users whose access permission requirements are similar. Import user groups from Active Directory, or create them from scratch in Cortex XSIAM.Users with Access Management permission can further restrict access of these user groups, specifically for the designated role and list of users configured in the user group by granting access only to the relevant data that the user requires for their designated role. This is performed by applying scopes to limit the data and content that users can be granted access to in Cortex XSIAM, which are divided into different scoping areas. The scoping areas include Assets, Cases and Issues, Endpoints, and Dataset Rows, which can be applied as relevant to the enforcement area, entity, or dataset. This enables you to adhere to your company's security policies of limiting user access by specifying, for example, which groups of assets users can access and what actions they can perform.Users with Access Management permission can further restrict access of these user groups, specifically for the designated role and list of users configured in the user group by granting access only to the relevant data that the user requires for their designated role. This is performed by applying scopes to limit the data and content that users can be granted access to in Cortex XSIAM, which are divided into different scoping areas. The scoping areas include Assets, Cases and Issues, Endpoints, and Dataset Rows, which can be applied as relevant to the enforcement area, entity, or dataset. This enables you to adhere to your company's security policies of limiting user access by specifying, for example, which groups of assets users can access and what actions they can perform.hint infohint info### NoteFor features where scoping is not applicable, Role-Based Access Control (RBAC) is used and can be configured when managing user roles. For more information, see Manage user roles.For features where scoping is not applicable, Role-Based Access Control (RBAC) is used and can be configured when managing user roles. For more information, see Manage user roles.endhintendhintSingle Sign-OnSingle Sign-OnManage your SSO integration with the Security Assertion Markup Language (SAML) 2.0 standard to securely authenticate system users across enterprise-wide applications and websites, with one set of credentials. This configuration allows system users to authenticate using your organization's Identity Provider (IdP), such as Okta or PingOne. You can integrate any IdP with Cortex XSIAM supported by SAML 2.0.Manage your SSO integration with the Security Assertion Markup Language (SAML) 2.0 standard to securely authenticate system users across enterprise-wide applications and websites, with one set of credentials. This configuration allows system users to authenticate using your organization's Identity Provider (IdP), such as Okta or PingOne. You can integrate any IdP with Cortex XSIAM supported by SAML 2.0.SSO with SAML 2.0 configuration activities are dependent on your organization’s IdP. Some of the field values need to be obtained from your organization’s IdP, and some values need to be added to your organization’s IdP. It is your responsibility to understand how to access your organization’s IdP to provide these fields, and to add any fields from Cortex XSIAM to your IdP.SSO with SAML 2.0 configuration activities are dependent on your organization’s IdP. Some of the field values need to be obtained from your organization’s IdP, and some values need to be added to your organization’s IdP. It is your responsibility to understand how to access your organization’s IdP to provide these fields and to add any fields from Cortex XSIAM to your IdP.After SSO configuration is complete, when you sign in as an SSO user, the Cortex XSIAM permissions granted to you after logging in, either from the group mapping or from the default role configuration, are effective throughout the entire session for the defined maximum session length. Maximum session length is defined in your Cortex XSIAM Session Security Settings. This applies even if the default role configuration is updated or the group membership settings were changed.After SSO configuration is complete, when you sign in as an SSO user, the Cortex XSIAM permissions granted to you after logging in, either from the group mapping or from the default role configuration, are effective throughout the entire session for the defined maximum session length. The maximum session length is defined in your Cortex XSIAM Session Security Settings. This applies even if the default role configuration is updated or the group membership settings are changed.</details></details>Show markdown source
@@ -4,90 +4,82 @@ description: >- Sign-On (SSO) for users on a specific Cortex XSIAM tenant. --- # Manage user roles and access management {% hint style="warning" %} ### Prerequisite -Managing users, roles, scopes, user groups, authentication settings in Cortex XSIAM Access Management requires **View/Edit** RBAC permissions for **Access Management** (under **Configurations**). Account Admin and Instance Administrator roles are granted this permission by default. For more information, see _Predefined user roles_ in [Set up users and roles](../deployment-steps/set-up-users-and-roles). +Managing users, roles, scopes, user groups, and authentication settings in Cortex XSIAM Access Management requires **View/Edit** RBAC permissions for **Access Management** (under **Configurations**). Account Admin and Instance Administrator roles are granted this permission by default. For more information, see _Predefined user roles_ in [Set up users and roles](../deployment-steps/set-up-users-and-roles). {% endhint %} Access management enables you to control who can access the different parts of your organization's resources. It ensures only authorized users can interact with sensitive data. Cortex XSIAM uses a combination of Role-Based Access Control (RBAC) and Scope-Based Access Control (SBAC) to ensure scalability and granular control. <details> <summary>What is the difference between RBAC and SBAC?</summary> -RBAC assigns permissions based on a user's organizational role, such as Investigator or Responder, establishing a clear hierarchy and set of capabilities for each role and simplifying management by linking access to job functions. RBAC does this by helping to manage access to Cortex XSIAM components and Cortex Query Language (XQL) datasets, so that users, based on their roles, are granted minimal access required to accomplish their tasks. +RBAC assigns permissions based on a user's organizational role, such as Investigator or Responder, establishing a clear hierarchy and set of capabilities for each role and simplifying management by linking access to job functions. RBAC does this by helping to manage access to Cortex XSIAM components and Cortex Query Language (XQL) datasets, so that users, based on their roles, are granted the minimal access required to accomplish their tasks. -SBAC refines RBAC by granting access only to the relevant data that the user requires for their designated role. Users with **Access Management** permission apply scopes to limit the data and content that users can be granted access to in Cortex XSIAM, which are divided into different scoping areas. The scoping areas include Assets, Cases and Issues, Endpoints, and Datasets Rows, which can be applied as relevant to the enforcement area, entity, or dataset. +SBAC refines RBAC by granting access only to the relevant data that the user requires for their designated role. Users with **Access Management** permission apply scopes to limit the data and content that users can be granted access to in Cortex XSIAM, which are divided into different scoping areas. The scoping areas include Assets, Cases and Issues, Endpoints, and Dataset Rows, which can be applied as relevant to the enforcement area, entity, or dataset. For example, an Investigator role might have access to asset information based on the RBAC permissions, but SBAC granular scoping could limit that investigator's view and control to only assets within a particular scoping area. This hybrid approach ensures scalability and granular control, significantly strengthening system security. </details> <details> <summary>Understanding more about access management concepts</summary> -You can manage access for users, and create and assign user roles and user groups for a specific tenant. When Single Sign-On (SSO) is enabled, you can manage SSO for users. +You can manage access for users and create and assign user roles and user groups for a specific tenant. When Single Sign-On (SSO) is enabled, you can manage SSO for users. **Users** You can manage access permissions and activities for users allocated to a specific Customer Support Portal account and tenant. All users must belong to a user group or have an assigned role. {% hint style="info" %} -### Note - To remove users added to your CSP account, you must do so in the CSP, not in Cortex Gateway. {% endhint %} **User roles** User roles enable you to define the type of access and actions a user can perform. User roles are assigned to users, user groups, or API keys. {% hint style="info" %} -### Note - For more information on assigning user roles when generating an API key, see [Manage API keys](../../learn-about-cortex-xsiam/manage-api-keys). {% endhint %} **Predefined user roles** Cortex XSIAM provides predefined built-in user roles that provide specific access rights that cannot be modified. You can also create custom, editable user roles. To view the predefined permissions for each default role, go to **Settings** → **Configurations** → **Access Management** → **Roles**. **Dataset access permissions** -You can also set dataset access permissions using user roles or set specific permissions using role-based access control (RBAC). Configuring administrative access depends on the security requirements of your organization. Dataset permissions control dataset access for all components, while RBAC controls access to a specific component. By default, dataset access management is disabled, and users have access to all datasets. If you enable dataset access management, you must configure access permissions for each dataset type, and for each user role. When a dataset component is enabled for a particular role, the Issues and Cases pages include information about datasets. For more information on how to set dataset access permissions, see [Manage user roles](#UUID-751d26ed-9390-dddd-d4f6-bb1f20db3a1d). +You can also set dataset access permissions using user roles or set specific permissions using role-based access control (RBAC). Configuring administrative access depends on the security requirements of your organization. Dataset permissions control dataset access for all components, while RBAC controls access to a specific component. By default, dataset access management is disabled, and users have access to all datasets. If you enable dataset access management, you must configure access permissions for each dataset type and for each user role. When a dataset component is enabled for a particular role, the Issues and Cases pages include information about datasets. For more information on how to set dataset access permissions, see [Manage user roles](#UUID-751d26ed-9390-dddd-d4f6-bb1f20db3a1d). Be aware that even with scoped access to dataset rows applied, users can still indirectly access unauthorized dataset rows through dataset views and correlation rules. You can prevent this by ensuring that users don't have access to these dataset views and are unable to write correlation rules based on these datasets by enabling dataset access management for the relevant user roles, and limiting access to the applicable datasets. You may also want to consider not allowing these dataset-scoped users to write correlation rules, which we recommend as a best practice. For more information on how to set dataset access permissions, see [Manage user roles](manage-user-roles-and-access-management/manage-user-roles). For more information on row-level scoping, see [Manage user scope](manage-user-roles-and-access-management/manage-user-scope). {% hint style="info" %} -### Note - Some features are license-dependent. Accordingly, users may not see a specific feature if the feature is not supported by the license type or if they do not have access based on their assigned role or scope. {% endhint %} **User groups and scoping areas** You can use user groups to streamline configuration activities by grouping together users whose access permission requirements are similar. Import user groups from Active Directory, or create them from scratch in Cortex XSIAM. Users with **Access Management** permission can further restrict access of these user groups, specifically for the designated role and list of users configured in the user group by granting access only to the relevant data that the user requires for their designated role. This is performed by applying scopes to limit the data and content that users can be granted access to in Cortex XSIAM, which are divided into different scoping areas. The scoping areas include Assets, Cases and Issues, Endpoints, and Dataset Rows, which can be applied as relevant to the enforcement area, entity, or dataset. This enables you to adhere to your company's security policies of limiting user access by specifying, for example, which groups of assets users can access and what actions they can perform. {% hint style="info" %} -### Note - For features where scoping is not applicable, Role-Based Access Control (RBAC) is used and can be configured when managing user roles. For more information, see [Manage user roles](#UUID-751d26ed-9390-dddd-d4f6-bb1f20db3a1d). {% endhint %} **Single Sign-On** Manage your SSO integration with the Security Assertion Markup Language (SAML) 2.0 standard to securely authenticate system users across enterprise-wide applications and websites, with one set of credentials. This configuration allows system users to authenticate using your organization's Identity Provider (IdP), such as Okta or PingOne. You can integrate any IdP with Cortex XSIAM supported by SAML 2.0. -SSO with SAML 2.0 configuration activities are dependent on your organization’s IdP. Some of the field values need to be obtained from your organization’s IdP, and some values need to be added to your organization’s IdP. It is your responsibility to understand how to access your organization’s IdP to provide these fields, and to add any fields from Cortex XSIAM to your IdP. +SSO with SAML 2.0 configuration activities are dependent on your organization’s IdP. Some of the field values need to be obtained from your organization’s IdP, and some values need to be added to your organization’s IdP. It is your responsibility to understand how to access your organization’s IdP to provide these fields and to add any fields from Cortex XSIAM to your IdP. -After SSO configuration is complete, when you sign in as an SSO user, the Cortex XSIAM permissions granted to you after logging in, either from the group mapping or from the default role configuration, are effective throughout the entire session for the defined maximum session length. Maximum session length is defined in your Cortex XSIAM Session Security Settings. This applies even if the default role configuration is updated or the group membership settings were changed. +After SSO configuration is complete, when you sign in as an SSO user, the Cortex XSIAM permissions granted to you after logging in, either from the group mapping or from the default role configuration, are effective throughout the entire session for the defined maximum session length. The maximum session length is defined in your Cortex XSIAM Session Security Settings. This applies even if the default role configuration is updated or the group membership settings are changed. </details> -
▸ ▾ Manage access to objects modified +6 −0
xsiam/onboard-cortex-xsiam/post-deployment/manage-user-roles-and-access-management/manage-access-to-objectsRead it on the Cortex docs portal ↗ Read it here → This file's diff on GitHub ↗
Before After@@ -1,8 +1,14 @@---description: >-Manage Cortex XSIAM per-object access for dashboards, reports, playbooks,scripts, and saved XQL queries using owner, editor, and viewer roles.---# Manage access to objects# Manage access to objectsCortex XSIAM enforces least-privileged access by allowing you to manage access for individual instances of custom (user-defined) objects. Access management for these items is handled through a common experience for per-object access, which allows you to treat these tools as distinct objects with their own access settings.Cortex XSIAM enforces least-privileged access by allowing you to manage access for individual instances of custom (user-defined) objects. Access management for these items is handled through a common experience for per-object access, which allows you to treat these tools as distinct objects with their own access settings.### What are Objects?### What are Objects?Objects are the tools used to visualize, analyze, and interact with information within Cortex XSIAM. By managing access at the object level, you can isolate sensitive information between teams (such as SOC vs. Internal Threat) or departments (such as CloudOps vs. SecOps).Objects are the tools used to visualize, analyze, and interact with information within Cortex XSIAM. By managing access at the object level, you can isolate sensitive information between teams (such as SOC vs. Internal Threat) or departments (such as CloudOps vs. SecOps).Show markdown source
@@ -1,8 +1,14 @@
+---
+description: >-
+  Manage Cortex XSIAM per-object access for dashboards, reports, playbooks,
+  scripts, and saved XQL queries using owner, editor, and viewer roles.
+---
+
 # Manage access to objects

 Cortex XSIAM enforces least-privileged access by allowing you to manage access for individual instances of custom (user-defined) objects. Access management for these items is handled through a common experience for per-object access, which allows you to treat these tools as distinct objects with their own access settings.

 ### What are Objects?

 Objects are the tools used to visualize, analyze, and interact with information within Cortex XSIAM. By managing access at the object level, you can isolate sensitive information between teams (such as SOC vs. Internal Threat) or departments (such as CloudOps vs. SecOps).
-
▸ ▾ Manage access to custom dashboards modified +6 −0
xsiam/onboard-cortex-xsiam/post-deployment/manage-user-roles-and-access-management/manage-access-to-objects/manage-access-to-custom-dashboardsRead it on the Cortex docs portal ↗ Read it here → This file's diff on GitHub ↗
Before After@@ -1,8 +1,14 @@---description: >-Manage Cortex XSIAM custom dashboard access with role permissions, objectsharing, owners, editors, viewers, and SBAC data scopes.---# Manage access to custom dashboards# Manage access to custom dashboardsReview the following:Review the following:• Manage access to objects• Manage access to objectsThe Dashboard Manager serves as the central repository for your visualizations. By using object-level access, you can ensure that custom (user-defined) dashboards, such as those used for sensitive executive reporting or specialized department views, are only accessible to authorized users and user groups. The permissions assigned to your role, combined with the ownership of specific objects, directly determine the content available to you; you can only access dashboards where you are the Owner, dashboards that have been explicitly shared with you (or your user group), or dashboards marked as Public.The Dashboard Manager serves as the central repository for your visualizations. By using object-level access, you can ensure that custom (user-defined) dashboards, such as those used for sensitive executive reporting or specialized department views, are only accessible to authorized users and user groups. The permissions assigned to your role, combined with the ownership of specific objects, directly determine the content available to you; you can only access dashboards where you are the Owner, dashboards that have been explicitly shared with you (or your user group), or dashboards marked as Public.Show markdown source
@@ -1,8 +1,14 @@
+---
+description: >-
+  Manage Cortex XSIAM custom dashboard access with role permissions, object
+  sharing, owners, editors, viewers, and SBAC data scopes.
+---
+
 # Manage access to custom dashboards

 Review the following:

 * [Manage access to objects]()

 The **Dashboard Manager** serves as the central repository for your visualizations. By using object-level access, you can ensure that custom (user-defined) dashboards, such as those used for sensitive executive reporting or specialized department views, are only accessible to authorized users and user groups. The permissions assigned to your role, combined with the ownership of specific objects, directly determine the content available to you; you can only access dashboards where you are the Owner, dashboards that have been explicitly shared with you (or your user group), or dashboards marked as **Public**.
-
▸ ▾ Manage access to playbooks and scripts modified +6 −0
xsiam/onboard-cortex-xsiam/post-deployment/manage-user-roles-and-access-management/manage-access-to-objects/manage-access-to-playbooks-and-scriptsRead it on the Cortex docs portal ↗ Read it here → This file's diff on GitHub ↗
Before After@@ -1,8 +1,14 @@---description: >-Manage Cortex XSIAM playbook and script access with role permissions,ownership, sharing, public visibility, and automation controls.---# Manage access to playbooks and scripts# Manage access to playbooks and scriptsReview the following:Review the following:• Manage access to objects• Manage access to objectsThe Playbooks and Scripts pages serve as the central repositories where you can view, create, and modify automation logic for your environment. By using object-level access, you can ensure that custom (user-defined) playbooks and scripts, such as those used for sensitive remediation or specialized third-party integrations, are only accessible to authorized users and user groups. Your access is determined by your role permissions combined with object ownership; you can only interact with playbooks and scripts where you are the Owner, those explicitly shared with you (or your user group), or those marked as Public.The Playbooks and Scripts pages serve as the central repositories where you can view, create, and modify automation logic for your environment. By using object-level access, you can ensure that custom (user-defined) playbooks and scripts, such as those used for sensitive remediation or specialized third-party integrations, are only accessible to authorized users and user groups. Your access is determined by your role permissions combined with object ownership; you can only interact with playbooks and scripts where you are the Owner, those explicitly shared with you (or your user group), or those marked as Public.Show markdown source
@@ -1,8 +1,14 @@
+---
+description: >-
+  Manage Cortex XSIAM playbook and script access with role permissions,
+  ownership, sharing, public visibility, and automation controls.
+---
+
 # Manage access to playbooks and scripts

 Review the following:

 * [Manage access to objects]()

 The **Playbooks** and **Scripts** pages serve as the central repositories where you can view, create, and modify automation logic for your environment. By using object-level access, you can ensure that custom (user-defined) playbooks and scripts, such as those used for sensitive remediation or specialized third-party integrations, are only accessible to authorized users and user groups. Your access is determined by your role permissions combined with object ownership; you can only interact with playbooks and scripts where you are the Owner, those explicitly shared with you (or your user group), or those marked as **Public**.
-
▸ ▾ Manage access to report templates modified +6 −0
xsiam/onboard-cortex-xsiam/post-deployment/manage-user-roles-and-access-management/manage-access-to-objects/manage-access-to-report-templatesRead it on the Cortex docs portal ↗ Read it here → This file's diff on GitHub ↗
Before After@@ -1,8 +1,14 @@---description: >-Manage Cortex XSIAM report template access with role permissions, ownership,sharing, public visibility, and SBAC data scopes.---# Manage access to report templates# Manage access to report templatesReview the following:Review the following:• Manage access to objects• Manage access to objectsThe Report Templates page serves as the central repository where you can view, create, and modify report templates for your reports. By using object-level access, you can ensure that custom (user-defined) report templates, such as those used for specialized department metrics or sensitive internal audits, are only accessible to authorized users and user groups. Your access is determined by your role permissions combined with report template ownership; you can only interact with report templates where you are the Owner, report templates explicitly shared with you (or your user group), or report templates marked as Public.The Report Templates page serves as the central repository where you can view, create, and modify report templates for your reports. By using object-level access, you can ensure that custom (user-defined) report templates, such as those used for specialized department metrics or sensitive internal audits, are only accessible to authorized users and user groups. Your access is determined by your role permissions combined with report template ownership; you can only interact with report templates where you are the Owner, report templates explicitly shared with you (or your user group), or report templates marked as Public.Show markdown source
@@ -1,8 +1,14 @@
+---
+description: >-
+  Manage Cortex XSIAM report template access with role permissions, ownership,
+  sharing, public visibility, and SBAC data scopes.
+---
+
 # Manage access to report templates

 Review the following:

 * [Manage access to objects]()

 The **Report Templates** page serves as the central repository where you can view, create, and modify report templates for your reports. By using object-level access, you can ensure that custom (user-defined) report templates, such as those used for specialized department metrics or sensitive internal audits, are only accessible to authorized users and user groups. Your access is determined by your role permissions combined with report template ownership; you can only interact with report templates where you are the Owner, report templates explicitly shared with you (or your user group), or report templates marked as **Public**.
-
▸ ▾ Manage access to saved queries modified +6 −0
xsiam/onboard-cortex-xsiam/post-deployment/manage-user-roles-and-access-management/manage-access-to-objects/manage-access-to-saved-queriesRead it on the Cortex docs portal ↗ Read it here → This file's diff on GitHub ↗
Before After@@ -1,8 +1,14 @@---description: >-Manage Cortex XSIAM saved XQL query access with role permissions, ownership,sharing, public visibility, and Query Library controls.---# Manage access to saved queries# Manage access to saved queriesReview the following:Review the following:• Manage access to objects• Manage access to objectsThe Query Library serves as the central repository for your team's investigation logic. By using object-level access, you can ensure that specific Cortex Query Language (XQL) queries, such as those used for sensitive internal investigations or executive reporting, are only accessible to authorized users, user groups, and API keys.The Query Library serves as the central repository for your team's investigation logic. By using object-level access, you can ensure that specific Cortex Query Language (XQL) queries, such as those used for sensitive internal investigations or executive reporting, are only accessible to authorized users, user groups, and API keys.Show markdown source
@@ -1,8 +1,14 @@
+---
+description: >-
+  Manage Cortex XSIAM saved XQL query access with role permissions, ownership,
+  sharing, public visibility, and Query Library controls.
+---
+
 # Manage access to saved queries

 Review the following:

 * [Manage access to objects]()

 The Query Library serves as the central repository for your team's investigation logic. By using object-level access, you can ensure that specific Cortex Query Language (XQL) queries, such as those used for sensitive internal investigations or executive reporting, are only accessible to authorized users, user groups, and API keys.
-
▸ ▾ Manage user access modified +6 −0
xsiam/onboard-cortex-xsiam/post-deployment/manage-user-roles-and-access-management/manage-user-accessRead it on the Cortex docs portal ↗ Read it here → This file's diff on GitHub ↗
Before After@@ -1,8 +1,14 @@---description: >-Manage Cortex XSIAM user access with roles, user groups, RBAC permissions,SBAC scopes, and XQL dataset row controls.---# Manage user access# Manage user accesshint warninghint warning### Prerequisite### PrerequisiteManaging users, roles, scopes, user groups, authentication settings in Cortex XSIAM Access Management requires View/Edit RBAC permissions for Access Management (under Configurations). Account Admin and Instance Administrator roles are granted this permission by default. For more information, see Predefined user roles in Set up users and roles.Managing users, roles, scopes, user groups, authentication settings in Cortex XSIAM Access Management requires View/Edit RBAC permissions for Access Management (under Configurations). Account Admin and Instance Administrator roles are granted this permission by default. For more information, see Predefined user roles in Set up users and roles.endhintendhintShow markdown source
@@ -1,8 +1,14 @@ +--- +description: >- + Manage Cortex XSIAM user access with roles, user groups, RBAC permissions, + SBAC scopes, and XQL dataset row controls. +--- + # Manage user access {% hint style="warning" %} ### Prerequisite Managing users, roles, scopes, user groups, authentication settings in Cortex XSIAM Access Management requires **View/Edit** RBAC permissions for **Access Management** (under **Configurations**). Account Admin and Instance Administrator roles are granted this permission by default. For more information, see _Predefined user roles_ in [Set up users and roles](../../deployment-steps/set-up-users-and-roles). {% endhint %} -
▸ ▾ User access reference information modified +6 −0
xsiam/onboard-cortex-xsiam/post-deployment/manage-user-roles-and-access-management/manage-user-access/user-access-reference-informationRead it on the Cortex docs portal ↗ Read it here → This file's diff on GitHub ↗
Before After@@ -1,8 +1,14 @@---description: >-Reference Cortex XSIAM Users page fields for user types, direct roles, groups,group roles, and granular access scopes.---# User access reference information# User access reference informationThe following is a list of common fields on the Users page:The following is a list of common fields on the Users page:Field│DescriptionField│Description| ---------------- | ---------------------------------------------------------------------------------------------------------------------------------------------------------------------------------------------------------------------------------------------------------------------------------------------------------------------------------------------------- || ---------------- | ---------------------------------------------------------------------------------------------------------------------------------------------------------------------------------------------------------------------------------------------------------------------------------------------------------------------------------------------------- |Show User Subset│Displays all users except for hidden users.Show User Subset│Displays all users except for hidden users.User Type│Indicates whether a user was defined in Cortex XSIAM using the Customer Support Portal, SSO (single sign-on) using your organization’s IdP, or both Customer Support Portal/SSO.User Type│Indicates whether a user was defined in Cortex XSIAM using the Customer Support Portal, SSO (single sign-on) using your organization’s IdP, or both Customer Support Portal/SSO.Show markdown source
@@ -1,8 +1,14 @@
+---
+description: >-
+  Reference Cortex XSIAM Users page fields for user types, direct roles, groups,
+  group roles, and granular access scopes.
+---
+
 # User access reference information

 The following is a list of common fields on the **Users** page:

 | Field            | Description                                                                                                                                                                                                                                                                                                                                          |
 | ---------------- | ---------------------------------------------------------------------------------------------------------------------------------------------------------------------------------------------------------------------------------------------------------------------------------------------------------------------------------------------------- |
 | Show User Subset | Displays all users except for hidden users.                                                                                                                                                                                                                                                                                                          |
 | User Type        | Indicates whether a user was defined in Cortex XSIAM using the Customer Support Portal, SSO (single sign-on) using your organization’s IdP, or both Customer Support Portal/SSO.                                                                                                                                                                     |
-
▸ ▾ Manage user roles modified +8 −2
xsiam/onboard-cortex-xsiam/post-deployment/manage-user-roles-and-access-management/manage-user-rolesRead it on the Cortex docs portal ↗ Read it here → This file's diff on GitHub ↗
Before After@@ -1,8 +1,14 @@---description: >-Create and manage Cortex XSIAM user roles with RBAC permissions, XQL datasetaccess controls, and scoped access settings.---# Manage user roles# Manage user roleshint warninghint warning### Prerequisite### PrerequisiteManaging user roles in Cortex XSIAM Access Management requires View/Edit RBAC permissions for Access Management (under Configurations). Account Admin and Instance Administrator roles are granted this permission by default. For more information, see Predefined user roles in Set up users and roles.Managing user roles in Cortex XSIAM Access Management requires View/Edit RBAC permissions for Access Management (under Configurations). Account Admin and Instance Administrator roles are granted this permission by default. For more information, see Predefined user roles in Set up users and roles.endhintendhint@@ -10,19 +16,19 @@ Review the following topics:• Set up users and roles• Set up users and roles• User group management• User group management• Assign user roles and groups• Assign user roles and groups• Manage user roles and access management• Manage user roles and access managementManage user roles that are assigned to Cortex XSIAM users, user groups, or API keys. User roles enable you to define the type of access and actions a user can perform.Manage user roles that are assigned to Cortex XSIAM users, user groups, or API keys. User roles enable you to define the type of access and actions a user can perform.You can only set dataset access permissions from a user role in Cortex XSIAM Access Management for the tenant. When creating user roles from the Cortex Gateway, these settings are disabled. By default, dataset access management is disabled, and users have access to all datasets. If you enable dataset access management, you must configure access permissions for each dataset type, and for each user role. When a dataset component is enabled for a particular role, the Issues and Cases pages include information about datasets.You can only set dataset access permissions from a user role in Cortex XSIAM Access Management for the tenant. When creating user roles from the Cortex Gateway, these settings are disabled. By default, dataset access management is disabled, and users have access to all datasets. If you enable dataset access management, you must configure access permissions for each dataset type and for each user role. When a dataset component is enabled for a particular role, the Issues and Cases pages include information about datasets.Be aware that even with scoped access to dataset rows applied, users can still indirectly access unauthorized dataset rows through dataset views and correlation rules. You can prevent this by ensuring that users don't have access to these dataset views and are unable to write correlation rules based on these datasets by enabling dataset access management for the relevant user roles, and limiting access to the applicable datasets. You may also want to consider not allowing these dataset-scoped users to write correlation rules, which we recommend as a best practice. For more information on row-level scoping, see Manage user scope.Be aware that even with scoped access to dataset rows applied, users can still indirectly access unauthorized dataset rows through dataset views and correlation rules. You can prevent this by ensuring that users don't have access to these dataset views and are unable to write correlation rules based on these datasets by enabling dataset access management for the relevant user roles and limiting access to the applicable datasets. You may also want to consider not allowing these dataset-scoped users to write correlation rules, which we recommend as a best practice. For more information on row-level scoping, see Manage user scope.Create a user roleCreate a user role1. Select Settings → Configurations → Access Management → Roles.1. Select Settings → Configurations → Access Management → Roles.2. Click New Role.2. Click New Role.3. Under Role Name, enter a name for the user role.3. Under Role Name, enter a name for the user role.Show markdown source
@@ -1,8 +1,14 @@ +--- +description: >- + Create and manage Cortex XSIAM user roles with RBAC permissions, XQL dataset + access controls, and scoped access settings. +--- + # Manage user roles {% hint style="warning" %} ### Prerequisite Managing user roles in Cortex XSIAM Access Management requires **View/Edit** RBAC permissions for **Access Management** (under **Configurations**). Account Admin and Instance Administrator roles are granted this permission by default. For more information, see _Predefined user roles_ in [Set up users and roles](../../deployment-steps/set-up-users-and-roles). {% endhint %} @@ -10,19 +16,19 @@ Review the following topics: * Set up users and roles * User group management * Assign user roles and groups * Manage user roles and access management Manage user roles that are assigned to Cortex XSIAM users, user groups, or API keys. User roles enable you to define the type of access and actions a user can perform. -You can only set dataset access permissions from a user role in Cortex XSIAM **Access Management** for the tenant. When creating user roles from the Cortex Gateway, these settings are disabled. By default, dataset access management is disabled, and users have access to all datasets. If you enable dataset access management, you must configure access permissions for each dataset type, and for each user role. When a dataset component is enabled for a particular role, the Issues and Cases pages include information about datasets. +You can only set dataset access permissions from a user role in Cortex XSIAM **Access Management** for the tenant. When creating user roles from the Cortex Gateway, these settings are disabled. By default, dataset access management is disabled, and users have access to all datasets. If you enable dataset access management, you must configure access permissions for each dataset type and for each user role. When a dataset component is enabled for a particular role, the Issues and Cases pages include information about datasets. -Be aware that even with scoped access to dataset rows applied, users can still indirectly access unauthorized dataset rows through dataset views and correlation rules. You can prevent this by ensuring that users don't have access to these dataset views and are unable to write correlation rules based on these datasets by enabling dataset access management for the relevant user roles, and limiting access to the applicable datasets. You may also want to consider not allowing these dataset-scoped users to write correlation rules, which we recommend as a best practice. For more information on row-level scoping, see Manage user scope. +Be aware that even with scoped access to dataset rows applied, users can still indirectly access unauthorized dataset rows through dataset views and correlation rules. You can prevent this by ensuring that users don't have access to these dataset views and are unable to write correlation rules based on these datasets by enabling dataset access management for the relevant user roles and limiting access to the applicable datasets. You may also want to consider not allowing these dataset-scoped users to write correlation rules, which we recommend as a best practice. For more information on row-level scoping, see Manage user scope. <details> <summary>Create a user role</summary> 1. Select **Settings** → **Configurations** → **Access Management** → **Roles**. 2. Click **New Role**. 3. Under **Role Name**, enter a name for the user role. -
▸ ▾ Manage user scope modified +8 −2
xsiam/onboard-cortex-xsiam/post-deployment/manage-user-roles-and-access-management/manage-user-scopeRead it on the Cortex docs portal ↗ Read it here → This file's diff on GitHub ↗
Before After@@ -1,8 +1,14 @@---description: >-Configure Cortex XSIAM Scope-Based Access Control (SBAC) for users, groups,and API keys across assets, cases, endpoints, and dataset rows.---# Manage user scope# Manage user scopehint warninghint warning### Prerequisite### Prerequisite• Configuring user scopes in Cortex XSIAM Access Management requires View/Edit RBAC permissions for Access Management (under Configurations). Account Admin and Instance Administrator roles are granted this permission by default. For more information, see Predefined user roles in Set up users and roles.• Configuring user scopes in Cortex XSIAM Access Management requires View/Edit RBAC permissions for Access Management (under Configurations). Account Admin and Instance Administrator roles are granted this permission by default. For more information, see Predefined user roles in Set up users and roles.• By default, Enable Scope Based Access Control is disabled in Settings → Configurations → General → Server Settings, and granular scoping is not enforced. Before enabling SBAC, we recommend that you first ensure that the users, user groups, and API Keys defined in Cortex XSIAM are granted the required access by assigning the relevant scopes.• By default, Enable Scope Based Access Control is disabled in Settings → Configurations → General → Server Settings, and granular scoping is not enforced. Before enabling SBAC, we recommend that you first ensure that the users, user groups, and API Keys defined in Cortex XSIAM are granted the required access by assigning the relevant scopes.endhintendhint@@ -254,18 +260,18 @@ Make sure to assign the required default granular scoping for users. This depend``````3. Optional) Set the Time frame for the query. The default is Last 1 day.3. Optional) Set the Time frame for the query. The default is Last 1 day.4. (Optional) You can preview the query results displayed based on your defined query by clicking Preview. You can edit your query until you're satisfied with the output. By default, the query results are limited to 1000 records.4. (Optional) You can preview the query results displayed based on your defined query by clicking Preview. You can edit your query until you're satisfied with the output. By default, the query results are limited to 1000 records.5. When you are finished, click Done.5. When you are finished, click Done.The Scope field for the dataset that you added the filter on is updated with the query.The Scope field for the dataset that you added the filter on is updated with the query.In the above example, the Scope field displays `_collector_name = “bu2_collector”`.In the above example, the Scope field displays `_collector_name = “bu2_collector”`.4. Click Save. 4. Click Save.5. Repeat steps 2 to 4 until you have configured all users, user groups, and API keys with the correct granular scoping access. 5. Repeat steps 2 to 4 until you have configured all users, user groups, and API keys with the correct granular scoping access.6. Enable granular scoping in Cortex XSIAM.6. Enable granular scoping in Cortex XSIAM.1. Select Settings → Configurations → General → Server Settings, and select the Enable Scope-Based Access Control toggle.1. Select Settings → Configurations → General → Server Settings, and select the Enable Scope-Based Access Control toggle.2. (Optional) You can select the Endpoint Scoping Mode, which is defined per tenant:2. (Optional) You can select the Endpoint Scoping Mode, which is defined per tenant:* Permissive: Enables users with at least one scope tag to access the relevant entity with that same tag.* Permissive: Enables users with at least one scope tag to access the relevant entity with that same tag.* Restrictive: Users must have all the scoped tags that are tagged within the relevant entity of the system.* Restrictive: Users must have all the scoped tags that are tagged within the relevant entity of the system.3. Click Save.3. Click Save.Show markdown source
@@ -1,8 +1,14 @@ +--- +description: >- + Configure Cortex XSIAM Scope-Based Access Control (SBAC) for users, groups, + and API keys across assets, cases, endpoints, and dataset rows. +--- + # Manage user scope {% hint style="warning" %} ### Prerequisite * Configuring user scopes in Cortex XSIAM Access Management requires **View/Edit** RBAC permissions for **Access Management** (under **Configurations**). Account Admin and Instance Administrator roles are granted this permission by default. For more information, see _Predefined user roles_ in [Set up users and roles](../../deployment-steps/set-up-users-and-roles). * By default, **Enable Scope Based Access Control** is disabled in Settings → Configurations → General → **Server Settings**, and granular scoping is not enforced. Before enabling SBAC, we recommend that you first ensure that the users, user groups, and API Keys defined in Cortex XSIAM are granted the required access by assigning the relevant scopes. {% endhint %} @@ -254,18 +260,18 @@ Make sure to assign the required default granular scoping for users. This depend ``` 3. Optional) Set the Time frame for the query. The default is Last 1 day. 4. (Optional) You can preview the query results displayed based on your defined query by clicking Preview. You can edit your query until you're satisfied with the output. By default, the query results are limited to 1000 records. 5. When you are finished, click Done. The Scope field for the dataset that you added the filter on is updated with the query. In the above example, the Scope field displays `_collector_name = “bu2_collector”`. -4. Click Save.  -5. Repeat steps 2 to 4 until you have configured all users, user groups, and API keys with the correct granular scoping access.  +4. Click Save. +5. Repeat steps 2 to 4 until you have configured all users, user groups, and API keys with the correct granular scoping access. 6. Enable granular scoping in Cortex XSIAM. 1. Select Settings → Configurations → General → Server Settings, and select the Enable Scope-Based Access Control toggle. 2. (Optional) You can select the Endpoint Scoping Mode, which is defined per tenant: * Permissive: Enables users with at least one scope tag to access the relevant entity with that same tag. * Restrictive: Users must have all the scoped tags that are tagged within the relevant entity of the system. 3. Click Save. -
▸ ▾ Perform health checks modified +5 −3
xsiam/onboard-cortex-xsiam/post-deployment/perform-health-checksRead it on the Cortex docs portal ↗ Read it here → This file's diff on GitHub ↗
Before After@@ -1,15 +1,17 @@------description: Learn which health checks to perform after deployment.description: >-Perform Cortex XSIAM health checks for prevention policies, Cortex XDR agents,WildFire testing, alerts, cases, and log ingestion.------# Perform health checks# Perform health checksAs part of the onboarding process, it is recommended to perform the following health checks:As part of the onboarding process, it is recommended to perform the following health checks:• Update prevention policies: Update policies and profiles and ensure that all action modes are set to Block. For more information, see Set up endpoint profiles and exception rules in the Cortex XSIAM Administrator Guide.• Update prevention policies: Update policies and profiles, and ensure that all action modes are set to Block. For more information, seeset-up-endpoint-protection.• Monitor operational status: Verify that Cortex XDR agents are protecting endpoints according to predefined security policies and profiles. For more information, see Monitor agent operational status in Cortex XSIAM.• Monitor operational status: Verify that Cortex XDR agents are protecting endpoints according to predefined security policies and profiles. For more information, see Monitor agent operational status in Cortex XSIAM.• Test sample malware: Use a malware PE, MacOSX, or APK test file, to test end-to-end WildFire sample processing. For more information, see Get a Malware Test File.• Test sample malware: Use a malware PE, MacOSX, or APK test file, to test end-to-end WildFire sample processing. For more information, see Get a Malware Test File.• Validate detectors for issues and cases: Check issues and their associated sources. Validate that all the configurations on the policy level and on the agent deployment level meet the requirements to generate alerts and cases on Cortex XSIAM. For example, check the following:• Validate detectors for issues and cases: Check issues and their associated sources. Validate that all the configurations on the policy level and on the agent deployment level meet the requirements to generate alerts and cases on Cortex XSIAM. For example, check the following:• Cortex XDR agent generates WildFire malware issues.• Cortex XDR agent generates WildFire malware issues.• NFGW issues are listed by PAN NGFW.• NFGW issues are listed by PAN NGFW.• Validate log ingestion from external integrations: Verify what datasets are being created. The Dataset Management page enables you to manage your datasets and understand your overall data storage duration for different retention periods and datasets based on your Hot and Cold Storage licenses, and retention add-ons to extend your storage. For more information, see Data storage lifecycle.• Validate log ingestion from external integrations: Verify what datasets are being created. The Dataset Management page enables you to manage your datasets and understand your overall data storage duration for different retention periods and datasets based on your Hot and Cold Storage licenses and retention add-ons to extend your storage. For more information, see Data storage lifecycle.Show markdown source
@@ -1,15 +1,17 @@
 ---
-description: Learn which health checks to perform after deployment.
+description: >-
+  Perform Cortex XSIAM health checks for prevention policies, Cortex XDR agents,
+  WildFire testing, alerts, cases, and log ingestion.
 ---

 # Perform health checks

 As part of the onboarding process, it is recommended to perform the following health checks:

-* **Update prevention policies:** Update policies and profiles and ensure that all action modes are set to Block. For more information, see Set up endpoint profiles and exception rules in the Cortex XSIAM Administrator Guide.
+* **Update prevention policies:** Update policies and profiles, and ensure that all action modes are set to Block. For more information, see[set-up-endpoint-protection](../../protect-your-endpoints/endpoint-security/install-and-manage-endpoints/set-up-endpoint-protection "mention").
 * **Monitor operational status:** Verify that Cortex XDR agents are protecting endpoints according to predefined security policies and profiles. For more information, see [Monitor agent operational status in Cortex XSIAM](perform-health-checks/monitor-agent-operational-status-in-cortex-xsiam).
 * **Test sample malware:** Use a malware PE, MacOSX, or APK test file, to test end-to-end WildFire sample processing. For more information, see [Get a Malware Test File](https://docs.paloaltonetworks.com/wildfire/u-v/wildfire-api/get-wildfire-information-through-the-wildfire-api/get-a-malware-test-file-wildfire-api).
 * **Validate detectors for issues and cases:** Check issues and their associated sources. Validate that all the configurations on the policy level and on the agent deployment level meet the requirements to generate alerts and cases on Cortex XSIAM. For example, check the following:
   * Cortex XDR agent generates WildFire malware issues.
   * NFGW issues are listed by PAN NGFW.
-* **Validate log ingestion from external integrations:** Verify what datasets are being created. The **Dataset Management** page enables you to manage your datasets and understand your overall data storage duration for different retention periods and datasets based on your Hot and Cold Storage licenses, and retention add-ons to extend your storage. For more information, see [Data storage lifecycle](../../learn-about-cortex-xsiam/cortex-xsiam-product-licenses/data-storage-lifecycle).
+* **Validate log ingestion from external integrations:** Verify what datasets are being created. The **Dataset Management** page enables you to manage your datasets and understand your overall data storage duration for different retention periods and datasets based on your Hot and Cold Storage licenses and retention add-ons to extend your storage. For more information, see [Data storage lifecycle](../../learn-about-cortex-xsiam/cortex-xsiam-product-licenses/data-storage-lifecycle).
-
▸ ▾ Monitor agent operational status in Cortex XSIAM modified +26 −10
xsiam/onboard-cortex-xsiam/post-deployment/perform-health-checks/monitor-agent-operational-status-in-cortex-xsiamRead it on the Cortex docs portal ↗ Read it here → This file's diff on GitHub ↗
Before After@@ -1,22 +1,38 @@---description: >-Monitor Cortex XDR agent operational status in Cortex XSIAM, includingprotected, partially protected, unprotected, and resource-impact states.---# Monitor agent operational status in Cortex XSIAM# Monitor agent operational status in Cortex XSIAMCortex XSIAM provides you with information about the XDR agent operational status on an endpoint and indicates whether the agent is protecting according to its predefined security policies and profiles. This can help you identify when the agent may suffer from a technical issue or misconfiguration that interferes with the agent’s protection capabilities or interaction with Cortex XSIAM and other applications.Cortex XSIAM provides information about the XDR agent operational status on an endpoint. It indicates whether the agent provides protection according to its predefined security policies and profiles. This information can help you identify technical issues or misconfigurations that interfere with the agent’s protection capabilities or interactions with Cortex XSIAM and other applications.The XDR agent reports the operational status as follows:The XDR agent reports the operational status as follows:• Protected: Indicates that the XDR agent is running as configured and did not report any exceptions to Cortex XSIAM.• Protected: Indicates that the XDR agent is running as configured and did not report any exceptions to Cortex XSIAM.• Partially protected: Indicates that the XDR agent reported one or more exceptions to Cortex XSIAM.• Partially protected: Indicates that the XDR agent reported one or more exceptions to Cortex XSIAM.• Unprotected: Indicates the XDR agent is not enforcing protection on the endpoint.• Unprotected: Indicates the XDR agent is not enforcing protection on the endpoint.• Local Resource Impact: Indicates that the XDR agent machine resources currently available for use, are not enough for the agent to operate smoothly.• Local Resource Impact: Indicates that available endpoint resources are insufficient for the XDR agent to operate smoothly.You can monitor the Cortex XDR agent Operational Status in Endpoints → All Endpoints.You can monitor the Cortex XDR agent Operational Status in Endpoints → All Endpoints.The operational status that the agent reports varies according to the exceptions reported by the XDR agent.The reported operational status varies according to exceptions reported by the XDR agent.Status│Description| ------------------------- | ------------------------------------------------------------------------------------------------------------------------------------------------------------------------------------------------------------------------------------------------------------------------------------------------------------------------------------------------------------------------------------------------------------------------------------------------------------------------------------------------------------------------------------------------------------------------------------------------------------------------------------------------------------------------------------------------------------------------------------------------------------------------------------------------------------------------------------------------------------------------------------------------------------------------------------------------------------------------------------------------------------------------------------------------------------------------------------------------------------------------------------- |Protected│(Windows, Mac, and Linux) Indicates all protection modules are running as configured on the endpoint.Partially protected│Windows
- XDR data collection is not running, or not set
- Behavioral threat protection is not running
- Malware protection is not running
- Exploit protection is not running
Mac
- Operating system adaptive mode*
- XDR Data Collection is not running, or not set
- Behavioral threat protection is not running
- Malware protection is not running
- Exploit protection is not running
Linux
- Kernel module not loaded**
- Kernel module compatible but not loaded**
- Kernel version not compatible**
- XDR Data Collection is not running, or not set
- Behavioral threat protection is not running
- Anti-malware flow is asynchronous
- Malware protection is not running
Exploit protection is not running
Any of the listed items could lead to a partially protected state. Refer to the Cortex XSIAM management console for specific reasons for the state.
Unprotected│Windows, Mac, and Linux:
- Behavioral threat protection and Malware protection are not running
- Exploit protection and malware protection are not running
- The content is unavailable.
Local Resource Impact│Windows, Mac, Linux
- Machine CPU impact on the agent operation
- Machine memory impact on the agent operation
In addition to the status, either one of the following sub-statuses appear:
- Low local available memory
- No local available memory
hint warningA status can have the following implications for the endpoint:Status│Description• *(Status): The exploit protection module is not running.| ----------------------------------------------------------------------------------------------------------------------------------------------------------------------------------------------------------------------------------------------------------------------------------------------------------------------------------------------------------------------------------------------------------------------------------------------------------------------------------------------------------------------------------------------- | ----------------------------------------------------------------------------------------------------------------------------------------------------------------------------------------------------------------------------------------------------------------------------------------------------------------------------------------------------------------------------------------------------------------------------------------------------------------------------------------------------------------------------------------------------------------------------------------------------------------------------------------------------------------------------------------------------------------------------------------------------------------------------------------------------------------------------------------------------------------------------------------------------------------------------------------------------------------------------------------------------------------------------------------------------------------------------------------------------------------------------------------------------------------- |• **(Status):Protected│(Windows, Mac, and Linux) Indicates all protection modules are running as configured on the endpoint.• XDR data collection is not runningPartially protected│Windows
- XDR data collection is not running, or not set
- Behavioral threat protection is not running
- Malware protection is not running
- Exploit protection is not running
Mac
- Operating system adaptive mode*
- XDR Data Collection is not running, or not set
- Behavioral threat protection is not running
- Malware protection is not running
- Exploit protection is not running
Linux
- Kernel module not loaded**
- Kernel module compatible but not loaded**
- Kernel version not compatible**
- XDR Data Collection is not running, or not set
- Behavioral threat protection is not running
- Anti-malware flow is asynchronous
- Malware protection is not running
Exploit protection is not running
Note
Any of the listed items could lead to a partially protected state. Refer to the Cortex XSIAM management console for specific reasons for the state.
• Behavioral threat protection is not runningUnprotected│Windows, Mac, and Linux:
- Behavioral threat protection and Malware protection are not running
- Exploit protection and malware protection are not running
- The content is unavailable.
• Anti-malware flow is asynchronousLocal Resource Impact│Windows, Mac, Linux
- Machine CPU impact on the agent operation
- Machine memory impact on the agent operation
In addition to the status, either one of the following sub-statuses appear:
- Low local available memory
- No local available memory
• Local privilege escalation protection is asynchronous│Caution
Status can have the following implications on the endpoint:
- *(
Status): The exploit protection module is not running. **(
Status):- XDR data collection is not running
- Behavioral threat protection is not running
- Anti-malware flow is asynchronous
- Local privilege escalation protection is asynchronous
endhintShow markdown source
@@ -1,22 +1,38 @@ +--- +description: >- + Monitor Cortex XDR agent operational status in Cortex XSIAM, including + protected, partially protected, unprotected, and resource-impact states. +--- + # Monitor agent operational status in Cortex XSIAM -Cortex XSIAM provides you with information about the XDR agent operational status on an endpoint and indicates whether the agent is protecting according to its predefined security policies and profiles. This can help you identify when the agent may suffer from a technical issue or misconfiguration that interferes with the agent’s protection capabilities or interaction with Cortex XSIAM and other applications. +Cortex XSIAM provides information about the XDR agent operational status on an endpoint. It indicates whether the agent provides protection according to its predefined security policies and profiles. This information can help you identify technical issues or misconfigurations that interfere with the agent’s protection capabilities or interactions with Cortex XSIAM and other applications. The XDR agent reports the operational status as follows: * **Protected:** Indicates that the XDR agent is running as configured and did not report any exceptions to Cortex XSIAM. * **Partially protected:** Indicates that the XDR agent reported one or more exceptions to Cortex XSIAM. * **Unprotected:** Indicates the XDR agent is not enforcing protection on the endpoint. -* **Local Resource Impact:** Indicates that the XDR agent machine resources currently available for use, are not enough for the agent to operate smoothly. +* **Local Resource Impact:** Indicates that available endpoint resources are insufficient for the XDR agent to operate smoothly. You can monitor the Cortex XDR agent **Operational Status** in Endpoints → **All Endpoints**. -The operational status that the agent reports varies according to the exceptions reported by the XDR agent. +The reported operational status varies according to exceptions reported by the XDR agent. + +| Status | Description | +| ------------------------- | ------------------------------------------------------------------------------------------------------------------------------------------------------------------------------------------------------------------------------------------------------------------------------------------------------------------------------------------------------------------------------------------------------------------------------------------------------------------------------------------------------------------------------------------------------------------------------------------------------------------------------------------------------------------------------------------------------------------------------------------------------------------------------------------------------------------------------------------------------------------------------------------------------------------------------------------------------------------------------------------------------------------------------------------------------------------------------------------------------------------------------------- | +| **Protected** | (Windows, Mac, and Linux) Indicates all protection modules are running as configured on the endpoint. | +| **Partially protected** | <p>Windows</p><ul><li>XDR data collection is not running, or not set</li><li>Behavioral threat protection is not running</li><li>Malware protection is not running</li><li>Exploit protection is not running</li></ul><p>Mac</p><ul><li>Operating system adaptive mode*</li><li>XDR Data Collection is not running, or not set</li><li>Behavioral threat protection is not running</li><li>Malware protection is not running</li><li>Exploit protection is not running</li></ul><p>Linux</p><ul><li>Kernel module not loaded**</li><li>Kernel module compatible but not loaded**</li><li>Kernel version not compatible**</li><li>XDR Data Collection is not running, or not set</li><li>Behavioral threat protection is not running</li><li>Anti-malware flow is asynchronous</li><li>Malware protection is not running</li><li><p>Exploit protection is not running</p><div data-gb-custom-block data-tag="hint" data-style="info" class="hint hint-info"><p>Any of the listed items could lead to a partially protected state. Refer to the Cortex XSIAM management console for specific reasons for the state.</p></div></li></ul> | +| **Unprotected** | <p>Windows, Mac, and Linux:</p><ul><li>Behavioral threat protection and Malware protection are not running</li><li>Exploit protection and malware protection are not running</li><li>The content is unavailable.</li></ul> | +| **Local Resource Impact** | <p>Windows, Mac, Linux</p><ul><li>Machine CPU impact on the agent operation</li><li>Machine memory impact on the agent operation</li></ul><p>In addition to the status, either one of the following sub-statuses appear:</p><ul><li>Low local available memory</li><li>No local available memory</li></ul> | + +{% hint style="warning" %} +A status can have the following implications for the endpoint: -| Status | Description | -| ----------------------------------------------------------------------------------------------------------------------------------------------------------------------------------------------------------------------------------------------------------------------------------------------------------------------------------------------------------------------------------------------------------------------------------------------------------------------------------------------------------------------------------------------- | ----------------------------------------------------------------------------------------------------------------------------------------------------------------------------------------------------------------------------------------------------------------------------------------------------------------------------------------------------------------------------------------------------------------------------------------------------------------------------------------------------------------------------------------------------------------------------------------------------------------------------------------------------------------------------------------------------------------------------------------------------------------------------------------------------------------------------------------------------------------------------------------------------------------------------------------------------------------------------------------------------------------------------------------------------------------------------------------------------------------------------------------------------------------- | -| **Protected** | (Windows, Mac, and Linux) Indicates all protection modules are running as configured on the endpoint. | -| **Partially protected** | <p>Windows</p><ul><li>XDR data collection is not running, or not set</li><li>Behavioral threat protection is not running</li><li>Malware protection is not running</li><li>Exploit protection is not running</li></ul><p>Mac</p><ul><li>Operating system adaptive mode*</li><li>XDR Data Collection is not running, or not set</li><li>Behavioral threat protection is not running</li><li>Malware protection is not running</li><li>Exploit protection is not running</li></ul><p>Linux</p><ul><li>Kernel module not loaded**</li><li>Kernel module compatible but not loaded**</li><li>Kernel version not compatible**</li><li>XDR Data Collection is not running, or not set</li><li>Behavioral threat protection is not running</li><li>Anti-malware flow is asynchronous</li><li>Malware protection is not running</li><li><p>Exploit protection is not running</p><div data-gb-custom-block data-tag="hint" data-style="info" class="hint hint-info"><p><strong>Note</strong></p><p>Any of the listed items could lead to a partially protected state. Refer to the Cortex XSIAM management console for specific reasons for the state.</p></div></li></ul> | -| **Unprotected** | <p>Windows, Mac, and Linux:</p><ul><li>Behavioral threat protection and Malware protection are not running</li><li>Exploit protection and malware protection are not running</li><li>The content is unavailable.</li></ul> | -| **Local Resource Impact** | <p>Windows, Mac, Linux</p><ul><li>Machine CPU impact on the agent operation</li><li>Machine memory impact on the agent operation</li></ul><p>In addition to the status, either one of the following sub-statuses appear:</p><ul><li>Low local available memory</li><li>No local available memory</li></ul> | -| <div data-gb-custom-block data-tag="hint" data-style="warning" class="hint hint-warning"><p><strong>Caution</strong></p><p>Status can have the following implications on the endpoint:</p><ul><li>*(<code>Status</code>): The exploit protection module is not running.</li><li><p>**(<code>Status</code>):</p><ul><li>XDR data collection is not running</li><li>Behavioral threat protection is not running</li><li>Anti-malware flow is asynchronous</li><li>Local privilege escalation protection is asynchronous</li></ul></li></ul></div> | | +* \*(`Status`): The exploit protection module is not running. +* \*\*(`Status`): + * XDR data collection is not running + * Behavioral threat protection is not running + * Anti-malware flow is asynchronous + * Local privilege escalation protection is asynchronous +{% endhint %} -
▸ ▾ Cortex XSIAM post-deployment checklist modified +23 −23
xsiam/onboard-cortex-xsiam/post-deployment/post-deployment-checklistRead it on the Cortex docs portal ↗ Read it here → This file's diff on GitHub ↗
Before After@@ -1,74 +1,74 @@------description: Use the post-deployment checklist after you have onboarded Cortex XSIAM.description: >-Use this Cortex XSIAM post-deployment checklist for health checks,automations, case triage, XDR agent rollout, and integrations.------# Post-deployment checklist# Cortex XSIAM post-deployment checklistStart with the essential initial actions for post-deployment, which get you up and running quickly. Continue with advanced actions, such as configuring relevant integrations, expanding the XDR deployment, and deploying additional On-prem components.Use this Cortex XSIAM post-deployment checklist after onboarding. Start with health checks and case triage. Then configure integrations, expand the Cortex XDR agent rollout, and deploy on-premises components.hint infohint info### NoteThis checklist includes post-deployment for the Cortex XSIAM environment, but does not include any specific Cloud Security requirements. For more information about Cloud Security onboarding, see Cloud service provider (CSP) onboarding.This checklist includes post-deployment for the Cortex XSIAM environment, but does not include any specific Cloud Security requirements. For more information about Cloud Security onboarding, see Cloud service provider (CSP) onboarding.endhintendhint🖼 post-deploy.png🖼 imagePost-deployment - initial actions### Initial Cortex XSIAM post-deployment actionsThe following table describes the post-deployment steps for the most critical areas to get you up and running quickly.The following table describes the post-deployment steps for the most critical areas to get you up and running quickly.Action│Details│See MoreAction│Details│See More| ----------------------- | --------------------------------------------------------------------------------------------------------------------------------------------------------------------------------------------------------------------------------------------------------------------------------------------------------------------------------------------------------------------------------------------------------------------------------------------------------------------------------------------------------------------------------------------------------------------------------------------------------------------------------------------------------------------------------------------------------------------------------------------------------------------------------------------------------------------------------------------------------------------------------------------------------------------------------------------------------------------------------------------------------------------------------------------------------------------------------------------------------------------------------------------------------------------------------------------------------------------------------------- | ------------------------------------------------------------------------------------------------------------------------------------------------------------------------------------------------------------------------------------------------------------------------------------------------------------------------------------------------------------------------------------------------------------------------------------------------------------------------- || ----------------------- | --------------------------------------------------------------------------------------------------------------------------------------------------------------------------------------------------------------------------------------------------------------------------------------------------------------------------------------------------------------------------------------------------------------------------------------------------------------------------------------------------------------------------------------------------------------------------------------------------------------------------------------------------------------------------------------------------------------------------------------------------------------------------------------------------------------------------------------------------------------------------------------------------------------------------------------------------------------------------------------------------------------------------------------------------------------------------------------------------------------------------------------------------------------------------------------------------------------------------------------- | ------------------------------------------------------------------------------------------------------------------------------------------------------------------------------------------------------------------------------------------------------------------------------------------------------------------------------------------------------------------------------------------------------------------------------------------------------------------------- |Perform health checks│✓ Validate logs, detectors, and update prevention policies. It is recommended to perform health checks, including updating prevention policies, monitoring operational status, and validating detectors for any issues or cases.│Perform health checksPerform health checks│✅ Validate logs, detectors, and update prevention policies. It is recommended to perform health checks, including updating prevention policies, monitoring operational status, and validating detectors for any issues or cases.│Perform health checksConfigure automations│✓ Review the different types of automations (playbooks and scripts) and apply automation rules to your use case.│Create an automation ruleConfigure automations│✅ Review the different types of automations (playbooks and scripts) and apply automation rules to your use case.│Create an automation ruleReview cases and issues│✓ Monitor the Cases page for new, generated cases (grouped issues) and begin basic triage exercises with the analyst team. Look for cases or issues that were generated.✓ Check that your automation rules are working as expected and reflect the cases for your use case. Check whether your playbooks are responding to alerts and incidents as expected.
✓ Validate your workflow. Start with Widfire testing to confirm the security controls and sandbox integration are functional and working as expected. For example, acquire a safe, benign sample unknown to Wildfire, attempt to execute it, and confirm that the XDR agent’s malware prevention file intercepts the execution. Confirm that a case/issue was generated and the file verdict is populated.
✓ Review and test the default Behavioral Indicators of Compromise (BIOC). Review severity levels and exceptions on pre-built BIOCs to minimize false positives, especially for legitimate administrative tools and scripts.
✓ Review and test the default Indicator of Compromise (IOC) rules. Ensure all known bad indicators from historical incidents or key threat intelligence feeds are loaded, enabled, and prioritized.
│Analyze and resolve casesReview cases and issues│✅ Monitor the Cases page for new, generated cases (grouped issues) and begin basic triage exercises with the analyst team. Look for cases or issues that were generated.✅ Check that your automation rules are working as expected and reflect the cases for your use case. Check whether your playbooks are responding to alerts and incidents as expected.
✅ Validate your workflow. Start with Widfire testing to confirm the security controls and sandbox integration are functional and working as expected. For example, acquire a safe, benign sample unknown to Wildfire, attempt to execute it, and confirm that the XDR agent’s malware prevention file intercepts the execution. Confirm that a case/issue was generated and the file verdict is populated.
✅ Review and test the default Behavioral Indicators of Compromise (BIOC). Review severity levels and exceptions on pre-built BIOCs to minimize false positives, especially for legitimate administrative tools and scripts.
✅ Review and test the default Indicator of Compromise (IOC) rules. Ensure all known bad indicators from historical incidents or key threat intelligence feeds are loaded, enabled, and prioritized.
│Analyze and resolve casesPost-deployment - Advanced### Advanced Cortex XSIAM post-deployment actionsGeneralGeneralThis section includes general post-deployment steps, such as server and security settings, configuring dashboards, and refining RBAC roles.This section includes general post-deployment steps, such as server and security settings, configuring dashboards, and refining RBAC roles.Action│Details│See MoreAction│Details│See More| ---------------------------- | ------------------------------------------------------------------------------------------------------------------------------------------------------------------------------------------------------------------------------------------------------------------------------------------------------------------------------------------------------------------------------------------------------------------------------------------------------------------------------------------------------------------- | ----------------------------------------------------------------------------------------------------------------------------------------------------------------- || ---------------------------- | ------------------------------------------------------------------------------------------------------------------------------------------------------------------------------------------------------------------------------------------------------------------------------------------------------------------------------------------------------------------------------------------------------------------------------------------------------------------------------------------------------------------- | ----------------------------------------------------------------------------------------------------------------------------------------------------------------- |Set up relevant integrations│✓ Install essential content packs (for example, common security use cases or SOAR playbook) and configure relevant integrations, from the Data Sources catalog.If your use case is not in the Data Sources catalog, you can install content from Marketplace. For example, if you require content packs such as Phishing and Malware, you need to download the pack from Marketplace and configure the integration. The Data Sources catalog includes the most used data sources to help you onboard.
│What are Cortex XSIAM data sources?Set up relevant integrations│✅ Install essential content packs (for example, common security use cases or SOAR playbook) and configure relevant integrations, from the Data Sources catalog.If your use case is not in the Data Sources catalog, you can install content from Marketplace. For example, if you require content packs such as Phishing and Malware, you need to download the pack from Marketplace and configure the integration. The Data Sources catalog includes the most used data sources to help you onboard.
│What are Cortex XSIAM data sources?Update users and roles│✓ Review and configure users, roles, and user groups as required. Each role extends specific privileges to users. The way you configure administrative access depends on your organization's security requirements. Use roles to assign specific access privileges to administrative user accounts.│Manage user roles and access managementUpdate users and roles│✅ Review and configure users, roles, and user groups as required. Each role extends specific privileges to users. The way you configure administrative access depends on your organization's security requirements. Use roles to assign specific access privileges to administrative user accounts.│Manage user roles and access managementDashboards│✓ Review and configure dashboards and ensure you can visualize activity from your active log sources (for example, VPN logins, Firewall blocks).│Overview of dashboards and reportsDashboards│✅ Review and configure dashboards and ensure you can visualize activity from your active log sources (for example, VPN logins, Firewall blocks).│Overview of dashboards and reportsServer and security settings│✓ Customize and configure Cortex XSIAM for a more personalized user experience:
- Server settings, such as the timezone, the timestamp format, password protection, and custom logos for communication task emails.
- Security settings, such as allowed domains, allowed sessions, and user expiration.
Server and security settings│✅ Customize and configure Cortex XSIAM for a more personalized user experience:
- Server settings, such as the timezone, the timestamp format, password protection, and custom logos for communication task emails.
- Security settings, such as allowed domains, allowed sessions, and user expiration.
Log forwarding│✓ Set up sending logs to an external service, such as a Slack channel or an email distribution list.│Forward logs and data from Cortex XSIAM to external servicesLog forwarding│✅ Set up sending logs to an external service, such as a Slack channel or an email distribution list.│Forward logs and data from Cortex XSIAM to external services</details></details>Expand the XDR Agent deploymentExpand the XDR Agent deploymentThis stage involves customizing policies and gradually rolling out the XDR Agent to all users.This stage involves customizing policies and gradually rolling out the XDR Agent to all users.Action│Details│See MoreAction│Details│See More| ------------------------------------------------- | --------------------------------------------------------------------------------------------------------------------------------------------------------------------------------------------------------------------------------------------------------------------------------------------------------------------------------------------------------------------------------------------------------------------------------------------------------------------------------------------------------------------------------------------------------------------------------------------------------------------------------------------------- | ------------------------------------------------------------------------------------------------------------------------------------------------------------------------ || ------------------------------------------------- | --------------------------------------------------------------------------------------------------------------------------------------------------------------------------------------------------------------------------------------------------------------------------------------------------------------------------------------------------------------------------------------------------------------------------------------------------------------------------------------------------------------------------------------------------------------------------------------------------------------------------------------------------- | ------------------------------------------------------------------------------------------------------------------------------------------------------------------------ |Customize endpoint security profiles and policies│✓ Review your policy rules and the security profiles assigned to these rules and make any necessary adjustments. After the pilot group has been running for about a week, analyze the cases and issues that were generated. You may find issues with benign activity, such as in-house applications or custom scripts. Do the following:
- Create exceptions to prevent false positives
- Start building your primary prevention policies to suit your use case as necessary
Customize endpoint security profiles and policies│✅ Review your policy rules and the security profiles assigned to these rules and make any necessary adjustments. After the pilot group has been running for about a week, analyze the cases and issues that were generated. You may find issues with benign activity, such as in-house applications or custom scripts. Do the following:
- Create exceptions to prevent false positives
- Start building your primary prevention policies to suit your use case as necessary
Expand the agent deployment│✓ Expand the Agent deployment to larger groups for initial data collection.│Expand the agent deployment│✅ Expand the Agent deployment to larger groups for initial data collection.│Define endpoint groups│✓ (Optional, can be performed post-deployment) Define an endpoint group to apply policy rules and manage specific endpoints.
Instead of managing security policies and configurations for each device, you can manage them for the entire group. For example, create a High-Security Prevention Profile and apply it to an entire group, Critical Financial Servers.
│Define endpoint groupsNote
If you set up Cloud Identity Engine, you can also leverage your Active Directory user, group, and computer details in endpoint groups.
Define endpoint groups│✅ (Optional, can be performed post-deployment) Define an endpoint group to apply policy rules and manage specific endpoints.
Instead of managing security policies and configurations for each device, you can manage them for the entire group. For example, create a High-Security Prevention Profile and apply it to an entire group, Critical Financial Servers.
│Define endpoint groupsNote
If you set up Cloud Identity Engine, you can also leverage your Active Directory user, group, and computer details in endpoint groups.
Complete the XDR agent deployment│✓ Gradually distribute the Cortex XDR agent throughout the organization until all endpoints are protected. You can do this at any time during post-deployment.│Complete the XDR agent deployment│✅ Gradually distribute the Cortex XDR agent throughout the organization until all endpoints are protected. You can do this at any time during post-deployment.│</details></details>Deploy additional On-prem componentsDeploy additional On-prem componentsDeploy additional on-prem components for data ingestion, collection, and automation for complete protection. Although these components are optional, XDR Collectors and the Broker VM are critical for this next deployment phase. The Broker VM is often highly recommended early on because it can solve immediate connectivity and log collection challenges for on-prem identity sources.Deploy additional on-prem components for data ingestion, collection, and automation for complete protection. Although these components are optional, XDR Collectors and the Broker VM are critical for this next deployment phase. The Broker VM is often highly recommended early on because it can solve immediate connectivity and log collection challenges for on-prem identity sources.Action│Details│Action│Details│| ---------------------------------------------------------------- | ---------------------------------------------------------------------------------------------------------------------------------------------------------------------------------------------------------------------------------------------------------------------------------------------------------------------------------------------------------------------------------------------------------------------------------------------------------------------------------------------------------------------------------------------------------------------------------------------------- | ------------------------------------------------------------------------------------------------------------------------------------------------ || ---------------------------------------------------------------- | ---------------------------------------------------------------------------------------------------------------------------------------------------------------------------------------------------------------------------------------------------------------------------------------------------------------------------------------------------------------------------------------------------------------------------------------------------------------------------------------------------------------------------------------------------------------------------------------------------- | ------------------------------------------------------------------------------------------------------------------------------------------------ |Set up XDR Collectors for specific Windows/Linux logs (optional)│✓ Set up XDR Collectors (XDRCs), which are installed directly on a Windows or Linux machine to collect log files from that machine's local file system. They are crucial for ingesting detailed Windows and Linux event logs from systems where the full Cortex XDR Agent may not be deployed, or to collect specific log types, complementing agent data.✓ After installing XDRCs, create/configure a profile and apply it to a policy. The XDRC then starts collecting and forwarding the logs to Cortex XSIAM.
│XDR CollectorsSet up XDR Collectors for specific Windows/Linux logs (optional)│✅ Set up XDR Collectors (XDRCs), which are installed directly on a Windows or Linux machine to collect log files from that machine's local file system. They are crucial for ingesting detailed Windows and Linux event logs from systems where the full Cortex XDR Agent may not be deployed, or to collect specific log types, complementing agent data.✅ After installing XDRCs, create/configure a profile and apply it to a policy. The XDRC then starts collecting and forwarding the logs to Cortex XSIAM.
│XDR CollectorsSet up and configure Broker VM (optional but highly recommended)│✓ Set up the Broker VM, which functions as a secure on-prem gateway for Cortex XSIAM. It centralizes on-prem data collection by running applets to ingest logs from on-prem security devices and services that can’t send data directly to the cloud. It also allows secure agent proxy and communication located in restricted or air-gapped networks to communicate securely with the Cortex XSIAM tenant.
│Set up and configure Broker VMNote
You can also use the Broker VM for high availability.
Set up and configure Broker VM (optional but highly recommended)│✅ Set up the Broker VM, which functions as a secure on-prem gateway for Cortex XSIAM. It centralizes on-prem data collection by running applets to ingest logs from on-prem security devices and services that can’t send data directly to the cloud. It also allows secure agent proxy and communication located in restricted or air-gapped networks to communicate securely with the Cortex XSIAM tenant.
│Set up and configure Broker VMNote
You can also use the Broker VM for high availability.
Set up and deploy an engine (optional)│✓ Deploy an engine if you have specific automation and feed integrations, scripts, or playbooks that execute actions or fetch data directly from resources within your internal network (for example, querying an on-prem Active Directory, isolating a machine via a local tool).An engine is a proxy server application that is installed on a remote machine, enabling communication between the remote machine and the Cortex XSIAM tenant. You can run playbooks, scripts, commands, and integrations on the remote machine, and the results are returned to the tenant.
│What is an engine?Set up and deploy an engine (optional)│✅ Deploy an engine if you have specific automation and feed integrations, scripts, or playbooks that execute actions or fetch data directly from resources within your internal network (for example, querying an on-prem Active Directory, isolating a machine via a local tool).An engine is a proxy server application that is installed on a remote machine, enabling communication between the remote machine and the Cortex XSIAM tenant. You can run playbooks, scripts, commands, and integrations on the remote machine, and the results are returned to the tenant.
│What is an engine?</details></details>After completing the post-deployment steps, you can now start configuring Cortex XSIAM.After completing the post-deployment steps, you can now start configuring Cortex XSIAM.Show markdown source
@@ -1,74 +1,74 @@ --- -description: Use the post-deployment checklist after you have onboarded Cortex XSIAM. +description: >- + Use this Cortex XSIAM post-deployment checklist for health checks, + automations, case triage, XDR agent rollout, and integrations. --- -# Post-deployment checklist +# Cortex XSIAM post-deployment checklist -Start with the essential initial actions for post-deployment, which get you up and running quickly. Continue with advanced actions, such as configuring relevant integrations, expanding the XDR deployment, and deploying additional On-prem components. +Use this Cortex XSIAM post-deployment checklist after onboarding. Start with health checks and case triage. Then configure integrations, expand the Cortex XDR agent rollout, and deploy on-premises components. {% hint style="info" %} -### Note - This checklist includes post-deployment for the Cortex XSIAM environment, but does not include any specific Cloud Security requirements. For more information about Cloud Security onboarding, see [Cloud service provider (CSP) onboarding](../../configure-cortex-xsiam/cortex-xsiam-data-sources/cloud-service-provider-csp-onboarding). {% endhint %} -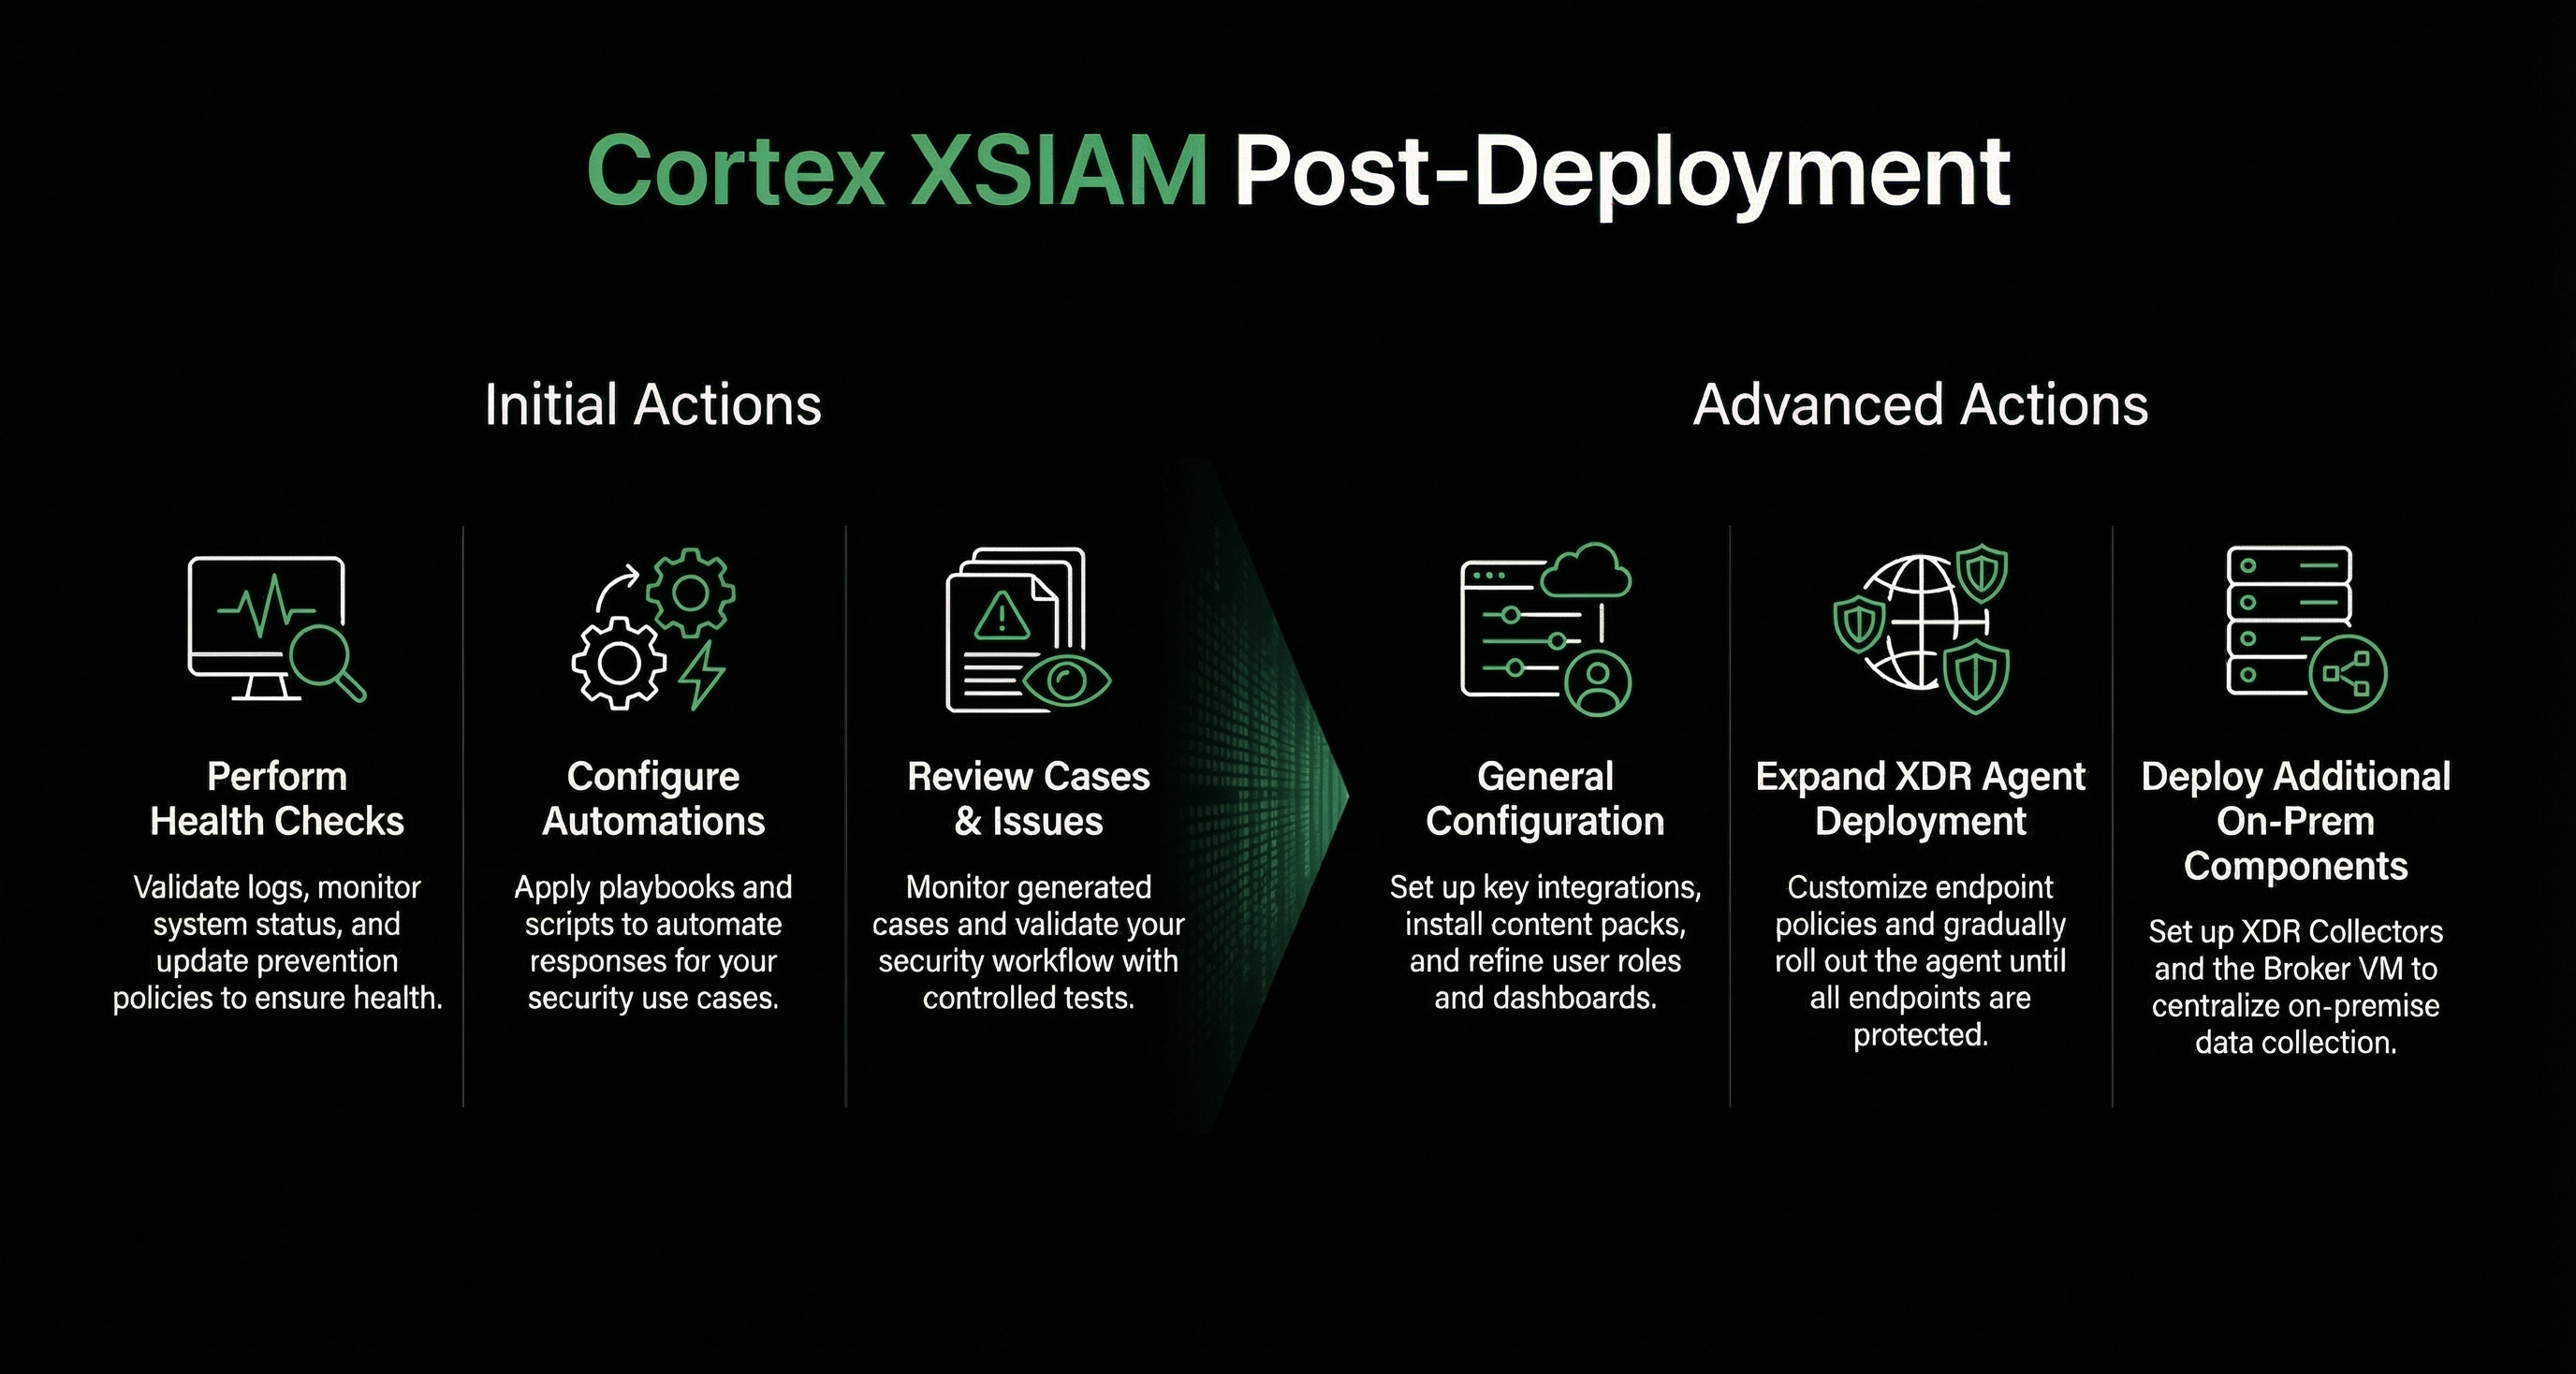 + -**Post-deployment - initial actions** +### Initial Cortex XSIAM post-deployment actions The following table describes the post-deployment steps for the most critical areas to get you up and running quickly. | Action | Details | See More | | ----------------------- | --------------------------------------------------------------------------------------------------------------------------------------------------------------------------------------------------------------------------------------------------------------------------------------------------------------------------------------------------------------------------------------------------------------------------------------------------------------------------------------------------------------------------------------------------------------------------------------------------------------------------------------------------------------------------------------------------------------------------------------------------------------------------------------------------------------------------------------------------------------------------------------------------------------------------------------------------------------------------------------------------------------------------------------------------------------------------------------------------------------------------------------------------------------------------------------------------------------------------------------- | ------------------------------------------------------------------------------------------------------------------------------------------------------------------------------------------------------------------------------------------------------------------------------------------------------------------------------------------------------------------------------------------------------------------------------------------------------------------------- | -| Perform health checks | ✓ Validate logs, detectors, and update prevention policies. It is recommended to perform health checks, including updating prevention policies, monitoring operational status, and validating detectors for any issues or cases. | [Perform health checks](perform-health-checks) | -| Configure automations | ✓ Review the different types of automations (playbooks and scripts) and apply automation rules to your use case. | [Create an automation rule](../../configure-cortex-xsiam/automations/create-an-automation-rule) | -| Review cases and issues | <p>✓ Monitor the Cases page for new, generated cases (grouped issues) and begin basic triage exercises with the analyst team. Look for cases or issues that were generated.</p><p>✓ Check that your automation rules are working as expected and reflect the cases for your use case. Check whether your playbooks are responding to alerts and incidents as expected.</p><p>✓ Validate your workflow. Start with Widfire testing to confirm the security controls and sandbox integration are functional and working as expected. For example, acquire a safe, benign sample unknown to Wildfire, attempt to execute it, and confirm that the XDR agent’s malware prevention file intercepts the execution. Confirm that a case/issue was generated and the file verdict is populated.</p><p>✓ Review and test the default Behavioral Indicators of Compromise (BIOC). Review severity levels and exceptions on pre-built BIOCs to minimize false positives, especially for legitimate administrative tools and scripts.</p><p>✓ Review and test the default Indicator of Compromise (IOC) rules. Ensure all known bad indicators from historical incidents or key threat intelligence feeds are loaded, enabled, and prioritized.</p> | <p><a href="../../detect-investigate-and-respond-to-threats/investigation-and-response/analyze-and-resolve-cases">Analyze and resolve cases</a></p><p><a href="../../detect-investigate-and-respond-to-threats/threat-management/detection-rules/what-are-detection-rules/whats-a-bioc">What's a BIOC?</a></p><p><a href="../../detect-investigate-and-respond-to-threats/threat-management/detection-rules/what-are-detection-rules/whats-an-ioc">What's an IOC?</a></p> | +| Perform health checks | ✅ Validate logs, detectors, and update prevention policies. It is recommended to perform health checks, including updating prevention policies, monitoring operational status, and validating detectors for any issues or cases. | [Perform health checks](perform-health-checks) | +| Configure automations | ✅ Review the different types of automations (playbooks and scripts) and apply automation rules to your use case. | [Create an automation rule](../../configure-cortex-xsiam/automations/create-an-automation-rule) | +| Review cases and issues | <p>✅ Monitor the Cases page for new, generated cases (grouped issues) and begin basic triage exercises with the analyst team. Look for cases or issues that were generated.</p><p>✅ Check that your automation rules are working as expected and reflect the cases for your use case. Check whether your playbooks are responding to alerts and incidents as expected.</p><p>✅ Validate your workflow. Start with Widfire testing to confirm the security controls and sandbox integration are functional and working as expected. For example, acquire a safe, benign sample unknown to Wildfire, attempt to execute it, and confirm that the XDR agent’s malware prevention file intercepts the execution. Confirm that a case/issue was generated and the file verdict is populated.</p><p>✅ Review and test the default Behavioral Indicators of Compromise (BIOC). Review severity levels and exceptions on pre-built BIOCs to minimize false positives, especially for legitimate administrative tools and scripts.</p><p>✅ Review and test the default Indicator of Compromise (IOC) rules. Ensure all known bad indicators from historical incidents or key threat intelligence feeds are loaded, enabled, and prioritized.</p> | <p><a href="../../detect-investigate-and-respond-to-threats/investigation-and-response/analyze-and-resolve-cases">Analyze and resolve cases</a></p><p><a href="../../detect-investigate-and-respond-to-threats/threat-management/detection-rules/what-are-detection-rules/whats-a-bioc">What's a BIOC?</a></p><p><a href="../../detect-investigate-and-respond-to-threats/threat-management/detection-rules/what-are-detection-rules/whats-an-ioc">What's an IOC?</a></p> | -**Post-deployment - Advanced** +### Advanced Cortex XSIAM post-deployment actions <details> <summary>General</summary> This section includes general post-deployment steps, such as server and security settings, configuring dashboards, and refining RBAC roles. | Action | Details | See More | | ---------------------------- | ------------------------------------------------------------------------------------------------------------------------------------------------------------------------------------------------------------------------------------------------------------------------------------------------------------------------------------------------------------------------------------------------------------------------------------------------------------------------------------------------------------------- | ----------------------------------------------------------------------------------------------------------------------------------------------------------------- | -| Set up relevant integrations | <p>✓ Install essential content packs (for example, common security use cases or SOAR playbook) and configure relevant integrations, from the Data Sources catalog.</p><p>If your use case is not in the Data Sources catalog, you can install content from Marketplace. For example, if you require content packs such as Phishing and Malware, you need to download the pack from Marketplace and configure the integration. The Data Sources catalog includes the most used data sources to help you onboard.</p> | [What are Cortex XSIAM data sources?](../../configure-cortex-xsiam/cortex-xsiam-data-sources/what-are-cortex-xsiam-data-sources) | -| Update users and roles | ✓ Review and configure users, roles, and user groups as required. Each role extends specific privileges to users. The way you configure administrative access depends on your organization's security requirements. Use roles to assign specific access privileges to administrative user accounts. | [Manage user roles and access management](manage-user-roles-and-access-management) | -| Dashboards | ✓ Review and configure dashboards and ensure you can visualize activity from your active log sources (for example, VPN logins, Firewall blocks). | [Overview of dashboards and reports](../../detect-investigate-and-respond-to-threats/monitor-dashboards-and-reports/overview-of-dashboards-and-reports) | -| Server and security settings | <p>✓ Customize and configure Cortex XSIAM for a more personalized user experience:</p><ul><li>Server settings, such as the timezone, the timestamp format, password protection, and custom logos for communication task emails.</li><li>Security settings, such as allowed domains, allowed sessions, and user expiration.</li></ul> | <ul><li><a href="configure-server-settings">Configure server settings</a></li><li><a href="configure-security-settings">Configure security settings</a></li></ul> | -| Log forwarding | ✓ Set up sending logs to an external service, such as a Slack channel or an email distribution list. | [Forward logs and data from Cortex XSIAM to external services](../data-and-log-forwarding#UUID-8cf9dc23-530e-9c23-89bc-9ebfccd6b949) | +| Set up relevant integrations | <p>✅ Install essential content packs (for example, common security use cases or SOAR playbook) and configure relevant integrations, from the Data Sources catalog.</p><p>If your use case is not in the Data Sources catalog, you can install content from Marketplace. For example, if you require content packs such as Phishing and Malware, you need to download the pack from Marketplace and configure the integration. The Data Sources catalog includes the most used data sources to help you onboard.</p> | [What are Cortex XSIAM data sources?](../../configure-cortex-xsiam/cortex-xsiam-data-sources/what-are-cortex-xsiam-data-sources) | +| Update users and roles | ✅ Review and configure users, roles, and user groups as required. Each role extends specific privileges to users. The way you configure administrative access depends on your organization's security requirements. Use roles to assign specific access privileges to administrative user accounts. | [Manage user roles and access management](manage-user-roles-and-access-management) | +| Dashboards | ✅ Review and configure dashboards and ensure you can visualize activity from your active log sources (for example, VPN logins, Firewall blocks). | [Overview of dashboards and reports](../../detect-investigate-and-respond-to-threats/monitor-dashboards-and-reports/overview-of-dashboards-and-reports) | +| Server and security settings | <p>✅ Customize and configure Cortex XSIAM for a more personalized user experience:</p><ul><li>Server settings, such as the timezone, the timestamp format, password protection, and custom logos for communication task emails.</li><li>Security settings, such as allowed domains, allowed sessions, and user expiration.</li></ul> | <ul><li><a href="configure-server-settings">Configure server settings</a></li><li><a href="configure-security-settings">Configure security settings</a></li></ul> | +| Log forwarding | ✅ Set up sending logs to an external service, such as a Slack channel or an email distribution list. | [Forward logs and data from Cortex XSIAM to external services](../data-and-log-forwarding#UUID-8cf9dc23-530e-9c23-89bc-9ebfccd6b949) | </details> <details> <summary>Expand the XDR Agent deployment</summary> This stage involves customizing policies and gradually rolling out the XDR Agent to all users. | Action | Details | See More | | ------------------------------------------------- | --------------------------------------------------------------------------------------------------------------------------------------------------------------------------------------------------------------------------------------------------------------------------------------------------------------------------------------------------------------------------------------------------------------------------------------------------------------------------------------------------------------------------------------------------------------------------------------------------------------------------------------------------- | ------------------------------------------------------------------------------------------------------------------------------------------------------------------------ | -| Customize endpoint security profiles and policies | <p>✓ Review your policy rules and the security profiles assigned to these rules and make any necessary adjustments. After the pilot group has been running for about a week, analyze the cases and issues that were generated. You may find issues with benign activity, such as in-house applications or custom scripts. Do the following:</p><ul><li>Create exceptions to prevent false positives</li><li>Start building your primary prevention policies to suit your use case as necessary</li></ul> | [Set up endpoint profiles and exception rules](../../../protect-your-endpoints/endpoint-security/install-and-manage-endpoints#UUID-8e42879c-93b8-fb0c-baff-1fe6544db66d) | -| Expand the agent deployment | ✓ Expand the Agent deployment to larger groups for initial data collection. | | -| Define endpoint groups | <p>✓ (Optional, can be performed post-deployment) Define an endpoint group to apply policy rules and manage specific endpoints.</p><p>Instead of managing security policies and configurations for each device, you can manage them for the entire group. For example, create a High-Security Prevention Profile and apply it to an entire group, Critical Financial Servers.</p><div data-gb-custom-block data-tag="hint" data-style="info" class="hint hint-info"><p><strong>Note</strong></p><p>If you set up Cloud Identity Engine, you can also leverage your Active Directory user, group, and computer details in endpoint groups.</p></div> | [Define endpoint groups](../../protect-your-endpoints/endpoint-security/install-and-manage-endpoints/define-endpoint-groups) | -| Complete the XDR agent deployment | ✓ Gradually distribute the Cortex XDR agent throughout the organization until all endpoints are protected. You can do this at any time during post-deployment. | | +| Customize endpoint security profiles and policies | <p>✅ Review your policy rules and the security profiles assigned to these rules and make any necessary adjustments. After the pilot group has been running for about a week, analyze the cases and issues that were generated. You may find issues with benign activity, such as in-house applications or custom scripts. Do the following:</p><ul><li>Create exceptions to prevent false positives</li><li>Start building your primary prevention policies to suit your use case as necessary</li></ul> | [Set up endpoint profiles and exception rules](../../../protect-your-endpoints/endpoint-security/install-and-manage-endpoints#UUID-8e42879c-93b8-fb0c-baff-1fe6544db66d) | +| Expand the agent deployment | ✅ Expand the Agent deployment to larger groups for initial data collection. | | +| Define endpoint groups | <p>✅ (Optional, can be performed post-deployment) Define an endpoint group to apply policy rules and manage specific endpoints.</p><p>Instead of managing security policies and configurations for each device, you can manage them for the entire group. For example, create a High-Security Prevention Profile and apply it to an entire group, Critical Financial Servers.</p><div data-gb-custom-block data-tag="hint" data-style="info" class="hint hint-info"><p><strong>Note</strong></p><p>If you set up Cloud Identity Engine, you can also leverage your Active Directory user, group, and computer details in endpoint groups.</p></div> | [Define endpoint groups](../../protect-your-endpoints/endpoint-security/install-and-manage-endpoints/define-endpoint-groups) | +| Complete the XDR agent deployment | ✅ Gradually distribute the Cortex XDR agent throughout the organization until all endpoints are protected. You can do this at any time during post-deployment. | | </details> <details> <summary>Deploy additional On-prem components</summary> Deploy additional on-prem components for data ingestion, collection, and automation for complete protection. Although these components are optional, XDR Collectors and the Broker VM are critical for this next deployment phase. The Broker VM is often highly recommended early on because it can solve immediate connectivity and log collection challenges for on-prem identity sources. | Action | Details | | | ---------------------------------------------------------------- | ---------------------------------------------------------------------------------------------------------------------------------------------------------------------------------------------------------------------------------------------------------------------------------------------------------------------------------------------------------------------------------------------------------------------------------------------------------------------------------------------------------------------------------------------------------------------------------------------------- | ------------------------------------------------------------------------------------------------------------------------------------------------ | -| Set up XDR Collectors for specific Windows/Linux logs (optional) | <p>✓ Set up XDR Collectors (XDRCs), which are installed directly on a Windows or Linux machine to collect log files from that machine's local file system. They are crucial for ingesting detailed Windows and Linux event logs from systems where the full Cortex XDR Agent may not be deployed, or to collect specific log types, complementing agent data.</p><p>✓ After installing XDRCs, create/configure a profile and apply it to a policy. The XDRC then starts collecting and forwarding the logs to Cortex XSIAM.</p> | [XDR Collectors](../../configure-cortex-xsiam/cortex-xsiam-data-sources/generic-on-premise-data-collectors/xdr-collectors/manage-xdr-collectors) | -| Set up and configure Broker VM (optional but highly recommended) | <p>✓ Set up the Broker VM, which functions as a secure on-prem gateway for Cortex XSIAM. It centralizes on-prem data collection by running applets to ingest logs from on-prem security devices and services that can’t send data directly to the cloud. It also allows secure agent proxy and communication located in restricted or air-gapped networks to communicate securely with the Cortex XSIAM tenant.</p><div data-gb-custom-block data-tag="hint" data-style="info" class="hint hint-info"><p><strong>Note</strong></p><p>You can also use the Broker VM for high availability.</p></div> | [Set up and configure Broker VM](../../configure-cortex-xsiam/data-management/broker-vm/set-up-and-configure-broker-vm) | -| Set up and deploy an engine (optional) | <p>✓ Deploy an engine if you have specific automation and feed integrations, scripts, or playbooks that execute actions or fetch data directly from resources within your internal network (for example, querying an on-prem Active Directory, isolating a machine via a local tool).</p><p>An engine is a proxy server application that is installed on a remote machine, enabling communication between the remote machine and the Cortex XSIAM tenant. You can run playbooks, scripts, commands, and integrations on the remote machine, and the results are returned to the tenant.</p> | [What is an engine?](../../configure-cortex-xsiam/engines/what-is-an-engine) | +| Set up XDR Collectors for specific Windows/Linux logs (optional) | <p>✅ Set up XDR Collectors (XDRCs), which are installed directly on a Windows or Linux machine to collect log files from that machine's local file system. They are crucial for ingesting detailed Windows and Linux event logs from systems where the full Cortex XDR Agent may not be deployed, or to collect specific log types, complementing agent data.</p><p>✅ After installing XDRCs, create/configure a profile and apply it to a policy. The XDRC then starts collecting and forwarding the logs to Cortex XSIAM.</p> | [XDR Collectors](../../configure-cortex-xsiam/cortex-xsiam-data-sources/generic-on-premise-data-collectors/xdr-collectors/manage-xdr-collectors) | +| Set up and configure Broker VM (optional but highly recommended) | <p>✅ Set up the Broker VM, which functions as a secure on-prem gateway for Cortex XSIAM. It centralizes on-prem data collection by running applets to ingest logs from on-prem security devices and services that can’t send data directly to the cloud. It also allows secure agent proxy and communication located in restricted or air-gapped networks to communicate securely with the Cortex XSIAM tenant.</p><div data-gb-custom-block data-tag="hint" data-style="info" class="hint hint-info"><p><strong>Note</strong></p><p>You can also use the Broker VM for high availability.</p></div> | [Set up and configure Broker VM](../../configure-cortex-xsiam/data-management/broker-vm/set-up-and-configure-broker-vm) | +| Set up and deploy an engine (optional) | <p>✅ Deploy an engine if you have specific automation and feed integrations, scripts, or playbooks that execute actions or fetch data directly from resources within your internal network (for example, querying an on-prem Active Directory, isolating a machine via a local tool).</p><p>An engine is a proxy server application that is installed on a remote machine, enabling communication between the remote machine and the Cortex XSIAM tenant. You can run playbooks, scripts, commands, and integrations on the remote machine, and the results are returned to the tenant.</p> | [What is an engine?](../../configure-cortex-xsiam/engines/what-is-an-engine) | </details> After completing the post-deployment steps, you can now start configuring Cortex XSIAM. -
▸ ▾ Agents and endpoint protection modified +6 −0
xsiam/reference-and-developer-docs/role-based-access-control/agents-and-endpoint-protectionRead it on the Cortex docs portal ↗ Read it here → This file's diff on GitHub ↗
Before After@@ -1,6 +1,12 @@---description: >-Configure permissions for XDR Agent infrastructure and endpoint data lossprevention in Cortex XSIAM.---# Agents and endpoint protection# Agents and endpoint protectionThis section includes all features that rely on the deployment and health of the XDR Agent infrastructure:This section includes all features that rely on the deployment and health of the XDR Agent infrastructure:• Agent permissions (Agent Administrations, Host Firewall, Device Control, Prevention Policies)• Agent permissions (Agent Administrations, Host Firewall, Device Control, Prevention Policies)• Endpoint DLP Permissions (Data-in-Motion Rules, Endpoint Applications)• Endpoint DLP Permissions (Data-in-Motion Rules, Endpoint Applications)Show markdown source
@@ -1,6 +1,12 @@
+---
+description: >-
+  Configure permissions for XDR Agent infrastructure and endpoint data loss
+  prevention in Cortex XSIAM.
+---
+
 # Agents and endpoint protection

 This section includes all features that rely on the deployment and health of the XDR Agent infrastructure:

 * Agent permissions (Agent Administrations, Host Firewall, Device Control, Prevention Policies)
 * Endpoint DLP Permissions (Data-in-Motion Rules, Endpoint Applications)
-
▸ ▾ Cases and Issues permissions modified +3 −1
xsiam/reference-and-developer-docs/role-based-access-control/cases-and-issues-permissionsRead it on the Cortex docs portal ↗ Read it here → This file's diff on GitHub ↗
Before After@@ -1,10 +1,12 @@------description: Set up Cases and Issues permissions.description: >-Control access to investigate, manage, and respond to cases and issues inCortex XSIAM.------# Cases and Issues permissions# Cases and Issues permissionsThe Cases & Issues section is the heartbeat of SOC operations. It is the primary workspace where alerts are aggregated into issues, and issues are escalated into cases for full-scale investigation.The Cases & Issues section is the heartbeat of SOC operations. It is the primary workspace where alerts are aggregated into issues, and issues are escalated into cases for full-scale investigation.Limits permissions to the Cases, Issues, and Case Configuration pages. It controls how analysts interact with security events, from the initial triage of a single issue to the coordinated response to a multi-stage attack.Limits permissions to the Cases, Issues, and Case Configuration pages. It controls how analysts interact with security events, from the initial triage of a single issue to the coordinated response to a multi-stage attack.Show markdown source
@@ -1,10 +1,12 @@
 ---
-description: Set up Cases and Issues permissions.
+description: >-
+  Control access to investigate, manage, and respond to cases and issues in
+  Cortex XSIAM.
 ---

 # Cases and Issues permissions

 The Cases & Issues section is the heartbeat of SOC operations. It is the primary workspace where alerts are aggregated into issues, and issues are escalated into cases for full-scale investigation.

 Limits permissions to the **Cases**, **Issues**, and **Case Configuration** pages. It controls how analysts interact with security events, from the initial triage of a single issue to the coordinated response to a multi-stage attack.
-
▸ ▾ Cloud Security and Posture Management permissions modified +16 −0 Gains a "For detailed access guidance" list linking its nine child permission pages.
xsiam/reference-and-developer-docs/role-based-access-control/cloud-security-and-posture-management-permissionsRead it on the Cortex docs portal ↗ Read it here → This file's diff on GitHub ↗
Before After@@ -1,3 +1,19 @@---description: Configure Cloud Security and Posture Management permissions in Cortex XSIAM.---# Cloud Security and Posture Management permissions# Cloud Security and Posture Management permissionsThis section includes permissions for Cloud Security and Posture Management, such as CLI Tools, Cloud Workload, and Compliance.This section includes permissions for Cloud Security and Posture Management, such as CLI Tools, Cloud Workload, and Compliance.For detailed access guidance, see:• cli-tool-permissions• application-security-permissions• policies-cloud-workload-permissions• cloud-security-permissions• compliance-cloud-permissions• data-security-permissions• ai-security-permissions• data-classification-permissions• identity-security-permissionsShow markdown source
@@ -1,3 +1,19 @@
+---
+description: Configure Cloud Security and Posture Management permissions in Cortex XSIAM.
+---
+
 # Cloud Security and Posture Management permissions

 This section includes permissions for Cloud Security and Posture Management, such as CLI Tools, Cloud Workload, and Compliance.
+
+For detailed access guidance, see:
+
+* [cli-tool-permissions](cloud-security-and-posture-management-permissions/cli-tool-permissions "mention")
+* [application-security-permissions](cloud-security-and-posture-management-permissions/application-security-permissions "mention")
+* [policies-cloud-workload-permissions](cloud-security-and-posture-management-permissions/policies-cloud-workload-permissions "mention")
+* [cloud-security-permissions](cloud-security-and-posture-management-permissions/cloud-security-permissions "mention")
+* [compliance-cloud-permissions](cloud-security-and-posture-management-permissions/compliance-cloud-permissions "mention")
+* [data-security-permissions](cloud-security-and-posture-management-permissions/data-security-permissions "mention")
+* [ai-security-permissions](cloud-security-and-posture-management-permissions/ai-security-permissions "mention")
+* [data-classification-permissions](cloud-security-and-posture-management-permissions/data-classification-permissions "mention")
+* [identity-security-permissions](cloud-security-and-posture-management-permissions/identity-security-permissions "mention")
-
▸ ▾ AI Security permissions modified +4 −0
xsiam/reference-and-developer-docs/role-based-access-control/cloud-security-and-posture-management-permissions/ai-security-permissionsRead it on the Cortex docs portal ↗ Read it here → This file's diff on GitHub ↗
Before After@@ -1,8 +1,12 @@---description: Configure AI Security permissions in Cortex XSIAM.---# AI Security permissions# AI Security permissionsCloud AI Security provides a comprehensive overview of the AI assets within an organization. It is designed to ensure AI security by offering tools to review and prioritize AI risks effectively. Users access these features by going to Modules → AI Security). This module covers the following:Cloud AI Security provides a comprehensive overview of the AI assets within an organization. It is designed to ensure AI security by offering tools to review and prioritize AI risks effectively. Users access these features by going to Modules → AI Security). This module covers the following:• AI Security Dashboard: An overview of AI security posture with asset summaries, risk breakdowns, and vulnerability widgets.• AI Security Dashboard: An overview of AI security posture with asset summaries, risk breakdowns, and vulnerability widgets.• AI Inventory: A comprehensive inventory of all AI assets, such as Models, Model Endpoints, and Software Packages.• AI Inventory: A comprehensive inventory of all AI assets, such as Models, Model Endpoints, and Software Packages.• AI Security Issues: Security findings and posture violations related to AI assets.• AI Security Issues: Security findings and posture violations related to AI assets.• AI Security Detection Rules: Rules that detect security issues in AI deployments.• AI Security Detection Rules: Rules that detect security issues in AI deployments.Show markdown source
@@ -1,8 +1,12 @@
+---
+description: Configure AI Security permissions in Cortex XSIAM.
+---
+
 # AI Security permissions

 Cloud AI Security provides a comprehensive overview of the AI assets within an organization. It is designed to ensure AI security by offering tools to review and prioritize AI risks effectively. Users access these features by going to Modules → AI Security). This module covers the following:

 * AI Security Dashboard: An overview of AI security posture with asset summaries, risk breakdowns, and vulnerability widgets.
 * AI Inventory: A comprehensive inventory of all AI assets, such as Models, Model Endpoints, and Software Packages.
 * AI Security Issues: Security findings and posture violations related to AI assets.
 * AI Security Detection Rules: Rules that detect security issues in AI deployments.
-
▸ ▾ Application Security permissions modified +13 −0
xsiam/reference-and-developer-docs/role-based-access-control/cloud-security-and-posture-management-permissions/application-security-permissionsRead it on the Cortex docs portal ↗ Read it here → This file's diff on GitHub ↗
Before After@@ -1,9 +1,22 @@---description: Configure Application Security permissions in Cortex XSIAM.---# Application Security permissions# Application Security permissionsApplication Security provides code-to-cloud security for software development lifecycles.Application Security provides code-to-cloud security for software development lifecycles.For detailed access guidance, see:• application-security-generic-collector-permissions• application-security-issues-permissions• application-security-scans-permissions• application-security-policy-management-permissions• application-security-3rd-party-tools-permissions• configurations-application-security-permissionshint infohint info### License### LicenseRequires Cloud Posture Security, Cloud Runtime Security, or Cortex XSIAM Premium license. Specific capabilities, such as Scans and Configurations, also require the Application Security add-on.Requires Cloud Posture Security, Cloud Runtime Security, or Cortex XSIAM Premium license. Specific capabilities, such as Scans and Configurations, also require the Application Security add-on.endhintendhintShow markdown source
@@ -1,9 +1,22 @@ +--- +description: Configure Application Security permissions in Cortex XSIAM. +--- + # Application Security permissions Application Security provides code-to-cloud security for software development lifecycles. +For detailed access guidance, see: + +* [application-security-generic-collector-permissions](application-security-permissions/application-security-generic-collector-permissions "mention") +* [application-security-issues-permissions](application-security-permissions/application-security-issues-permissions "mention") +* [application-security-scans-permissions](application-security-permissions/application-security-scans-permissions "mention") +* [application-security-policy-management-permissions](application-security-permissions/application-security-policy-management-permissions "mention") +* [application-security-3rd-party-tools-permissions](application-security-permissions/application-security-3rd-party-tools-permissions "mention") +* [configurations-application-security-permissions](application-security-permissions/configurations-application-security-permissions "mention") + {% hint style="info" %} ### License Requires Cloud Posture Security, Cloud Runtime Security, or Cortex XSIAM Premium license. Specific capabilities, such as Scans and Configurations, also require the Application Security add-on. {% endhint %} -
▸ ▾ Application Security - 3rd Party tools permissions modified +6 −0
xsiam/reference-and-developer-docs/role-based-access-control/cloud-security-and-posture-management-permissions/application-security-permissions/application-security-3rd-party-tools-permissionsRead it on the Cortex docs portal ↗ Read it here → This file's diff on GitHub ↗
Before After@@ -1,8 +1,14 @@---description: >-Configure third-party tool permissions for Application Security in CortexXSIAM.---# Application Security - 3rd Party tools permissions# Application Security - 3rd Party tools permissionsProvides visibility into supply chain security, including external tools integrated with your development pipeline and a catalog of known supply chain components.Provides visibility into supply chain security, including external tools integrated with your development pipeline and a catalog of known supply chain components.Supply Chain ToolsSupply Chain ToolsExternal security tools integrated with your development pipeline (e.g., SonarQube, Snyk, Semgrep, Veracode, 3rd Party AppSec Collector). Shows tool status, risk factors, permissions, and version information. To access Supply Chain Tools, go to Modules → Application Security → 3rd Party Tools → Supply Chain ToolsExternal security tools integrated with your development pipeline (e.g., SonarQube, Snyk, Semgrep, Veracode, 3rd Party AppSec Collector). Shows tool status, risk factors, permissions, and version information. To access Supply Chain Tools, go to Modules → Application Security → 3rd Party Tools → Supply Chain ToolsShow markdown source
@@ -1,8 +1,14 @@
+---
+description: >-
+  Configure third-party tool permissions for Application Security in Cortex
+  XSIAM.
+---
+
 # Application Security - 3rd Party tools permissions

 Provides visibility into supply chain security, including external tools integrated with your development pipeline and a catalog of known supply chain components.

 Supply Chain Tools

 External security tools integrated with your development pipeline (e.g., SonarQube, Snyk, Semgrep, Veracode, 3rd Party AppSec Collector). Shows tool status, risk factors, permissions, and version information. To access Supply Chain Tools, go to Modules → Application Security → 3rd Party Tools → Supply Chain Tools
-
▸ ▾ Application Security - Generic Collector permissions modified +6 −0
xsiam/reference-and-developer-docs/role-based-access-control/cloud-security-and-posture-management-permissions/application-security-permissions/application-security-generic-collector-permissionsRead it on the Cortex docs portal ↗ Read it here → This file's diff on GitHub ↗
Before After@@ -1,8 +1,14 @@---description: >-Configure Generic Collector permissions for Application Security in CortexXSIAM.---# Application Security - Generic Collector permissions# Application Security - Generic Collector permissionsThe Generic Collector is a data source integration type within the Application Security module that allows ingestion of code scan data from external third-party security tools into Cortex XSIAM. Access the 3rd party AppSec Collector data source by going to Settings → Data Sources & IntegrationsThe Generic Collector is a data source integration type within the Application Security module that allows ingestion of code scan data from external third-party security tools into Cortex XSIAM. Access the 3rd party AppSec Collector data source by going to Settings → Data Sources & IntegrationsUnlike built-in VCS integrations (GitHub, GitLab, etc.) and CI/CD integrations (Jenkins, CircleCI, etc.), the Generic Collector provides a flexible API endpoint for receiving scan results in supported formats (e.g., SARIF). Each collector instance is assigned a unique API URL and API key for external tool authentication.Unlike built-in VCS integrations (GitHub, GitLab, etc.) and CI/CD integrations (Jenkins, CircleCI, etc.), the Generic Collector provides a flexible API endpoint for receiving scan results in supported formats (e.g., SARIF). Each collector instance is assigned a unique API URL and API key for external tool authentication.hint infohint info### Notice### NoticeShow markdown source
@@ -1,8 +1,14 @@ +--- +description: >- + Configure Generic Collector permissions for Application Security in Cortex + XSIAM. +--- + # Application Security - Generic Collector permissions The Generic Collector is a data source integration type within the Application Security module that allows ingestion of code scan data from external third-party security tools into Cortex XSIAM. Access the **3rd party AppSec Collector** data source by going to **Settings** → **Data Sources & Integrations** Unlike built-in VCS integrations (GitHub, GitLab, etc.) and CI/CD integrations (Jenkins, CircleCI, etc.), the Generic Collector provides a flexible API endpoint for receiving scan results in supported formats (e.g., SARIF). Each collector instance is assigned a unique API URL and API key for external tool authentication. {% hint style="info" %} ### Notice -
▸ ▾ Application Security - Issues permissions modified +4 −0
xsiam/reference-and-developer-docs/role-based-access-control/cloud-security-and-posture-management-permissions/application-security-permissions/application-security-issues-permissionsRead it on the Cortex docs portal ↗ Read it here → This file's diff on GitHub ↗
Before After@@ -1,8 +1,12 @@---description: Configure Application Security issue permissions in Cortex XSIAM.---# Application Security - Issues permissions# Application Security - Issues permissionsIssues display security findings discovered across your code repositories, container images, and CI/CD pipelines. To view Issues, go to Modules → Application Security → Issues, and select one of the issues, such as IaC Misconfigurations, vulnerabilities, and Secrets.Issues display security findings discovered across your code repositories, container images, and CI/CD pipelines. To view Issues, go to Modules → Application Security → Issues, and select one of the issues, such as IaC Misconfigurations, vulnerabilities, and Secrets.Permission│Description│Roles ExamplePermission│Description│Roles Example| ---------- | ----------------------------------------------------------------------------------------------------------------------------------------------------------------------------------------------------------------------------------- | -------------------------------------------------------------------------------------------------------------------------------------------------------------------------------------------------------------------------------------------------------------------------- || ---------- | ----------------------------------------------------------------------------------------------------------------------------------------------------------------------------------------------------------------------------------- | -------------------------------------------------------------------------------------------------------------------------------------------------------------------------------------------------------------------------------------------------------------------------- |None│No access to Application Security Issues.│SOC Tier-1 Analyst: Focus on issue triage and initial case response. Application Security findings are not part of their primary workflow.None│No access to Application Security Issues.│SOC Tier-1 Analyst: Focus on issue triage and initial case response. Application Security findings are not part of their primary workflow.View│Read-only access to all issue categories. Users can browse, filter, search, and export issues. They can view issue details and findings. They cannot change issue status, assign issues, create exclusions, or trigger remediation.│- SOC Tier-2 and 3 Analysts: SOC Tier-2 analysts may need to investigate code-related cases or correlate AppSec findings with security issues.
- Threat Hunter: Needs to correlate code-level findings with threat intelligence and attack patterns.
View│Read-only access to all issue categories. Users can browse, filter, search, and export issues. They can view issue details and findings. They cannot change issue status, assign issues, create exclusions, or trigger remediation.│- SOC Tier-2 and 3 Analysts: SOC Tier-2 analysts may need to investigate code-related cases or correlate AppSec findings with security issues.
- Threat Hunter: Needs to correlate code-level findings with threat intelligence and attack patterns.
Show markdown source
@@ -1,8 +1,12 @@
+---
+description: Configure Application Security issue permissions in Cortex XSIAM.
+---
+
 # Application Security - Issues permissions

 Issues display security findings discovered across your code repositories, container images, and CI/CD pipelines. To view Issues, go to **Modules** → **Application Security** → **Issues**, and select one of the issues, such as IaC Misconfigurations, vulnerabilities, and Secrets.

 | Permission | Description                                                                                                                                                                                                                         | Roles Example                                                                                                                                                                                                                                                              |
 | ---------- | ----------------------------------------------------------------------------------------------------------------------------------------------------------------------------------------------------------------------------------- | -------------------------------------------------------------------------------------------------------------------------------------------------------------------------------------------------------------------------------------------------------------------------- |
 | None       | No access to Application Security Issues.                                                                                                                                                                                           | SOC Tier-1 Analyst: Focus on issue triage and initial case response. Application Security findings are not part of their primary workflow.                                                                                                                                 |
 | View       | Read-only access to all issue categories. Users can browse, filter, search, and export issues. They can view issue details and findings. They cannot change issue status, assign issues, create exclusions, or trigger remediation. | <ul><li>SOC Tier-2 and 3 Analysts: SOC Tier-2 analysts may need to investigate code-related cases or correlate AppSec findings with security issues.</li><li>Threat Hunter: Needs to correlate code-level findings with threat intelligence and attack patterns.</li></ul> |
-
▸ ▾ Application Security - Policy Management permissions modified +4 −0
xsiam/reference-and-developer-docs/role-based-access-control/cloud-security-and-posture-management-permissions/application-security-permissions/application-security-policy-management-permissionsRead it on the Cortex docs portal ↗ Read it here → This file's diff on GitHub ↗
Before After@@ -1,8 +1,12 @@---description: Configure Application Security policy management permissions in Cortex XSIAM.---# Application Security - Policy Management permissions# Application Security - Policy Management permissionsThis section describes how to configure Application Security Policy Management (rules and policies) permissions.This section describes how to configure Application Security Policy Management (rules and policies) permissions.### AppSec Rules### AppSec RulesAppSec Rules are individual security detection rules that define what security issues to detect in code, IaC templates, packages, and CI/CD configurations. Each rule has a severity, category, and detection logic. Rules are the building blocks of AppSec Policies. To access AppSec Rules, go to Modules → Application Security → Policy Management → AppSec Rules.AppSec Rules are individual security detection rules that define what security issues to detect in code, IaC templates, packages, and CI/CD configurations. Each rule has a severity, category, and detection logic. Rules are the building blocks of AppSec Policies. To access AppSec Rules, go to Modules → Application Security → Policy Management → AppSec Rules.Show markdown source
@@ -1,8 +1,12 @@
+---
+description: Configure Application Security policy management permissions in Cortex XSIAM.
+---
+
 # Application Security - Policy Management permissions

 This section describes how to configure Application Security Policy Management (rules and policies) permissions.

 ### AppSec Rules

 AppSec Rules are individual security detection rules that define what security issues to detect in code, IaC templates, packages, and CI/CD configurations. Each rule has a severity, category, and detection logic. Rules are the building blocks of AppSec Policies. To access AppSec Rules, go to Modules → Application Security → Policy Management → AppSec Rules.
-
▸ ▾ Application Security - Scans permissions modified +4 −0
xsiam/reference-and-developer-docs/role-based-access-control/cloud-security-and-posture-management-permissions/application-security-permissions/application-security-scans-permissionsRead it on the Cortex docs portal ↗ Read it here → This file's diff on GitHub ↗
Before After@@ -1,8 +1,12 @@---description: Configure Application Security scan permissions in Cortex XSIAM.---# Application Security - Scans permissions# Application Security - Scans permissionsConfigure the following permission for Application Security Scans:Configure the following permission for Application Security Scans:• Periodic scans• Periodic scans• PR scans• PR scans• CI/CD scans• CI/CD scansShow markdown source
@@ -1,8 +1,12 @@
+---
+description: Configure Application Security scan permissions in Cortex XSIAM.
+---
+
 # Application Security - Scans permissions

 Configure the following permission for Application Security Scans:

 * [Periodic scans](#periodic-scans)
 * [PR scans](#pr-scans)
 * [CI/CD scans](#cicd-scans)
-
▸ ▾ Configurations - Application Security permissions modified +4 −0
xsiam/reference-and-developer-docs/role-based-access-control/cloud-security-and-posture-management-permissions/application-security-permissions/configurations-application-security-permissionsRead it on the Cortex docs portal ↗ Read it here → This file's diff on GitHub ↗
Before After@@ -1,8 +1,12 @@---description: Configure Application Security configuration permissions in Cortex XSIAM.---# Configurations - Application Security permissions# Configurations - Application Security permissionsApplication Security Configurations controls access to the Application Security settings under Settings → Configurations → Application Security, which includes the following:Application Security Configurations controls access to the Application Security settings under Settings → Configurations → Application Security, which includes the following:• Application Configuration: Controls SLA target settings (Critical, High, Medium, Low severity target days and approaching SLA threshold), and the auto-refresh toggle for related application assets.• Application Configuration: Controls SLA target settings (Critical, High, Medium, Low severity target days and approaching SLA threshold), and the auto-refresh toggle for related application assets.• AppSec Issues Configuration: Controls whether SBOM (Software Bill of Materials) findings are treated as new vulnerabilities. When enabled, all detected SBOM findings are treated as new vulnerabilities. When disabled, the baseline for identifying new SBOM vulnerabilities starts with the next scan, excluding previously identified findings.• AppSec Issues Configuration: Controls whether SBOM (Software Bill of Materials) findings are treated as new vulnerabilities. When enabled, all detected SBOM findings are treated as new vulnerabilities. When disabled, the baseline for identifying new SBOM vulnerabilities starts with the next scan, excluding previously identified findings.hint infohint infoShow markdown source
@@ -1,8 +1,12 @@ +--- +description: Configure Application Security configuration permissions in Cortex XSIAM. +--- + # Configurations - Application Security permissions Application Security Configurations controls access to the Application Security settings under **Settings** → **Configurations** → **Application Security**, which includes the following: * Application Configuration: Controls SLA target settings (Critical, High, Medium, Low severity target days and approaching SLA threshold), and the auto-refresh toggle for related application assets. * AppSec Issues Configuration: Controls whether SBOM (Software Bill of Materials) findings are treated as new vulnerabilities. When enabled, all detected SBOM findings are treated as new vulnerabilities. When disabled, the baseline for identifying new SBOM vulnerabilities starts with the next scan, excluding previously identified findings. {% hint style="info" %} -
▸ ▾ CLI Tool permissions modified +4 −0
xsiam/reference-and-developer-docs/role-based-access-control/cloud-security-and-posture-management-permissions/cli-tool-permissionsRead it on the Cortex docs portal ↗ Read it here → This file's diff on GitHub ↗
Before After@@ -1,8 +1,12 @@---description: Configure CLI Tool permissions in Cortex XSIAM.---# CLI Tool permissions# CLI Tool permissionsCLI Tools (Cortex CLI) provides a unified command interface to efficiently scan Cloud Workload Protection (CWP), API Security, and Application Security environments with a single installation, enabling integration of security checks into development processes. It controls access to view the CLI Tools setup within the Data Sources & Integrations page (Settings → Data Sources & Integrations), download the CLI, and generate the required API keys.CLI Tools (Cortex CLI) provides a unified command interface to efficiently scan Cloud Workload Protection (CWP), API Security, and Application Security environments with a single installation, enabling integration of security checks into development processes. It controls access to view the CLI Tools setup within the Data Sources & Integrations page (Settings → Data Sources & Integrations), download the CLI, and generate the required API keys.hint warninghint warning### Caution### Caution• Licence Requirement: Accessing the CLI Tool requires a Cloud Posture Security, Cloud Runtime Security, or Cortex XSIAM Premium license.• Licence Requirement: Accessing the CLI Tool requires a Cloud Posture Security, Cloud Runtime Security, or Cortex XSIAM Premium license.Show markdown source
@@ -1,8 +1,12 @@ +--- +description: Configure CLI Tool permissions in Cortex XSIAM. +--- + # CLI Tool permissions CLI Tools (Cortex CLI) provides a unified command interface to efficiently scan Cloud Workload Protection (CWP), API Security, and Application Security environments with a single installation, enabling integration of security checks into development processes. It controls access to view the CLI Tools setup within the **Data Sources & Integrations** page (**Settings** → **Data Sources & Integrations**), download the CLI, and generate the required API keys. {% hint style="warning" %} ### Caution * Licence Requirement: Accessing the CLI Tool requires a Cloud Posture Security, Cloud Runtime Security, or Cortex XSIAM Premium license. -
▸ ▾ Cloud Security permissions modified +4 −0
xsiam/reference-and-developer-docs/role-based-access-control/cloud-security-and-posture-management-permissions/cloud-security-permissionsRead it on the Cortex docs portal ↗ Read it here → This file's diff on GitHub ↗
Before After@@ -1,8 +1,12 @@---description: Configure Cloud Security permissions in Cortex XSIAM.---# Cloud Security permissions# Cloud Security permissionsYou can edit Cloud Security policies and rules permissions by selecting CLOUDSEC when creating or editing a role.You can edit Cloud Security policies and rules permissions by selecting CLOUDSEC when creating or editing a role.Users manage Cloud Security Policies and Rules by going to Posture Management → Rules & Policies and then selecting Cloud Security either under Policies or Rules.Users manage Cloud Security Policies and Rules by going to Posture Management → Rules & Policies and then selecting Cloud Security either under Policies or Rules.Requires Cloud Posture Security, Cloud Runtime Security, or Cortex XSIAM Premium license.Requires Cloud Posture Security, Cloud Runtime Security, or Cortex XSIAM Premium license.Show markdown source
@@ -1,8 +1,12 @@
+---
+description: Configure Cloud Security permissions in Cortex XSIAM.
+---
+
 # Cloud Security permissions

 You can edit Cloud Security policies and rules permissions by selecting CLOUDSEC when creating or editing a role.

 Users manage Cloud Security Policies and Rules by going to Posture Management → Rules & Policies and then selecting Cloud Security either under Policies or Rules.

 Requires Cloud Posture Security, Cloud Runtime Security, or Cortex XSIAM Premium license.
-
▸ ▾ Compliance - Cloud permissions modified +4 −0
xsiam/reference-and-developer-docs/role-based-access-control/cloud-security-and-posture-management-permissions/compliance-cloud-permissionsRead it on the Cortex docs portal ↗ Read it here → This file's diff on GitHub ↗
Before After@@ -1,8 +1,12 @@---description: Configure cloud compliance permissions in Cortex XSIAM.---# Compliance - Cloud permissions# Compliance - Cloud permissionsConfigure access to Cloud compliance, which allows organizations to track adherence against regulatory frameworks (e.g., CIS, NIST, PCI DSS), monitor cloud compliance violations, and manage compliance assessment schedulesConfigure access to Cloud compliance, which allows organizations to track adherence against regulatory frameworks (e.g., CIS, NIST, PCI DSS), monitor cloud compliance violations, and manage compliance assessment schedulesRequires Cloud Posture Security, Cloud Runtime Security, or Cortex XSIAM Premium license.Requires Cloud Posture Security, Cloud Runtime Security, or Cortex XSIAM Premium license.System-provided (OOTB) standards and controls are immutable. They cannot be edited or deleted by any user, regardless of whether they hold View/Edit permissionsSystem-provided (OOTB) standards and controls are immutable. They cannot be edited or deleted by any user, regardless of whether they hold View/Edit permissionsShow markdown source
@@ -1,8 +1,12 @@
+---
+description: Configure cloud compliance permissions in Cortex XSIAM.
+---
+
 # Compliance - Cloud permissions

 Configure access to Cloud compliance, which allows organizations to track adherence against regulatory frameworks (e.g., CIS, NIST, PCI DSS), monitor cloud compliance violations, and manage compliance assessment schedules

 Requires Cloud Posture Security, Cloud Runtime Security, or Cortex XSIAM Premium license.

 System-provided (OOTB) standards and controls are immutable. They cannot be edited or deleted by any user, regardless of whether they hold View/Edit permissions
-
▸ ▾ Data Classification permissions modified +4 −0
xsiam/reference-and-developer-docs/role-based-access-control/cloud-security-and-posture-management-permissions/data-classification-permissionsRead it on the Cortex docs portal ↗ Read it here → This file's diff on GitHub ↗
Before After@@ -1,8 +1,12 @@---description: Configure Data Classification permissions in Cortex XSIAM.---# Data Classification permissions# Data Classification permissionsData Classification governs how sensitive data is identified, categorized, and labeled across the platform. It serves as the foundational engine that powers both Data Security Posture Management (DSPM) cloud scanning and Endpoint Data Loss Prevention (DLP) detection capabilities.Data Classification governs how sensitive data is identified, categorized, and labeled across the platform. It serves as the foundational engine that powers both Data Security Posture Management (DSPM) cloud scanning and Endpoint Data Loss Prevention (DLP) detection capabilities.Users can access Data Classification from both Settings → Configurations → Data Classification and Modules → Data Security → Data Classification. Data Classification includes the following:Users can access Data Classification from both Settings → Configurations → Data Classification and Modules → Data Security → Data Classification. Data Classification includes the following:• Data Patterns: Definitions used to identify specific types of sensitive data.• Data Patterns: Definitions used to identify specific types of sensitive data.• Data Profiles: Logical groupings of data patterns used to assign severity and classification labels.• Data Profiles: Logical groupings of data patterns used to assign severity and classification labels.Show markdown source
@@ -1,8 +1,12 @@
+---
+description: Configure Data Classification permissions in Cortex XSIAM.
+---
+
 # Data Classification permissions

 Data Classification governs how sensitive data is identified, categorized, and labeled across the platform. It serves as the foundational engine that powers both Data Security Posture Management (DSPM) cloud scanning and Endpoint Data Loss Prevention (DLP) detection capabilities.

 Users can access Data Classification from both Settings → Configurations → Data Classification and Modules → Data Security → Data Classification. Data Classification includes the following:

 * Data Patterns: Definitions used to identify specific types of sensitive data.
 * Data Profiles: Logical groupings of data patterns used to assign severity and classification labels.
-
▸ ▾ Data Security permissions modified +5 −1
xsiam/reference-and-developer-docs/role-based-access-control/cloud-security-and-posture-management-permissions/data-security-permissionsRead it on the Cortex docs portal ↗ Read it here → This file's diff on GitHub ↗
Before After@@ -1,13 +1,17 @@---description: Configure Data Security permissions in Cortex XSIAM.---# Data Security permissions# Data Security permissionsThe Data Security permission includes the following permissions:The Data Security permission includes the following permissions:• Endpoint DLP: Includes permissions such as Data-in-motion rules and Endpoint Applications.• Endpoint DLP: Includes permissions such as Data-in-motion rules and Endpoint Applications.• Data Security: Data Security Posture Management (DSPM)• Data Security: Data Security Posture Management (DSPM)This section controls access to the DSPM features, which provide deep visibility into cloud data assets (such as storage buckets, databases, and backups) and their underlying data objects (files, columns, and tables). It also controls access to the Data Pattern Inventory, Data Security Detection Rules, and the Data Security Issues queue.This section controls access to the DSPM features, which provide deep visibility into cloud data assets (such as storage buckets, databases, and backups) and their underlying data objects (files, columns, and tables). It also controls access to the Data Pattern Inventory, Data Security Detection Rules, and the Data Security Issues queue.Users access DSPM from Modules → Data Security.Users access DSPM from Modules → Data Security.Requires Cloud Posture Security, Cloud Runtime Security, or Cortex XSIAM Premium license.Requires Cloud Posture Security, Cloud Runtime Security, or Cortex XSIAM Premium license.Show markdown source
@@ -1,13 +1,17 @@
+---
+description: Configure Data Security permissions in Cortex XSIAM.
+---
+
 # Data Security permissions

 The Data Security permission includes the following permissions:

-* Endpoint DLP: Includes permissions such as Data-in-motion rules and Endpoint Applications.
+* Endpoint DLP: Includes permissions such as Data-in-motion rules and Endpoint Applications.
 * Data Security: Data Security Posture Management (DSPM)

 This section controls access to the DSPM features, which provide deep visibility into cloud data assets (such as storage buckets, databases, and backups) and their underlying data objects (files, columns, and tables). It also controls access to the Data Pattern Inventory, Data Security Detection Rules, and the Data Security Issues queue.

 Users access DSPM from Modules → Data Security.

 Requires Cloud Posture Security, Cloud Runtime Security, or Cortex XSIAM Premium license.
-
▸ ▾ Identity Security permissions modified +5 −1
xsiam/reference-and-developer-docs/role-based-access-control/cloud-security-and-posture-management-permissions/identity-security-permissionsRead it on the Cortex docs portal ↗ Read it here → This file's diff on GitHub ↗
Before After@@ -1,15 +1,19 @@---description: Configure Identity Security permissions in Cortex XSIAM.---# Identity Security permissions# Identity Security permissionsIdentity Security provides centralized visibility and governance over both human and non-human identities across cloud, SaaS, and on-premises environments. Users access these features by going to Modules → Identity Security.Identity Security provides centralized visibility and governance over both human and non-human identities across cloud, SaaS, and on-premises environments. Users access these features by going to Modules → Identity Security.Identity Security permissions controls the following permissions :Identity Security permissions controls the following permissions :• Cloud Identity Security (Posture Management): Focuses on identity posture, detecting misconfigured IAM policies, over-privileged accounts, inactive identities, and excessive permissions.• Cloud Identity Security (Posture Management): Focuses on identity posture, detecting misconfigured IAM policies, over-privileged accounts, inactive identities, and excessive permissions.• Identity Threat Detection and Response (ITDR): Focuses on real-time threat detection, identifying active attacks such as compromised credentials, privilege escalation, lateral movement, and suspicious authentication patterns.• Identity Threat Detection and Response (ITDR): Focuses on real-time threat detection, identifying active attacks such as compromised credentials, privilege escalation, lateral movement, and suspicious authentication patterns...Cloud Identity Security requires Cloud Posture Security, Cloud Runtime Security, or Cortex XSIAM Premium license.Cloud Identity Security requires Cloud Posture Security, Cloud Runtime Security, or Cortex XSIAM Premium license.ITDR requires a separate ITDR add-on.ITDR requires a separate ITDR add-on.Show markdown source
@@ -1,15 +1,19 @@ +--- +description: Configure Identity Security permissions in Cortex XSIAM. +--- + # Identity Security permissions Identity Security provides centralized visibility and governance over both human and non-human identities across cloud, SaaS, and on-premises environments. Users access these features by going to Modules → Identity Security. Identity Security permissions controls the following permissions : -* Cloud Identity Security (Posture Management): Focuses on identity posture, detecting misconfigured IAM policies, over-privileged accounts, inactive identities, and excessive permissions.  +* Cloud Identity Security (Posture Management): Focuses on identity posture, detecting misconfigured IAM policies, over-privileged accounts, inactive identities, and excessive permissions. * Identity Threat Detection and Response (ITDR): Focuses on real-time threat detection, identifying active attacks such as compromised credentials, privilege escalation, lateral movement, and suspicious authentication patterns. . Cloud Identity Security requires Cloud Posture Security, Cloud Runtime Security, or Cortex XSIAM Premium license. ITDR requires a separate ITDR add-on. -
▸ ▾ Policies - Cloud Workload permissions modified +4 −0
xsiam/reference-and-developer-docs/role-based-access-control/cloud-security-and-posture-management-permissions/policies-cloud-workload-permissionsRead it on the Cortex docs portal ↗ Read it here → This file's diff on GitHub ↗
Before After@@ -1,8 +1,12 @@---description: Configure Cloud Workload policy permissions in Cortex XSIAM.---# Policies - Cloud Workload permissions# Policies - Cloud Workload permissionsPolicy permissions control access to Cloud Workload rules and policies (Compute Policies). This module maintains security compliance, prevents misconfigurations, and reduces risks across your cloud environments. Users manage Cloud Workload Policies and Rules by going to Posture Management → Rules & Policies and then selecting Cloud Workload under Policies or Rules.Policy permissions control access to Cloud Workload rules and policies (Compute Policies). This module maintains security compliance, prevents misconfigurations, and reduces risks across your cloud environments. Users manage Cloud Workload Policies and Rules by going to Posture Management → Rules & Policies and then selecting Cloud Workload under Policies or Rules.Requires Cloud Posture Security, Cloud Runtime Security, or Cortex XSIAM Premium license.Requires Cloud Posture Security, Cloud Runtime Security, or Cortex XSIAM Premium license.Cloud Workload Policies ControlsCloud Workload Policies ControlsShow markdown source
@@ -1,8 +1,12 @@
+---
+description: Configure Cloud Workload policy permissions in Cortex XSIAM.
+---
+
 # Policies - Cloud Workload permissions

 Policy permissions control access to Cloud Workload rules and policies (Compute Policies). This module maintains security compliance, prevents misconfigurations, and reduces risks across your cloud environments. Users manage Cloud Workload Policies and Rules by going to Posture Management → Rules & Policies and then selecting Cloud Workload under Policies or Rules.

 Requires Cloud Posture Security, Cloud Runtime Security, or Cortex XSIAM Premium license.

 **Cloud Workload Policies Controls**
-
▸ ▾ Configuration permissions modified +23 −8 The eight plain-text component names become 19 links to individual permission pages, including auditing, credentials and network scanners.
xsiam/reference-and-developer-docs/role-based-access-control/configuration-permissionsRead it on the Cortex docs portal ↗ Read it here → This file's diff on GitHub ↗
Before After@@ -1,12 +1,27 @@---description: Learn about role permissions for Cortex XSIAM configuration components.---# Configuration permissions# Configuration permissions### This section includes:### This section includes:• General configuration settings• auditing-permissions• Cortex XDR-Analytics• alert-notifications-permissions• Access Management• general-configuration-permissions• Data Broker• cortex-xdr-analytics-permissions• Data Collection• access-management-permissions• Data Management• data-broker-permissions• Integrations• log-collection-permissions• Object Setup• data-sources-permissions• external-issues-mapping-permissions• integrations-instance-permissions• integrations-permissions• data-management-permissions• public-api• threat-intelligence-permission-api-configuration• long-running-http-integrations-configuration• credentials-permissions• network-scanners-permissions• apps-instance-permissions• object-setup-permissionsShow markdown source
@@ -1,12 +1,27 @@
+---
+description: Learn about role permissions for Cortex XSIAM configuration components.
+---
+
 # Configuration permissions

 ### This section includes:

-* General configuration settings
-* Cortex XDR-Analytics
-* Access Management
-* Data Broker
-* Data Collection
-* Data Management
-* Integrations
-* Object Setup
+* [auditing-permissions](configuration-permissions/auditing-permissions "mention")
+* [alert-notifications-permissions](configuration-permissions/alert-notifications-permissions "mention")
+* [general-configuration-permissions](configuration-permissions/general-configuration-permissions "mention")
+* [cortex-xdr-analytics-permissions](configuration-permissions/cortex-xdr-analytics-permissions "mention")
+* [access-management-permissions](configuration-permissions/access-management-permissions "mention")
+* [data-broker-permissions](configuration-permissions/data-broker-permissions "mention")
+* [log-collection-permissions](configuration-permissions/log-collection-permissions "mention")
+* [data-sources-permissions](configuration-permissions/data-sources-permissions "mention")
+* [external-issues-mapping-permissions](configuration-permissions/external-issues-mapping-permissions "mention")
+* [integrations-instance-permissions](configuration-permissions/integrations-instance-permissions "mention")
+* [integrations-permissions](configuration-permissions/integrations-permissions "mention")
+* [data-management-permissions](configuration-permissions/data-management-permissions "mention")
+* [public-api](configuration-permissions/public-api "mention")
+* [threat-intelligence-permission-api-configuration](configuration-permissions/threat-intelligence-permission-api-configuration "mention")
+* [long-running-http-integrations-configuration](configuration-permissions/long-running-http-integrations-configuration "mention")
+* [credentials-permissions](configuration-permissions/credentials-permissions "mention")
+* [network-scanners-permissions](configuration-permissions/network-scanners-permissions "mention")
+* [apps-instance-permissions](configuration-permissions/apps-instance-permissions "mention")
+* [object-setup-permissions](configuration-permissions/object-setup-permissions "mention")
-
▸ ▾ Access management permissions modified +4 −0
xsiam/reference-and-developer-docs/role-based-access-control/configuration-permissions/access-management-permissionsRead it on the Cortex docs portal ↗ Read it here → This file's diff on GitHub ↗
Before After@@ -1,8 +1,12 @@---description: Manage access to Cortex XSIAM users, roles, and access management settings.---# Access management permissions# Access management permissionsSet permissions for Users, Roles, User Groups, and Authentication Settings under Access Management (Settings → Configurations → Access Management).Set permissions for Users, Roles, User Groups, and Authentication Settings under Access Management (Settings → Configurations → Access Management).hint warninghint warning### Caution### Caution• SSO Configuration Risk: Granting View/Edit access allows users to modify the tenant's Single Sign-On (SSO) and authentication settings. Misconfigurations can cause tenant-wide lockouts. Ensure only authorized identity or infrastructure administrators hold this permission.• SSO Configuration Risk: Granting View/Edit access allows users to modify the tenant's Single Sign-On (SSO) and authentication settings. Misconfigurations can cause tenant-wide lockouts. Ensure only authorized identity or infrastructure administrators hold this permission.Show markdown source
@@ -1,8 +1,12 @@ +--- +description: Manage access to Cortex XSIAM users, roles, and access management settings. +--- + # Access management permissions Set permissions for Users, Roles, User Groups, and Authentication Settings under Access Management (**Settings** → **Configurations** → **Access Management**). {% hint style="warning" %} ### Caution * SSO Configuration Risk: Granting View/Edit access allows users to modify the tenant's Single Sign-On (SSO) and authentication settings. Misconfigurations can cause tenant-wide lockouts. Ensure only authorized identity or infrastructure administrators hold this permission. -
▸ ▾ Alert Notifications permissions modified +6 −0
xsiam/reference-and-developer-docs/role-based-access-control/configuration-permissions/alert-notifications-permissionsRead it on the Cortex docs portal ↗ Read it here → This file's diff on GitHub ↗
Before After@@ -1,8 +1,14 @@---description: >-Manage Cortex XSIAM alert notification rules, templates, and forwardingsettings.---# Alert Notifications permissions# Alert Notifications permissionsControls access to configure notification rules, templates, and external integration forwarding.:Controls access to configure notification rules, templates, and external integration forwarding.:• Configurations: Manage rules through Settings → Configuration → General → Notifications: Includes main notification rules and user notifications.• Configurations: Manage rules through Settings → Configuration → General → Notifications: Includes main notification rules and user notifications.• External forwarding: Configure through Settings → Configuration → Integrations → External Applications.• External forwarding: Configure through Settings → Configuration → Integrations → External Applications.hint warninghint warningShow markdown source
@@ -1,8 +1,14 @@ +--- +description: >- + Manage Cortex XSIAM alert notification rules, templates, and forwarding + settings. +--- + # Alert Notifications permissions Controls access to configure notification rules, templates, and external integration forwarding.: * Configurations: Manage rules through **Settings** → **Configuration** → **General** → **Notifications**: Includes main notification rules and user notifications. * External forwarding: Configure through **Settings** → **Configuration** → **Integrations** → **External Applications**. {% hint style="warning" %} -
▸ ▾ Apps - Instance permissions modified +4 −0
xsiam/reference-and-developer-docs/role-based-access-control/configuration-permissions/apps-instance-permissionsRead it on the Cortex docs portal ↗ Read it here → This file's diff on GitHub ↗
Before After@@ -1,8 +1,12 @@---description: Manage access to Cortex XSIAM app instances and their configuration.---# Apps - Instance permissions# Apps - Instance permissionsControls the ability to install, configure, and delete Jupyter Notebooks and Observability instances (Settings → Configurations → Integrations → Apps).Controls the ability to install, configure, and delete Jupyter Notebooks and Observability instances (Settings → Configurations → Integrations → Apps).To use and access the apps, users need the Apps permission. For more information, see Jupyter and Observability apps permissions.To use and access the apps, users need the Apps permission. For more information, see Jupyter and Observability apps permissions.Permission│Description│Role ExamplePermission│Description│Role Example| ---------- | ------------------------------------------------------------------------------------------------------- | ------------------------------------------------------------------------------------------ || ---------- | ------------------------------------------------------------------------------------------------------- | ------------------------------------------------------------------------------------------ |Show markdown source
@@ -1,8 +1,12 @@
+---
+description: Manage access to Cortex XSIAM app instances and their configuration.
+---
+
 # Apps - Instance permissions

 Controls the ability to install, configure, and delete Jupyter Notebooks and Observability instances (Settings → Configurations → Integrations → Apps).

 To use and access the apps, users need the Apps permission. For more information, see [Jupyter and Observability apps permissions](../jupyter-and-observability-apps-permissions).

 | Permission | Description                                                                                             | Role Example                                                                               |
 | ---------- | ------------------------------------------------------------------------------------------------------- | ------------------------------------------------------------------------------------------ |
-
▸ ▾ Auditing permissions modified +4 −0
xsiam/reference-and-developer-docs/role-based-access-control/configuration-permissions/auditing-permissionsRead it on the Cortex docs portal ↗ Read it here → This file's diff on GitHub ↗
Before After@@ -1,8 +1,12 @@---description: Manage access to Cortex XSIAM audit logs and administrative activity records.---# Auditing permissions# Auditing permissionsProvides access to view audit logs that track all administrative and operational activities within Cortex XSIAM:Provides access to view audit logs that track all administrative and operational activities within Cortex XSIAM:• Management Audit Logs: Track user actions, role modifications, and administrative operations. Go to Settings → Management Audit Logs.• Management Audit Logs: Track user actions, role modifications, and administrative operations. Go to Settings → Management Audit Logs.• Agent Audit Logs: Track endpoint agent activities and related activities. Go to Settings → Agent Audit Logs.• Agent Audit Logs: Track endpoint agent activities and related activities. Go to Settings → Agent Audit Logs.• XDR Collector Audit Logs: Track XDR collector activities and data collection events. Go to Settings → XDR Collector Audit Logs.• XDR Collector Audit Logs: Track XDR collector activities and data collection events. Go to Settings → XDR Collector Audit Logs.Show markdown source
@@ -1,8 +1,12 @@
+---
+description: Manage access to Cortex XSIAM audit logs and administrative activity records.
+---
+
 # Auditing permissions

 Provides access to view audit logs that track all administrative and operational activities within Cortex XSIAM:

 * Management Audit Logs: Track user actions, role modifications, and administrative operations. Go to **Settings** → **Management Audit Logs**.
 * Agent Audit Logs: Track endpoint agent activities and related activities. Go to **Settings** → **Agent Audit Logs**.
 * XDR Collector Audit Logs: Track XDR collector activities and data collection events. Go to **Settings** → **XDR Collector Audit Logs**.
-
▸ ▾ Cortex XDR Analytics permissions modified +4 −0
xsiam/reference-and-developer-docs/role-based-access-control/configuration-permissions/cortex-xdr-analytics-permissionsRead it on the Cortex docs portal ↗ Read it here → This file's diff on GitHub ↗
Before After@@ -1,8 +1,12 @@---description: Manage access to Cortex XSIAM analytics configuration and related settings.---# Cortex XDR Analytics permissions# Cortex XDR Analytics permissionsControls access to the Analytics Engine configuration page through Settings → Configurations → Cortex-Analytics.Controls access to the Analytics Engine configuration page through Settings → Configurations → Cortex-Analytics.hint warninghint warning### Caution### CautionThis permission strictly controls access to enable or configure the backend Analytics engines. It does not control analytics rules management. Analytics rules (such as BIOCs and Correlation rules) are managed through the Detection Rules permission under the Threat Management sectionThis permission strictly controls access to enable or configure the backend Analytics engines. It does not control analytics rules management. Analytics rules (such as BIOCs and Correlation rules) are managed through the Detection Rules permission under the Threat Management sectionShow markdown source
@@ -1,8 +1,12 @@ +--- +description: Manage access to Cortex XSIAM analytics configuration and related settings. +--- + # Cortex XDR Analytics permissions Controls access to the Analytics Engine configuration page through **Settings** → **Configurations** → **Cortex-Analytics**. {% hint style="warning" %} ### Caution This permission strictly controls access to enable or configure the backend Analytics engines. It does not control analytics rules management. Analytics rules (such as BIOCs and Correlation rules) are managed through the Detection Rules permission under the Threat Management section -
▸ ▾ Credentials permissions modified +4 −0
xsiam/reference-and-developer-docs/role-based-access-control/configuration-permissions/credentials-permissionsRead it on the Cortex docs portal ↗ Read it here → This file's diff on GitHub ↗
Before After@@ -1,8 +1,12 @@---description: Manage access to Cortex XSIAM credentials and secure connection settings.---# Credentials permissions# Credentials permissionsControls access to stored credential sets (reusable authentication objects that integrations and systems reference for connecting to external services). Credential sets centralize sensitive authentication data (such as, usernames, passwords, certificates, and API tokens) so they can be managed in one place rather than being embedded in each integration configuration.Controls access to stored credential sets (reusable authentication objects that integrations and systems reference for connecting to external services). Credential sets centralize sensitive authentication data (such as, usernames, passwords, certificates, and API tokens) so they can be managed in one place rather than being embedded in each integration configuration.Users can access Credentials on the Credentials page by going to Settings → Configurations → Integrations → Credentials.Users can access Credentials on the Credentials page by going to Settings → Configurations → Integrations → Credentials.To view the Credentials page, users require the following View permissions:To view the Credentials page, users require the following View permissions:Show markdown source
@@ -1,8 +1,12 @@
+---
+description: Manage access to Cortex XSIAM credentials and secure connection settings.
+---
+
 # Credentials permissions

 Controls access to stored credential sets (reusable authentication objects that integrations and systems reference for connecting to external services). Credential sets centralize sensitive authentication data (such as, usernames, passwords, certificates, and API tokens) so they can be managed in one place rather than being embedded in each integration configuration.

 Users can access Credentials on the **Credentials** page by going to **Settings** → **Configurations** → **Integrations** → **Credentials**.

 To view the **Credentials** page, users require the following **View** permissions:
-
▸ ▾ Data Broker permissions modified +4 −1
xsiam/reference-and-developer-docs/role-based-access-control/configuration-permissions/data-broker-permissionsRead it on the Cortex docs portal ↗ Read it here → This file's diff on GitHub ↗
Before After@@ -1,8 +1,12 @@---description: Manage access to Cortex XSIAM Data Broker configuration and operations.---# Data Broker permissions# Data Broker permissionsData Broker permissions control access to the Broker VM infrastructure.Data Broker permissions control access to the Broker VM infrastructure.### Broker Service### Broker ServiceManages Broker VMs that act as intermediaries for data collection from various sources. Brokers can host applets and other collection services. Go to Settings → Configurations → Data Broker → Broker VMs.Manages Broker VMs that act as intermediaries for data collection from various sources. Brokers can host applets and other collection services. Go to Settings → Configurations → Data Broker → Broker VMs.@@ -33,9 +37,8 @@ Managing Broker VMs effectively requires visibility into the data sources they cAgent Administrations│View│Brokers interact with agent infrastructure; agents connect through Brokers. Strongly recommended.Agent Administrations│View│Brokers interact with agent infrastructure; agents connect through Brokers. Strongly recommended.Auditing│View│Track changes to Broker configurations for compliance. Strongly recommended.Auditing│View│Track changes to Broker configurations for compliance. Strongly recommended.Cases & Issues│View│Broker issues may generate cases requiring investigation. Recommended.Cases & Issues│View│Broker issues may generate cases requiring investigation. Recommended.Integrations│View│Brokers host integrations; need visibility into integration health. Recommended.Integrations│View│Brokers host integrations; need visibility into integration health. Recommended.Alert Notifications│View│Syslog forwarding through Brokers is tied to notification configuration. Recommended.Alert Notifications│View│Syslog forwarding through Brokers is tied to notification configuration. Recommended.Live Terminal│View│Remote terminal access to Broker VMs for troubleshooting. Recommended.Live Terminal│View│Remote terminal access to Broker VMs for troubleshooting. Recommended.General Configuration│View│Server settings may affect Broker behavior. Recommended.General Configuration│View│Server settings may affect Broker behavior. Recommended.Query Center│View│Query Broker-related data for troubleshooting collection issues. Recommended.Query Center│View│Query Broker-related data for troubleshooting collection issues. Recommended.Show markdown source
@@ -1,8 +1,12 @@
+---
+description: Manage access to Cortex XSIAM Data Broker configuration and operations.
+---
+
 # Data Broker permissions

 Data Broker permissions control access to the Broker VM infrastructure.

 ### Broker Service

 Manages Broker VMs that act as intermediaries for data collection from various sources. Brokers can host applets and other collection services. Go to **Settings** → **Configurations** → **Data Broker** → **Broker VMs**.

@@ -33,9 +37,8 @@ Managing Broker VMs effectively requires visibility into the data sources they c
 | Agent Administrations | View             | Brokers interact with agent infrastructure; agents connect through Brokers. Strongly recommended.                                  |
 | Auditing              | View             | Track changes to Broker configurations for compliance. Strongly recommended.                                                       |
 | Cases & Issues        | View             | Broker issues may generate cases requiring investigation. Recommended.                                                             |
 | Integrations          | View             | Brokers host integrations; need visibility into integration health. Recommended.                                                   |
 | Alert Notifications   | View             | Syslog forwarding through Brokers is tied to notification configuration. Recommended.                                              |
 | Live Terminal         | View             | Remote terminal access to Broker VMs for troubleshooting. Recommended.                                                             |
 | General Configuration | View             | Server settings may affect Broker behavior. Recommended.                                                                           |
 | Query Center          | View             | Query Broker-related data for troubleshooting collection issues. Recommended.                                                      |
-
-
▸ ▾ Data Management permissions modified +4 −0
xsiam/reference-and-developer-docs/role-based-access-control/configuration-permissions/data-management-permissionsRead it on the Cortex docs portal ↗ Read it here → This file's diff on GitHub ↗
Before After@@ -1,8 +1,12 @@---description: Manage access to Cortex XSIAM data management and retention settings.---# Data Management permissions# Data Management permissionsControls access to dataset configuration, data transformation rules, and data lifecycle management in Cortex XSIAM through Settings → Configurations → Data Management.Controls access to dataset configuration, data transformation rules, and data lifecycle management in Cortex XSIAM through Settings → Configurations → Data Management.This permission includes:This permission includes:• Dataset Management: For viewing and managing datasets• Dataset Management: For viewing and managing datasets• Parsing Rules: For data transformation during ingestion• Parsing Rules: For data transformation during ingestionShow markdown source
@@ -1,8 +1,12 @@
+---
+description: Manage access to Cortex XSIAM data management and retention settings.
+---
+
 # Data Management permissions

 Controls access to dataset configuration, data transformation rules, and data lifecycle management in Cortex XSIAM through **Settings** → **Configurations** → **Data Management**.

 This permission includes:

 * Dataset Management: For viewing and managing datasets
 * Parsing Rules: For data transformation during ingestion
-
▸ ▾ Data Sources permissions modified +6 −0
xsiam/reference-and-developer-docs/role-based-access-control/configuration-permissions/data-sources-permissionsRead it on the Cortex docs portal ↗ Read it here → This file's diff on GitHub ↗
Before After@@ -1,8 +1,14 @@---description: >-Manage access to Cortex XSIAM data source configuration and ingestionsettings.---# Data Sources permissions# Data Sources permissionsEnables the configuration and management of cloud and third-party data source integrations. This includes Cloud Service Provider (CSP) integrations (AWS, Azure, GCP), Cloud Workload Protection (CWP) instances, Cloud Access Security (CAS) connectors, and Outposts.Enables the configuration and management of cloud and third-party data source integrations. This includes Cloud Service Provider (CSP) integrations (AWS, Azure, GCP), Cloud Workload Protection (CWP) instances, Cloud Access Security (CAS) connectors, and Outposts.### Data Sources & Integrations page### Data Sources & Integrations pageData Sources is managed under Settings → Configurations → Data Collection → Data Sources & Integrations. Access levels to the Data Sources & Integrations are determined with the Integrations permissions:Data Sources is managed under Settings → Configurations → Data Collection → Data Sources & Integrations. Access levels to the Data Sources & Integrations are determined with the Integrations permissions:Show markdown source
@@ -1,8 +1,14 @@
+---
+description: >-
+  Manage access to Cortex XSIAM data source configuration and ingestion
+  settings.
+---
+
 # Data Sources permissions

 Enables the configuration and management of cloud and third-party data source integrations. This includes Cloud Service Provider (CSP) integrations (AWS, Azure, GCP), Cloud Workload Protection (CWP) instances, Cloud Access Security (CAS) connectors, and Outposts.

 ### Data Sources & Integrations page

 Data Sources is managed under **Settings** → **Configurations** → **Data Collection** → **Data Sources & Integrations**. Access levels to the **Data Sources & Integrations** are determined with the Integrations permissions:
-
▸ ▾ External Issues Mapping permissions modified +4 −0
xsiam/reference-and-developer-docs/role-based-access-control/configuration-permissions/external-issues-mapping-permissionsRead it on the Cortex docs portal ↗ Read it here → This file's diff on GitHub ↗
Before After@@ -1,8 +1,12 @@---description: Manage access to Cortex XSIAM mappings for external issue integrations.---# External Issues Mapping permissions# External Issues Mapping permissionsConfigure how alerts from third-party systems are translated into Cases through Settings → Configurations → Data Collection → External Issues Mapping.Configure how alerts from third-party systems are translated into Cases through Settings → Configurations → Data Collection → External Issues Mapping.For more information, see External alerts using External Issue Mapping.For more information, see External alerts using External Issue Mapping.Permission│Description│Roles ExamplePermission│Description│Roles Example| ---------- | ---------------------------------------------------------------------------------------------------------------------------------------------------------------------------------------------------------------------------------------------------------------------------------------------------------------------------------- | ------------------------------------------------------------------------------------------------------------------------------------------------------------------------------- || ---------- | ---------------------------------------------------------------------------------------------------------------------------------------------------------------------------------------------------------------------------------------------------------------------------------------------------------------------------------- | ------------------------------------------------------------------------------------------------------------------------------------------------------------------------------- |Show markdown source
@@ -1,8 +1,12 @@
+---
+description: Manage access to Cortex XSIAM mappings for external issue integrations.
+---
+
 # External Issues Mapping permissions

 Configure how alerts from third-party systems are translated into Cases through **Settings** → **Configurations** → **Data Collection** → **External Issues Mapping**.

 For more information, see [External alerts using External Issue Mapping](../../../configure-cortex-xsiam/cortex-xsiam-data-sources/external-alerts-using-external-issue-mapping).

 | Permission | Description                                                                                                                                                                                                                                                                                                                        | Roles Example                                                                                                                                                                   |
 | ---------- | ---------------------------------------------------------------------------------------------------------------------------------------------------------------------------------------------------------------------------------------------------------------------------------------------------------------------------------- | ------------------------------------------------------------------------------------------------------------------------------------------------------------------------------- |
-
▸ ▾ General Configuration permissions modified +4 −0
xsiam/reference-and-developer-docs/role-based-access-control/configuration-permissions/general-configuration-permissionsRead it on the Cortex docs portal ↗ Read it here → This file's diff on GitHub ↗
Before After@@ -1,8 +1,12 @@---description: Manage access to Cortex XSIAM general settings and system-wide configuration.---# General Configuration permissions# General Configuration permissionsControls access to core platform settings that affect system-wide behavior, such as server settings, timezone settings, and system preferences. Access these through Settings → Configurations → General → Server Settings.Controls access to core platform settings that affect system-wide behavior, such as server settings, timezone settings, and system preferences. Access these through Settings → Configurations → General → Server Settings.For more information, see Configure server settings.For more information, see Configure server settings.Permission│Description│Roles ExamplePermission│Description│Roles Example| ---------- | ------------------------------------------------------------------------------- | -------------------------------------------------------------------------------------------------------------------------------------------------------------------------------------------------------------------------------------------------------------------------------- || ---------- | ------------------------------------------------------------------------------- | -------------------------------------------------------------------------------------------------------------------------------------------------------------------------------------------------------------------------------------------------------------------------------- |Show markdown source
@@ -1,8 +1,12 @@
+---
+description: Manage access to Cortex XSIAM general settings and system-wide configuration.
+---
+
 # General Configuration permissions

 Controls access to core platform settings that affect system-wide behavior, such as server settings, timezone settings, and system preferences. Access these through **Settings** → **Configurations** → **General** → **Server Settings**.

 For more information, see [Configure server settings](../../../onboard-cortex-xsiam/post-deployment/configure-server-settings).

 | Permission | Description                                                                     | Roles Example                                                                                                                                                                                                                                                                    |
 | ---------- | ------------------------------------------------------------------------------- | -------------------------------------------------------------------------------------------------------------------------------------------------------------------------------------------------------------------------------------------------------------------------------- |
-
▸ ▾ Integrations - instance permissions modified +4 −0
xsiam/reference-and-developer-docs/role-based-access-control/configuration-permissions/integrations-instance-permissionsRead it on the Cortex docs portal ↗ Read it here → This file's diff on GitHub ↗
Before After@@ -1,8 +1,12 @@---description: Manage access to individual Cortex XSIAM integration instances and settings.---# Integrations - instance permissions# Integrations - instance permissionsControls access to data collection integration instances, such as automation and feed integrations that collect and process data on the Data Sources & Integrations page (Settings → Data Sources & Integrations). It also controls access to classifiers and mappers Settings → Configurations → Object Setup → Issues → Classification & Mapping.Controls access to data collection integration instances, such as automation and feed integrations that collect and process data on the Data Sources & Integrations page (Settings → Data Sources & Integrations). It also controls access to classifiers and mappers Settings → Configurations → Object Setup → Issues → Classification & Mapping.Data Sources & Integrations pageData Sources & Integrations pageThe Data Sources & Integrations page is a unified interface. Access levels are determined as follows:The Data Sources & Integrations page is a unified interface. Access levels are determined as follows:Show markdown source
@@ -1,8 +1,12 @@
+---
+description: Manage access to individual Cortex XSIAM integration instances and settings.
+---
+
 # Integrations - instance permissions

 Controls access to data collection integration instances, such as automation and feed integrations that collect and process data on the **Data Sources & Integrations** page (**Settings** → **Data Sources & Integrations**). It also controls access to classifiers and mappers **Settings** → **Configurations** → **Object Setup** → **Issues** → **Classification & Mapping**.

 **Data Sources & Integrations page**

 The Data Sources & Integrations page is a unified interface. Access levels are determined as follows:
-
▸ ▾ Integrations Permissions modified +6 −0
xsiam/reference-and-developer-docs/role-based-access-control/configuration-permissions/integrations-permissionsRead it on the Cortex docs portal ↗ Read it here → This file's diff on GitHub ↗
Before After@@ -1,8 +1,14 @@---description: >-Manage access to Cortex XSIAM integration configuration and availableinstances.---# Integrations Permissions# Integrations PermissionsControls access to the Integration Permissions page, a command-level access control layer that determines which roles are allowed to execute specific integration commands. This is distinct from the Integrations permission, which controls access to integration instances and their configuration.Controls access to the Integration Permissions page, a command-level access control layer that determines which roles are allowed to execute specific integration commands. This is distinct from the Integrations permission, which controls access to integration instances and their configuration.Integrations Permissions provides fine-grained, per-command role restrictions on top of the broader integration access model. Access the Integration Permissions page by going to Settings → Configurations → Data Collection → Integration Permissions.Integrations Permissions provides fine-grained, per-command role restrictions on top of the broader integration access model. Access the Integration Permissions page by going to Settings → Configurations → Data Collection → Integration Permissions.Permission│Description│Role ExamplePermission│Description│Role Example| ---------- | -------------------------------------------------------------------------------------------------------------------------------------------------------------------------------------------------------------- | ---------------------------------------------------------------------------------------------------------------------------------------------------------------------------------------------------------------------- || ---------- | -------------------------------------------------------------------------------------------------------------------------------------------------------------------------------------------------------------- | ---------------------------------------------------------------------------------------------------------------------------------------------------------------------------------------------------------------------- |Show markdown source
@@ -1,8 +1,14 @@
+---
+description: >-
+  Manage access to Cortex XSIAM integration configuration and available
+  instances.
+---
+
 # Integrations Permissions

 Controls access to the Integration Permissions page, a command-level access control layer that determines which roles are allowed to execute specific integration commands. This is distinct from the Integrations permission, which controls access to integration instances and their configuration.

 Integrations Permissions provides fine-grained, per-command role restrictions on top of the broader integration access model. Access the Integration Permissions page by going to Settings → Configurations → Data Collection → Integration Permissions.

 | Permission | Description                                                                                                                                                                                                    | Role Example                                                                                                                                                                                                           |
 | ---------- | -------------------------------------------------------------------------------------------------------------------------------------------------------------------------------------------------------------- | ---------------------------------------------------------------------------------------------------------------------------------------------------------------------------------------------------------------------- |
-
▸ ▾ Log Collection permissions modified +4 −0
xsiam/reference-and-developer-docs/role-based-access-control/configuration-permissions/log-collection-permissionsRead it on the Cortex docs portal ↗ Read it here → This file's diff on GitHub ↗
Before After@@ -1,8 +1,12 @@---description: Manage access to Cortex XSIAM log collection configuration and data sources.---# Log Collection permissions# Log Collection permissionsConfigure XDR Collectors, installers, and collection policies through Settings → Configurations → XDR Collectors.Configure XDR Collectors, installers, and collection policies through Settings → Configurations → XDR Collectors.Permission│Description│Roles ExamplePermission│Description│Roles Example| ---------- | ---------------------------------------------------------------------------------------------------------------------------- | ------------------------------------------------------------------------------------------------------------------------------------------------------------------------------------------------------ || ---------- | ---------------------------------------------------------------------------------------------------------------------------- | ------------------------------------------------------------------------------------------------------------------------------------------------------------------------------------------------------ |None│No access to the XDR Collectors configuration pages.│SOC Tier-1 Analyst: Focus on issue triage; log collection configuration is not within their scope.None│No access to the XDR Collectors configuration pages.│SOC Tier-1 Analyst: Focus on issue triage; log collection configuration is not within their scope.View│Read-only access to the XDR Collector menu, including configuration, administration, and groups.│- SOC Tier 2 and 3 Analyst: May need to verify collection status when investigating cases.
- Threat Hunter: May need to verify data collection during threat hunting activities.
View│Read-only access to the XDR Collector menu, including configuration, administration, and groups.│- SOC Tier 2 and 3 Analyst: May need to verify collection status when investigating cases.
- Threat Hunter: May need to verify data collection during threat hunting activities.
Show markdown source
@@ -1,8 +1,12 @@
+---
+description: Manage access to Cortex XSIAM log collection configuration and data sources.
+---
+
 # Log Collection permissions

 Configure XDR Collectors, installers, and collection policies through **Settings** → **Configurations** → **XDR Collectors**.

 | Permission | Description                                                                                                                  | Roles Example                                                                                                                                                                                          |
 | ---------- | ---------------------------------------------------------------------------------------------------------------------------- | ------------------------------------------------------------------------------------------------------------------------------------------------------------------------------------------------------ |
 | None       | No access to the XDR Collectors configuration pages.                                                                         | SOC Tier-1 Analyst: Focus on issue triage; log collection configuration is not within their scope.                                                                                                     |
 | View       | Read-only access to the XDR Collector menu, including configuration, administration, and groups.                             | <ul><li>SOC Tier 2 and 3 Analyst: May need to verify collection status when investigating cases.</li><li>Threat Hunter: May need to verify data collection during threat hunting activities.</li></ul> |
-
▸ ▾ Long-running HTTP Integrations configuration modified +5 −1
xsiam/reference-and-developer-docs/role-based-access-control/configuration-permissions/long-running-http-integrations-configurationRead it on the Cortex docs portal ↗ Read it here → This file's diff on GitHub ↗
Before After@@ -1,15 +1,19 @@---description: Manage access to Cortex XSIAM long-running HTTP integration configuration.---# Long-running HTTP Integrations configuration# Long-running HTTP Integrations configurationGoverns the backend service that hosts and serves dynamic content to external security devices, such as Palo Alto Networks firewalls. It allows administrators to enable or disable the EDL service and manage its global settings. Access this through Settings → Configurations → Integrations → External Dynamic List Integration.Governs the backend service that hosts and serves dynamic content to external security devices, such as Palo Alto Networks firewalls. It allows administrators to enable or disable the EDL service and manage its global settings. Access this through Settings → Configurations → Integrations → External Dynamic List Integration.This permission is used by administrators to set up and maintain the EDL service infrastructure.This permission is used by administrators to set up and maintain the EDL service infrastructure.EDL (under Investigation & Response permissions): Used by analysts to add or remove specific IP addresses and domains to lists during active investigations.EDL (under Investigation & Response permissions): Used by analysts to add or remove specific IP addresses and domains to lists during active investigations.Permission│Description│Role ExamplePermission│Description│Role Example| ---------- | ---------------------------------------------------------------------------------------------------------- | ----------------------------------------------------------------------------------------------------------------------- || ---------- | ---------------------------------------------------------------------------------------------------------- | ----------------------------------------------------------------------------------------------------------------------- |None│The External Dynamic List Integration page is hidden.│- SOC Tier-1 and 2 Analysts: No configuration needed.
None│The External Dynamic List Integration page is hidden.│- SOC Tier-1 and 2 Analysts: No configuration needed.
View│Users can view existing EDL configurations and service status, but cannot make changes.│- SOC Tier-3 Analyst: Understand EDL configurations.
View│Users can view existing EDL configurations and service status, but cannot make changes.│- SOC Tier-3 Analyst: Understand EDL configurations.
View/Edit│Full control over the EDL service, including enabling/disabling the service and modifying global settings.│- Threat Hunter: Understand data flows.
- Security Engineer: Develop and manage API integrations.
View/Edit│Full control over the EDL service, including enabling/disabling the service and modifying global settings.│- Threat Hunter: Understand data flows.
- Security Engineer: Develop and manage API integrations.
Required and recommended permissionsRequired and recommended permissionsShow markdown source
@@ -1,15 +1,19 @@
+---
+description: Manage access to Cortex XSIAM long-running HTTP integration configuration.
+---
+
 # Long-running HTTP Integrations configuration

 Governs the backend service that hosts and serves dynamic content to external security devices, such as Palo Alto Networks firewalls. It allows administrators to enable or disable the EDL service and manage its global settings. Access this through Settings → Configurations → Integrations → External Dynamic List Integration.

 This permission is used by administrators to set up and maintain the EDL service infrastructure.

-EDL (under Investigation & Response permissions): Used by analysts to add or remove specific IP addresses and domains to lists during active investigations.
+EDL (under Investigation & Response permissions): Used by analysts to add or remove specific IP addresses and domains to lists during active investigations.

 | Permission | Description                                                                                                | Role Example                                                                                                            |
 | ---------- | ---------------------------------------------------------------------------------------------------------- | ----------------------------------------------------------------------------------------------------------------------- |
 | None       | The External Dynamic List Integration page is hidden.                                                      | <ul><li>SOC Tier-1 and 2 Analysts: No configuration needed.</li></ul>                                                   |
 | View       | Users can view existing EDL configurations and service status, but cannot make changes.                    | <ul><li>SOC Tier-3 Analyst: Understand EDL configurations.</li></ul>                                                    |
 | View/Edit  | Full control over the EDL service, including enabling/disabling the service and modifying global settings. | <ul><li>Threat Hunter: Understand data flows.</li><li>Security Engineer: Develop and manage API integrations.</li></ul> |

 Required and recommended permissions
-
▸ ▾ Network Scanners permissions modified +4 −0
xsiam/reference-and-developer-docs/role-based-access-control/configuration-permissions/network-scanners-permissionsRead it on the Cortex docs portal ↗ Read it here → This file's diff on GitHub ↗
Before After@@ -1,8 +1,12 @@---description: Manage access to Cortex XSIAM network scanner configuration and operations.---# Network Scanners permissions# Network Scanners permissionsLocated under Settings → Configurations → Network Scanning, this permission allows administrators to set up scan definitions, manage credentials for authenticated scans, configure targets, and view results.Located under Settings → Configurations → Network Scanning, this permission allows administrators to set up scan definitions, manage credentials for authenticated scans, configure targets, and view results.Requires either the ASM and the Exposure Management add-ons, or a Cortex XSIAM Premium license with the Exposure Management add-on.Requires either the ASM and the Exposure Management add-ons, or a Cortex XSIAM Premium license with the Exposure Management add-on.For more information, see Cortex Network Scanner.For more information, see Cortex Network Scanner.Show markdown source
@@ -1,8 +1,12 @@
+---
+description: Manage access to Cortex XSIAM network scanner configuration and operations.
+---
+
 # Network Scanners permissions

 Located under Settings → Configurations → Network Scanning, this permission allows administrators to set up scan definitions, manage credentials for authenticated scans, configure targets, and view results.

 Requires either the ASM and the Exposure Management add-ons, or a Cortex XSIAM Premium license with the Exposure Management add-on.

 For more information, see [Cortex Network Scanner](../../../detect-investigate-and-respond-to-threats/exposure-management/cortex-network-scanner).
-
▸ ▾ Object Setup permissions modified +12 −0
xsiam/reference-and-developer-docs/role-based-access-control/configuration-permissions/object-setup-permissionsRead it on the Cortex docs portal ↗ Read it here → This file's diff on GitHub ↗
Before After@@ -1,3 +1,15 @@---description: Manage access to Cortex XSIAM object setup and related configuration.---# Object Setup permissions# Object Setup permissionsThe Object Setup section governs the structural and visual components of how security data is organized and displayed within the tenant.The Object Setup section governs the structural and visual components of how security data is organized and displayed within the tenant.### This section includes:• case-properties-permissions• exclusion-list-permissions• fields-and-types-permissions• layout-permissions• sync-profile-permissionsShow markdown source
@@ -1,3 +1,15 @@
+---
+description: Manage access to Cortex XSIAM object setup and related configuration.
+---
+
 # Object Setup permissions

 The Object Setup section governs the structural and visual components of how security data is organized and displayed within the tenant.
+
+### This section includes:
+
+* [case-properties-permissions](object-setup-permissions/case-properties-permissions "mention")
+* [exclusion-list-permissions](object-setup-permissions/exclusion-list-permissions "mention")
+* [fields-and-types-permissions](object-setup-permissions/fields-and-types-permissions "mention")
+* [layout-permissions](object-setup-permissions/layout-permissions "mention")
+* [sync-profile-permissions](object-setup-permissions/sync-profile-permissions "mention")
-
▸ ▾ Case Properties permissions modified +6 −0
xsiam/reference-and-developer-docs/role-based-access-control/configuration-permissions/object-setup-permissions/case-properties-permissionsRead it on the Cortex docs portal ↗ Read it here → This file's diff on GitHub ↗
Before After@@ -1,8 +1,14 @@---description: >-Configure access to case domains, custom statuses, and resolution statuses inCortex XSIAM.---# Case Properties permissions# Case Properties permissionsControls access to the following tabs from Cases (Settings → Configurations → Object Setup → Cases):Controls access to the following tabs from Cases (Settings → Configurations → Object Setup → Cases):• Domains: These represent the primary classifications for cases, such as Malware, Phishing, or Network Intrusion. Each domain has a name, color, description, associated statuses, and resolution statuses.• Domains: These represent the primary classifications for cases, such as Malware, Phishing, or Network Intrusion. Each domain has a name, color, description, associated statuses, and resolution statuses.• Properties: Manages custom case statuses and resolution statuses. For example, New, Under Investigation, Pending, Resolved.• Properties: Manages custom case statuses and resolution statuses. For example, New, Under Investigation, Pending, Resolved.hint warninghint warningShow markdown source
@@ -1,8 +1,14 @@ +--- +description: >- + Configure access to case domains, custom statuses, and resolution statuses in + Cortex XSIAM. +--- + # Case Properties permissions Controls access to the following tabs from Cases (**Settings** → **Configurations** → **Object Setup** → **Cases**): * Domains: These represent the primary classifications for cases, such as Malware, Phishing, or Network Intrusion. Each domain has a name, color, description, associated statuses, and resolution statuses. * Properties: Manages custom case statuses and resolution statuses. For example, New, Under Investigation, Pending, Resolved. {% hint style="warning" %} -
▸ ▾ Exclusion List permissions modified +6 −0
xsiam/reference-and-developer-docs/role-based-access-control/configuration-permissions/object-setup-permissions/exclusion-list-permissionsRead it on the Cortex docs portal ↗ Read it here → This file's diff on GitHub ↗
Before After@@ -1,8 +1,14 @@---description: >-Control access to manage excluded threat indicators and their exclusionsettings in Cortex XSIAM.---# Exclusion List permissions# Exclusion List permissionsControls access to the indicator exclusion list configuration under Settings → Configurations → Object Setup → Indicators → Exclusion List. This governs the permanent exclusion of indicators such as IP addresses, domains, URLs, file hashes, and email addresses. It is primarily used for:Controls access to the indicator exclusion list configuration under Settings → Configurations → Object Setup → Indicators → Exclusion List. This governs the permanent exclusion of indicators such as IP addresses, domains, URLs, file hashes, and email addresses. It is primarily used for:• Allowing known-good or trusted infrastructure.• Allowing known-good or trusted infrastructure.• Suppressing false-positive indicators identified during investigations.• Suppressing false-positive indicators identified during investigations.• Filtering noisy vendor feeds that generate high volumes of low-value alerts.• Filtering noisy vendor feeds that generate high volumes of low-value alerts.Show markdown source
@@ -1,8 +1,14 @@
+---
+description: >-
+  Control access to manage excluded threat indicators and their exclusion
+  settings in Cortex XSIAM.
+---
+
 # Exclusion List permissions

 Controls access to the indicator exclusion list configuration under **Settings** → **Configurations** → **Object Setup** → **Indicators** → **Exclusion List**. This governs the permanent exclusion of indicators such as IP addresses, domains, URLs, file hashes, and email addresses. It is primarily used for:

 * Allowing known-good or trusted infrastructure.
 * Suppressing false-positive indicators identified during investigations.
 * Filtering noisy vendor feeds that generate high volumes of low-value alerts.
-
▸ ▾ Fields and Types permissions modified +6 −0
xsiam/reference-and-developer-docs/role-based-access-control/configuration-permissions/object-setup-permissions/fields-and-types-permissionsRead it on the Cortex docs portal ↗ Read it here → This file's diff on GitHub ↗
Before After@@ -1,8 +1,14 @@---description: >-Control access to custom fields, indicator types, and SLA rule configurationsin Cortex XSIAM.---# Fields and Types permissions# Fields and Types permissionsControls access to custom fields and indicator types within Object Setup Settings → Configurations → Object Setup:Controls access to custom fields and indicator types within Object Setup Settings → Configurations → Object Setup:• Case fields (Cases → Fields): Custom fields that extend the case data schema, appearing in case views, queries, and layouts.• Case fields (Cases → Fields): Custom fields that extend the case data schema, appearing in case views, queries, and layouts.• Issue fields (Issues → Fields): Custom fields for the issue data schema, often used for automation rules and filtering.• Issue fields (Issues → Fields): Custom fields for the issue data schema, often used for automation rules and filtering.• Indicator fields and types: Definitions for custom indicator fields and new indicator types (e.g., Cloud Resource ID), including extraction regex patterns.• Indicator fields and types: Definitions for custom indicator fields and new indicator types (e.g., Cloud Resource ID), including extraction regex patterns.• SLA rules: Service Level Agreement rules that define time-based expectations for issue handling.• SLA rules: Service Level Agreement rules that define time-based expectations for issue handling.Show markdown source
@@ -1,8 +1,14 @@
+---
+description: >-
+  Control access to custom fields, indicator types, and SLA rule configurations
+  in Cortex XSIAM.
+---
+
 # Fields and Types permissions

 Controls access to custom fields and indicator types within Object Setup **Settings** → **Configurations** → **Object Setup**:

 * Case fields (**Cases** → **Fields**): Custom fields that extend the case data schema, appearing in case views, queries, and layouts.
 * Issue fields (**Issues** → **Fields**): Custom fields for the issue data schema, often used for automation rules and filtering.
 * Indicator fields and types: Definitions for custom indicator fields and new indicator types (e.g., Cloud Resource ID), including extraction regex patterns.
 * SLA rules: Service Level Agreement rules that define time-based expectations for issue handling.
-
▸ ▾ Layout permissions modified +6 −0
xsiam/reference-and-developer-docs/role-based-access-control/configuration-permissions/object-setup-permissions/layout-permissionsRead it on the Cortex docs portal ↗ Read it here → This file's diff on GitHub ↗
Before After@@ -1,8 +1,14 @@---description: >-Control access to case and issue layouts, including their layout rules inCortex XSIAM.---# Layout permissions# Layout permissionsControls access within Object Setup (Settings → Configurations → Object Setup) to the following:Controls access within Object Setup (Settings → Configurations → Object Setup) to the following:• Case layouts (Cases → Layouts): Visual layout definitions that determine how case data is presented when viewing a case. Layouts define which fields are shown, their arrangement in sections/tabs:• Case layouts (Cases → Layouts): Visual layout definitions that determine how case data is presented when viewing a case. Layouts define which fields are shown, their arrangement in sections/tabs:• Case layout rules (Cases → Layout Rules): Rules that determine which layout is applied to a given case based on conditions (e.g., case type, source, severity).• Case layout rules (Cases → Layout Rules): Rules that determine which layout is applied to a given case based on conditions (e.g., case type, source, severity).• Issue layouts (Issues → Layouts): Visual layout definitions that determine how alert data is presented when viewing an issue. Layouts define which fields are shown, their arrangement in sections/tabs, and widget configurations.• Issue layouts (Issues → Layouts): Visual layout definitions that determine how alert data is presented when viewing an issue. Layouts define which fields are shown, their arrangement in sections/tabs, and widget configurations.• Issue layout rules (Issues → Layout Rules): Rules that determine which layout is applied to a given issue based on conditions (e.g., issue type, source, severity).• Issue layout rules (Issues → Layout Rules): Rules that determine which layout is applied to a given issue based on conditions (e.g., issue type, source, severity).Show markdown source
@@ -1,8 +1,14 @@
+---
+description: >-
+  Control access to case and issue layouts, including their layout rules in
+  Cortex XSIAM.
+---
+
 # Layout permissions

 Controls access within Object Setup (**Settings** → **Configurations** → **Object Setup**) to the following:

 * Case layouts (**Cases** → **Layouts**): Visual layout definitions that determine how case data is presented when viewing a case. Layouts define which fields are shown, their arrangement in sections/tabs:
 * Case layout rules (**Cases** → **Layout Rules**): Rules that determine which layout is applied to a given case based on conditions (e.g., case type, source, severity).
 * Issue layouts (**Issues** → **Layouts**): Visual layout definitions that determine how alert data is presented when viewing an issue. Layouts define which fields are shown, their arrangement in sections/tabs, and widget configurations.
 * Issue layout rules (**Issues** → **Layout Rules**): Rules that determine which layout is applied to a given issue based on conditions (e.g., issue type, source, severity).
-
▸ ▾ Sync Profile permissions modified +6 −0
xsiam/reference-and-developer-docs/role-based-access-control/configuration-permissions/object-setup-permissions/sync-profile-permissionsRead it on the Cortex docs portal ↗ Read it here → This file's diff on GitHub ↗
Before After@@ -1,8 +1,14 @@---description: >-Control access to sync profiles for mirroring cases with external platformsin Cortex XSIAM.---# Sync Profile permissions# Sync Profile permissionsControls access to case mirroring profiles configuration in Settings → Configurations → Object Setup → Issues → Sync Profiles.Controls access to case mirroring profiles configuration in Settings → Configurations → Object Setup → Issues → Sync Profiles.Sync Profiles define the parameters for case mirroring with third-party platforms such as Jira and ServiceNow. When a profile is active, updates to cases in the tenant are automatically reflected in the external system, and depending on the profile type (inbound or bidirectional), changes in the external system can update XSIAM cases.Sync Profiles define the parameters for case mirroring with third-party platforms such as Jira and ServiceNow. When a profile is active, updates to cases in the tenant are automatically reflected in the external system, and depending on the profile type (inbound or bidirectional), changes in the external system can update XSIAM cases.For more information, see Create a sync profile.For more information, see Create a sync profile.Show markdown source
@@ -1,8 +1,14 @@
+---
+description: >-
+  Control access to sync profiles for mirroring cases with external platforms
+  in Cortex XSIAM.
+---
+
 # Sync Profile permissions

 Controls access to case mirroring profiles configuration in **Settings** → **Configurations** → **Object Setup** → **Issues** → **Sync Profiles**.

 Sync Profiles define the parameters for case mirroring with third-party platforms such as Jira and ServiceNow. When a profile is active, updates to cases in the tenant are automatically reflected in the external system, and depending on the profile type (inbound or bidirectional), changes in the external system can update XSIAM cases.

 For more information, see [Create a sync profile](../../../../configure-cortex-xsiam/customize-cases-and-issues/create-a-sync-profile).
-
▸ ▾ Public API modified +4 −0
xsiam/reference-and-developer-docs/role-based-access-control/configuration-permissions/public-apiRead it on the Cortex docs portal ↗ Read it here → This file's diff on GitHub ↗
Before After@@ -1,8 +1,12 @@---description: Manage access to Cortex XSIAM public API configuration and credentials.---# Public API# Public APIControls access to API key management for external integrations. This includes creating, viewing, editing, and revoking API keys that allow external systems to interact with Cortex XSIAM in Settings → Configurations → Integrations → API Keys. The Public API permissions also manage access to the Compute Unit Usage page.Controls access to API key management for external integrations. This includes creating, viewing, editing, and revoking API keys that allow external systems to interact with Cortex XSIAM in Settings → Configurations → Integrations → API Keys. The Public API permissions also manage access to the Compute Unit Usage page.### Error Handling### Error HandlingAny API call attempting to fetch, list, or modify stored secrets using a restricted key will return a 403 Forbidden error with an Insufficient permissions message. This ensures that automated workflows, scripts, and CLI interactions follow a strict least-privilege model.Any API call attempting to fetch, list, or modify stored secrets using a restricted key will return a 403 Forbidden error with an Insufficient permissions message. This ensures that automated workflows, scripts, and CLI interactions follow a strict least-privilege model.Show markdown source
@@ -1,8 +1,12 @@
+---
+description: Manage access to Cortex XSIAM public API configuration and credentials.
+---
+
 # Public API

 Controls access to API key management for external integrations. This includes creating, viewing, editing, and revoking API keys that allow external systems to interact with Cortex XSIAM in Settings → Configurations → Integrations → API Keys. The Public API permissions also manage access to the Compute Unit Usage page.

 ### Error Handling

 Any API call attempting to fetch, list, or modify stored secrets using a restricted key will return a 403 Forbidden error with an Insufficient permissions message. This ensures that automated workflows, scripts, and CLI interactions follow a strict least-privilege model.
-
▸ ▾ Threat Intelligence permission - API configuration modified +4 −0
xsiam/reference-and-developer-docs/role-based-access-control/configuration-permissions/threat-intelligence-permission-api-configurationRead it on the Cortex docs portal ↗ Read it here → This file's diff on GitHub ↗
Before After@@ -1,8 +1,12 @@---description: Manage access to Cortex XSIAM Threat Intelligence API configuration.---# Threat Intelligence permission - API configuration# Threat Intelligence permission - API configurationControls access to the configuration page for external threat intelligence API keys (Virus Total) on Settings → Configurations → Integrations → Threat Intelligence. This configuration enables the enrichment of indicators within the tenant using Virus Total.Controls access to the configuration page for external threat intelligence API keys (Virus Total) on Settings → Configurations → Integrations → Threat Intelligence. This configuration enables the enrichment of indicators within the tenant using Virus Total.Permission│Description│Role ExamplePermission│Description│Role Example| ---------- | ------------------------------------------------------------------------------------------ | ---------------------------------------------------------------------------------------------------------------------- || ---------- | ------------------------------------------------------------------------------------------ | ---------------------------------------------------------------------------------------------------------------------- |None│The user cannot access or view the Threat Intelligence configuration page.│SOC Tier-1 Analyst: Uses TI data but doesn't configure.None│The user cannot access or view the Threat Intelligence configuration page.│SOC Tier-1 Analyst: Uses TI data but doesn't configure.View│Users can see if a VirusTotal API key is configured but cannot add, edit, or test the key.│SOC Tier-2 and 3 Analysts: May need to review TI configurations.View│Users can see if a VirusTotal API key is configured but cannot add, edit, or test the key.│SOC Tier-2 and 3 Analysts: May need to review TI configurations.Show markdown source
@@ -1,8 +1,12 @@
+---
+description: Manage access to Cortex XSIAM Threat Intelligence API configuration.
+---
+
 # Threat Intelligence permission - API configuration

 Controls access to the configuration page for external threat intelligence API keys (Virus Total) on Settings → Configurations → Integrations → Threat Intelligence. This configuration enables the enrichment of indicators within the tenant using Virus Total.

 | Permission | Description                                                                                | Role Example                                                                                                           |
 | ---------- | ------------------------------------------------------------------------------------------ | ---------------------------------------------------------------------------------------------------------------------- |
 | None       | The user cannot access or view the Threat Intelligence configuration page.                 | SOC Tier-1 Analyst: Uses TI data but doesn't configure.                                                                |
 | View       | Users can see if a VirusTotal API key is configured but cannot add, edit, or test the key. | SOC Tier-2 and 3 Analysts: May need to review TI configurations.                                                       |
-
▸ ▾ Cortex Agentic Assistant permissions modified +2 −2
xsiam/reference-and-developer-docs/role-based-access-control/cortex-agentic-assistant-permissionsRead it on the Cortex docs portal ↗ Read it here → This file's diff on GitHub ↗
Before After@@ -1,12 +1,12 @@------description: >-description: >-Configure the Cortex Agentic Assistant permissions, which include AI PromptsConfigure the Cortex Agentic Assistant permissions, which includes AI Promptsand Agent permissions.and Agent permissions in Cortex XSIAM.------# Cortex Agentic Assistant permissions# Cortex Agentic Assistant permissionsThe Cortex Agentic Assistant is an AI-powered assistant that provides autonomous-agent capabilities, natural-language querying, insights, and automated-investigation support within the XSIAM tenant.The Cortex Agentic Assistant is an AI-powered assistant that provides autonomous-agent capabilities, natural-language querying, insights, and automated-investigation support within the XSIAM tenant.This permission is split into the following:This permission is split into the following:Show markdown source
@@ -1,12 +1,12 @@
 ---
 description: >-
-  Configure the Cortex Agentic Assistant permissions, which include AI Prompts
-  and Agent permissions.
+  Configure the Cortex Agentic Assistant permissions, which includes AI Prompts
+  and Agent permissions in Cortex XSIAM.
 ---

 # Cortex Agentic Assistant permissions

 The Cortex Agentic Assistant is an AI-powered assistant that provides autonomous-agent capabilities, natural-language querying, insights, and automated-investigation support within the XSIAM tenant.

 This permission is split into the following:
-
▸ ▾ AI Prompts modified +1 −3
xsiam/reference-and-developer-docs/role-based-access-control/cortex-agentic-assistant-permissions/ai-promptsRead it on the Cortex docs portal ↗ Read it here → This file's diff on GitHub ↗
Before After@@ -1,16 +1,14 @@------description: Configure AI Prompts permissions.description: Configure AI Prompts permissions in Cortex XSIAM.------# AI Prompts# AI PromptsAI PromptsControls access to the AI Prompts Library (Investigation & Response → Automation → AI Prompts), where users create and manage reusable prompt templates (including system instructions and few-shot examples) used to guide the LLM's behavior.Controls access to the AI Prompts Library (Investigation & Response → Automation → AI Prompts), where users create and manage reusable prompt templates (including system instructions and few-shot examples) used to guide the LLM's behavior.hint warninghint warning### Caution### CautionTo effectively embed AI Prompts directly into playbook workflows, users must be granted the Manage prompts in playbook editor checkbox, and they must also hold View/Edit permissions for the Playbooks module.To effectively embed AI Prompts directly into playbook workflows, users must be granted the Manage prompts in playbook editor checkbox, and they must also hold View/Edit permissions for the Playbooks module.endhintendhintShow markdown source
@@ -1,16 +1,14 @@ --- -description: Configure AI Prompts permissions. +description: Configure AI Prompts permissions in Cortex XSIAM. --- # AI Prompts -**AI Prompts** - Controls access to the AI Prompts Library (**Investigation & Response** → **Automation** → **AI Prompts**), where users create and manage reusable prompt templates (including system instructions and few-shot examples) used to guide the LLM's behavior. {% hint style="warning" %} ### Caution To effectively embed AI Prompts directly into playbook workflows, users must be granted the Manage prompts in playbook editor checkbox, and they must also hold View/Edit permissions for the Playbooks module. {% endhint %} -
▸ ▾ Cortex Agentic Assistant Agents modified +1 −1
xsiam/reference-and-developer-docs/role-based-access-control/cortex-agentic-assistant-permissions/cortex-agentic-assistant-agentsRead it on the Cortex docs portal ↗ Read it here → This file's diff on GitHub ↗
Before After@@ -1,10 +1,10 @@------description: Configure Cortex Agentic Assistant Agents permissions.description: Configure Cortex Agentic Assistant Agents permissions in Cortex XSIAM.------# Cortex Agentic Assistant Agents# Cortex Agentic Assistant AgentsCortex Agentic Assistant AgentsCortex Agentic Assistant AgentsControls whether a user can access and interact with the Cortex Agentic Assistant, including managing actions and agents. This is the base permission required for any assistant interaction.Controls whether a user can access and interact with the Cortex Agentic Assistant, including managing actions and agents. This is the base permission required for any assistant interaction.Show markdown source
@@ -1,10 +1,10 @@
 ---
-description: Configure Cortex Agentic Assistant Agents permissions.
+description: Configure Cortex Agentic Assistant Agents permissions in Cortex XSIAM.
 ---

 # Cortex Agentic Assistant Agents

 **Cortex Agentic Assistant Agents**

 Controls whether a user can access and interact with the Cortex Agentic Assistant, including managing actions and agents. This is the base permission required for any assistant interaction.
-
▸ ▾ Cloud Security Command Center permissions modified +4 −0
xsiam/reference-and-developer-docs/role-based-access-control/dashboards-and-reports-permissions/cloud-security-command-center-permissionsRead it on the Cortex docs portal ↗ Read it here → This file's diff on GitHub ↗
Before After@@ -1,8 +1,12 @@---description: Manage access to the Cortex XSIAM Cloud Security Command Center.---# Cloud Security Command Center permissions# Cloud Security Command Center permissionsControls the ability to view and edit the Cortex Cloud Command Center, which is the central command center for cloud security, and includes capabilities like Cloud Security Posture Management (CSPM), Application Security Posture Management (ASPM), and Data Security Posture Management (DSPM).Controls the ability to view and edit the Cortex Cloud Command Center, which is the central command center for cloud security, and includes capabilities like Cloud Security Posture Management (CSPM), Application Security Posture Management (ASPM), and Data Security Posture Management (DSPM).hint infohint info### Notice### NoticeRequires a Cloud Runtime Security, Cloud Posture Security, or Cortex XSIAM Premium license.Requires a Cloud Runtime Security, Cloud Posture Security, or Cortex XSIAM Premium license.Show markdown source
@@ -1,8 +1,12 @@ +--- +description: Manage access to the Cortex XSIAM Cloud Security Command Center. +--- + # Cloud Security Command Center permissions Controls the ability to view and edit the Cortex Cloud Command Center, which is the central command center for cloud security, and includes capabilities like Cloud Security Posture Management (CSPM), Application Security Posture Management (ASPM), and Data Security Posture Management (DSPM). {% hint style="info" %} ### Notice Requires a Cloud Runtime Security, Cloud Posture Security, or Cortex XSIAM Premium license. -
▸ ▾ Command Center Dashboard permissions modified +6 −0
xsiam/reference-and-developer-docs/role-based-access-control/dashboards-and-reports-permissions/command-center-dashboard-permissionsRead it on the Cortex docs portal ↗ Read it here → This file's diff on GitHub ↗
Before After@@ -1,8 +1,14 @@---description: >-Manage access to Cortex XSIAM Command Center dashboards and their securitymetrics.---# Command Center Dashboard permissions# Command Center Dashboard permissionsControls access to XSIAM Command Center and Cortex Command Center.Controls access to XSIAM Command Center and Cortex Command Center.For more information about these dashboards, see Command Center reference.For more information about these dashboards, see Command Center reference.Permission│Description│Roles ExamplePermission│Description│Roles Example| ---------- | --------------------------------------------------------------------------- | --------------------------------------- || ---------- | --------------------------------------------------------------------------- | --------------------------------------- |Show markdown source
@@ -1,8 +1,14 @@
+---
+description: >-
+  Manage access to Cortex XSIAM Command Center dashboards and their security
+  metrics.
+---
+
 # Command Center Dashboard permissions

 Controls access to XSIAM Command Center and Cortex Command Center.

 For more information about these dashboards, see [Command Center reference](../../../detect-investigate-and-respond-to-threats/monitor-dashboards-and-reports/dashboard-reference/command-center-reference).

 | Permission | Description                                                                 | Roles Example                           |
 | ---------- | --------------------------------------------------------------------------- | --------------------------------------- |
-
▸ ▾ Dashboards permissions modified +4 −0
xsiam/reference-and-developer-docs/role-based-access-control/dashboards-and-reports-permissions/dashboards-permissionsRead it on the Cortex docs portal ↗ Read it here → This file's diff on GitHub ↗
Before After@@ -1,8 +1,12 @@---description: Manage access to Cortex XSIAM dashboards, widgets, and dashboard sharing.---# Dashboards permissions# Dashboards permissionsControls the ability to monitor security posture through visual data and documented summaries.Controls the ability to monitor security posture through visual data and documented summaries.This is a master permission. To view any specific dashboard (e.g., Command Center), this primary permission must first be set to Enabled.This is a master permission. To view any specific dashboard (e.g., Command Center), this primary permission must first be set to Enabled.• Functionality: When enabled, users can manage the Dashboard Manager, use the widget library, and view accessible dashboards.• Functionality: When enabled, users can manage the Dashboard Manager, use the widget library, and view accessible dashboards.• Scope-Based Access Control (SBAC): Access to a dashboard does not grant access to the underlying data. If a user lacks the necessary SBAC data scope, widgets may appear empty or show errors• Scope-Based Access Control (SBAC): Access to a dashboard does not grant access to the underlying data. If a user lacks the necessary SBAC data scope, widgets may appear empty or show errorsShow markdown source
@@ -1,8 +1,12 @@
+---
+description: Manage access to Cortex XSIAM dashboards, widgets, and dashboard sharing.
+---
+
 # Dashboards permissions

 Controls the ability to monitor security posture through visual data and documented summaries.

 This is a master permission. To view any specific dashboard (e.g., Command Center), this primary permission must first be set to **Enabled.**

 * Functionality: When enabled, users can manage the Dashboard Manager, use the widget library, and view accessible dashboards.
 * Scope-Based Access Control (SBAC): Access to a dashboard does not grant access to the underlying data. If a user lacks the necessary SBAC data scope, widgets may appear empty or show errors
-
▸ ▾ Email Command Center permissions modified +6 −0
xsiam/reference-and-developer-docs/role-based-access-control/dashboards-and-reports-permissions/email-command-center-permissionsRead it on the Cortex docs portal ↗ Read it here → This file's diff on GitHub ↗
Before After@@ -1,8 +1,14 @@---description: >-Manage access to the Cortex XSIAM Email Command Center and email threatmetrics.---# Email Command Center permissions# Email Command Center permissionsControls access to the Email Command Center, which enables you to view high-level metrics on inbound email threats, phishing trends, and top targeted users.Controls access to the Email Command Center, which enables you to view high-level metrics on inbound email threats, phishing trends, and top targeted users.For more information, see Email Command Center.For more information, see Email Command Center.hint infohint info### Notice### NoticeShow markdown source
@@ -1,8 +1,14 @@ +--- +description: >- + Manage access to the Cortex XSIAM Email Command Center and email threat + metrics. +--- + # Email Command Center permissions Controls access to the Email Command Center, which enables you to view high-level metrics on inbound email threats, phishing trends, and top targeted users. For more information, see [Email Command Center](../../../detect-investigate-and-respond-to-threats/cortex-advanced-email-security/email-command-center). {% hint style="info" %} ### Notice -
▸ ▾ Ingestion Monitoring dashboard permissions modified +4 −0
xsiam/reference-and-developer-docs/role-based-access-control/dashboards-and-reports-permissions/ingestion-monitoring-dashboard-permissionsRead it on the Cortex docs portal ↗ Read it here → This file's diff on GitHub ↗
Before After@@ -1,8 +1,12 @@---description: Manage access to Cortex XSIAM data ingestion monitoring dashboards.---# Ingestion Monitoring dashboard permissions# Ingestion Monitoring dashboard permissionsAccess to the Data Ingestion Dashboard, which provides an overview of data ingestion by product and vendor:Access to the Data Ingestion Dashboard, which provides an overview of data ingestion by product and vendor:• Daily quota consumption: Tracking used data limits against the organization's allowance.• Daily quota consumption: Tracking used data limits against the organization's allowance.• Data ingestion rates: Visualizing the velocity of incoming data.• Data ingestion rates: Visualizing the velocity of incoming data.• Source Health: Ensuring that various data sources and products are communicating correctly with Cortex XSIAM.• Source Health: Ensuring that various data sources and products are communicating correctly with Cortex XSIAM.Show markdown source
@@ -1,8 +1,12 @@
+---
+description: Manage access to Cortex XSIAM data ingestion monitoring dashboards.
+---
+
 # Ingestion Monitoring dashboard permissions

 Access to the Data Ingestion Dashboard, which provides an overview of data ingestion by product and vendor:

 * Daily quota consumption: Tracking used data limits against the organization's allowance.
 * Data ingestion rates: Visualizing the velocity of incoming data.
 * Source Health: Ensuring that various data sources and products are communicating correctly with Cortex XSIAM.
-
▸ ▾ Reports permissions modified +4 −0
xsiam/reference-and-developer-docs/role-based-access-control/dashboards-and-reports-permissions/reports-permissionsRead it on the Cortex docs portal ↗ Read it here → This file's diff on GitHub ↗
Before After@@ -1,8 +1,12 @@---description: Manage access to Cortex XSIAM reports and custom report templates.---# Reports permissions# Reports permissionsControls access to the generation and management of documented security summaries, ranging from shift handoffs to compliance evidenceControls access to the generation and management of documented security summaries, ranging from shift handoffs to compliance evidenceCortex XSIAM enforces least-privileged per-object access by allowing you to manage access for custom (user-defined) report templates. For more information, see Manage access to objects.Cortex XSIAM enforces least-privileged per-object access by allowing you to manage access for custom (user-defined) report templates. For more information, see Manage access to objects.Permission│Description│Roles ExamplePermission│Description│Roles Example| ---------- | ----------------------------------------------------------------------------------------------------------------------------------------------------------------------------------------------------------------------------------------------------------------------------------------------------------------------------------------------------------------------------------------------------------------------------------------------------------------------------------------------------------------------------------------------------------------------------------------------------------------------------------------------------------------------------------------------------------------------------------------------------------------------------------------------------------------------------------------------------------------------------------------------------------------------------------- | --------------------------------------------------- || ---------- | ----------------------------------------------------------------------------------------------------------------------------------------------------------------------------------------------------------------------------------------------------------------------------------------------------------------------------------------------------------------------------------------------------------------------------------------------------------------------------------------------------------------------------------------------------------------------------------------------------------------------------------------------------------------------------------------------------------------------------------------------------------------------------------------------------------------------------------------------------------------------------------------------------------------------------------- | --------------------------------------------------- |Show markdown source
@@ -1,8 +1,12 @@
+---
+description: Manage access to Cortex XSIAM reports and custom report templates.
+---
+
 # Reports permissions

 Controls access to the generation and management of documented security summaries, ranging from shift handoffs to compliance evidence

 Cortex XSIAM enforces least-privileged per-object access by allowing you to manage access for custom (user-defined) report templates. For more information, see [Manage access to objects](../../../onboard-cortex-xsiam/post-deployment/manage-user-roles-and-access-management/manage-access-to-objects).

 | Permission | Description                                                                                                                                                                                                                                                                                                                                                                                                                                                                                                                                                                                                                                                                                                                                                                                                                                                                                                                         | Roles Example                                       |
 | ---------- | ----------------------------------------------------------------------------------------------------------------------------------------------------------------------------------------------------------------------------------------------------------------------------------------------------------------------------------------------------------------------------------------------------------------------------------------------------------------------------------------------------------------------------------------------------------------------------------------------------------------------------------------------------------------------------------------------------------------------------------------------------------------------------------------------------------------------------------------------------------------------------------------------------------------------------------- | --------------------------------------------------- |
-
▸ ▾ Data Security - Endpoint DLP permissions modified +9 −0
xsiam/reference-and-developer-docs/role-based-access-control/data-security-endpoint-dlp-permissionsRead it on the Cortex docs portal ↗ Read it here → This file's diff on GitHub ↗
Before After@@ -1,11 +1,20 @@---description: Configure Endpoint Data Loss Prevention permissions in Cortex XSIAM.---# Data Security - Endpoint DLP permissions# Data Security - Endpoint DLP permissionsEndpoint Data Loss Prevention (DLP) permission (under Data Security) controls the policies and configurations that govern how sensitive data is handled when it moves across endpoints.Endpoint Data Loss Prevention (DLP) permission (under Data Security) controls the policies and configurations that govern how sensitive data is handled when it moves across endpoints.Endpoint DLP includes Data-in-motion rules, Endpoint Applications, Endpoint Application Groups, and Endpoint DLP settings.Endpoint DLP includes Data-in-motion rules, Endpoint Applications, Endpoint Application Groups, and Endpoint DLP settings.• data-in-motion-rules• endpoint-applications• endpoint-applications-groups• endpoint-dlp-settingshint infohint info### License### LicenseRequires the Data Loss Prevention (DLP) add-on plus Enterprise Runtime Security (XDR), Cortex XSIAM Enterprise, or Cortex XSIAM Premium license.Requires the Data Loss Prevention (DLP) add-on plus Enterprise Runtime Security (XDR), Cortex XSIAM Enterprise, or Cortex XSIAM Premium license.endhintendhintShow markdown source
@@ -1,11 +1,20 @@ +--- +description: Configure Endpoint Data Loss Prevention permissions in Cortex XSIAM. +--- + # Data Security - Endpoint DLP permissions Endpoint Data Loss Prevention (DLP) permission (under **Data Security**) controls the policies and configurations that govern how sensitive data is handled when it moves across endpoints. Endpoint DLP includes Data-in-motion rules, Endpoint Applications, Endpoint Application Groups, and Endpoint DLP settings. +* [data-in-motion-rules](data-security-endpoint-dlp-permissions/data-in-motion-rules "mention") +* [endpoint-applications](data-security-endpoint-dlp-permissions/endpoint-applications "mention") +* [endpoint-applications-groups](data-security-endpoint-dlp-permissions/endpoint-applications-groups "mention") +* [endpoint-dlp-settings](data-security-endpoint-dlp-permissions/endpoint-dlp-settings "mention") + {% hint style="info" %} ### License Requires the Data Loss Prevention (DLP) add-on plus Enterprise Runtime Security (XDR), Cortex XSIAM Enterprise, or Cortex XSIAM Premium license. {% endhint %} -
▸ ▾ Data-in-Motion Rules modified +4 −0
xsiam/reference-and-developer-docs/role-based-access-control/data-security-endpoint-dlp-permissions/data-in-motion-rulesRead it on the Cortex docs portal ↗ Read it here → This file's diff on GitHub ↗
Before After@@ -1,8 +1,12 @@---description: Configure endpoint data-in-motion protection rules in Cortex XSIAM.---# Data-in-Motion Rules# Data-in-Motion RulesData-in-motion Rules define the DLP policies that govern how sensitive data is handled when it moves across endpoints. These rules specify what data patterns to detect, which applications and destinations to monitor, and what actions to take (allow, block, notify) when sensitive data movement is detected. Rules can be created, edited, cloned, enabled/disabled, deleted, and prioritized.Data-in-motion Rules define the DLP policies that govern how sensitive data is handled when it moves across endpoints. These rules specify what data patterns to detect, which applications and destinations to monitor, and what actions to take (allow, block, notify) when sensitive data movement is detected. Rules can be created, edited, cloned, enabled/disabled, deleted, and prioritized.Users access Data In Motion Rules by going to Modules → Data Security → Endpoint Data-in-Motion Rules.Users access Data In Motion Rules by going to Modules → Data Security → Endpoint Data-in-Motion Rules.Permission│Description│Recommended RolesPermission│Description│Recommended Roles| ---------- | ------------------------------------------------------------------------------------------------------------------------------------------------------------------------------------------------------------------------------------------------- | ------------------------------------------------------------------------------------------------------------------------------------------------------------------------------------------------------------ || ---------- | ------------------------------------------------------------------------------------------------------------------------------------------------------------------------------------------------------------------------------------------------- | ------------------------------------------------------------------------------------------------------------------------------------------------------------------------------------------------------------ |Show markdown source
@@ -1,8 +1,12 @@
+---
+description: Configure endpoint data-in-motion protection rules in Cortex XSIAM.
+---
+
 # Data-in-Motion Rules

 Data-in-motion Rules define the DLP policies that govern how sensitive data is handled when it moves across endpoints. These rules specify what data patterns to detect, which applications and destinations to monitor, and what actions to take (allow, block, notify) when sensitive data movement is detected. Rules can be created, edited, cloned, enabled/disabled, deleted, and prioritized.

 Users access Data In Motion Rules by going to **Modules** → **Data Security** → **Endpoint Data-in-Motion Rules**.

 | Permission | Description                                                                                                                                                                                                                                       | Recommended Roles                                                                                                                                                                                            |
 | ---------- | ------------------------------------------------------------------------------------------------------------------------------------------------------------------------------------------------------------------------------------------------- | ------------------------------------------------------------------------------------------------------------------------------------------------------------------------------------------------------------ |
-
▸ ▾ Endpoint Applications Groups modified +6 −0
xsiam/reference-and-developer-docs/role-based-access-control/data-security-endpoint-dlp-permissions/endpoint-applications-groupsRead it on the Cortex docs portal ↗ Read it here → This file's diff on GitHub ↗
Before After@@ -1,8 +1,14 @@---description: >-Manage endpoint application groups for Data Loss Prevention policies in CortexXSIAM.---# Endpoint Applications Groups# Endpoint Applications GroupsEndpoint Applications Groups allow organizing endpoint applications into logical groups for use in Data-in-motion Rules. Instead of selecting individual applications in a rule, administrators can reference an application group, making rule management more scalable. Groups can contain custom application groups (user-defined collections of applications) and catalog web application groups (predefined web application categories).Endpoint Applications Groups allow organizing endpoint applications into logical groups for use in Data-in-motion Rules. Instead of selecting individual applications in a rule, administrators can reference an application group, making rule management more scalable. Groups can contain custom application groups (user-defined collections of applications) and catalog web application groups (predefined web application categories).Users access Endpoint Applications by going to Modules → Data Security → Endpoint Data-in-Motion Rules → Endpoint Applications Groups.Users access Endpoint Applications by going to Modules → Data Security → Endpoint Data-in-Motion Rules → Endpoint Applications Groups.Permission│Description│Recommended RolesPermission│Description│Recommended Roles| ---------- | --------------------------------------------------------------------------------------------------------------------------------------------------------------------------------------------------------------------------------------------------------------------------------------------------------------------------- | ---------------------------------------------------------------------------------------------------------------------------------------------------------------------------------------------------------------------------------- || ---------- | --------------------------------------------------------------------------------------------------------------------------------------------------------------------------------------------------------------------------------------------------------------------------------------------------------------------------- | ---------------------------------------------------------------------------------------------------------------------------------------------------------------------------------------------------------------------------------- |Show markdown source
@@ -1,8 +1,14 @@
+---
+description: >-
+  Manage endpoint application groups for Data Loss Prevention policies in Cortex
+  XSIAM.
+---
+
 # Endpoint Applications Groups

 Endpoint Applications Groups allow organizing endpoint applications into logical groups for use in Data-in-motion Rules. Instead of selecting individual applications in a rule, administrators can reference an application group, making rule management more scalable. Groups can contain custom application groups (user-defined collections of applications) and catalog web application groups (predefined web application categories).

 Users access Endpoint Applications by going to **Modules** → **Data Security** → **Endpoint Data-in-Motion Rules** → **Endpoint Applications Groups**.

 | Permission | Description                                                                                                                                                                                                                                                                                                                 | Recommended Roles                                                                                                                                                                                                                  |
 | ---------- | --------------------------------------------------------------------------------------------------------------------------------------------------------------------------------------------------------------------------------------------------------------------------------------------------------------------------- | ---------------------------------------------------------------------------------------------------------------------------------------------------------------------------------------------------------------------------------- |
-
▸ ▾ Endpoint Applications modified +6 −0
xsiam/reference-and-developer-docs/role-based-access-control/data-security-endpoint-dlp-permissions/endpoint-applicationsRead it on the Cortex docs portal ↗ Read it here → This file's diff on GitHub ↗
Before After@@ -1,8 +1,14 @@---description: >-Manage endpoint applications monitored by Data Loss Prevention in CortexXSIAM.---# Endpoint Applications# Endpoint ApplicationsEndpoint Applications is a catalog of applications that can be referenced in Data-in-motion Rules. It includes predefined applications (web applications, local file-sharing applications, cloud storage applications, USB devices) and allows creation of custom local and web applications. Each application entry defines process names, URLs/domains, and application type that the DLP engine uses to identify data movement channels.Endpoint Applications is a catalog of applications that can be referenced in Data-in-motion Rules. It includes predefined applications (web applications, local file-sharing applications, cloud storage applications, USB devices) and allows creation of custom local and web applications. Each application entry defines process names, URLs/domains, and application type that the DLP engine uses to identify data movement channels.Users access Endpoint Applications by going to Modules → Data Security → Endpoint Data-in-Motion Rules → Endpoint Applications.Users access Endpoint Applications by going to Modules → Data Security → Endpoint Data-in-Motion Rules → Endpoint Applications.hint warninghint warning### Caution### CautionShow markdown source
@@ -1,8 +1,14 @@ +--- +description: >- + Manage endpoint applications monitored by Data Loss Prevention in Cortex + XSIAM. +--- + # Endpoint Applications Endpoint Applications is a catalog of applications that can be referenced in Data-in-motion Rules. It includes predefined applications (web applications, local file-sharing applications, cloud storage applications, USB devices) and allows creation of custom local and web applications. Each application entry defines process names, URLs/domains, and application type that the DLP engine uses to identify data movement channels. Users access Endpoint Applications by going to **Modules** → **Data Security** → **Endpoint Data-in-Motion Rules** → **Endpoint Applications**. {% hint style="warning" %} ### Caution -
▸ ▾ Endpoint DLP Settings modified +4 −0
xsiam/reference-and-developer-docs/role-based-access-control/data-security-endpoint-dlp-permissions/endpoint-dlp-settingsRead it on the Cortex docs portal ↗ Read it here → This file's diff on GitHub ↗
Before After@@ -1,8 +1,12 @@---description: Configure endpoint Data Loss Prevention settings in Cortex XSIAM.---# Endpoint DLP Settings# Endpoint DLP SettingsEndpoint DLP Settings provide global options that dictate the overarching behavior of the Data Loss Prevention (DLP) engine across all endpoints.Endpoint DLP Settings provide global options that dictate the overarching behavior of the Data Loss Prevention (DLP) engine across all endpoints.Users access Endpoint DLP Settings by going to Modules → Data Security → Endpoint Data-in-Motion Rules → Endpoint DLP Settings.Users access Endpoint DLP Settings by going to Modules → Data Security → Endpoint Data-in-Motion Rules → Endpoint DLP Settings.hint warninghint warning### Caution### CautionShow markdown source
@@ -1,8 +1,12 @@ +--- +description: Configure endpoint Data Loss Prevention settings in Cortex XSIAM. +--- + # Endpoint DLP Settings Endpoint DLP Settings provide global options that dictate the overarching behavior of the Data Loss Prevention (DLP) engine across all endpoints. Users access Endpoint DLP Settings by going to **Modules** → **Data Security** → **Endpoint Data-in-Motion Rules** → **Endpoint DLP Settings**. {% hint style="warning" %} ### Caution -
▸ ▾ Exceptions Configuration permissions modified +1 −1
xsiam/reference-and-developer-docs/role-based-access-control/exceptions-configuration-permissionsRead it on the Cortex docs portal ↗ Read it here → This file's diff on GitHub ↗
Before After@@ -1,10 +1,10 @@------description: Configure issue exclusion permissions.description: Configure issue exclusion permissions in Cortex XSIAM.------# Exceptions Configuration permissions# Exceptions Configuration permissionsExceptions Configuration permission controls how security teams manage alert/issue suppression and exception workflows. It provides mechanisms to:Exceptions Configuration permission controls how security teams manage alert/issue suppression and exception workflows. It provides mechanisms to:• Suppress false-positive issues by creating exclusion rules that automatically prevent matching issues from being generated.• Suppress false-positive issues by creating exclusion rules that automatically prevent matching issues from being generated.• Manage exception rules that define conditions under which issues are treated as exceptions (requiring approval workflows).• Manage exception rules that define conditions under which issues are treated as exceptions (requiring approval workflows).Show markdown source
@@ -1,10 +1,10 @@
 ---
-description: Configure issue exclusion permissions.
+description: Configure issue exclusion permissions in Cortex XSIAM.
 ---

 # Exceptions Configuration permissions

 Exceptions Configuration permission controls how security teams manage alert/issue suppression and exception workflows. It provides mechanisms to:

 * Suppress false-positive issues by creating exclusion rules that automatically prevent matching issues from being generated.
 * Manage exception rules that define conditions under which issues are treated as exceptions (requiring approval workflows).
-
▸ ▾ Exception Approver Admin permissions modified +1 −3
xsiam/reference-and-developer-docs/role-based-access-control/exceptions-configuration-permissions/exception-approver-admin-permissionsRead it on the Cortex docs portal ↗ Read it here → This file's diff on GitHub ↗
Before After@@ -1,16 +1,14 @@------description: Configure Exception Approver Admin permissions.description: Configure Exception Approver Admin permissions in Cortex XSIAM.------# Exception Approver Admin permissions# Exception Approver Admin permissionsException Approver Admin permissionsControls access to the Exception Management section on the Server Settings page, located at Settings → Configurations → General → Server Settings.Controls access to the Exception Management section on the Server Settings page, located at Settings → Configurations → General → Server Settings.This permission governs who can configure the exception approval workflow, specifically, whether exceptions require approval, and managing the list of designated approvers.This permission governs who can configure the exception approval workflow, specifically, whether exceptions require approval, and managing the list of designated approvers.hint warninghint warning### Caution### CautionUsers also need General Configuration View permission to view or View/Edit Exception Management in Server Settings.Users also need General Configuration View permission to view or View/Edit Exception Management in Server Settings.Show markdown source
@@ -1,16 +1,14 @@ --- -description: Configure Exception Approver Admin permissions. +description: Configure Exception Approver Admin permissions in Cortex XSIAM. --- # Exception Approver Admin permissions -**Exception Approver Admin permissions** - Controls access to the **Exception Management** section on the **Server Settings** page, located at **Settings** → **Configurations** → **General** → **Server Settings**. This permission governs who can configure the exception approval workflow, specifically, whether exceptions require approval, and managing the list of designated approvers. {% hint style="warning" %} ### Caution Users also need **General Configuration** View permission to view or View/Edit **Exception Management** in **Server Settings**. -
▸ ▾ Exception Management Admin permissions modified +2 −6
xsiam/reference-and-developer-docs/role-based-access-control/exceptions-configuration-permissions/exception-management-admin-permissionsRead it on the Cortex docs portal ↗ Read it here → This file's diff on GitHub ↗
Before After@@ -1,21 +1,17 @@------description: Configure Exception Management Admin permissions.description: Configure Exception Management Admin permissions in Cortex XSIAM.------# Exception Management Admin permissions# Exception Management Admin permissionsException Management Admin permissionsException Management Admin controls access to the Exception Rules tab on the Issue Exclusions and Exceptions page under Settings → Issue Exception & Exclusion. Exception rules differ from exclusion rules in that they define conditions under which issues are flagged as exceptions that may require approval before being acted upon, rather than being silently suppressed.Exception Management Admin controls access to the Exception Rules tab on the Issue Exclusions and Exceptions page under Settings → Issue Exception & Exclusion . Exception rules differ from exclusion rules in that they define conditions under which issues are flagged as exceptions that may require approval before being acted upon, rather than being silently suppressed.hint infohint info### NoteRequires Issue Exclusions permission (at least View) to access the page. Without Issue Exclusions, the entire page is hidden.Requires Issue Exclusions permission (at least View) to access the page. Without Issue Exclusions, the entire page is hidden.endhintendhintPermission│Description│Roles ExamplePermission│Description│Roles Example| ---------- | ------------------------------------------------------------------------------------------------------------------------------------------------------------------------------------------------------------------------------------------------------------------------------------------- | ---------------------------------------------------------------------------------------------------------------------------------------------------------------- || ---------- | ------------------------------------------------------------------------------------------------------------------------------------------------------------------------------------------------------------------------------------------------------------------------------------------- | ---------------------------------------------------------------------------------------------------------------------------------------------------------------- |None│No access to the Exceptions Rules tab on the All Issue Exception & Exclusion Rules page.│SOC Tier-1 Analyst: Should escalate false positives rather than create an exception.None│No access to the Exceptions Rules tab on the All Issue Exception & Exclusion Rules page.│SOC Tier-1 Analyst: Should escalate false positives rather than create an exception.View│Read-only access to the Exception Rules tab on theAll Issue Exception & Exclusion Rules page. Users can browse Exception Rules, view rule details including BIOC indicator definitions, and filter/search the exception rules grid, but cannot create, edit, or delete exception rules.│SOC Tier-2 Analyst and Threat Hunter: Should reference existing exceptions during investigations or understand filtered activity.View│Read-only access to the Exception Rules tab on theAll Issue Exception & Exclusion Rules page. Users can browse Exception Rules, view rule details including BIOC indicator definitions, and filter/search the exception rules grid, but cannot create, edit, or delete exception rules.│SOC Tier-2 Analyst and Threat Hunter: Should reference existing exceptions during investigations or understand filtered activity.View/Edit│Read and write access to the Exception Rules tab on theAll Issue Exception & Exclusion Rules page, including creating, editing, and deleting Exception Rules.│- SOC Tier-3 Analyst: Create exception rules for validated false positives.
- Security Engineer: Manage exception rules as part of tuning.
View/Edit│Read and write access to the Exception Rules tab on theAll Issue Exception & Exclusion Rules page, including creating, editing, and deleting Exception Rules.│- SOC Tier-3 Analyst: Create exception rules for validated false positives.
- Security Engineer: Manage exception rules as part of tuning.
Show markdown source
@@ -1,21 +1,17 @@ --- -description: Configure Exception Management Admin permissions. +description: Configure Exception Management Admin permissions in Cortex XSIAM. --- # Exception Management Admin permissions -**Exception Management Admin permissions** - -Exception Management Admin controls access to the **Exception Rules** tab on the **Issue Exclusions and Exceptions** page under **Settings** → **Issue Exception & Exclusion** . Exception rules differ from exclusion rules in that they define conditions under which issues are flagged as exceptions that may require approval before being acted upon, rather than being silently suppressed. +Exception Management Admin controls access to the **Exception Rules** tab on the **Issue Exclusions and Exceptions** page under **Settings** → **Issue Exception & Exclusion**. Exception rules differ from exclusion rules in that they define conditions under which issues are flagged as exceptions that may require approval before being acted upon, rather than being silently suppressed. {% hint style="info" %} -### Note - Requires **Issue Exclusions** permission (at least View) to access the page. Without Issue Exclusions, the entire page is hidden. {% endhint %} | Permission | Description | Roles Example | | ---------- | ------------------------------------------------------------------------------------------------------------------------------------------------------------------------------------------------------------------------------------------------------------------------------------------- | ---------------------------------------------------------------------------------------------------------------------------------------------------------------- | | None | No access to the **Exceptions Rules** tab on the **All Issue Exception & Exclusion Rules** page. | SOC Tier-1 Analyst: Should escalate false positives rather than create an exception. | | View | Read-only access to the Exception Rules tab on the**All Issue Exception & Exclusion Rules** page. Users can browse Exception Rules, view rule details including BIOC indicator definitions, and filter/search the exception rules grid, but cannot create, edit, or delete exception rules. | SOC Tier-2 Analyst and Threat Hunter: Should reference existing exceptions during investigations or understand filtered activity. | | View/Edit | Read and write access to **the Exception Rules** tab on the**All Issue Exception & Exclusion Rules** page, including creating, editing, and deleting Exception Rules. | <ul><li>SOC Tier-3 Analyst: Create exception rules for validated false positives.</li><li>Security Engineer: Manage exception rules as part of tuning.</li></ul> | -
▸ ▾ Issue Exclusions permissions modified +1 −5
xsiam/reference-and-developer-docs/role-based-access-control/exceptions-configuration-permissions/issue-exclusions-permissionsRead it on the Cortex docs portal ↗ Read it here → This file's diff on GitHub ↗
Before After@@ -1,24 +1,20 @@------description: Configure Issue Exclusions permissions.description: Configure Issue Exclusions permissions in Cortex XSIAM.------# Issue Exclusions permissions# Issue Exclusions permissionsIssue Exclusions permissionsIssue Exclusions controls access to the All Issue Exclusions and Exceptions page under Settings → Issue Exception & Exclusion, which includes the following:Issue Exclusions controls access to the All Issue Exclusions and Exceptions page under Settings → Issue Exception & Exclusion, which includes the following:• Exclusion Rules: Defines conditions (based on issue attributes, such as severity, source, category, etc.) that automatically suppress the creation or surfacing of matching issues. This is the primary mechanism for tuning out false positives and reducing issue noise.• Exclusion Rules: Defines conditions (based on issue attributes, such as severity, source, category, etc.) that automatically suppress the creation or surfacing of matching issues. This is the primary mechanism for tuning out false positives and reducing issue noise.• Exception Rules: Defines conditions under which issues are flagged as exceptions that may require approval before being acted upon, rather than being silently suppressed.• Exception Rules: Defines conditions under which issues are flagged as exceptions that may require approval before being acted upon, rather than being silently suppressed.hint infohint info### NoteThis permission controls access to the All Issue Exclusions and Exceptions page. If users require access to Exception Rules, they also need Exception Approver Admin View or View/Edit permission.This permission controls access to the All Issue Exclusions and Exceptions page. If users require access to Exception Rules, they also need Exception Approver Admin View or View/Edit permission.endhintendhintPermission│Description│Roles ExamplePermission│Description│Roles Example| ---------- | ------------------------------------------------------------------------------------------------------------------------------------------------------------------------------------------------------------------------------------------------------------------------------------------------------------------------------------------------------------------------------------------------- | ----------------------------------------------------------------------------------------------------------------------------------------------------------- || ---------- | ------------------------------------------------------------------------------------------------------------------------------------------------------------------------------------------------------------------------------------------------------------------------------------------------------------------------------------------------------------------------------------------------- | ----------------------------------------------------------------------------------------------------------------------------------------------------------- |None│No access to the All Issue Exception & Exclusion Rules page.│SOC Tier-1 Analyst: Should escalate false positives rather than create exclusions.None│No access to the All Issue Exception & Exclusion Rules page.│SOC Tier-1 Analyst: Should escalate false positives rather than create exclusions.View│Read-only access to the All Issue Exception & Exclusion Rules page. Users can browse both Exclusion Rules and Exception Rules tabs, view rule details (name, description, indicator conditions, BIOC indicators, status, modification time), search and filter rules, and export data, but cannot create new rules, edit existing rules, delete rules, or enable/disable rules on either tab.│SOC Tier-2 Analyst and Threat Hunter: Should reference existing exclusions during investigations or understand filtered activity.View│Read-only access to the All Issue Exception & Exclusion Rules page. Users can browse both Exclusion Rules and Exception Rules tabs, view rule details (name, description, indicator conditions, BIOC indicators, status, modification time), search and filter rules, and export data, but cannot create new rules, edit existing rules, delete rules, or enable/disable rules on either tab.│SOC Tier-2 Analyst and Threat Hunter: Should reference existing exclusions during investigations or understand filtered activity.View/Edit│Read and write access to theAll Issue Exception & Exclusion Rules page, including creating, editing, deleting, enabling, importing, and duplicating Exclusion Rules and Exception Rules.│- SOC Tier-3 Analyst: Create exclusions for validated false positives.
- Security Engineer: Manage exclusion rules as part of tuning.
View/Edit│Read and write access to theAll Issue Exception & Exclusion Rules page, including creating, editing, deleting, enabling, importing, and duplicating Exclusion Rules and Exception Rules.│- SOC Tier-3 Analyst: Create exclusions for validated false positives.
- Security Engineer: Manage exclusion rules as part of tuning.
Show markdown source
@@ -1,24 +1,20 @@ --- -description: Configure Issue Exclusions permissions. +description: Configure Issue Exclusions permissions in Cortex XSIAM. --- # Issue Exclusions permissions -**Issue Exclusions permissions** - Issue Exclusions controls access to the **All Issue Exclusions and Exceptions** page under **Settings** → **Issue Exception & Exclusion**, which includes the following: * Exclusion Rules: Defines conditions (based on issue attributes, such as severity, source, category, etc.) that automatically suppress the creation or surfacing of matching issues. This is the primary mechanism for tuning out false positives and reducing issue noise. * Exception Rules: Defines conditions under which issues are flagged as exceptions that may require approval before being acted upon, rather than being silently suppressed. {% hint style="info" %} -### Note - This permission controls access to the **All Issue Exclusions and Exceptions** page. If users require access to **Exception Rules**, they also need **Exception Approver Admin** View or View/Edit permission. {% endhint %} | Permission | Description | Roles Example | | ---------- | ------------------------------------------------------------------------------------------------------------------------------------------------------------------------------------------------------------------------------------------------------------------------------------------------------------------------------------------------------------------------------------------------- | ----------------------------------------------------------------------------------------------------------------------------------------------------------- | | None | No access to the **All Issue Exception & Exclusion Rules** page. | SOC Tier-1 Analyst: Should escalate false positives rather than create exclusions. | | View | Read-only access to the **All Issue Exception & Exclusion Rules** page. Users can browse both Exclusion Rules and Exception Rules tabs, view rule details (name, description, indicator conditions, BIOC indicators, status, modification time), search and filter rules, and export data, but cannot create new rules, edit existing rules, delete rules, or enable/disable rules on either tab. | SOC Tier-2 Analyst and Threat Hunter: Should reference existing exclusions during investigations or understand filtered activity. | | View/Edit | Read and write access to the**All Issue Exception & Exclusion Rules** page, including creating, editing, deleting, enabling, importing, and duplicating Exclusion Rules and Exception Rules. | <ul><li>SOC Tier-3 Analyst: Create exclusions for validated false positives.</li><li>Security Engineer: Manage exclusion rules as part of tuning.</li></ul> | -
▸ ▾ Exposure and Vulnerability Management permissions modified +9 −5
xsiam/reference-and-developer-docs/role-based-access-control/exposure-and-vulnerability-management-permissionsRead it on the Cortex docs portal ↗ Read it here → This file's diff on GitHub ↗
Before After@@ -1,15 +1,19 @@---description: >-Configure exposure, vulnerability, and attack surface management permissionsin Cortex XSIAM.---# Exposure and Vulnerability Management permissions# Exposure and Vulnerability Management permissionsThese sections relate to the full lifecycle of a vulnerability, from external discovery to internal tracking and risk prioritization.These sections relate to the full lifecycle of a vulnerability, from external discovery to internal tracking and risk prioritization.hint infohint info### NoteTo configure the active scanning tools used for vulnerability discovery, see Network Scanners permissions.To configure the active scanning tools used for vulnerability discovery, see Network Scanners permissions.endhintendhintFor detailed access guidance, see:For detailed access guidance, see:• Attack Surface permissions• attack-surface-permissions• Vulnerability Management permissions• vulnerability-management-permissions• Exposure Management permissions• exposure-management-permissionsShow markdown source
@@ -1,15 +1,19 @@ +--- +description: >- + Configure exposure, vulnerability, and attack surface management permissions + in Cortex XSIAM. +--- + # Exposure and Vulnerability Management permissions These sections relate to the full lifecycle of a vulnerability, from external discovery to internal tracking and risk prioritization. {% hint style="info" %} -### Note - To configure the active scanning tools used for vulnerability discovery, see [Network Scanners permissions](../configuration-permissions#UUID-be923730-0e8e-fc3a-3a2c-d1c5ab7be184). {% endhint %} For detailed access guidance, see: -* [Attack Surface permissions](exposure-and-vulnerability-management-permissions/attack-surface-permissions) -* [Vulnerability Management permissions](exposure-and-vulnerability-management-permissions/vulnerability-management-permissions) -* [Exposure Management permissions](exposure-and-vulnerability-management-permissions/exposure-management-permissions) +* [attack-surface-permissions](exposure-and-vulnerability-management-permissions/attack-surface-permissions "mention") +* [vulnerability-management-permissions](exposure-and-vulnerability-management-permissions/vulnerability-management-permissions "mention") +* [exposure-management-permissions](exposure-and-vulnerability-management-permissions/exposure-management-permissions "mention") -
▸ ▾ Attack Surface permissions modified +1 −1
xsiam/reference-and-developer-docs/role-based-access-control/exposure-and-vulnerability-management-permissions/attack-surface-permissionsRead it on the Cortex docs portal ↗ Read it here → This file's diff on GitHub ↗
Before After@@ -1,10 +1,10 @@------description: Configure Attack Surface permissions.description: Configure Attack Surface Management permissions in Cortex XSIAM.------# Attack Surface permissions# Attack Surface permissionsAttack Surface Management (ASM) identifies exposed assets, misconfigurations, and vulnerabilities on your organization's external-facing attack surface. This permission covers the following:Attack Surface Management (ASM) identifies exposed assets, misconfigurations, and vulnerabilities on your organization's external-facing attack surface. This permission covers the following:• Attack Surface Rules: Detection rules that generate issues when specific external exposures are found (e.g., exposed RDP, insecure SSH).• Attack Surface Rules: Detection rules that generate issues when specific external exposures are found (e.g., exposed RDP, insecure SSH).• Vulnerability Testing: An active scanning module that performs non-intrusive and intrusive tests against discovered services to validate CVEs and exposures, generating CVSS/EPSS scores.• Vulnerability Testing: An active scanning module that performs non-intrusive and intrusive tests against discovered services to validate CVEs and exposures, generating CVSS/EPSS scores.Show markdown source
@@ -1,10 +1,10 @@
 ---
-description: Configure Attack Surface permissions.
+description: Configure Attack Surface Management permissions in Cortex XSIAM.
 ---

 # Attack Surface permissions

 Attack Surface Management (ASM) identifies exposed assets, misconfigurations, and vulnerabilities on your organization's external-facing attack surface. This permission covers the following:

 * Attack Surface Rules: Detection rules that generate issues when specific external exposures are found (e.g., exposed RDP, insecure SSH).
 * Vulnerability Testing: An active scanning module that performs non-intrusive and intrusive tests against discovered services to validate CVEs and exposures, generating CVSS/EPSS scores.
-
▸ ▾ Exposure Management permissions modified +1 −1
xsiam/reference-and-developer-docs/role-based-access-control/exposure-and-vulnerability-management-permissions/exposure-management-permissionsRead it on the Cortex docs portal ↗ Read it here → This file's diff on GitHub ↗
Before After@@ -1,10 +1,10 @@------description: Configure Exposure Management permissions.description: Configure Exposure Management permissions in Cortex XSIAM.------# Exposure Management permissions# Exposure Management permissionsExposure Management permissions provide a risk-based approach to prioritizing and remediating security exposures across your organization. Exposure Management ties together vulnerability data, attack-surface context, and security-control posture to provide actionable risk prioritization.Exposure Management permissions provide a risk-based approach to prioritizing and remediating security exposures across your organization. Exposure Management ties together vulnerability data, attack-surface context, and security-control posture to provide actionable risk prioritization.hint infohint info### Notice### NoticeShow markdown source
@@ -1,10 +1,10 @@ --- -description: Configure Exposure Management permissions. +description: Configure Exposure Management permissions in Cortex XSIAM. --- # Exposure Management permissions Exposure Management permissions provide a risk-based approach to prioritizing and remediating security exposures across your organization. Exposure Management ties together vulnerability data, attack-surface context, and security-control posture to provide actionable risk prioritization. {% hint style="info" %} ### Notice -
▸ ▾ Vulnerability Management permissions modified +1 −1
xsiam/reference-and-developer-docs/role-based-access-control/exposure-and-vulnerability-management-permissions/vulnerability-management-permissionsRead it on the Cortex docs portal ↗ Read it here → This file's diff on GitHub ↗
Before After@@ -1,10 +1,10 @@------description: Configure Vulnerability Management permissions.description: Configure Vulnerability Management permissions in Cortex XSIAM.------# Vulnerability Management permissions# Vulnerability Management permissionsControls access to Vulnerability Management, which provides a centralized view of vulnerabilities across your organization to track, prioritize, and remediate discovered CVEs and exposures.Controls access to Vulnerability Management, which provides a centralized view of vulnerabilities across your organization to track, prioritize, and remediate discovered CVEs and exposures.hint infohint info### Note### NoteShow markdown source
@@ -1,10 +1,10 @@ --- -description: Configure Vulnerability Management permissions. +description: Configure Vulnerability Management permissions in Cortex XSIAM. --- # Vulnerability Management permissions Controls access to Vulnerability Management, which provides a centralized view of vulnerabilities across your organization to track, prioritize, and remediate discovered CVEs and exposures. {% hint style="info" %} ### Note -
▸ ▾ Help permissions modified +6 −0
xsiam/reference-and-developer-docs/role-based-access-control/help-permissionsRead it on the Cortex docs portal ↗ Read it here → This file's diff on GitHub ↗
Before After@@ -1,8 +1,14 @@---description: >-Control access to create and manage in-product technical support cases inCortex XSIAM.---# Help permissions# Help permissionsSupportSupportAllows users to create, view, and manage technical support cases by going to Help → In-App Help Center.Allows users to create, view, and manage technical support cases by going to Help → In-App Help Center.For more information, see In-product support case creation.For more information, see In-product support case creation.Show markdown source
@@ -1,8 +1,14 @@
+---
+description: >-
+  Control access to create and manage in-product technical support cases  in
+  Cortex XSIAM.
+---
+
 # Help permissions

 **Support**

 Allows users to create, view, and manage technical support cases by going to **Help** → **In-App Help Center**.

 For more information, see [In-product support case creation](../../learn-about-cortex-xsiam/in-product-support-case-creation).
-
▸ ▾ Inventory - Agent permissions modified +11 −1
xsiam/reference-and-developer-docs/role-based-access-control/inventory-agent-permissionsRead it on the Cortex docs portal ↗ Read it here → This file's diff on GitHub ↗
Before After@@ -1,16 +1,26 @@------description: Configure permissions for Endpoints (XDR Agent).description: Configure permissions for Endpoints (XDR Agent) in Cortex XSIAM.------# Inventory - Agent permissions# Inventory - Agent permissionsThis section controls access to endpoint agent management, security policies, host firewalls, device controls, and agent lifecycles.This section controls access to endpoint agent management, security policies, host firewalls, device controls, and agent lifecycles.• agent-administrations• agent-groups• agent-prevention-policies• global-exceptions• agent-profiles• agent-extension-policies• agent-installations• host-firewall• device-controlhint warninghint warning### Caution### Caution• The Master switch: Setting Agent Administrations to View/Edit acts as a master switch that unlocks highly granular execution checkboxes (such as Agent Management, Pause Protection, and Agent Scan). Leaving these unchecked allows the user to view the administration without the ability to execute the actions.• The Master switch: Setting Agent Administrations to View/Edit acts as a master switch that unlocks highly granular execution checkboxes (such as Agent Management, Pause Protection, and Agent Scan). Leaving these unchecked allows the user to view the administration without the ability to execute the actions.• High-Risk Operations:• High-Risk Operations:• Pause Protection temporarily disables malware and exploit prevention, leaving endpoints actively vulnerable to threats.• Pause Protection temporarily disables malware and exploit prevention, leaving endpoints actively vulnerable to threats.• Token Revocation permanently disconnects agents until they are manually re-enrolled.• Token Revocation permanently disconnects agents until they are manually re-enrolled.• Global Exceptions bypass prevention policies and can create severe security blind spots; implement strict change management workflows• Global Exceptions bypass prevention policies and can create severe security blind spots; implement strict change management workflowsShow markdown source
@@ -1,16 +1,26 @@ --- -description: Configure permissions for Endpoints (XDR Agent). +description: Configure permissions for Endpoints (XDR Agent) in Cortex XSIAM. --- # Inventory - Agent permissions This section controls access to endpoint agent management, security policies, host firewalls, device controls, and agent lifecycles. +* [agent-administrations](inventory-agent-permissions/agent-administrations "mention") +* [agent-groups](inventory-agent-permissions/agent-groups "mention") +* [agent-prevention-policies](inventory-agent-permissions/agent-prevention-policies "mention") +* [global-exceptions](inventory-agent-permissions/global-exceptions "mention") +* [agent-profiles](inventory-agent-permissions/agent-profiles "mention") +* [agent-extension-policies](inventory-agent-permissions/agent-extension-policies "mention") +* [agent-installations](inventory-agent-permissions/agent-installations "mention") +* [host-firewall](inventory-agent-permissions/host-firewall "mention") +* [device-control](inventory-agent-permissions/device-control "mention") + {% hint style="warning" %} ### Caution * The Master switch: Setting **Agent Administrations** to View/Edit acts as a master switch that unlocks highly granular execution checkboxes (such as Agent Management, Pause Protection, and Agent Scan). Leaving these unchecked allows the user to view the administration without the ability to execute the actions. * High-Risk Operations: * Pause Protection temporarily disables malware and exploit prevention, leaving endpoints actively vulnerable to threats. * Token Revocation permanently disconnects agents until they are manually re-enrolled. * Global Exceptions bypass prevention policies and can create severe security blind spots; implement strict change management workflows -
▸ ▾ Agent Administrations modified +7 −1
xsiam/reference-and-developer-docs/role-based-access-control/inventory-agent-permissions/agent-administrationsRead it on the Cortex docs portal ↗ Read it here → This file's diff on GitHub ↗
Before After@@ -1,8 +1,14 @@---description: >-Control access to endpoint inventory, agent health, and lifecycle operationsin Cortex XSIAM.---# Agent Administrations# Agent AdministrationsAgent Administration provides comprehensive endpoint and agent management capabilities, such as viewing all managed endpoints and their status, monitoring agent health, version, and connectivity, and performing agent operations (upgrade, uninstall, restart).Agent Administration provides comprehensive endpoint and agent management capabilities, such as viewing all managed endpoints and their status, monitoring agent health, version, and connectivity, and performing agent operations (upgrade, uninstall, restart).Permissions│Description│Roles ExamplePermissions│Description│Roles Example| ----------- | ------------------------------------------------------------------------------------------------------------------------------------------------------------------------ | --------------------------------------------------------------------------------------------------------------------------------------------------------------------------------------------------------------------------------------------------------------------- || ----------- | ------------------------------------------------------------------------------------------------------------------------------------------------------------------------ | --------------------------------------------------------------------------------------------------------------------------------------------------------------------------------------------------------------------------------------------------------------------- |None│No access to the Endpoints menu (Inventory → Endpoints, including access to the All Endpoints page. Limited access to endpoint data in cases and in widgets.│None│No access to the Endpoints menu (Inventory → Endpoints, including access to the All Endpoints page. Limited access to endpoint data in cases and in widgets.│View│Read-only access to the Endpoints menu, including the All Endpoints page, which enables users to view, for example, endpoint lists, details, upgrade, and uninstall.│- SOC Tier-1 Analyst: Should focus on triage and escalation, not endpoint management. Accidental changes could impact protection.
- Threat Hunter: Focus on detection, not endpoint management. Should request actions through proper channels.
View│Read-only access to the Endpoints menu, including the All Endpoints page, which enables users to view, for example, endpoint lists, details, upgrade, and uninstall.│- SOC Tier-1 Analyst: Should focus on triage and escalation, not endpoint management. Accidental changes could impact protection.
- Threat Hunter: Focus on detection, not endpoint management. Should request actions through proper channels.
@@ -12,17 +18,17 @@ Agent Administration provides comprehensive endpoint and agent management capabiSub-permission│Description│Roles ExampleSub-permission│Description│Roles Example| ---------------------- | ------------------------------------------------------------------------------------------------------------------------------------------------------------------------------------------------------------------------------------------------------------------------------------------------------------------------------------------------------------------------------------------------------------------------------------------------------------------------------------------------------------------------------------------------------------------------------------------------------------------------------------------------------------------------------------------------------------------------------------------------------------------------------------------------------------------------------------------------------------------------------------------------------------------------------------------------------------------------------------------------------------------------------------------------------------------------------------------------------------------------------------------------------------------------------------------------------------------------------------------------------------------------------------------------------------------------------------------------------------------------------------------------------------- | ------------------------------------------------------------------------------------------------------------------------------------------------------------ || ---------------------- | ------------------------------------------------------------------------------------------------------------------------------------------------------------------------------------------------------------------------------------------------------------------------------------------------------------------------------------------------------------------------------------------------------------------------------------------------------------------------------------------------------------------------------------------------------------------------------------------------------------------------------------------------------------------------------------------------------------------------------------------------------------------------------------------------------------------------------------------------------------------------------------------------------------------------------------------------------------------------------------------------------------------------------------------------------------------------------------------------------------------------------------------------------------------------------------------------------------------------------------------------------------------------------------------------------------------------------------------------------------------------------------------------------------- | ------------------------------------------------------------------------------------------------------------------------------------------------------------ |Agent Management│High risk. Controls core agent lifecycle and the following configuration operations by right-clicking an endpoint from the All Endpoints page (Inventory → Endpoints → All Endpoints → Endpoint Control):
Open in Interactive Mode
Note
Opens an interactive terminal session on the selected endpoint where you can run scripts in real-time. You need to add View/Edit permission for Agent Script and Scripts under Investigation and Response permissions.
- Perform Heartbeat
- Change Endpoint Alias
- Upgrade Agent version
- Set/Disable Agent Proxy
- Uninstall Agent
- Delete Endpoint
- Disable Capabilities
- Force Check-in
- Restart Agent
- Clear Agent Database
- Exclude/Include endpoints from auto upgrade
- Assign/Remove Endpoint Tags
│Note
To access advanced endpoint actions like Force Check-in, Restart, and Clear Agent Database, users must hold Alt/Option while right-clicking the endpoint to open the advanced Endpoint Control menu.
- Security Engineer: Primary responsibility for agent deployment, upgrades, and maintenance.
Agent Management│High risk. Controls core agent lifecycle and the following configuration operations by right-clicking an endpoint from the All Endpoints page (Inventory → Endpoints → All Endpoints → Endpoint Control):
Open in Interactive Mode
Note
Opens an interactive terminal session on the selected endpoint where you can run scripts in real-time. You need to add View/Edit permission for Agent Script and Scripts under Investigation and Response permissions.
- Perform Heartbeat
- Change Endpoint Alias
- Upgrade Agent version
- Set/Disable Agent Proxy
- Uninstall Agent
- Delete Endpoint
- Disable Capabilities
- Force Check-in
- Restart Agent
- Clear Agent Database
- Exclude/Include endpoints from auto upgrade
- Assign/Remove Endpoint Tags
│Note
To access advanced endpoint actions like Force Check-in, Restart, and Clear Agent Database, users must hold Alt/Option while right-clicking the endpoint to open the advanced Endpoint Control menu.
- Security Engineer: Primary responsibility for agent deployment, upgrades, and maintenance.
Retrieve Agent Data│Enables retrieval of detailed agent diagnostic information, logs, and operational data by right-clicking an endpoint and selecting Endpoint Control → Retrieve from Support File from the ALL Endpoints page.Users can also select Retrieve Support File Password from the Key icon on the All Endpoints page (top right-hand corner).
│SOC 2 and 3 Analysts, and Security Engineer: Agent troubleshooting and support.Retrieve Agent Data│Enables retrieval of detailed agent diagnostic information, logs, and operational data by right-clicking an endpoint and selecting Endpoint Control → Retrieve from Support File from the ALL Endpoints page.Users can also select Retrieve Support File Password from the Key icon on the All Endpoints page (top right-hand corner).
│SOC 2 and 3 Analysts, and Security Engineer: Agent troubleshooting and support.Agent Scan│Initiate on-demand malware scans on endpoints by right-clicking an endpoint,Security Operations → Initiate Malware Scan.│All roles. SOC Tier-1 Analysts may need View permission with approval workflow. Initiating scans can impact endpoint performance. Should escalate to Tier-2.Agent Scan│Initiate on-demand malware scans on endpoints by right-clicking an endpoint,Security Operations → Initiate Malware Scan.│All roles. SOC Tier-1 Analysts may need View permission with approval workflow. Initiating scans can impact endpoint performance. Should escalate to Tier-2.Change Managing Server│Reassign agents to different Cortex XSIAM management servers by right-clicking an endpoint and selecting Endpoint Control → Change managing server. Useful for disaster recovery, load balancing across management infrastructure, and migrating endpoints between environments (development/production). For more information, seeMove agents between managing servers.│Security Engineer: May be needed for infrastructure changes or disaster recovery (with change management approval).Change Managing Server│Reassign agents to different Cortex XSIAM management servers by right-clicking an endpoint and selecting Endpoint Control → Change managing server. Useful for disaster recovery, load balancing across management infrastructure, and migrating endpoints between environments (development/production). For more information, seeMove agents between managing servers.│Security Engineer: May be needed for infrastructure changes or disaster recovery (with change management approval).Pause Protection│High risk. Temporarily disable agent protection modules on endpoints by right-clicking an endpoint and selecting Endpoint Control → Pause Endpoint Protection.
│Caution
Pausing protection leaves endpoints vulnerable to threats. This should only be used for troubleshooting or software installation that conflicts with protection.
Pause Protection│High risk. Temporarily disable agent protection modules on endpoints by right-clicking an endpoint and selecting Endpoint Control → Pause Endpoint Protection.
│Caution
Pausing protection leaves endpoints vulnerable to threats. This should only be used for troubleshooting or software installation that conflicts with protection.
Agent Token Management│High risk. Manage agent authentication tokens and credentials by right-clicking an endpoint and selecting Endpoint Control → View Token, or Set Temporary Token. Tokens can also be managed on the All Endpoints page when clicking the Key button (top right-hand side of the page).
│Caution
Token regeneration will temporarily disconnect agents until they receive the new token. Token revocation will permanently disconnect agents until they are manually re-enrolled.
Agent Token Management│High risk. Manage agent authentication tokens and credentials by right-clicking an endpoint and selecting Endpoint Control → View Token, or Set Temporary Token. Tokens can also be managed on the All Endpoints page when clicking the Key button (top right-hand side of the page).
│Caution
Token regeneration will temporarily disconnect agents until they receive the new token. Token revocation will permanently disconnect agents until they are manually re-enrolled.
Required and recommended permissionsRequired and recommended permissionsConsider adding the following permissions:Consider adding the following permissions:Permission│Permission Level│ReasonPermission│Permission Level│Reason| ------------------------- | ----------------- | -------------------------------------------------------------------------------------------------------------------------------------------------------------------------------------------------------------------------------------------------------------------------------------------------------------------------------------------------------------------------------------------------------------------------------------------------------------------------------------------------------------------------------------------------------------------------------------------------------------------------------------------------------------------------------------------------------------------------------------------------------------------------------------------------------------------------------------------------------------------------- || ------------------------- | ----------------- | -------------------------------------------------------------------------------------------------------------------------------------------------------------------------------------------------------------------------------------------------------------------------------------------------------------------------------------------------------------------------------------------------------------------------------------------------------------------------------------------------------------------------------------------------------------------------------------------------------------------------------------------------------------------------------------------------------------------------------------------------------------------------------------------------------------------------------------------------------------------------- |Cases & Issues│View or View/Edit│- View: Strongly recommended. Without case access, users cannot follow endpoint-to-case investigation links. Also, Agent Scans are often triggered during case response. Case context helps correlate scan results with active investigations.
- View: Recommended for Retrieve Agent Data and Pause Protection. Retrieval is often triggered during case investigation. Case context helps document why data was retrieved. Pausing protection should only be done in the context of an active investigation or documented change. Case access provides the justification context.
Cases & Issues│View or View/Edit│- View: Strongly recommended. Without case access, users cannot follow endpoint-to-case investigation links. Also, Agent Scans are often triggered during case response. Case context helps correlate scan results with active investigations.
- View: Recommended for Retrieve Agent Data and Pause Protection. Retrieval is often triggered during case investigation. Case context helps document why data was retrieved. Pausing protection should only be done in the context of an active investigation or documented change. Case access provides the justification context.
Show markdown source
@@ -1,8 +1,14 @@ +--- +description: >- + Control access to endpoint inventory, agent health, and lifecycle operations + in Cortex XSIAM. +--- + # Agent Administrations Agent Administration provides comprehensive endpoint and agent management capabilities, such as viewing all managed endpoints and their status, monitoring agent health, version, and connectivity, and performing agent operations (upgrade, uninstall, restart). | Permissions | Description | Roles Example | | ----------- | ------------------------------------------------------------------------------------------------------------------------------------------------------------------------ | --------------------------------------------------------------------------------------------------------------------------------------------------------------------------------------------------------------------------------------------------------------------- | | None | No access to the Endpoints menu (**Inventory** → **Endpoints**, including access to the **All Endpoints** page. Limited access to endpoint data in cases and in widgets. | | | View | Read-only access to the Endpoints menu, including the **All Endpoints** page, which enables users to view, for example, endpoint lists, details, upgrade, and uninstall. | <ul><li>SOC Tier-1 Analyst: Should focus on triage and escalation, not endpoint management. Accidental changes could impact protection.</li><li>Threat Hunter: Focus on detection, not endpoint management. Should request actions through proper channels.</li></ul> | @@ -12,17 +18,17 @@ Agent Administration provides comprehensive endpoint and agent management capabi | Sub-permission | Description | Roles Example | | ---------------------- | ------------------------------------------------------------------------------------------------------------------------------------------------------------------------------------------------------------------------------------------------------------------------------------------------------------------------------------------------------------------------------------------------------------------------------------------------------------------------------------------------------------------------------------------------------------------------------------------------------------------------------------------------------------------------------------------------------------------------------------------------------------------------------------------------------------------------------------------------------------------------------------------------------------------------------------------------------------------------------------------------------------------------------------------------------------------------------------------------------------------------------------------------------------------------------------------------------------------------------------------------------------------------------------------------------------------------------------------------------------------------------------------------------------- | ------------------------------------------------------------------------------------------------------------------------------------------------------------ | | Agent Management | <p>High risk. Controls core agent lifecycle and the following configuration operations by right-clicking an endpoint from the <strong>All Endpoints</strong> page (<strong>Inventory</strong> → <strong>Endpoints</strong> → <strong>All Endpoints</strong> → <strong>Endpoint Control</strong>):</p><ul><li><p>Open in Interactive Mode</p><div data-gb-custom-block data-tag="hint" data-style="info" class="hint hint-info"><p><strong>Note</strong></p><p>Opens an interactive terminal session on the selected endpoint where you can run scripts in real-time. You need to add View/Edit permission for Agent Script and Scripts under Investigation and Response permissions.</p></div></li><li>Perform Heartbeat</li><li>Change Endpoint Alias</li><li>Upgrade Agent version</li><li>Set/Disable Agent Proxy</li><li>Uninstall Agent</li><li>Delete Endpoint</li><li>Disable Capabilities</li><li>Force Check-in</li><li>Restart Agent</li><li>Clear Agent Database</li><li>Exclude/Include endpoints from auto upgrade</li><li>Assign/Remove Endpoint Tags</li></ul><div data-gb-custom-block data-tag="hint" data-style="info" class="hint hint-info"><p><strong>Note</strong></p><p>To access advanced endpoint actions like Force Check-in, Restart, and Clear Agent Database, users must hold Alt/Option while right-clicking the endpoint to open the advanced Endpoint Control menu.</p></div> | <ul><li>Security Engineer: Primary responsibility for agent deployment, upgrades, and maintenance.</li></ul> | | Retrieve Agent Data | <p>Enables retrieval of detailed agent diagnostic information, logs, and operational data by right-clicking an endpoint and selecting <strong>Endpoint Control</strong> → <strong>Retrieve from Support File</strong> from the <strong>ALL Endpoints</strong> page.</p><p>Users can also select <strong>Retrieve Support File Password</strong> from the Key icon on the <strong>All Endpoints</strong> page (top right-hand corner).</p> | SOC 2 and 3 Analysts, and Security Engineer: Agent troubleshooting and support. | | Agent Scan | Initiate on-demand malware scans on endpoints by right-clicking an endpoint,**Security Operations** → **Initiate Malware Scan**. | All roles. SOC Tier-1 Analysts may need View permission with approval workflow. Initiating scans can impact endpoint performance. Should escalate to Tier-2. | | Change Managing Server | Reassign agents to different Cortex XSIAM management servers by right-clicking an endpoint and selecting **Endpoint Control** → **Change managing server**. Useful for disaster recovery, load balancing across management infrastructure, and migrating endpoints between environments (development/production). For more information, see[Move agents between managing servers](../../../../protect-your-endpoints/endpoint-security/install-and-manage-endpoints#UUID-3e8955af-79fd-ba81-68f0-be10eb88ed84). | Security Engineer: May be needed for infrastructure changes or disaster recovery (with change management approval). | | Pause Protection | <p>High risk. Temporarily disable agent protection modules on endpoints by right-clicking an endpoint and selecting <strong>Endpoint Control</strong> → <strong>Pause Endpoint Protection</strong>.</p><div data-gb-custom-block data-tag="hint" data-style="warning" class="hint hint-warning"><p><strong>Caution</strong></p><p>Pausing protection leaves endpoints vulnerable to threats. This should only be used for troubleshooting or software installation that conflicts with protection.</p></div> | | -| Agent Token Management | <p>High risk. Manage agent authentication tokens and credentials by right-clicking an endpoint and selecting <strong>Endpoint Control</strong> → <strong>View Token</strong>, or <strong>Set Temporary Token</strong>. Tokens can also be managed on the All Endpoints page when clicking the <strong>Key</strong> button (top right-hand side of the page). </p><div data-gb-custom-block data-tag="hint" data-style="warning" class="hint hint-warning"><p><strong>Caution</strong></p><p>Token regeneration will temporarily disconnect agents until they receive the new token. Token revocation will permanently disconnect agents until they are manually re-enrolled.</p></div> | | +| Agent Token Management | <p>High risk. Manage agent authentication tokens and credentials by right-clicking an endpoint and selecting <strong>Endpoint Control</strong> → <strong>View Token</strong>, or <strong>Set Temporary Token</strong>. Tokens can also be managed on the All Endpoints page when clicking the <strong>Key</strong> button (top right-hand side of the page).</p><div data-gb-custom-block data-tag="hint" data-style="warning" class="hint hint-warning"><p><strong>Caution</strong></p><p>Token regeneration will temporarily disconnect agents until they receive the new token. Token revocation will permanently disconnect agents until they are manually re-enrolled.</p></div> | | **Required and recommended permissions** Consider adding the following permissions: | Permission | Permission Level | Reason | | ------------------------- | ----------------- | -------------------------------------------------------------------------------------------------------------------------------------------------------------------------------------------------------------------------------------------------------------------------------------------------------------------------------------------------------------------------------------------------------------------------------------------------------------------------------------------------------------------------------------------------------------------------------------------------------------------------------------------------------------------------------------------------------------------------------------------------------------------------------------------------------------------------------------------------------------------------- | | Cases & Issues | View or View/Edit | <ul><li>View: Strongly recommended. Without case access, users cannot follow endpoint-to-case investigation links. Also, Agent Scans are often triggered during case response. Case context helps correlate scan results with active investigations.</li><li>View: Recommended for Retrieve Agent Data and Pause Protection. Retrieval is often triggered during case investigation. Case context helps document why data was retrieved. Pausing protection should only be done in the context of an active investigation or documented change. Case access provides the justification context.</li></ul> |
-
▸ ▾ Agent Extension Policies modified +5 −1
xsiam/reference-and-developer-docs/role-based-access-control/inventory-agent-permissions/agent-extension-policiesRead it on the Cortex docs portal ↗ Read it here → This file's diff on GitHub ↗
Before After@@ -1,11 +1,15 @@---description: Configure endpoint extension policies and capabilities in Cortex XSIAM.---# Agent Extension Policies# Agent Extension PoliciesManage profiles for additional endpoint capabilities, such as configuring third-party integrations, managing agent extension modules, and defining extension deployment policies.Manage profiles for additional endpoint capabilities, such as configuring third-party integrations, managing agent extension modules, and defining extension deployment policies.hint infohint info### Note### NoteAgent Extension Policies enable access to configure extension policies, profiles, and exceptions. Device Control rules perform device control actions within the extension policies.Agent Extension Policies enable access to configure extension policies, profiles, and exceptions. Device Control rules perform device control actions within the extension policies.endhintendhintPermissions│Description│Roles ExamplePermissions│Description│Roles ExampleShow markdown source
@@ -1,11 +1,15 @@ +--- +description: Configure endpoint extension policies and capabilities in Cortex XSIAM. +--- + # Agent Extension Policies -Manage profiles for additional endpoint capabilities, such as configuring third-party integrations, managing agent extension modules, and defining extension deployment policies.  +Manage profiles for additional endpoint capabilities, such as configuring third-party integrations, managing agent extension modules, and defining extension deployment policies. {% hint style="info" %} ### Note Agent Extension Policies enable access to configure extension policies, profiles, and exceptions. Device Control rules perform device control actions within the extension policies. {% endhint %} | Permissions | Description | Roles Example | -
▸ ▾ Agent Groups modified +4 −0
xsiam/reference-and-developer-docs/role-based-access-control/inventory-agent-permissions/agent-groupsRead it on the Cortex docs portal ↗ Read it here → This file's diff on GitHub ↗
Before After@@ -1,8 +1,12 @@---description: Manage endpoint groups and policy targeting in Cortex XSIAM.---# Agent Groups# Agent GroupsCreate and manage logical groups of endpoints. These groups are used to assign specific security policies and target actions to specific subsets of devices.Create and manage logical groups of endpoints. These groups are used to assign specific security policies and target actions to specific subsets of devices.Permissions│Description│Roles ExamplePermissions│Description│Roles Example| ----------- | --------------------------------------------------------------------------------------------------------------------------------------------- | ----------------------------------------------------------------------------------------------------------------------------------------------------------------------------------------------------------------------------------------------------------------------------------------------------------------------------------------------------------------------------------------------------------------------- || ----------- | --------------------------------------------------------------------------------------------------------------------------------------------- | ----------------------------------------------------------------------------------------------------------------------------------------------------------------------------------------------------------------------------------------------------------------------------------------------------------------------------------------------------------------------------------------------------------------------- |None│No access to the Groups page (Inventory → Endpoints → Groups.│None│No access to the Groups page (Inventory → Endpoints → Groups.│View│Read-only access to the Endpoint Groups page, including read-only access to agent group configurations, group details, members, and criteria.│- SOC Tier 1 Analyst: Understanding which group an endpoint belongs to helps contextualize issues.
- SOC Tier 2 Analyst: Group membership is important for understanding applied policies.
- SOC Tier 3 Analyst: Full visibility helps understand policy application and identify misconfigurations.
- Threat Hunter: Understanding endpoint grouping helps target hunting activities
View│Read-only access to the Endpoint Groups page, including read-only access to agent group configurations, group details, members, and criteria.│- SOC Tier 1 Analyst: Understanding which group an endpoint belongs to helps contextualize issues.
- SOC Tier 2 Analyst: Group membership is important for understanding applied policies.
- SOC Tier 3 Analyst: Full visibility helps understand policy application and identify misconfigurations.
- Threat Hunter: Understanding endpoint grouping helps target hunting activities
Show markdown source
@@ -1,8 +1,12 @@
+---
+description: Manage endpoint groups and policy targeting in Cortex XSIAM.
+---
+
 # Agent Groups

 Create and manage logical groups of endpoints. These groups are used to assign specific security policies and target actions to specific subsets of devices.

 | Permissions | Description                                                                                                                                   | Roles Example                                                                                                                                                                                                                                                                                                                                                                                                           |
 | ----------- | --------------------------------------------------------------------------------------------------------------------------------------------- | ----------------------------------------------------------------------------------------------------------------------------------------------------------------------------------------------------------------------------------------------------------------------------------------------------------------------------------------------------------------------------------------------------------------------- |
 | None        | No access to the Groups page (Inventory → Endpoints → Groups.                                                                                 |                                                                                                                                                                                                                                                                                                                                                                                                                         |
 | View        | Read-only access to the Endpoint Groups page, including read-only access to agent group configurations, group details, members, and criteria. | <ul><li>SOC Tier 1 Analyst: Understanding which group an endpoint belongs to helps contextualize issues.</li><li>SOC Tier 2 Analyst: Group membership is important for understanding applied policies.</li><li>SOC Tier 3 Analyst: Full visibility helps understand policy application and identify misconfigurations.</li><li>Threat Hunter: Understanding endpoint grouping helps target hunting activities</li></ul> |
-
▸ ▾ Agent Installations modified +4 −0
xsiam/reference-and-developer-docs/role-based-access-control/inventory-agent-permissions/agent-installationsRead it on the Cortex docs portal ↗ Read it here → This file's diff on GitHub ↗
Before After@@ -1,8 +1,12 @@---description: Manage Cortex XSIAM agent installation packages and deployments.---# Agent Installations# Agent InstallationsAgent InstallationsAgent InstallationsManages the deployment of XDR agents, such as downloading agent installation packages, viewing installation status and history, and tracking deployment progress.Manages the deployment of XDR agents, such as downloading agent installation packages, viewing installation status and history, and tracking deployment progress.For more information, see Create an agent installation package.For more information, see Create an agent installation package.Show markdown source
@@ -1,8 +1,12 @@
+---
+description: Manage Cortex XSIAM agent installation packages and deployments.
+---
+
 # Agent Installations

 **Agent Installations**

 Manages the deployment of XDR agents, such as downloading agent installation packages, viewing installation status and history, and tracking deployment progress.

 For more information, see [Create an agent installation package](../../../../onboard-cortex-xsiam/deployment-steps/install-cortex-xdr-agents#UUID-de47a28d-9479-0584-e7b5-5ebd6f68fdce).
-
▸ ▾ Agent Prevention Policies modified +6 −0
xsiam/reference-and-developer-docs/role-based-access-control/inventory-agent-permissions/agent-prevention-policiesRead it on the Cortex docs portal ↗ Read it here → This file's diff on GitHub ↗
Before After@@ -1,8 +1,14 @@---description: >-Configure endpoint prevention policies and protection settings in CortexXSIAM.---# Agent Prevention Policies# Agent Prevention PoliciesAgent Prevention Policies define the security posture for endpoints.Agent Prevention Policies define the security posture for endpoints.Permissions│Description│Roles ExamplePermissions│Description│Roles Example| ----------- | --------------------------------------------------------------------------------------------------------------------------------------------------------------------------------------------- | ------------------------------------------------------------------------------------------------------------------------------------------------------------------------------------------------------------------------------------------------------------------------------------------------------- || ----------- | --------------------------------------------------------------------------------------------------------------------------------------------------------------------------------------------- | ------------------------------------------------------------------------------------------------------------------------------------------------------------------------------------------------------------------------------------------------------------------------------------------------------- |None│Cannot view the Policy Rules page (Inventory → Endpoints → Policy Management → Prevention → Policy Rules), which includes endpoint details, or view policy effectiveness.│None│Cannot view the Policy Rules page (Inventory → Endpoints → Policy Management → Prevention → Policy Rules), which includes endpoint details, or view policy effectiveness.│View│View the Prevention Policies menu, including viewing the policies list, details, protection settings, and viewing assigned groups.│- SOC Tier-1 Analyst: Understanding policies helps explain why actions were blocked or allowed.
- SOC Tier-2 Analyst: Policy visibility is essential for understanding protection posture
- Threat Hunter: Understanding prevention policies helps identify detection gaps.
View│View the Prevention Policies menu, including viewing the policies list, details, protection settings, and viewing assigned groups.│- SOC Tier-1 Analyst: Understanding policies helps explain why actions were blocked or allowed.
- SOC Tier-2 Analyst: Policy visibility is essential for understanding protection posture
- Threat Hunter: Understanding prevention policies helps identify detection gaps.
Show markdown source
@@ -1,8 +1,14 @@
+---
+description: >-
+  Configure endpoint prevention policies and protection settings in Cortex
+  XSIAM.
+---
+
 # Agent Prevention Policies

 Agent Prevention Policies define the security posture for endpoints.

 | Permissions | Description                                                                                                                                                                                   | Roles Example                                                                                                                                                                                                                                                                                           |
 | ----------- | --------------------------------------------------------------------------------------------------------------------------------------------------------------------------------------------- | ------------------------------------------------------------------------------------------------------------------------------------------------------------------------------------------------------------------------------------------------------------------------------------------------------- |
 | None        | Cannot view the Policy Rules page (**Inventory** → **Endpoints** → **Policy Management** → **Prevention** → **Policy Rules**), which includes endpoint details, or view policy effectiveness. |                                                                                                                                                                                                                                                                                                         |
 | View        | View the Prevention Policies menu, including viewing the policies list, details, protection settings, and viewing assigned groups.                                                            | <ul><li>SOC Tier-1 Analyst: Understanding policies helps explain why actions were blocked or allowed.</li><li>SOC Tier-2 Analyst: Policy visibility is essential for understanding protection posture</li><li>Threat Hunter: Understanding prevention policies helps identify detection gaps.</li></ul> |
-
▸ ▾ Agent Profiles modified +4 −0
xsiam/reference-and-developer-docs/role-based-access-control/inventory-agent-permissions/agent-profilesRead it on the Cortex docs portal ↗ Read it here → This file's diff on GitHub ↗
Before After@@ -1,8 +1,12 @@---description: Configure endpoint agent profiles and communication settings in Cortex XSIAM.---# Agent Profiles# Agent ProfilesDefines agent behavior and configuration settings, including agent communication settings and proxy configurations.Defines agent behavior and configuration settings, including agent communication settings and proxy configurations.Permissions│Description│Roles ExamplePermissions│Description│Roles Example| ----------- | -------------------------------------------------------------------------------------------------------------------------------------------------------------------------------------------------------------------- | ---------------------------------------------------------------------------------------------------------------------------------------------------------------------------------------------------------------------------------------------------------------------------------------------------------------------------------------------------------------------------------------------------------------------------------------------------------------------------------------------------------------------------------------------------------------------------------------- || ----------- | -------------------------------------------------------------------------------------------------------------------------------------------------------------------------------------------------------------------- | ---------------------------------------------------------------------------------------------------------------------------------------------------------------------------------------------------------------------------------------------------------------------------------------------------------------------------------------------------------------------------------------------------------------------------------------------------------------------------------------------------------------------------------------------------------------------------------------- |None│Cannot view the Prevention Profiles page (Inventory → Endpoints → Policy Management → Prevention → Profiles and is limited to the profile name when viewing the profile in endpoint details.│SOC Tier-1 Analyst: Profile details are typically not needed for basic triage. Although it may be useful for understanding why certain agent features are enabled/disabled on specific endpointsNone│Cannot view the Prevention Profiles page (Inventory → Endpoints → Policy Management → Prevention → Profiles and is limited to the profile name when viewing the profile in endpoint details.│SOC Tier-1 Analyst: Profile details are typically not needed for basic triage. Although it may be useful for understanding why certain agent features are enabled/disabled on specific endpointsView│View the Agent Profiles menu and read-only access for the Profiles list, details, settings, and view assigned groups.│- SOC Tier-2 Analyst: Understanding agent profiles helps explain agent behavior and capabilities during investigations. Profiles determine what data the agent collects and reports
- SOC Tier-3 Analyst: Full profile visibility needed for advanced analysis and understanding agent configuration. Critical for determining if an agent was properly configured during a case.
- Threat Hunter: Profile visibility helps understand agent capabilities and potential detection gaps. Hunters need to know what telemetry is available from each endpoint.
View│View the Agent Profiles menu and read-only access for the Profiles list, details, settings, and view assigned groups.│- SOC Tier-2 Analyst: Understanding agent profiles helps explain agent behavior and capabilities during investigations. Profiles determine what data the agent collects and reports
- SOC Tier-3 Analyst: Full profile visibility needed for advanced analysis and understanding agent configuration. Critical for determining if an agent was properly configured during a case.
- Threat Hunter: Profile visibility helps understand agent capabilities and potential detection gaps. Hunters need to know what telemetry is available from each endpoint.
Show markdown source
@@ -1,8 +1,12 @@
+---
+description: Configure endpoint agent profiles and communication settings in Cortex XSIAM.
+---
+
 # Agent Profiles

 Defines agent behavior and configuration settings, including agent communication settings and proxy configurations.

 | Permissions | Description                                                                                                                                                                                                          | Roles Example                                                                                                                                                                                                                                                                                                                                                                                                                                                                                                                                                                            |
 | ----------- | -------------------------------------------------------------------------------------------------------------------------------------------------------------------------------------------------------------------- | ---------------------------------------------------------------------------------------------------------------------------------------------------------------------------------------------------------------------------------------------------------------------------------------------------------------------------------------------------------------------------------------------------------------------------------------------------------------------------------------------------------------------------------------------------------------------------------------- |
 | None        | Cannot view the **Prevention Profiles** page (**Inventory** → **Endpoints** → **Policy Management** → **Prevention** → **Profiles** and is limited to the profile name when viewing the profile in endpoint details. | SOC Tier-1 Analyst: Profile details are typically not needed for basic triage. Although it may be useful for understanding why certain agent features are enabled/disabled on specific endpoints                                                                                                                                                                                                                                                                                                                                                                                         |
 | View        | View the Agent Profiles menu and read-only access for the Profiles list, details, settings, and view assigned groups.                                                                                                | <ul><li>SOC Tier-2 Analyst: Understanding agent profiles helps explain agent behavior and capabilities during investigations. Profiles determine what data the agent collects and reports</li><li>SOC Tier-3 Analyst: Full profile visibility needed for advanced analysis and understanding agent configuration. Critical for determining if an agent was properly configured during a case.</li><li>Threat Hunter: Profile visibility helps understand agent capabilities and potential detection gaps. Hunters need to know what telemetry is available from each endpoint.</li></ul> |
-
▸ ▾ Device Control modified +4 −0
xsiam/reference-and-developer-docs/role-based-access-control/inventory-agent-permissions/device-controlRead it on the Cortex docs portal ↗ Read it here → This file's diff on GitHub ↗
Before After@@ -1,8 +1,12 @@---description: Manage device control policies, rules, and exceptions in Cortex XSIAM.---# Device Control# Device ControlManage policies for external devices connected to endpoints. Controls access permissions for USB drives, Bluetooth devices, and other peripherals.Manage policies for external devices connected to endpoints. Controls access permissions for USB drives, Bluetooth devices, and other peripherals.hint warninghint warning### Caution### CautionDevice Control is critical for data loss prevention. Overly restrictive policies may impact productivity, while permissive policies may enable data exfiltration. Balance security requirements with operational needs.Device Control is critical for data loss prevention. Overly restrictive policies may impact productivity, while permissive policies may enable data exfiltration. Balance security requirements with operational needs.Show markdown source
@@ -1,8 +1,12 @@
+---
+description: Manage device control policies, rules, and exceptions in Cortex XSIAM.
+---
+
 # Device Control

 Manage policies for external devices connected to endpoints. Controls access permissions for USB drives, Bluetooth devices, and other peripherals.

 {% hint style="warning" %}
 ### Caution

 Device Control is critical for data loss prevention. Overly restrictive policies may impact productivity, while permissive policies may enable data exfiltration. Balance security requirements with operational needs.