Cortex XSIAM Developer Guide
Tree viewThis book on one page — search it with your browser’s find (Ctrl+F / ⌘F), or jump from the tree.
Cortex XSIAM Developer Guide
Getting Started
This guide helps you create Cortex XSIAM content. You can create content for your own use, or contribute content to Marketplace that either you support or that is community supported.
Playbooks, alert fields/layouts/rules, indicator fields/types/layouts, classifiers, mappers, widgets, and dashboards should be developed within the Cortex XSIAM UI.
For integrations and scripts, when creating content to use within your instance of Cortex XSIAM or for contribution as a community supported content pack, the UI may be sufficient. For more complex development needs, or if you plan on contributing content as a partner supported content pack or a modification to partner supported content, we recommend using Visual Studio Code, with the Visual Studio Code extension. If you work locally, we recommend installing Demisto SDK to upload, download, and run code on Cortex XSIAM directly from your operating system shell. To develop content for contribution as a partner-supported content pack, or to submit modifications to partner-supported content packs, you must set up a full development environment.
If you have questions or need support, contact us on the #demisto-developers channel on our DFIR Slack community.
Prerequisites and resources
Cortex XSIAM is a powerful platform with a rich set of features and customizations. We recommend following these steps before creating custom content:
- Read and understand Cortex XSIAM Concepts.
- Read the FAQs.
- Review relevant sections of the Cortex XSIAM product documentation.
-
Understand your use case.
What are you trying to achieve? What is the user story? What is the expected workflow? Are you creating a content pack or creating content for internal use?
-
Development scope
What content items do you need to develop? Content can include integrations, scripts, playbooks, dashboards, fields, layouts, classifiers, mappers, lists, and data modeling and parsing rules. In some cases, you may just need a playbook to achieve your goals. In other cases, you may need multiple content items.
- Verify you have an active tenant.
- If you plan to publish your content to Marketplace for other customers to use, read about the contribution process and the different tiers and support levels (for example, partner vs community support). Learn about best practices and requirements for content pack contributions.
- Register to the Learning Center and go through the Product Training.
- Access the Palo Alto Networks DFIR Slack community and join the
#demisto-developerschannel. - If you are integrating with an external API, verify you have API or SDK access to the product or solution you want to integrate with.
-
(Optional) Install the Demisto SDK.
The Demisto SDK is a command line tool that can be used to upload, download, validate and run code on Cortex XSIAM directly from your command line. The Demisto SDK offers a Python library and CLI designed to aid the development process, to validate entities and to assist in the interaction between your development setup and Cortex XSIAM. You can use the Demisto SDK with the built-in IDE or with a full development environment.
- (Optional) Install the Video Studio Code extension to develop integrations and scripts.
Development, documentation, and contributions
- Development
-
Integrations and scripts
Review the structure for integrations and code conventions, as well as features such as data centralization, intelligent stitching, analytics-based detection, alert and incident management, script, generic commands, and reputation score. Write and test your code.
-
Playbooks - learn about playbook design, conventions, and the use of generic playbooks.
For more information on playbook design and development, see Playbooks.
- Lists - learn how to download a list from Cortex XSIAM and include it in your content pack.
- Alerts - learn how to create alert fields, layouts, rules, classifiers, and mappers.
-
Data modeling, parsing, and correlation - learn how to create parsing, data modeling, and correlation rules.
Enable mapping of events and logs into a single, unified data model. This data model provides a consolidated schema, and a simpler way to interact with your data, regardless of its source or dataset. To familiarize yourself with the data model schema, see Cortex XSIAM Data Model Schema.
- Indicators - learn how to create indicator fields and layouts. Learn how domains and URLs are extracted, how to create and use relationships, and more.
-
- Documentation - learn about documentation best practices, as well as documentation requirements for Marketplace contributions.
- Contributions - learn the requirements for contributing content to Marketplace.
Design
Cortex XSIAM provides out-of-the-box content that contain most of the functionality you need. However, it also supports creating custom content, enabling you to develop unique functions to meet any specific need. You can create individual content items (playbooks, integrations, etc.) for your own use or create content packs that can be contributed to Marketplace.
Content packs include one or more content items, and facilitate integrating various data sources by packaging together predefined configurations such as parsers, rules, and dashboards, improving the accuracy and efficiency of security threat identification and analysis. All content contributed to Marketplace must be within a content pack.
Before you begin to create content packs for contribution, you need to understand your goals, and review the design guidelines. Careful attention to the design process ensures that you achieve your desired use case and that the different components of your content pack function correctly together.
During the design process, we recommend the following stages:
- Understand your use case.
- Identify which components you need to achieve your use case, such as playbooks, integrations, incident fields, etc. Determine what content, if any, you can reuse from existing content packs.
- Review documentation best practices.
While you do not need to complete your entire design before you begin coding, we recommend you return regularly to the design stage throughout the development process, to review whether you are achieving your use case, if your components have changed, and to verify you are implementing best practices.
Use Case Design for Cortex XSIAM
When designing your use case, consider how you want to create alerts, enrich data, and respond to alerts.
-
Alert creation
Alerts can be fetched from external APIs or pushed to Cortex XSIAM using REST APIs or emails. Custom layouts can also be created to allow the SOC analyst to focus on the most relevant information.
-
Data enrichment
Additional data is automatically collected from multiple sources (including directories and databases) to provide the analyst with all the necessary context to make decisions on priority and impact.
-
Alert response
This can range from closing a false positive to complex playbooks including automated or semi-automated remediation steps across the entire IT infrastructure, such as blocking, quarantining, notifying people, collecting more data, forensics analysis, reporting, etc.
When you begin designing a content pack, we recommend you start by thinking about user stories. What would be a successful outcome for the user? How can you improve your incident workflow and decrease the time and resources required for investigation? The following points can help you design your contribution:
- Do you want to create an end-to-end use case that includes all of the phases of alert creation, data enrichment, and incident response?
- Do you want Cortex XSIAM to consume alerts from a new product?
- Do you want to provide enrichment from a data or reputation source that isn't already available in content?
- Do you want to automatically fetch IOCs from a third party platform into Cortex XSIAM?
- Do you want to map a third party product API into Cortex XSIAM, so that actions can be automated?
- Do you want to create playbooks that automate a response workflow across multiple security products?
- Are there time-consuming manual tasks in your products or security department that could be automated?
The following are examples of use cases:
- The SOC team wants to include a new source of alerts in Cortex XSIAM from a security product that is currently not supported by Marketplace. This could be already achieved through a SIEM, but a direct integration makes it easier to consume and provide a better UX to the analysts.
- The SOC team wants Cortex XSIAM to automatically provide reputation information about IOCs from a Threat Intelligence source that is currently not supported by Cortex XSIAM.
- The SOC team wants to integrate to an existing IT solution (i.e. a CMDB, Instant Messaging platform or Database) to automatically exchange data with Cortex XSIAM.
- The SOC team wants to automatically trigger actions on a third party security product that is currently not available in the Marketplace.
You can also view more use cases across a variety of product categories.
If you are a third-party security vendor and want to integrate your product, we encourage you to think creatively about your product's unique capabilities that can be provided through Cortex XSIAM to provide value to joint customers. We recommend not limiting the use case to your existing APIs, during the design phase. In some cases, when creating a content contribution, technology partners decide to implement new APIs in their platforms to improve automation and better integrate with Cortex XSIAM.
Development scope
Based on your use case, you can determine which content items to create.
You can create individual content items for your own use, or package one or more content items together within a content pack. Contributions are content packs that you create for Marketplace which are submitted to Cortex XSIAM for review and approval. After approval, these content packs are uploaded to Marketplace, and can be installed by other users.
Playbooks
If you have an end-to-end use case in mind, you likely need one or more playbooks. Think about the process that you want to automate and the steps and the decisions during the process. These steps and decisions become the playbook tasks. Check if any or all of these building blocks are already part of Cortex XSIAM by browsing Marketplace.
You can have multiple playbooks in the same content pack, as long as they are related to a similar end-to-end use case. If they are completely separate, consider splitting them in multiple content packs.
Playbooks can use sub-playbooks from the same content pack or other content packs, with dependencies that can be set as mandatory or optional. Select the Skip this branch if this script/playbook is unavailable option in playbook task fields to enable the playbook to continue executing if an instance of the script, playbook, or sub-playbook is not available.
Cortex XSIAM provides a number of generic playbooks that can be used as sub-playbooks.
Integrations
Create an integration if:
- You have a use case in mind that requires communicating with a third-party system or API, but there is no integration available for it in the Cortex XSIAM Marketplace.
- You are a vendor and you want Cortex XSIAM to be able to interact with your product or retrieve indicators from your threat intel feed.
Integrations are the building blocks that enable external communications and form the foundations of playbooks.
While you can include multiple integrations within a single content pack, we recommend in most cases including only one integration per content pack. If you are building two separate integrations to interact with two different third-party products, you should create a separate content pack for each product.
Data Model rules, alert fields, layouts, classifiers, mappers, and playbooks
If you are creating an integration that fetches incidents from a third-party system, in many cases additional items are required within the content pack.
-
Data model rules
You can map your logs into a single, unified data model that provides a consolidated schema and a simpler way to interact with your data, regardless of its source or dataset. Map your data to the data model using data model rules, either by using the default rules that are automatically added when installing content packs from the Marketplace, or by creating user-defined rules.
-
Parsing rules
Define patterns or regular expressions that specify how to identify and extract specific pieces of information from the incoming data. For example, you can create a parsing rule to extract IP addresses, URLs, or file names.
-
Correlation rules
Analyze correlations of multi-events from multiple sources by using the Cortex Query Language (XQL) based engine for creating scheduled rules called Correlation Rules. Alerts can then be triggered based on these correlation rules with a defined time frame and set schedule, including every X minutes, once a day, once a week, or a custom time.
-
Alert fields
Create alert fields for data specific to custom incident types. All of the alert fields should be associated only to the incident type you have created, and their names should be prefixed accordingly to indicate this association.
-
Layouts
As you create alert fields, they can be added to new alert layouts, making the most relevant information visible to your users.
-
Classifiers
Create a classifier that determines how incoming alerts are classified (by alert type) in Cortex XSIAM.
-
Mapper
A mapper determines how the raw data from the incoming alert JSON is mapped to alert fields.
-
Playbooks
Playbooks can be associated with an alert type and run automatically on incoming alerts of that type. A playbook might enrich indicators within a playbook or perform additional triage of an alert. For an example, see the Handle Hello World Alert playbook.
Scripts (automations)
Scripts work with data already within Cortex XSIAM, while integrations, by contrast, can communicate with external APIs. Scripts are often used to transform data, visualize it, trigger playbooks when certain conditions occur, etc. Often, you do not need to plan exactly which scripts you need early during the design process. As you progress with your content development, it can become clear, for example, that your playbook needs a particular script to transform incident data into a useable form.
Dashboards & widgets
If you want to visualize summarized and aggregated data about anything in Cortex XSIAM (for example, incidents, alerts, and indicators), you can create custom dashboards and widgets. Dashboards are collections of widgets that can be customized and included in content packs.
Integration design
Integrations enable communications with third-party APIs. If you are contributing an integration to Marketplace, you must follow the design best practices. To be accepted in the Cortex XSIAM Marketplace, integrations must function correctly, be properly documented, and work well with other related content.
When designing an integration, consider the following questions:
- Which product/API are you integrating with?
- Which product category does it belong to? See the list of approved product categories.
- Which version(s) of the product will you support?
- How does the authentication work?
- Will your integration fetch alerts? If so, what are the names of the entities in the source product (for example alerts, events, messages, warnings, logs) that will be mapped to alerts in Cortex XSIAM? What is the lifecycle of the entities, are they static or are they updated over time?
- What is the maximum number of new alerts this product can generate in a busy production environment?
- Are you calling APIs that can take longer than 5 to 10 seconds to respond?
- Does the product provide feeds of IOCs?
- Does the product provide any reputation on Indicators of Compromise (IOCs)?
Additional Considerations
- Understand and follow our code conventions to simplify implementation and the review process.
- Integrations run in Docker containers. Cortex XSIAM provides generic images with recent Python and PowerShell versions and a small set of libraries. To use additional libraries that are not part of the default images, view our dockerfiles repository in GitHub to see if an existing images meets your needs. If not, you can create your own Docker image and contribute it. The Docker image to use must be specified in the integration YAML file.
- You can build feed integrations that collect batches of indicators from threat intel feeds. For more information, see Feed Integrations.
- To store integration-specific data, such as tokens that have a specific duration (i.e. JWTs for authentication), you can use the integration cache functionality.
Design best practices
The following are design best practices that you should consider when building an integration.
Integration categories
Your integration should be categorized as one of the following:
- Import events as incidents
- Threat intel feeds
- Analysis & SIEM
- Authentication
- Data enrichment and threat intelligence
- Database
- Endpoint
- Forensics & malware analysis
- Messaging
- Utilities
- Vulnerability management
We recommend you review common use cases to help categorize your integration.
Data clarity
The data returned to the analyst should be as clear as possible. For example, you should convert Epoch timestamps, decrypt data if necessary, etc. If you return IDs, return the original asset name, category type, group name, etc. Additionally, make the parameters and command descriptions as descriptive as possible. Users should be able to understand what the command does and any argument/parameter defaults, maximums, minimums, etc. Use the same names as used by your product, when possible. Your product UI should serve as a baseline for your human readable output.
DBotScore
When mapping a score to DBotScore, stay as close as possible to the integrated product scoring thresholds and categorization. These are usually documented or can be found in the UI of the integrated product. DBotScore reputation includes the following scores: 0 – unknown, 1 – good, 2 – suspicious, 3 – bad. Give users a threshold argument to enable customers to override and implement alternate scoring logic. Specify the score thresholds and DBotScore mapping to the integration documentation.
Set generic reputation commands that indicate the entity reputation such as !url, !ip, !file, etc. .
Global context
Global context outputs are important. When an analyst executes commands/playbooks, global context gives them the option to receive information from multiple integrated products. You can also use global context outputs for DBot scoring and global indicators.
Commands
Follow these best practices for commands.
- Use the following naming convention for commands:
PRODUCTNAME-OBJECTNAME-ACTION. This structure makes it easier for the analyst to find the right object in the UI. - Command arguments should be snake case and lower case. For example,
argument_name. - If a command takes more than a few seconds to execute (for example, vulnerability scan, complex query, or file detonation in sandbox), add a polling playbook. If you implement a polling playbook, include a
statuscommand as well. - When a command supports filtering results by time, use start and end time parameters (if supported by the UI), and a time frame parameter that accepts inputs such as “4 days ago” or “5 minutes ago”.
Backward compatibility
Cortex XSIAMcomponents, such as playbooks, rely on previous inputs. To avoid breaking backward compatibility, keep the old context, add new paths as needed, and update the outputs accordingly. If a command needs major modifications, deprecate the command and create a new one.
Limitations
- The logo must be under 10kB. Use the company logo, not the product logo.
- If the result contains more than 50 entries, limit the context size.
Content development environments
Cortex XSIAM offers several tools for development including an IDE in the UI, a Visual Studio Code extension, and the Demisto SDK Python library.
When creating complex integrations and scripts, we recommend using a full development environment. Options include:
Content developed in the UI
The following content items should be developed from within the Cortex XSIAM UI:
- Playbooks
- Alert fields, layouts, and rules
- Indicator fields, types and layouts
- Classifiers and Mappers
- Widgets
- Dashboards
Once the resource is developed in the Cortex XSIAM UI, you can download it using demisto-sdk download -i "$NAME_OF_RESOURCE" or export it from the UI.
Content developed in Visual Studio Code
For integrations and scripts, when creating content to use within your instance of Cortex XSIAM or for contribution as a community supported content pack, the UI may be sufficient. For more complex development needs, or if you plan on contributing content as a partner supported content pack or a modification to partner supported content, we recommend Visual Studio Code. The Visual Studio Code extension should be installed locally, and can be used with a regular local development environment or GitHub Codespace. It is included by default with the containerized development environment. We also recommend installing Demisto SDK to upload, download, and run code on Cortex XSIAM directly from your operating system shell. Demisto SDK is included by default with the containerized development environment.
Note
To develop content for contribution as a partner-supported content pack, or to submit modifications to partner-supported content packs, you are required to set up a full development environment.
IDE for script development
Use the Cortex XSIAM built-in IDE to create and edit automation scripts. Open the script editor from Incident Response → Automation → Scripts.
The Cortex XSIAM IDE differs from other development environments. For example, it has no interpreter, whereas Visual Studio Code does.
Note
For more complex development needs, we recommend instead using the Visual Studio Code extension. It simplifies third-party integration and script development by enabling users to author Python content for Cortex XSIAM directly in Visual Studio Code. This is also the most efficient way to develop Python Unit Tests.
Script Helper for Cortex XSIAM script development
Script Helper provides commonly used functions for Cortex XSIAM automation script development.
To access the script helper, go to Cortex XSIAM under Incident Response → Automation → Scripts → Script Helper.
A list of the common server functions appears.
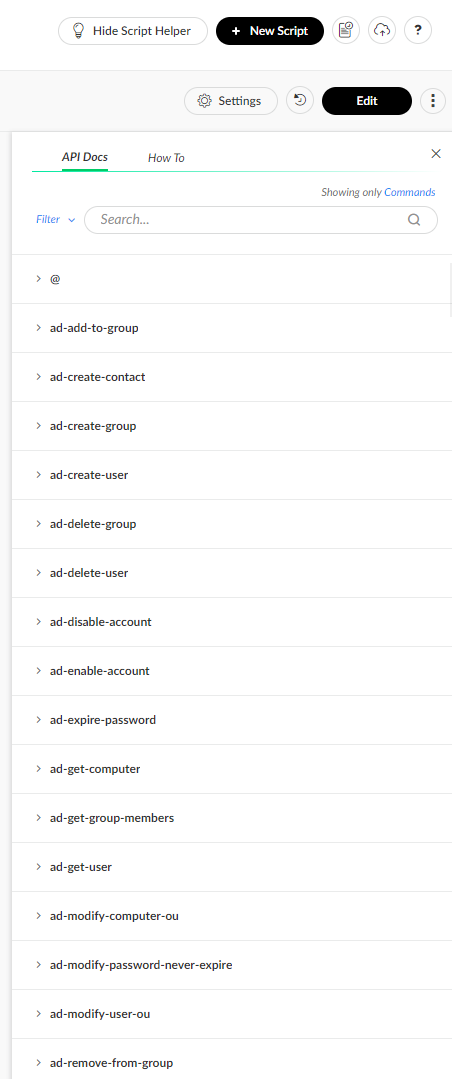
Script Settings
Clicking the Settings button opens the Script Settings dialog box, which contains configurations for Basic, Arguments, Permissions, Advanced, and Depends on Commands script settings.
For more information about the script settings, see Scripts.
Keyboard Shortcuts
The following are some useful keyboard shortcuts supported in the IDE.
Select
| Action | Windows/Linux | Mac |
|---|---|---|
| Select all | Ctrl-A | Command-A |
| Select left | Shift-Left | Shift-Left |
| Select right | Shift-Right | Shift-Right |
Go to
| Action | Windows/Linux | Mac |
|---|---|---|
| Go to start | Ctrl-Home | Command-Home, Command-Up |
| Go to end | Ctrl-End | Command-End, Command-Down |
Find/replace
| Action | Windows/Linux | Mac |
|---|---|---|
| Find | Ctrl-F | Command-F |
| Replace | Ctrl-H | Command-Option-F |
| Find next | Ctrl-K | Command-G |
| Find previous | Ctrl-Shift-K | Command-Shift-G |
Fold
| Action | Windows/Linux | Mac |
|---|---|---|
| Fold selection | Alt-L, Ctrl-F1 | Command-Option-L, Command-F1 |
| Unfold | Alt-Shift-L, Ctrl-Shift-F1 | Command-Option-Shift-L, Command-Shift-F1 |
| Fold all | Alt-0 | Command-Option-0 |
| Unfold all | Alt-Shift-0 | Command-Option-Shift-0 |
Other
| Action | Windows/Linux | Mac |
|---|---|---|
| Indent | Tab | Tab |
| Outdent | Shift-Tab | Shift-Tab |
| Undo | Ctrl-Z | Command-Z |
| Redo | Ctrl-Shift-Z, Ctrl-Y | Command-Shift-Z, Command-Y |
| Toggle comment | Ctrl-/ | Command-/ |
Set up a local development environment
You can write code directly in the UI, but to contribute a full integration, you need a full development environment external to Cortex XSIAM. An external development environment enables linting your code, running unit tests with pytest, creating documentation, submitting your changes via git and more. There are three options for your external development environment, a traditional local environment described below, a GitHub Codespace environment, or a containerized environment.
Setting up the local development environment involves the following steps:
Verify prerequisites
Cortex XSIAM
- An active Cortex XSIAM tenant.
- Review Contribution requirements.
GitHub
Go to GitHub and sign in or sign up for an account.
Docker
Make sure Docker is installed on your system and is working correctly by running the hello-world container:
sb@dddd:~/demisto$ docker run --rm hello-world

Hello from Docker!
This message shows that your installation appears to be working correctly.

[... output omitted for brevity ...]

For more examples and ideas, visit:
 https://docs.docker.com/get-started/

sb@dddd:~/demisto$
Note
If you are using Windows with WSL2, you can still use Docker Desktop from WSL. See here for details.
Fork the GitHub repo
- Log in to GitHub, navigate to the Content Repo, and click Fork.
-
Once the fork is complete, copy the URL.
This is the fork where you will commit your code and, once ready, create the Pull Request to submit your contribution back to the Cortex XSIAM content repository. Do not work on the master or main branch.
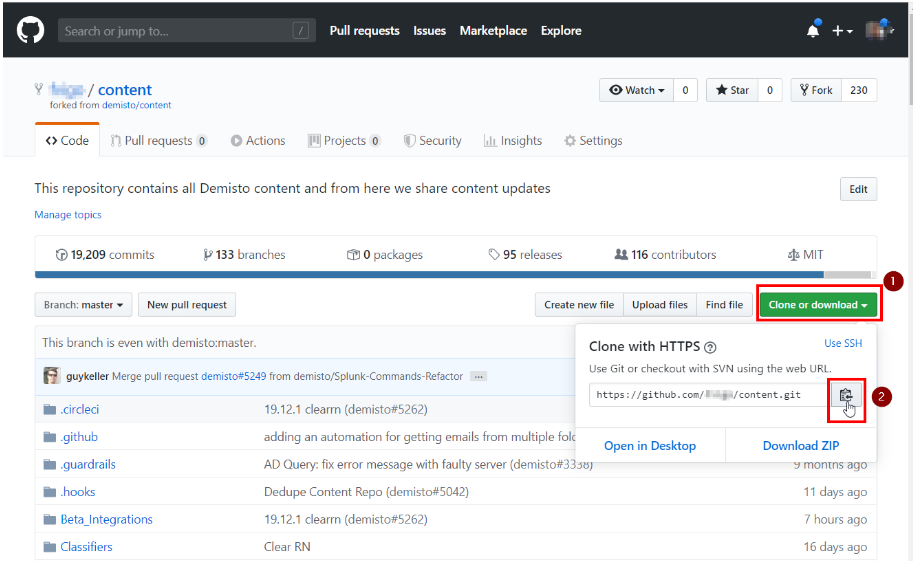
Clone the GitHub fork locally
In the shell, create a folder (for example, ~/demisto) and clone your fork of the content repository using git clone [your_fork_url], where [your_fork_url] is the URL you copied from GitHub after forking.
sb@dddd:~$ mkdir demisto
sb@dddd:~$ cd demisto
sb@dddd:~/demisto$ git clone https://github.com/[omitted]/content.git
Cloning into 'content'...
remote: Enumerating objects: 108, done.
remote: Counting objects: 100% (108/108), done.
remote: Compressing objects: 100% (90/90), done.
remote: Total 101143 (delta 50), reused 53 (delta 18), pack-reused 101035
Receiving objects: 100% (101143/101143), 110.65 MiB | 11.04 MiB/s, done.
Resolving deltas: 100% (73634/73634), done.
Checking out files: 100% (4522/4522), done.
sb@dddd:~/demisto$
Note
You must clone your fork of the repository, as you will need to be able to write into it. Do not clone demisto/content, because you won't be able to push commits.
Set up environments
Set up a remote environment
Follow these steps to set up a fully configured remote environment with VS Code Dev Containers.
VS Code
- Download and install VS Code.
- Install the Remote Development pack.
If you are not familiar with VS Code, follow the VS Code getting started guide.
Docker
Follow the instructions here to install Docker to your operating system.
- Windows: Docker Desktop 2.0+ on Windows 10 Pro/Enterprise. Windows 10 Home (2004+) requires Docker Desktop 2.3+ and the WSL 2 back-end.
- macOS: Docker Desktop 2.0+.
- Linux: Docker CE/EE 18.06+ and Docker Compose 1.21+
Install and enable WSL and Docker
For Windows users, we recommend using Windows Subsystem for Linux (WSL) for better performance.
- Install WSL.
- Open WSL in VS Code.
- Enable Docker support.
-
Verify
WSL 2is installed by running:wsl --list --verbose
Verify the installed distribution is running
WSL 2.To change versions, use the command:
wsl --set-version <distro name> 2
Replace
<distro name>with the name of the Linux distribution that you want to update. For example,wsl --set-version Ubuntu 2sets your Ubuntu distribution to use WSL 2.
You can clone the terminal and work directly with VS Code. To work with Github in VS Code, follow the instructions here.
Open the repository in VS Code
If you already cloned the repository with VS Code, go directly to open the dev container.
- In VS Code, go to File+Open Folder.
- Select your GitHub repository.
Open the Dev Container
-
Click the green button.
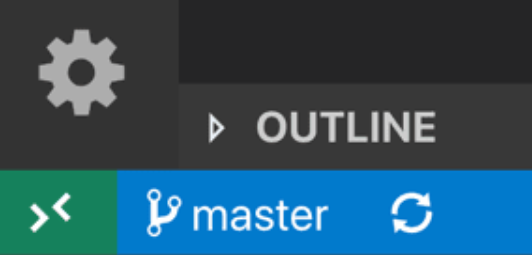
- Click Reopen in Container.
- It may take a few minutes until the Dev container is ready.
Docker performance issues
- For Windows, use WSL2.
- Update Docker.
- Disable Autosave in VS Code.
Since Docker is not native for Mac or Windows, there may be performance issues.
Errors opening the dev container
- Update Docker.
-
Clean up Docker.
docker system prune -a --volumes
Set up a local environment
Verify your operating system folder structure
If you are using Windows with WSL and your code resides in a shared folder on the Windows tree (/mnt/c/code/demisto), verify the folder is set to be case sensitive.
You need Python 3 installed on your system. We recommend using pyenv.
-
Verfiy
pyenvin installed and theeval "$(pyenv init -)"expression is placed in your shell configuration (~/.bashrcor~/.zshrc).sb@dddd:~/demisto$ eval "$(pyenv init -)" sb@dddd:~/demisto$ pyenv -v pyenv 1.2.15 sb@dddd:~/demisto$~/demisto$
See more more details about pyenv installation. Either Homebrew for MacOS or the automatic installer on Linux/WSL work.
-
If the required version of Python is missing, you need to install it. Because
pyenvcompiles CPython, you may need some libraries. See more troubleshooting info.For example, install Python 3.10.5.
sb@dddd:~/demisto$ pyenv install 3.10.5
Downloading Python-3.10.5.tar.xz...
-> https://www.python.org/ftp/python/3.10.5/Python-3.10.5.tar.xz
Installing Python-3.10.5...
Installed Python-3.10.5 to /home/sb/.pyenv/versions/3.10.5

sb@dddd:~/demisto$ pyenv versions
  3.10.5
sb@dddd:~/demisto$
- Install Poetry.
-
Once you set up your development environment, you can activate Poetry with the
poetry shellcommand. Include(.venv)in front of the prompt. Note that the shell command is available in a plugin.sb@dddd:~/demisto/content$ poetry shell (.venv) sb@dddd:~/demisto/content$
Note
You can leave the Poetry virtual environment using the deactivate command:
(.venv) sb@dddd:~/demisto/content$ deactivate sb@dddd:~/demisto/content$
Install the nvm package manager
- Install the nvm package manager.
- Run
nvm install node.
Pipx is a package that enables you to install and run the Python application globally in an isolated Python environment.
To install Pipx, run the following commands:
pip install --user pipx pipx ensurepath
Demisto SDK is a tool that assists in the contribution process. It helps you to generate a content pack, maintain your files, and validate them before committing to the branch. Install Demisto SDK using the pipx command pipx install demisto-sdk --force. To verify you have the latest version of the SDK, run: demisto-sdk --version.
Before running the bootstrap script that creates the virtual environment, set up pyenv to work correctly in the content folder you just cloned.
Initially, no local python interpreter has been set via pyenv.
sb@dddd:~/demisto$ cd content sb@dddd:~/demisto/content$ pyenv local pyenv: no local version configured for this directory
-
Set
pyenvto use the latest version Python 3 you previously installed and verify that everything is set correctly.sb@dddd:~/demisto/content$ pyenv local 3.10.5 sb@dddd:~/demisto/content$ pyenv local 3.10.5 sb@dddd:~/demisto/content$ which python3 /home/sb/.pyenv/shims/python3 sb@dddd:~/demisto/content$ python3 -V Ptyhon 3.10.5
-
Run the bootstrap script.
The bootstrap script sets up a pre-commit hook that validates your modified files before committing. It also sets up a Python virtual environment for development with the package requirements for Python3.
Note
If you are using WSL and you see errors about "python.exe" getting called, disable it in the App Execution Alias (see more details).
-
Run the script from the root directory of the source tree:
.hooks/bootstrap.sb@dddd:~/demisto/content$ .hooks/bootstrap Installing 'pre-commit' hooks ======================= Configure poetry to install virtual environment in the project repo (will be available in (.venv) Check if poetry files are valid All set! Installing dependencies... Detected local env. Installing dependencies from lock file No dependencies to install or update ========================== Done setting up virtualenv with poetry Activate the venv by running: poetry shell Deactivate by running: deactivate ======================= Running: npm install ... up to date, audited 230 packages in 1s
- After the bootstrap script completes, install an extra plugin to get poetry shell to work by running
poetry self add poetry-plugin-shell. - After the plugin script completes, activate the newly created virtual environment by running
poetry shell.
-
Run linters and unit tests
Cortex XSIAM content ships with a HelloWorld integration that provides basic functionality and is useful to understand how to create integrations.
It's located in the Packs/HelloWorld/Integrations/HelloWorld folder. demisto-sdk runs the linting and unit testing to verify the dev environment is working (including Python and Docker).
-
Verify you are running inside the Poetry virtual environment.
sb@dddd:~/demisto/content$ poetry shell
(.venv) sb@dddd:~/demisto/content$
-
Run the
demisto-sdk pre-commitcommand on thePacks/HelloWorld/Integrations/HelloWorldfolder using the-ioption, or if you want to run against all the committed files in your branch you can usedemisto-sdk pre-commit -g. It will run both the linters and pytest (unit testing).Note
The tests run within a Docker container, so if the tests pass, it means that your development environment is up and running correctly.
(venv) sb@dddd:~/demisto/content$ demisto-sdk pre-commit -i Packs/HelloWorld/Integrations/HelloWorld
Running pre-commit using template /Users/sfainberg/dev/demisto/content/.pre-commit-config_template.yaml
Running pre-commit with Python 3.11 on:
Packs/HelloWorld/Integrations/HelloWorld/HelloWorld.py
Packs/HelloWorld/Integrations/HelloWorld/HelloWorld.yml
Packs/HelloWorld/Integrations/HelloWorld/HelloWorld_description.md
Packs/HelloWorld/Integrations/HelloWorld/HelloWorld_image.png
Packs/HelloWorld/Integrations/HelloWorld/HelloWorld_test.py
Packs/HelloWorld/Integrations/HelloWorld/README.md
Packs/HelloWorld/Integrations/HelloWorld/command_examples
Packs/HelloWorld/Integrations/HelloWorld/test_data/get_alert.json
Packs/HelloWorld/Integrations/HelloWorld/test_data/incident_note_list_command.json
Packs/HelloWorld/Integrations/HelloWorld/test_data/ip_reputation.json
DockerHook - Unable to find image docker.io/devtestdemisto/python3:3.11.10.115186-12dd7198e064c21c217cc72c87ddadd5. Creating image based on docker.io/demisto/python3:3.11.10.115186 - Could take 2-3 minutes at first
check json...............................................................Passed
check yaml...............................................................Passed
check python ast.........................................................Passed
check for merge conflicts................................................Passed
debug statements (python)................................................Passed
python tests naming......................................................Passed
check for added large files..............................................Passed
check for case conflicts.................................................Passed
poetry-check.........................................(no files to check)Skipped
pycln....................................................................Passed
ruff-py3.11..............................................................Passed
autopep8.................................................................Passed
mypy-py3.11..............................................................Passed
xsoar-lint...............................................................Passed
pylint-in-docker-demisto/python3:3.11.10.115186..........................Passed
pytest-in-docker-demisto/python3:3.11.10.115186..........................Passed
validate-deleted-files...................................................Passed
validate-content-paths...................................................Passed
validate-conf-json...................................(no files to check)Skipped
validate.................................................................Passed
secrets..................................................................Passed
merge-pytest-reports.....................................................Passed
coverage-pytest-analyze..................................................Passed
Create a branch
The Git flow requires creating a branch with your new code that you will later use to submit a Pull Request.
To create a branch, use the git checkout -b [branch_name] command, where the [branch_name] corresponds to your integration.
(venv) sb@dddd:~/demisto/content$ git checkout -b my_integration_name
Switched to a new branch 'my_integration_name'
Create your integration directory
Create a directory under Packs/<Your pack name>, named after your product where you will put all your content files later, and add it to the staged changes in Git. Use PascalCase in the directory name (for example, MyIntegration). See Content Pack Structure for more information.
You can create a pack and an integration directory using the demisto-sdk init command. The following is an example of creating a pack called MyNewPack, with an integration called MyIntegration, with the metadata file created automatically:
➜  content-docs2 git:(add-pack-and-sdk-docs) ✗ demisto-sdk init --pack
Please input the name of the initialized pack: MyNewPack
Successfully created the pack test in: MyIntegration

Do you want to fill pack's metadata file? Y/N y

Display name of the pack: MyNewPack

Description of the pack: A description for my newly created pack.

Support type of the pack:
[1] demisto
[2] partner
[3] developer
[4] community

Enter option: 2

Server min version: 5.0.0

Author of the pack: Partner name

The url of support, should represent your GitHub account (optional): https://github.com/<PartnerGitAccount>

The email in which you can be contacted in: partner@partner.com

Pack category options:
[1] Analytics & SIEM
[2] Utilities
[3] Messaging
[4] Endpoint
[5] Network Security
[6] Vulnerability Management
[7] Case Management
[8] Forensics & Malware Analysis
[9] IT Services
[10] Data Enrichment & Threat Intelligence
[11] Authentication
[12] Database
[13] Deception
[14] Email Gateway

Enter option: 1

Tags of the pack, comma separated values:
Created pack metadata at path : MyNewPack/metadata.json

Do you want to create an integration in the pack? Y/N y
Please input the name of the initialized integration: test
Do you want to use the directory name as an ID for the integration? Y/N y
Finished creating integration: MyNewPack/Integrations/test.
Commit and push
The last step is to commit your changes and push them to the origin to verify that the pre-commit checks pass.
You can also run the hooks locally using Demisto SDK by running the following commands. See this README for more information about Demisto SDK commands and formats.
demisto-sdk format- Auto-corrects formatting for the validation to pass.demisto-sdk validate -g- Validates the integrity of the YAML files, and verifies they follow the pre-set roles.demisto-sdk pre-commit -i <The path to your changed/newly added content entity>- Runs lint and pytest on the changed Python files.
-
Run
git commit -m '[some commit message]', which automatically runs the pre-validation checks.(venv) sb@dddd:~/demisto/content$ git commit -m 'Initial commit of MyIntegration' Validating files... Starting validating files structure Using git Running validation on branch my_integration_name Validates only committed files Starting validation against origin/master The files are valid Starting secrets detection Finished validating secrets, no secrets were found. Skipping running dev tasks (flake8, mypy, pylint, pytest). If you want to run this as part of the precommit hook set CONTENT_PRECOMMIT_RUN_DEV_TASKS=1. You can add the following line to ~/.zshrc: echo "export CONTENT_PRECOMMIT_RUN_DEV_TASKS=1" >> ~/.zshrc Or if you want to manually run dev tasks: ./Tests/scripts/pkg_dev_test_tasks.py -d <integration/script dir> Example: ./Tests/scripts/pkg_dev_test_tasks.py -d Scripts/ParseEmailFiles On branch my_integration_name Untracked files: .python-version nothing added to commit but untracked files presentNote
- Ignore the
.python-versionfile warning, that is generated by pyenv and is not added to the repository. - Since there are no files yet in the directory you created (for example,
Integrations/MyIntegration), it will not show up in your branch after the commit. However, you can verify that all the components are in place.
- Ignore the
-
Push to your branch with the command
git push origin [branch_name]. You will be prompted for your GitHub credentials.(venv) sb@dddd:~/demisto/content$ git push origin my_integration_name Username for 'https://github.com': [omitted] Password for 'https://[omitted]@github.com': Total 0 (delta 0), reused 0 (delta 0) remote: remote: Create a pull request for 'my_integration_name' on GitHub by visiting: remote: https://github.com/[omitted]/content/pull/new/my_integration_name remote: To https://github.com/[omitted]/content * [new branch] my_integration_name -> my_integration_name (venv) sb@dddd:~/demisto/content$
-
Go back to GitHub and under your fork you should be able to see that there is a new branch with the name you provided (for example, my_integration_name).
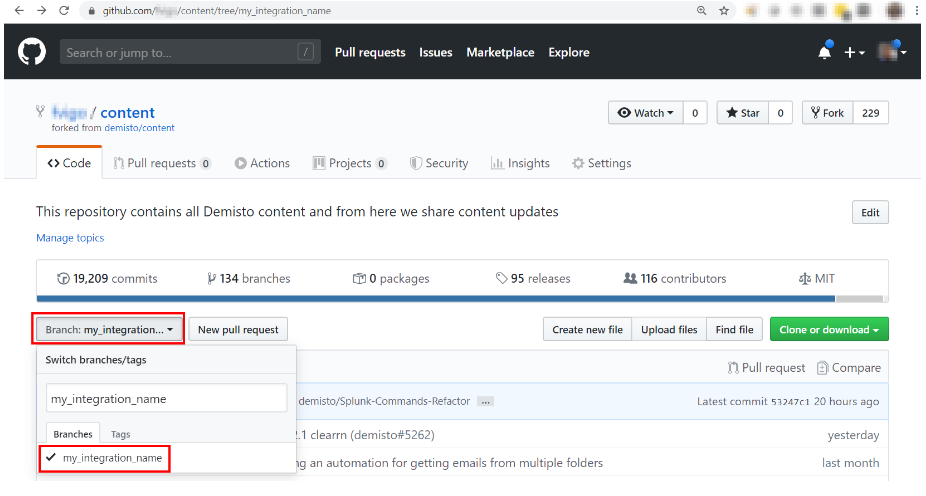
The development environment for Cortex XSIAM is complete, with a fully configured virtual environment where you can run different validation and utility scripts. You can now start writing your code.
Set up a GitHub Codespace environment
This topic provides step-by-step instructions for setting up a personal Codespace for developing Cortex XSIAM content.
What are GitHub Codespaces?
GitHub Codespaces are cloud-based development environments provided by GitHub that allow you to set up remote environments with preinstalled and preconfigured tools and dependencies using a dev container.
Your Codespace environment is hosted on GitHub's servers (attached to your GitHub account), and allows you to access your Codespace from any computer.
Cost and limitations
GitHub offers a free quota for Codespaces (which is higher for GitHub Pro users) that you can utilize for developing Cortex XSIAM content.
The quota is calculated based on the number of hours your Codespace is actively running. You can see the free quota plan and options for additional paid usage after you reach your quot, in the GitHub documentation.
You will receive an automated email notification when you have used 75%, 90%, and 100% of your free quota. You can find information about your Codespaces quota usage in the GitHub settings under Billing and plans. For more information, see the GitHub article Viewing your GitHub Codespaces usage.
Note
Codespaces generated from the content repository (or a fork of it) are configured to have four cores by default.
Create a new Codespace
- Log in to your GitHub account. If you do not have a GitHub account, you must create one before you can create a Codespace.
- Enter the content repository.
- Fork the repository to your account.
- Click Fork at the top right.
- Select your account as the owner, and leave the repository name as is.
- Keep the Copy the master branch only option selected.
-
Create fork.
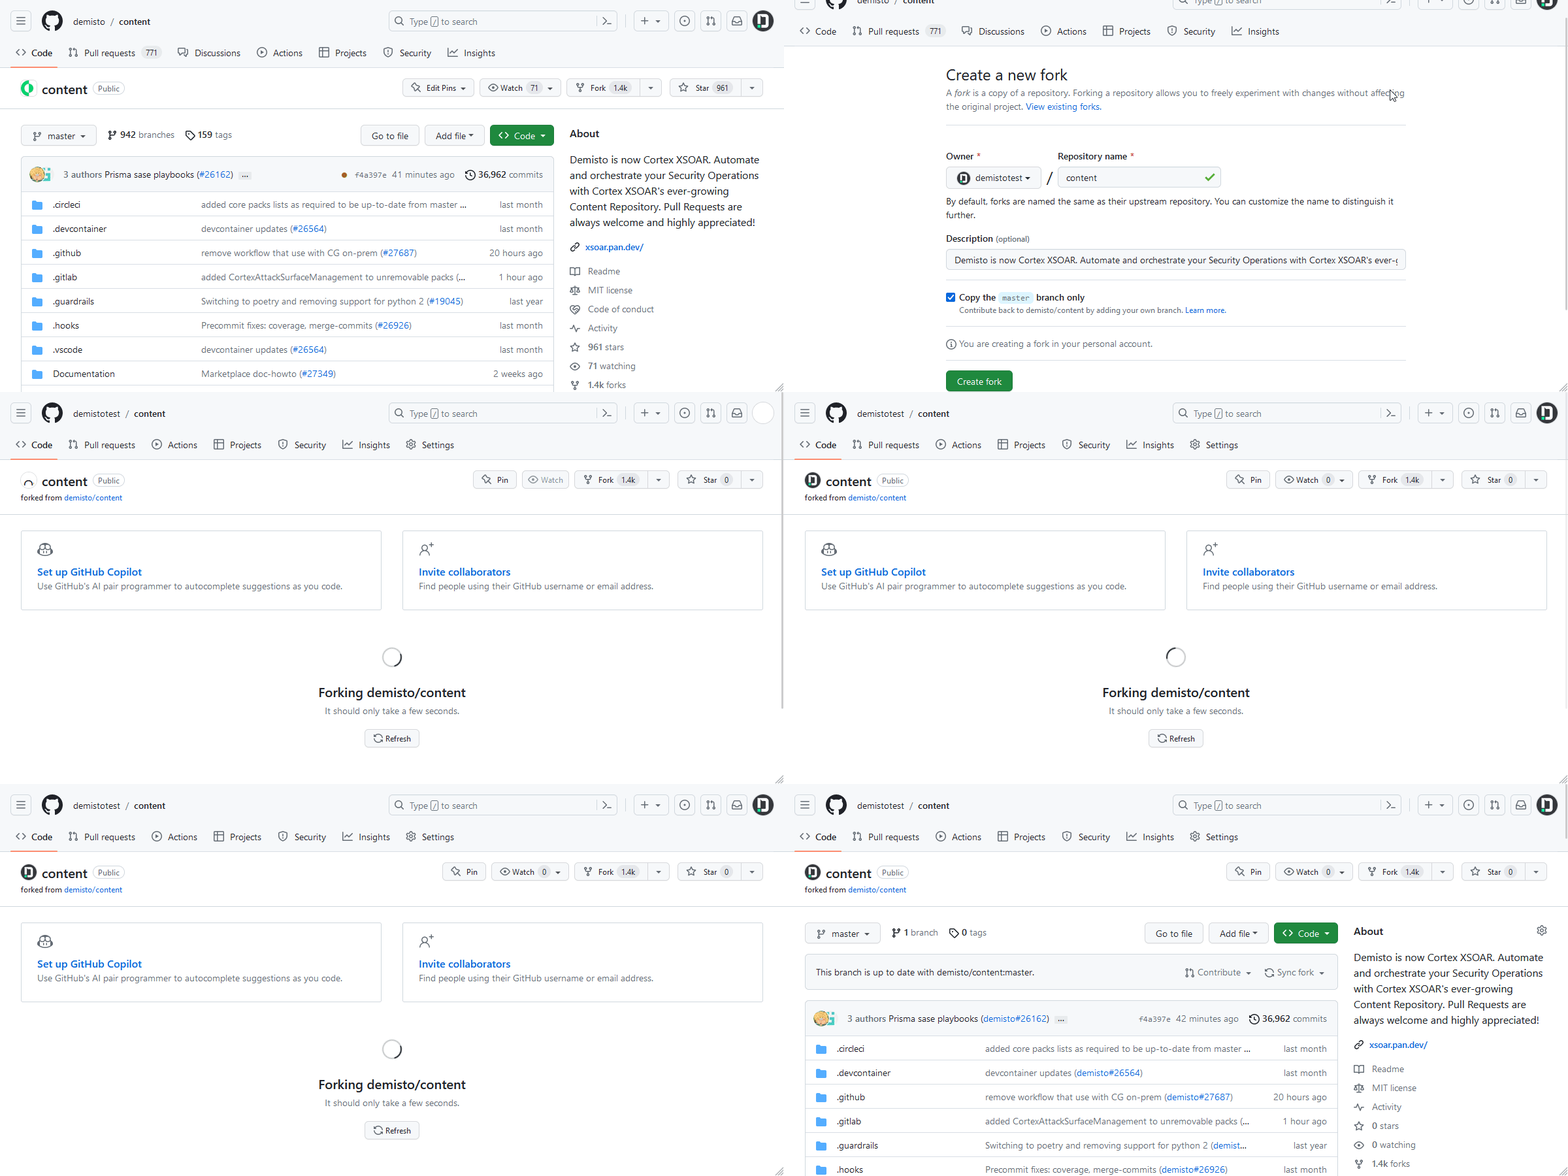
- After a few seconds, you are redirected to your forked repository page.
- Create a new branch on your fork, and give it a meaningful name.
-
Click Code, go to the Codespaces tab, and Create Codespace on \branch name>.
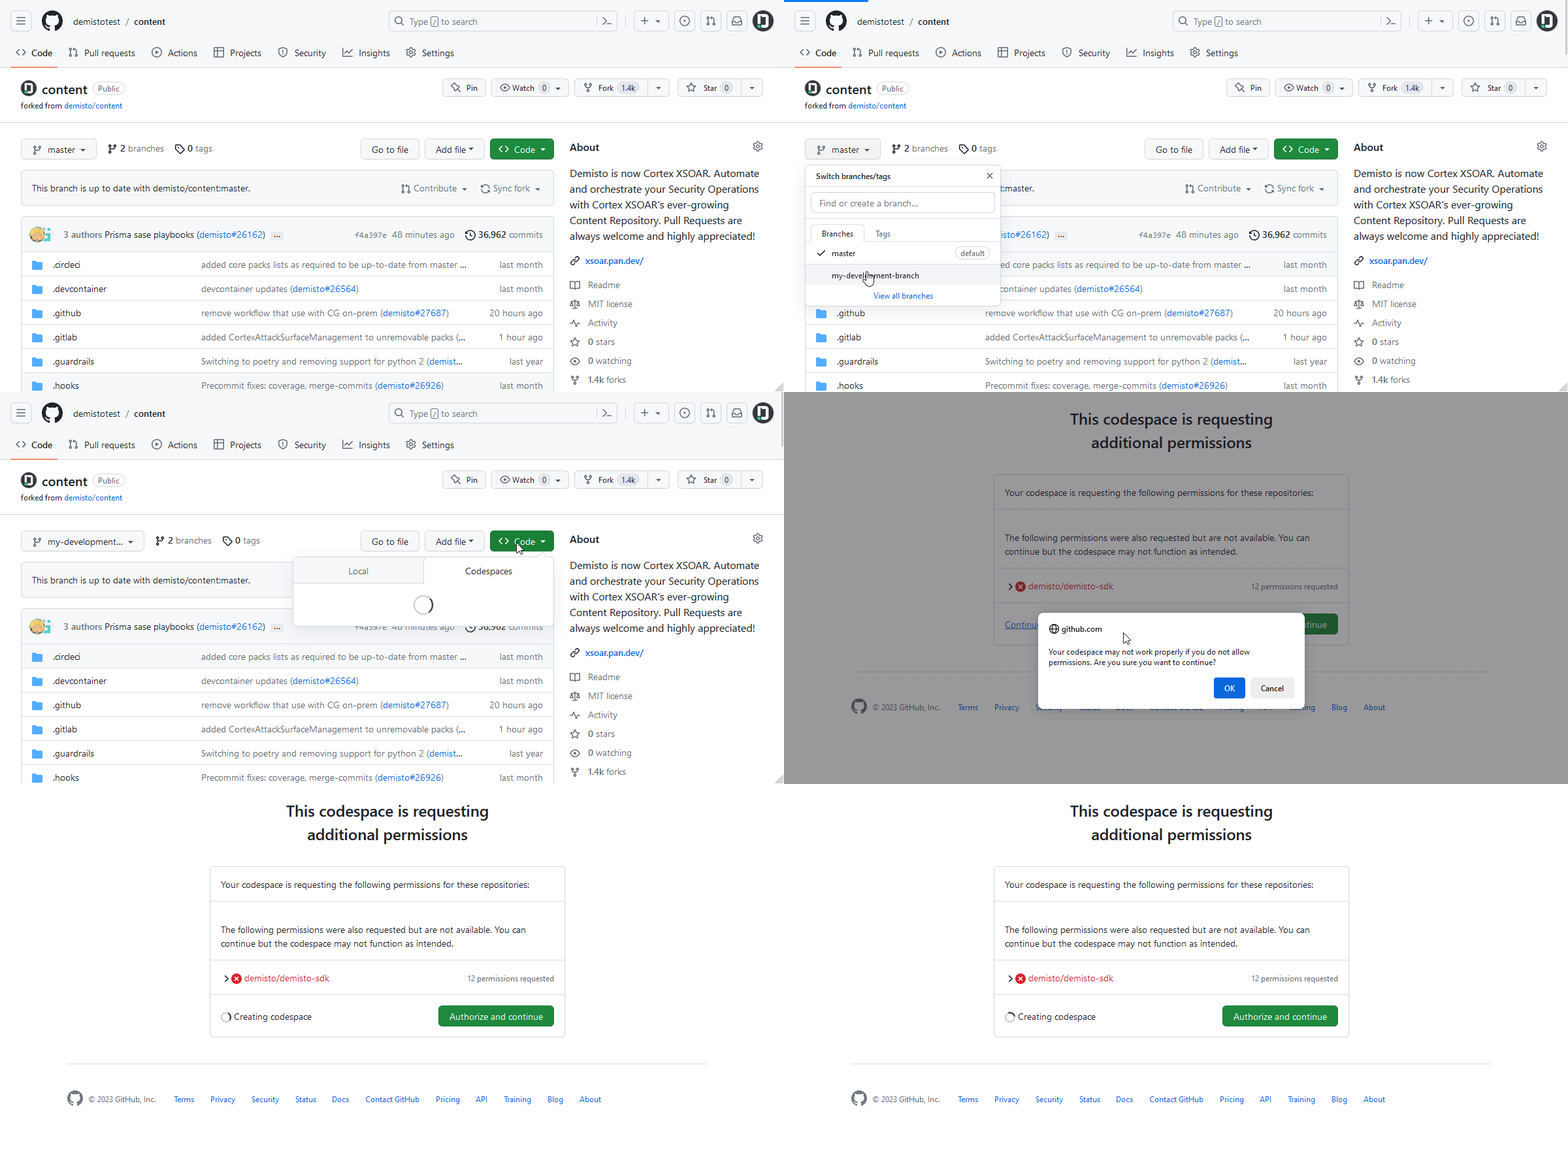
If the message This Codespace is requesting additional permissions appears, Continue without authorizing.
-
Click New Codespace.
This may take a few minutes to complete.
Configure an IDE
Browser-based Visual Studio Code
By default, GitHub provides a browser-based Visual Studio Code editor that's automatically configured, authenticated, and connected to your Codespace, using your GitHub account.
To open the editor, enter the main forked repository page, click Code, go to the Codespaces tab, and click the newly created Codespace (should have a random name).
It can take a few minutes for the Codespace to be fully initialized. This delay only occurs the first time you open a Codespace.
Once the initialization is completed and your Codespace is ready, you are redirected to the IDE, where you can start your development.
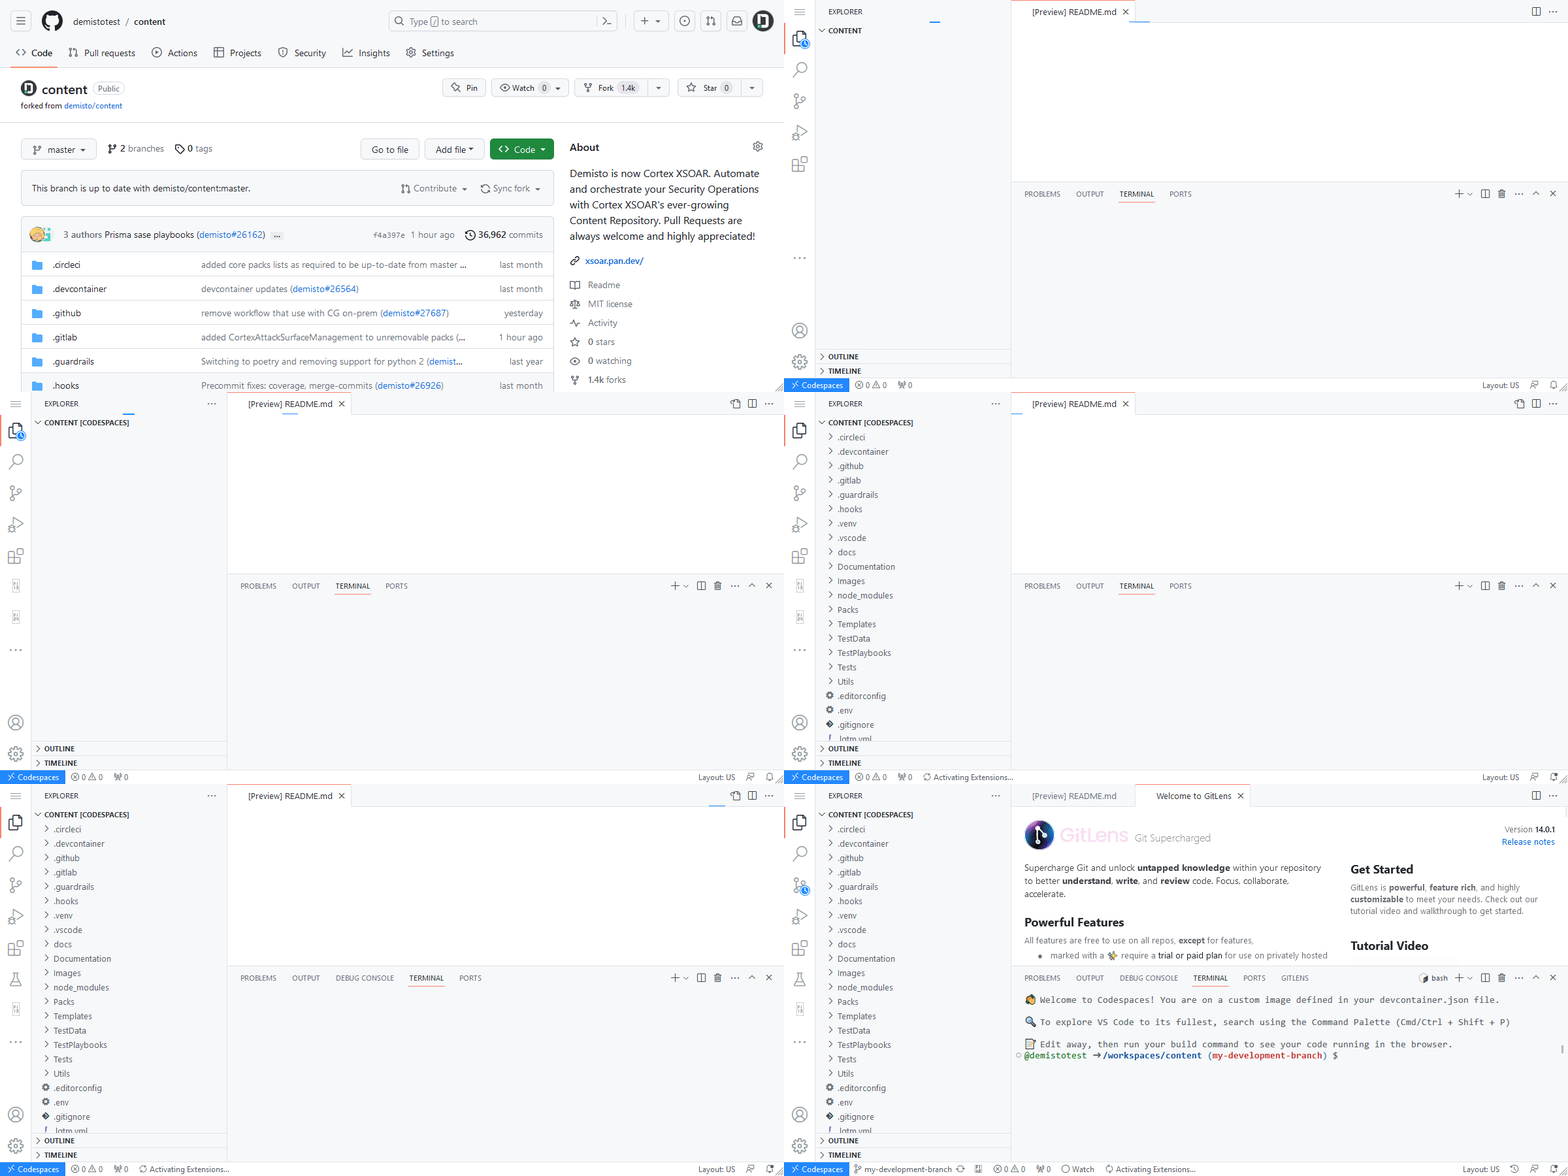
Visual Studio Code (local)
To connect to your Codespace from a local Visual Studio Code editor and use the Visual Studio Extension, you need to install the official GitHub Codespaces extension.
For a complete installation and configuration tutorial, refer to the Using GitHub Codespaces in your local development environment article by GitHub. You can skip the Creating a Codespace in VS Code section, as we've already created a Codespace.
JetBrains IDEs (PyCharm, IntelliJ IDEA, etc.) (local)
To connect to your Codespace from a JetBrains IDE, you will need to install and configure JetBrains Gateway.
For a complete installation and configuration tutorial, refer to the official Using GitHub Codespaces in your JetBrains IDE article by GitHub.
Development
After your IDE is connected to your Codespace, you can start developing your content. The environment comes pre-installed with all the required tools and dependencies for developing Cortex XSIAM content. Configuring SSH keys or any other credentials is not required, as the Codespace is already authenticated using your GitHub account.
Additional Resources
For additional documentation about GitHub Codespaces, see the official GitHub Codespaces documentation.
Set up a containerized development environment
You can set up a fully functional development environment in a Docker container. The containerized development environment includes all the necessary tools and dependencies needed to develop content in the demisto/content repository.
Requirements
The following must be installed on the host machine as described in System Requirements.
Recommended hots requirements are specified in devcontainer.json.
- 4 CPUs
- 8GB of memory
- 32GB free disk space
You also need a forked/cloned content repository on the host machine.
Installation
Install Docker, Visual Studio Code, and the Dev Containers extension, following the installation instructions on the Visual Studio Code website.
Open the repository in Visual Studio Code
- In Visual Studio Code, go to File → Open Folder.
- Select the cloned/forked repository.
- Create a new branch to use for your development.
Open the dev container in Visual Studio Code
-
In Visual Studio Code, click the green button.
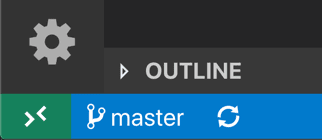
-
Click Reopen in Container. Alternatively, open the command prompt (CMD+SHIFT+P) and search for
Reopen in Container.Note
It may take a few minutes until the dev container is ready for use.
Usage
Once the dev container is ready, a new Visual Studio Code window opens and the content repository is available.
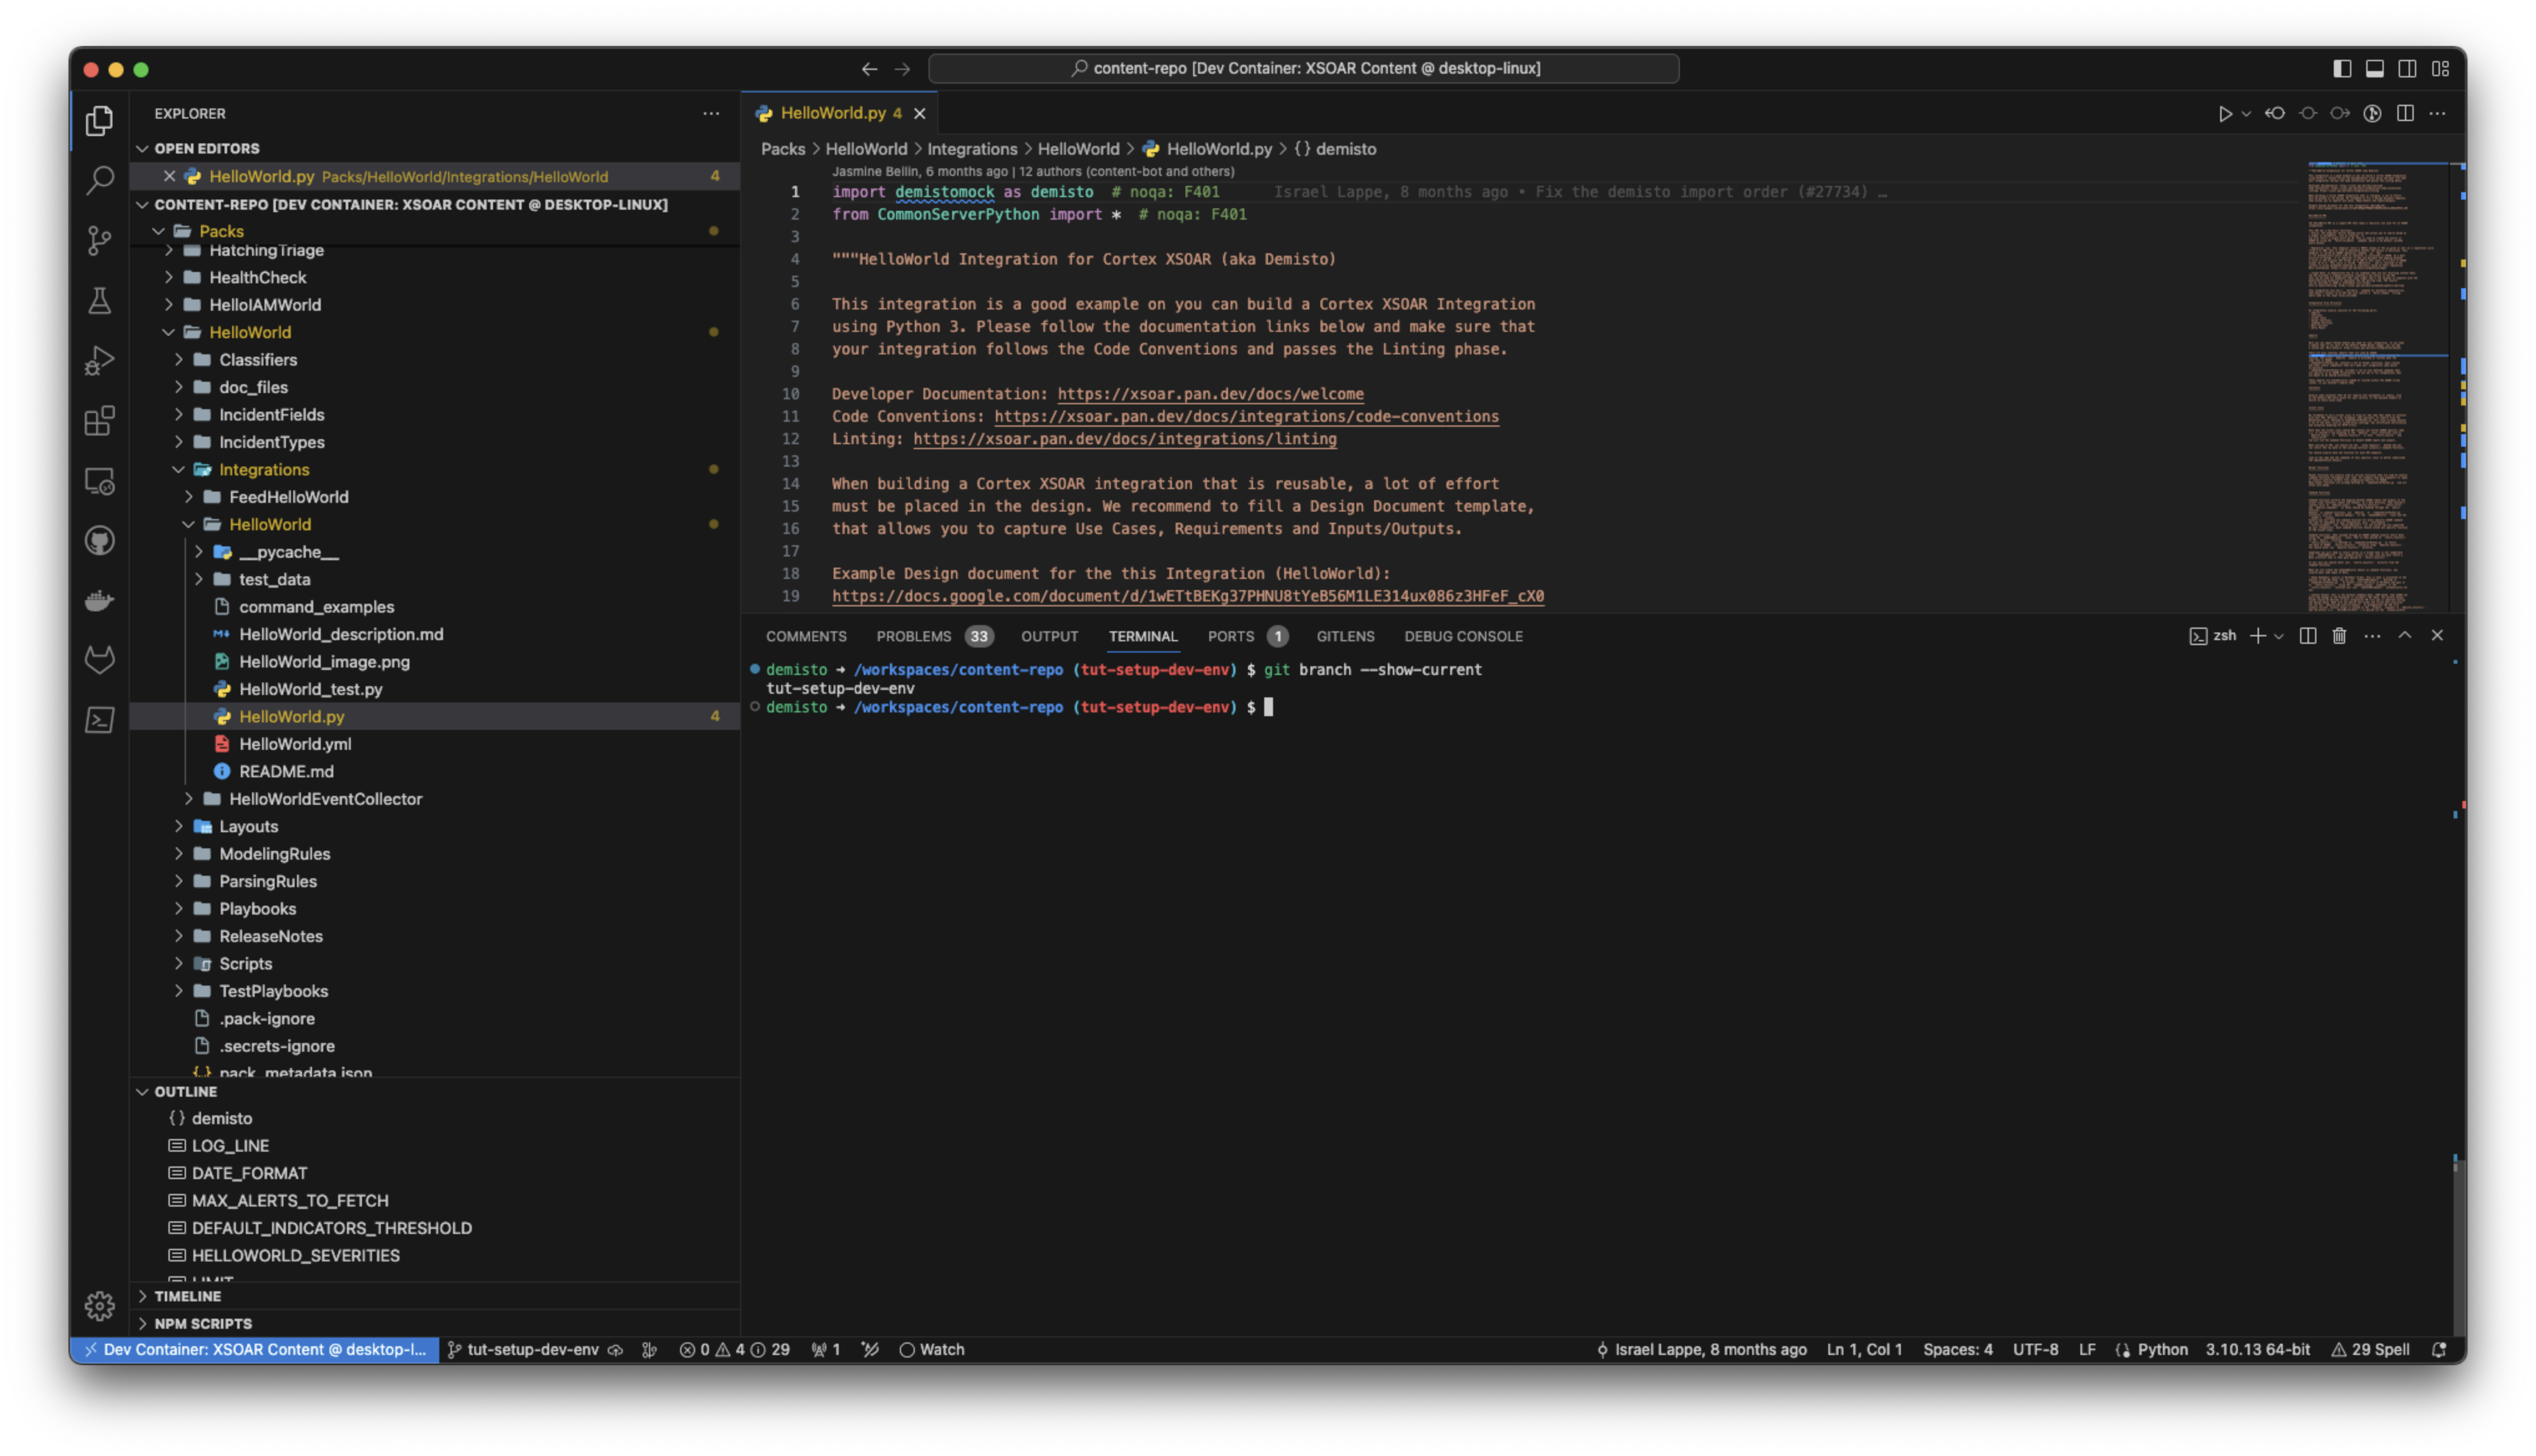
The environment contains demisto-sdk, zsh, git, pyenv, poetry, preinstalled system and Python dependencies, and recommended extensions, including the Cortex XSOAR Visual Studio Code Extension.
Troubleshooting
If there are errors when opening the dev container, try the following:
- Update Docker
- Run the following command to clean up Docker:
docker system prune -a --volumes
Demisto SDK
The Demisto SDK is a Python library and CLI designed to aid the development process, both to validate entities being developed and to assist in the interaction between your development setup and Cortex XSIAM.
Visual Studio Code extension
The Cortex XSOAR extension for Visual Studio Code (compatible with both Cortex XSOAR and Cortex XSIAM) enables you to design and author scripts and integrations for Cortex XSIAM directly from VS Code. When writing code, the plugin provides you with auto-completion of Cortex XSIAM and Python functions. The extension also provides an easy-to-use set of demisto-sdk commands to format your packs, lint, and validate. The extension provides an easy virtual environment setup for Cortex XSIAM integrations and scripts.
Note
The content repository from GitHub must be cloned or forked. Do not change the default folder name, which is content. The Visual Studio Code extension must be run from inside the content repository folder. If you run the extension from a different folder, the command 'xsoar.updateDSDK error appears.
Prerequisites
- Python 3.9 and up
- VS Code
-
Docker
See the Visual Studio Code instructions for Docker installation.
Install the Visual Studio Code extension
Install the Visual Studio Code extension directly from the Visual Studio Code marketplace or use this link. If you are using a Windows machine, click CTRL+SHIFT+P and choose Connect to WSL.
Configurations
Cortex XSIAM recommends keeping the xsoar.autoFindProblems.readProblems configuration set to false, which is the default setting, for improved performance. When this configuration is set to true, it automatically runs demisto-sdk validate when saving your file.
Commands
All of the commands in the extension start with XSOAR. For example:
XSOAR: Demisto-SDK Validate/Update Release Notes...: Runs thedemisto-sdkcommands.XSOAR: Configure XSOAR unit tests: Configures the integration unit tests.XSOAR: Configure XSOAR connection: Configures environment variables for demisto-sdk.
Environment setup
Remote development (Any OS)
To develop in a fully configured remote development environment, see instructions for a traditional development environment or a GitHub Codespace. You can also use a containerized development environment, which includes the Visual Studio Code extension by default.
Local development (Linux, MacOS, WSL2)
The VS Code extension supports setting up your development environment automatically. Run the command XSOAR: install local development environment from VS Code Command Pallete or by right-clicking the file.
If you want to install the dependencies manually, follow the instructions in this guide until the Bootstrap step.
Set up integrations and scripts environment
Each integration or script in Cortex XSIAM runs on a different environment and has different dependencies. This feature configures the integration or script and allows you to debug it and run unit tests. In addition, you can open the integration environment in a new workspace with a virtual environment, for auto-completion.
Usage
- Navigate to the integration or script.
- Right-click the integration/script and select Setup integration/script environment.
- A dialog box appears allowing you to choose to the use the current workspace or to open a new one with a virtual environment. Note that using the current workspace is faster, but you may not have auto-completion for some integrations. Opening a new workspace takes longer, but you have auto-completion for all integrations. Both options allow you to debug your integration or script, run unit test, and identify problems from within the IDE.
Debugging
- Setup integrations and scripts environment.
- Read the Debugging using your IDE section.
- Go to Run and Debug (⇧⌘D), and verify
Docker: debug (<integration>)is selected. - Click on the green arrow or the F5 key to begin debugging.
Note
If during the installation one or more Python packages fails to install, the installation proceeds and creates the virtual environment with the packages that were installed.
Troubleshooting
Setup integration/script environment fails
- Verify Docker is running.
- Verify the Allow the default Docker socket to be used (requires password) option is enabled in Docker advanced settings.
- If Docker is running, follow instructions to prune unused Docker objects and/or sign in to Docker to avoid the Docker pull rate limit.
Frequently asked questions
Which IDE should I use?
When it comes to an external IDE, you have multiple options. .
Cortex XSIAM offers a free Visual Studio Code extension that simplifies/automates tasks such as:
- Running unit tests
- Creating a blank integration or automation script
- Uploading/downloading your integration code to/from Cortex XSIAM
However, if you want to use a different IDE (for example Sublime, vi, emacs), some tasks must be performed manually. To automate them, you can use the Demisto SDK.
You can also write code directly in the Cortex XSIAM, but is not recommended if you want to contribute supported content. Check here for details.
Note
IDEs are used only for writing integrations and scripts, everything else (for example playbooks, dashboards, and layouts) should be developed in the Cortex XSIAM UI.
Once the resource is developed in the Cortex XSIAM UI, you can download it using demisto-sdk download -i "$NAME_OF_RESOURCE" or export it from the UI.
Which software development tools should I use?
While the basics of writing code and changing configuration options can be done in the Cortex XSIAM UI, for complex solutions and supported contributions you'll probably need a combination of both the Cortex XSIAM UI and other tools. See Content development environments for more information.
We recommend using Visual Studio Code with the Cortex XSOAR extension when you want to contribute content to the Marketplace. The Cortex XSOAR extension works with both Cortex XSOAR and Cortex XSIAM.
We recommend using the Cortex XSIAM UI when:
- Creating Playbooks.
- Creating non-code entities (everything but integrations and scripts), such as:
- Alert fields, types and layouts
- Indicator fields, types and layouts
- Classifiers and mappers
- Widgets
- Dashboards
- Working on the properties of your integration/script (parameters, commands, arguments, and outputs) in the YAML file - this can also be done using Visual Studio Code extension.
- Testing the user experience for what you developed.
What programming languages do you support for integrations and scripts?
-
Python
Python is the preferred development language, since it provides a wider set of capabilities and tools. Cortex XSIAM supports Python 3, and new contributions must be developed in Python 3.7 or later.
-
PowerShell
Cortex XSIAM supports PowerShell integrations and scripts.
Which operating systems are supported for development?
The recommended OS for development is either macOS or Linux, as Bash and Docker are used in some validation/testing flows.
For Windows, you can either work with a Linux VM or use Windows Subsystem for Linux.
What license applies to the Cortex XSIAM content repository?
The Cortex XSIAM content repository has an MIT License.
Why is my CLA pending after I signed the agreement?
The CLA should be signed by all branch committers. The CLA bot will let you know the committers who have not yet signed the agreement by marking them with a red X.
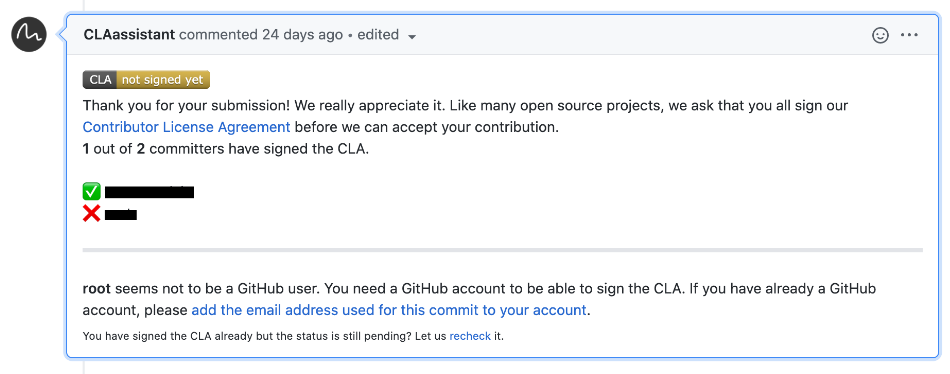
If the missing user appears under one of your commits (can be checked by visiting the Commits tab in the PR), it probably means that one of your commits was done with this user. Try the following:
- If you have the credentials for the missing user, try to log in and sign the CLA, then click the recheck button at the bottom of the CLA message.
- Try to link your commits: Add the email address of the missing user to your GitHub email settings, then click the recheck button at the bottom of the CLA message.
- If the missing user is not a real user or named
Root, you need to open a new branch:- In your local environment, manually copy the code you edited (usually you can copy the entire pack) to another location.
- Check out the master branch.
- Create a new branch.
- Paste the code from before into your new branch.
- Commit and push your new branch.
- Open a new Pull Request for the new branch.
-
If the license/CLA status check remains on Pending even though all contributors have accepted the CLA, you can recheck the CLA status by visiting the following link (replace
[PRID]with your PR ID):https://cla-assistant.io/check/demisto/content?pullRequest=[PRID]
Important
Don't forget to close the old PR and delete the old branch.
You can find information about troubleshooting commits in the GitHub docs site Troubleshooting Guide.
Integrations and scripts
Integrations and scripts enable seamless connections with other security tools, automate repetitive tasks, and provide customization for your organization's unique requirements. By leveraging these capabilities, cybersecurity teams can respond effectively to security events, reduce response time, and enhance overall security posture.
Components
Integrations and scripts in Cortex XSIAM are stored in YAML files that include all the required information (metadata, code, images, etc.). All these files together are referred to as a Unified YAML file.
To better handle the files in the content repository, Python/Powershell scripts and integrations are stored in a directory structure, where the YAML files only contain the metadata and the code and artifacts live in separate files. This is required for running linting and unit testing of the code.
When an integration or script is exported from Cortex XSIAM using demisto-sdk download, the Unified YAML is automatically split into its components. When other components (such as playbooks, alert fields, and layouts) are downloaded, they are exported as is and automatically added to their respective folders.
When an integration or script is imported into Cortex XSIAM using demisto-sdk upload, the integration/script directory files are automatically assembled in the Unified YAML file that is uploaded.
Content developers usually work with the directory structure and not the unified file.
Integration directory structure
Each integration is stored in the Integrations directory with a unique name, and includes the following file types:
 .
├── <INTEGRATION-NAME>.py              // Integration / automation script Python code.
├── <INTEGRATION-NAME>_test.py         // Python unit test code.
├── <INTEGRATION-NAME>.yml             // Configuration YAML file.
├── <INTEGRATION-NAME>_image.png       // Integration PNG logo (for integrations only).
├── <INTEGRATION-NAME>_description.md  // Detailed instructions markdown file (for integrations only)
├── README.md                          // Integration / automation script documentation.
For example, the Cortex XDR integration is stored in Integrations/CortexXDRIR and contains the following files:
.Integrations
│
└─── .CortexXDRIR
│    ├── CortexXDRIR.py
│    ├── CortexXDRIR_test.py
│    ├── CortexXDRIR.yml
│    ├── CortexXDRIR_image.png
│    ├── CortexXDRIR_description.md
│    ├── README.md
Integration metadata YAML file
All the metadata of your integration is included in the YAML file. It is a key value set for your integration. When pushing content for public release, your YAML file must follow certain structural requirements to work properly. Scripts also have a metadata YAML file that follows a similar structure.
Cortex XSIAM integration YAML common fields
The commonfields section contains information the Cortex XSIAM server uses to identify your integration.
commonfields:
  id: New Integration
  version: -1
This section contains the following information.
| Name | Description |
|---|---|
| id | A unique identifier for your integration. |
| version | Setting the value to -1 locks the integration from being modified. |
Basic integration metadata
This section contains integration metadata.
name: MaxMind GeoIP2
display: MaxMind GeoIP2
category: Data Enrichment & Threat Intelligence
image: data:image/png;base64,**Base64 of Image Here**
description: Enriches IP addresses
detaileddescription: 'The MaxMind GeoIP2 integration allows you to query the MaxMind
  API service and retrieve a JSON of all details. '
It includes the following parameters:
| Name | Description |
|---|---|
| sectionOrder | A key to organize collection and connection related parameters in separate sections in the integration settings configuration page. Applied to each parameter as relevant. |
| name | The name of your integration. This may be different than the display name. |
| display | The display name for your integration. |
| category | The applicable pack category. See all available values. |
| image | The icon used for the integration. This image must be in Base64. |
| description | A brief description of what your integration does. |
| detaileddescription | More details about how your integration works.. |
Integration settings configuration
The configuration section specifies the integration settings configuration requirements that are necessary for the integration to operate.
configuration:
- display: API Key
  name: apikey
  defaultvalue: ""
  type: 0
  required: true
- display: Use system proxy
  name: proxy
  defaultvalue: ""
  type: 8
  required: false
It includes the following parameters.
| Name | Description |
|---|---|
| display | The display name for the setting field. |
| name | The setting field name used within the integration. |
| defaultvalue | If there is a default for the field, it is indicated here. |
| type | <p>An Integer representing the field type.</p><p>Possible values</p><ul><li>0 - Short text field</li><li>4 - Encrypted text field</li><li>8 - Boolean checkbox</li><li>9 - Authentication text - allows switching to credentials</li><li>12 - Long text block</li><li>13 - special use - automatically added - Incident type single select dropdown</li><li>15 - Single select dropdown</li><li>16 - Multiple select dropdown</li></ul> |
| required | Boolean value indicating whether the parameter is required. |
| additionalinfo | Additional info about the field, appears when clicking a question mark in the settings configuration panel. |
| fromlicense | Specifies to take the credentials from the Cortex XSIAM license. This is relevant for type 9 - Authentication text. |
| advanced | Whether to expose the configuration under the advanced settings. Possible values are true or false. |
| section | Which section the configuration setting will be under. Possible values are Collect or Connect. |
Hide integration settings parameters
To hide integration parameters from the UI in all Marketplaces, set the optional hidden field to true.
To hide the parameter in specific content Marketplace versions, provide a list of marketplace version names.
xsoar- Cortex XSOAR 6 and 8xsoar_on_prem- Cortex XSOAR 6xsoar_saas- Cortex XSOAR 8 Cloud and On-premmarketplacev2- Cortex XSIARMxpanse- Cortex XPANSE
Integration configuration sections
An integration's configuration display is divided into the following sections to help users easily find parameters.
Connect parameters
Parameters required to connect to the product
- Name
- Server URL / URL address
- Classifier / Incident Type / Mapper section
- Username
- Password
- API key
- Other mandatory parameters
Advanced Connect parameters
Additional connect parameters
- Trust any certificate (not secure)
- Use system proxy settings
- Log level
- Run on single engine
- Any additional filters or non-mandatory parameters
Collect parameters
Parameters required to collect information from the product
- Fetch events / Do not fetch radio buttons or Fetch/Do not fetch indicators
- First fetch timestamp
- Number of events to fetch per fetch
- Do not use by default
- Indicator reputation
- Source reliability
- Traffic light protocol color
Advanced Collect parameters
Additional collect parameters
- Events fetch interval
- Indicator expiration method
- Feed fetch interval
- Bypass exclusion list
- Create relationships
- Any additional filters or non-mandatory parameters
Optimize parameters
This section contains parameters that do not belong to the Connect or Collect sections, such as Advanced Thresholds and Advanced Queries.
Add configuration sections to an integration YAML file
To add sections to your integrations:
- Add the
sectionOrderkey to the YAML's root. This key should contain a list of sections available. Currently, the only supported section types areConnect,Collect, andOptimize. - Add the
sectionkey to each parameter in the configuration, with one of the sections listed above. - If the parameter should only be shown in the advanced settings, add the
advanced:truekey and value to it.
category: Analytics & SIEM
sectionOrder:
- Connect
- Collect
commonfields:
  id: GitLab Event Collector
  version: -1
configuration:
- display: Server URL
  name: url
  required: true
  type: 0
  section: Connect
- displaypassword: API Key
  additionalinfo: The API Key to use for connection.
  name: api_key
  required: true
  hiddenusername: true
  type: 9
  section: Connect
- display: Groups IDs
  name: group_ids
  required: false
  type: 0
  section: Collect
- display: First fetch timestamp (<number> <time unit>, for example, 12 hours, 7 days, 3 months, 1 year)
  name: after
  required: true
  defaultvalue: 1 day
  type: 0
  section: Collect
- display: Trust any certificate (not secure)
  name: insecure
  required: false
  type: 8
  section: Connect
  advanced: true
- display: Use system proxy settings
  name: proxy
  type: 8
  required: false
  section: Connect
  advanced: true
Configuration sections example
In the following example, you can see the advanced parameters remain hidden until the user expands the Advanced Settings section.
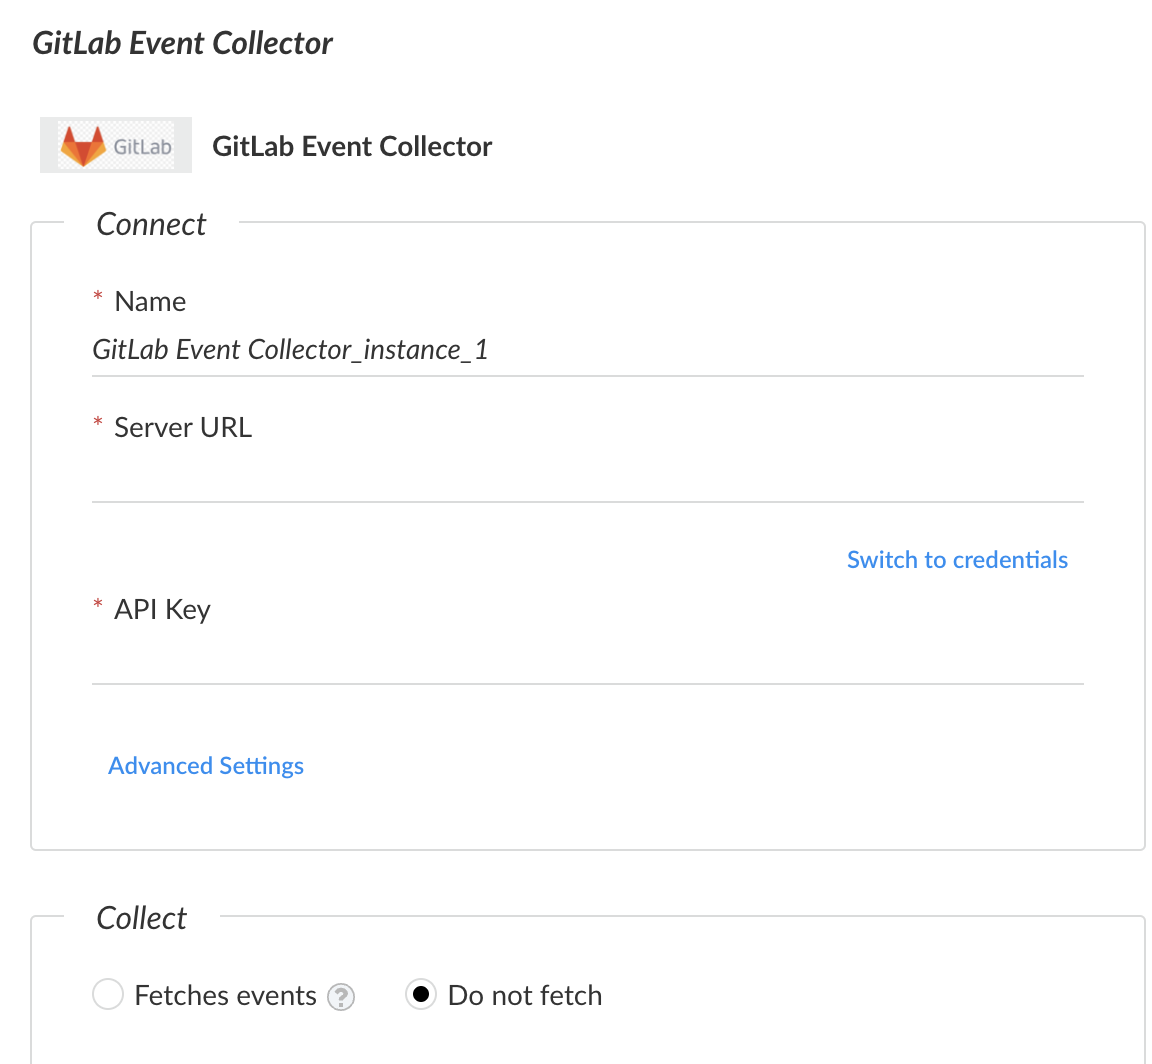
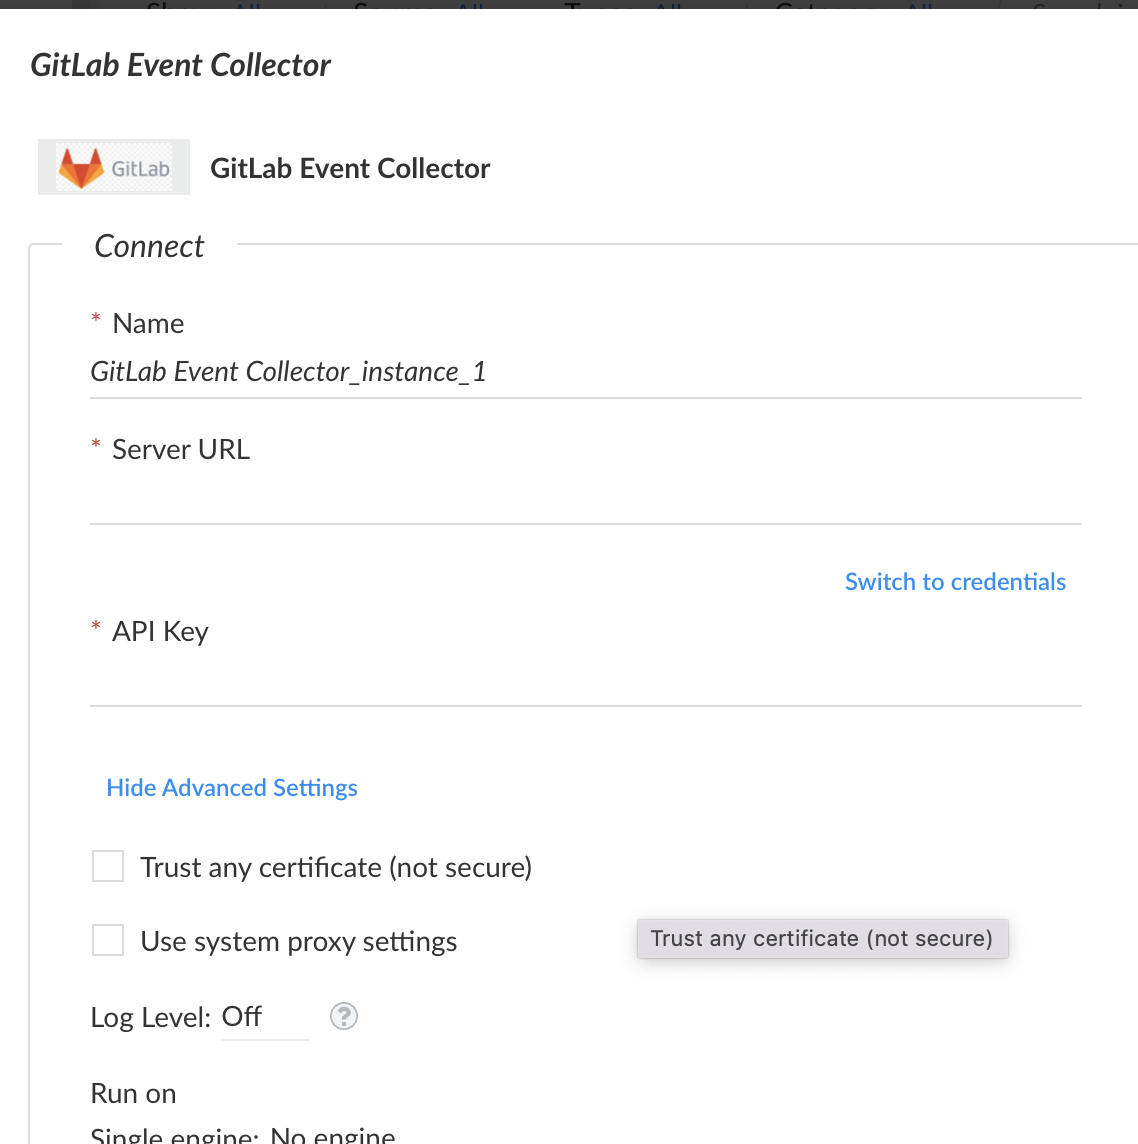
Integration script configuration
The script section is where the code resides.
script:
  script: |
    import requests
    import collections

    def explain_yaml():
        if user.understands is False:
            re_read_documentation()

  type: python
  subtype: python3
  dockerimage: demisto/python3:3.7.5.3066
It includes the following parameters.
| Name | Description |
|---|---|
| type | Indicates the language your integration is written in. Cortex XSIAM currently supports Python.t |
| subtype | When using Python, specifying subtype field is required. Use python3. |
| dockerimage | <p>When using Python, dockerimage should be specified. If dockerimage is not specified a default python3 image is used.</p><p>You can also specify any publicly available image found in DockerHub demisto account.</p><p>If you need to need to generate a custom image with your own Python packages installed, see https://github.com/demisto/dockerfiles.</p> |
Integration command configuration
The command section tells Cortex XSIAM what arguments are required for your command as well as what the outputs are.
  commands:
  - name: command-name
    arguments:
    - name: command-argument
      required: true
      default: false
      isArray: false
      secret: true
      description: This is a description for the argument
    outputs:
    - contextPath: Example.Sample.Name
      description: The name of the sample
      type: string
    - contextPath: Example.Sample.ID
      description: The ID for the sample
      type: string
    description: Sample description for the command-name function
  runonce: false
It includes the following parameters.
Command fields
| Name | Description | Standard |
|---|---|---|
| name | The name of the command. | vendorname-command |
| description | A description for the command. | |
| runonce | Boolean. Whether the command runs repeatedly. |
Command argument fields
| Name | Description | Standard |
|---|---|---|
| name | The name of the argument. | argument_name |
| required | Boolean. Whether the argument is required. | |
| default | <p>Boolean. If set to true, the user can pass a value for this argument without specifying the argument name. For example if an argument called ip is marked as default, running !ip 1.1.1.1 will be equivalent to running !ip ip=1.1.1.1.</p><div data-gb-custom-block data-tag="hint" data-style="info" class="hint hint-info"><p>Note</p><p>Only one argument per command can be set as the default.</p></div> |
|
| isArray | Boolean. Whether the argument accepts a CSV list of input values. If set to true, the command will run once instead for each input. | |
| secret | Boolean. If set to true, the argument value will not be printed in the War Room when the command runs. | |
| execution | Boolean. If set to true, the command will be marked as Potentially harmful. |
|
| description | A description of the argument. | |
| type | The type of the argument. For example keyValue is a valid argument type. If used, the argument received by your code is a python dictionary. |
Command output fields
| Name | Description | Standard |
|---|---|---|
| contextPath | The dot notation representation of the context. | Product.Entity.EntityDetails |
| description | Description of the context item. | |
| type | The type the context item will be formatted as. | Available options are: Unknown, String, Number, Date, Boolean. |
Integration version compatibility and tests
The last section of the YAML file provides Cortex XSIAM with information regarding what version is supported and tests.
fromversion: 6.5.0
tests:
  - Sample Integration Test
It includes the following parameters.
| Name | Description |
|---|---|
| fromversion | Indicates the server version that is supported with the integration. If the server version is below the fromversion, the integration will not display in the Settings area. |
| tests | <p>Instructs the Cortex XSIAM build which test to run to verify that the integration is working.</p><p>To run all of the tests, set tests to Run all tests.</p><p>To not run any tests (not recommended), set tests to No test - <reason> .</p><div data-gb-custom-block data-tag="hint" data-style="info" class="hint hint-info"><p>Note</p><p>Both the automatic and the manual mechanisms run in parallel and do not override each other, and will not cause the same test to run more than once.</p></div> |
War Room entry types
| ID | Name | Details |
|---|---|---|
| 1 | Note | A text entry in the War Room. |
| 2 | Download Agent | Internal use only. |
| 3 | File | Displays a file and its metadata. |
| 4 | Error | Displayed with a red background, this indicates that a command did not run successfully. |
| 5 | Pinned | Internal use only. |
| 6 | User Management | Internal use only. |
| 7 | Image | Displays an image in the War Room. |
| 8 | Playground Error | Indicates an error has occurred in the playground. |
| 9 | Entry Info File | Used in the FileResult function in ServerCommon. Similar to the file entry type. |
| 10-14 | Reserved | For future entry types. |
| 15 | Map | Posts a map location in the War Room. This requires an API key from Google maps. |
Integration and script parameter types
Integration parameter types are used for configuring integration instances. When adding a parameter to an integration in Cortex XSIAM, you assign it a type. The parameter type affects the parameter behavior and interaction with the user. See Configuration in the Integration metadata YAML file for more information about how to set the parameter type.
Boolean integration parameter type
This parameter type creates a checkbox in the integration instance settings configuration in the UI. When the checkbox is checked, the value in the integration code is True. If the checkbox is not checked, the value is False.
The type number is 8.
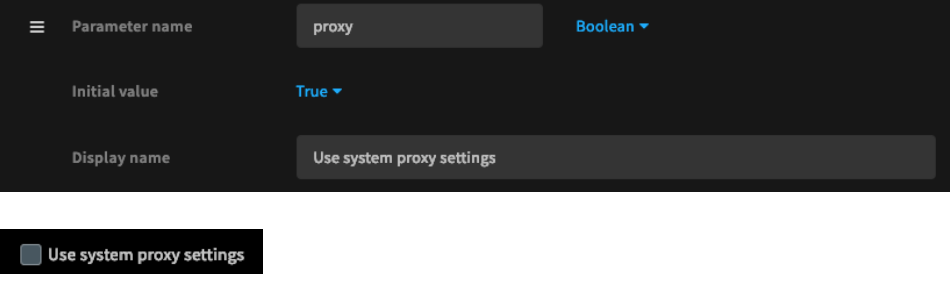
Access: demisto.params().get('proxy')
Short text integration parameter type
This parameter type is used for short input parameters, such as server URLs, ports or queries. It creates a small text box in the integration instance settings configuration in the UI.
The type number is 0.
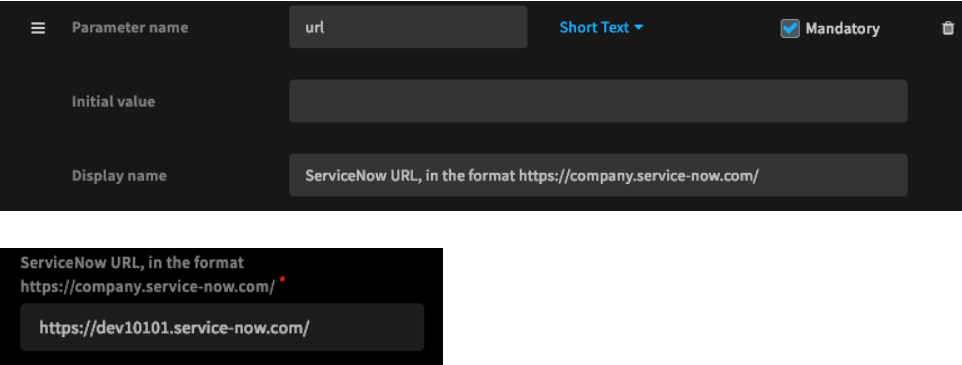
Access: demisto.params().get('url')
Long text integration parameter type
This parameter type is used for long text inputs, such as certificates. It creates a large text box in the integration instance settings configuration in the UI.
The type number is 12.
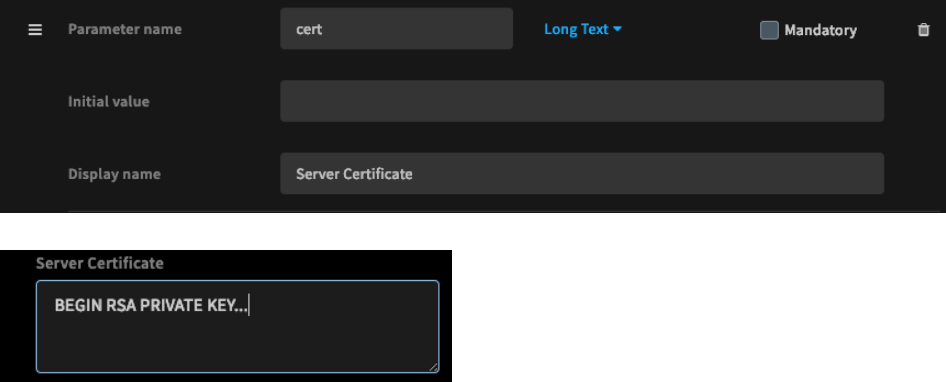
Access: demisto.params().get('cert')
Short encrypted integration parameter type
This parameter type is used for encrypted inputs, such as API tokens. This should not be used for username/password credentials. It creates a small text box for encrypted text, which is also stored encrypted in the database.
The type number is 4.
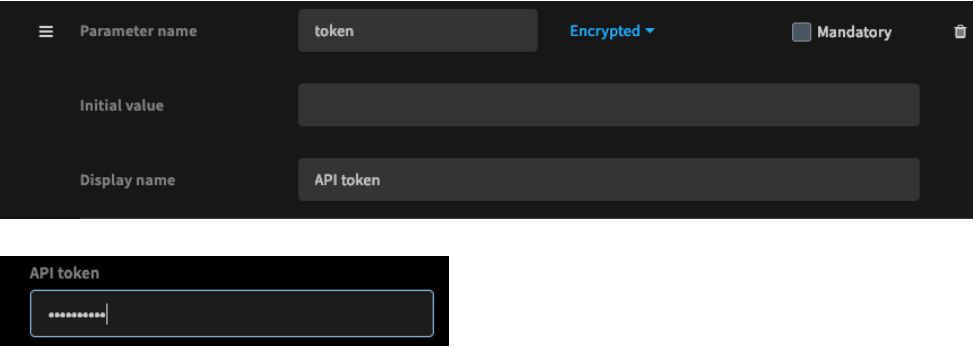
Access: demisto.params().get('token')
Long encrypted integration parameter type
This type of parameter is used for long encrypted inputs, such as certificates. It creates a text area with encrypted text. The text is also stored encrypted in the database.
The type number is: 14.

Access: demisto.params().get('cert')
Authentication integration parameter type
This parameter type is used for username/password credentials, with plain text username and an encrypted password. It supports retrieving credentials from the Cortex XSIAM credentials store (see the Cortex XSIAM support portal for more about the credentials store).
The type number is 9.
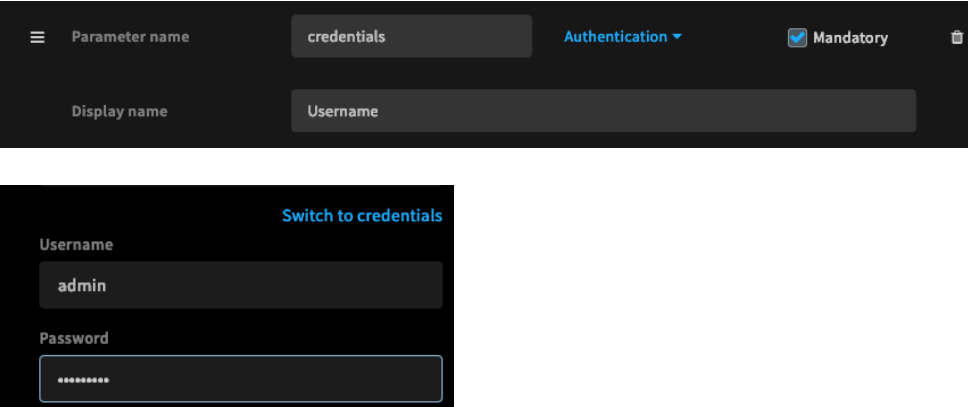
Access:
- Username:
demisto.params().get('credentials', {}).get('identifier') - Password:
demisto.params().get('credentials', {}).get('password')
Single-select integration parameter type
This parameter type enables selecting a single input from a list of allowed inputs.
The type number is 15.
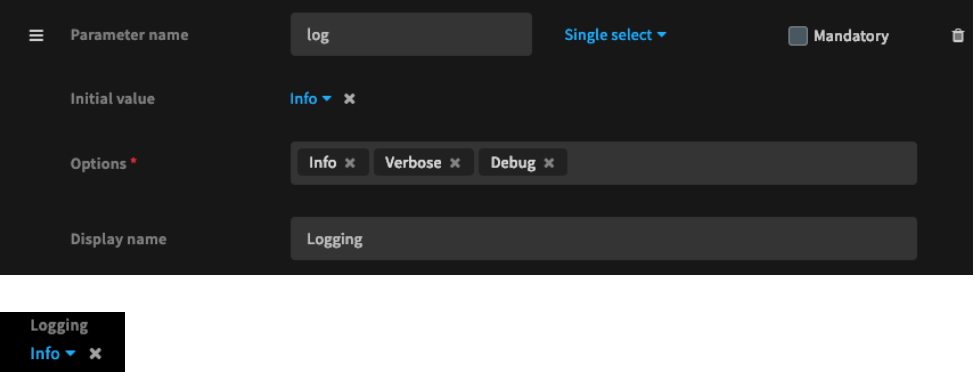
Access: demisto.params().get('log')
Multi-select integration parameter type
This parameter type enables selecting multiple inputs from a list of allowed inputs.
The type number is 16.
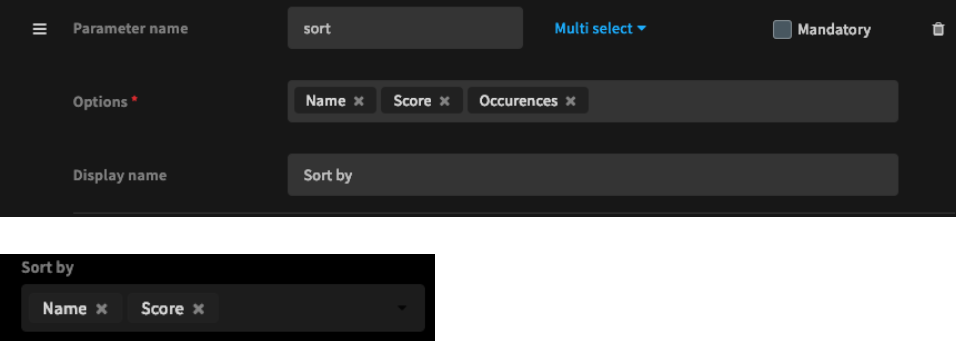
Access: demisto.params().get('sort')
Maintain integration parameter compatibility
Once a parameter is set in an integration instance settings configuration, it is saved to the Cortex XSIAM database. Before changing an existing parameter, consider the existing values to ensure backward compatibility. For example, when adding a parameter with a default value to an existing integration, add the default value in the code as well as the YAML file, as it is not added to existing instances.
Integration description file
The integration description file provides the supported integration use cases, and helps Cortex XSIAM users to easily configure an integration instance.
Tip
- Give as much information as you think the user needs to succeed, including permission levels, credentials, and keys.
- If there are permissions required on the integration level, list them.
- If commands have separate permissions, mention that, but document the required permission on the command level.
- Images can be added to integration description files.
Common integration description file use cases
- How to get credentials
- How to get API Key/secret
- How to get Application ID
Integration description file location
The description file should be placed with the rest of the integration's files.
For example, if the pack name is HelloWorld and the integration name is also HelloWorld, the description file path is:
~/.../content/Packs/HelloWorld/Integrations/HelloWorld/HelloWorld_description.md
Integration description file content
The description file contains details on how to configure an integration instance, together with the relevant details needed from the product that are important for configuration. The file content can include troubleshooting tips and advanced details for different configuration cases.
Note
This file should not be confused with the integration README file.
Integration description file example
This is the content of the HelloWorld_description.md file:
## Hello World
- This section explains how to configure the instance of HelloWorld in Cortex XSIAM.
- You can use the following API Key: `43ea9b2d-4998-43a6-ae91-aba62a26868c`
View integration description file content in Cortex XSIAM
The content of the description file is displayed in the Help tab next to the integration instance settings configurations:
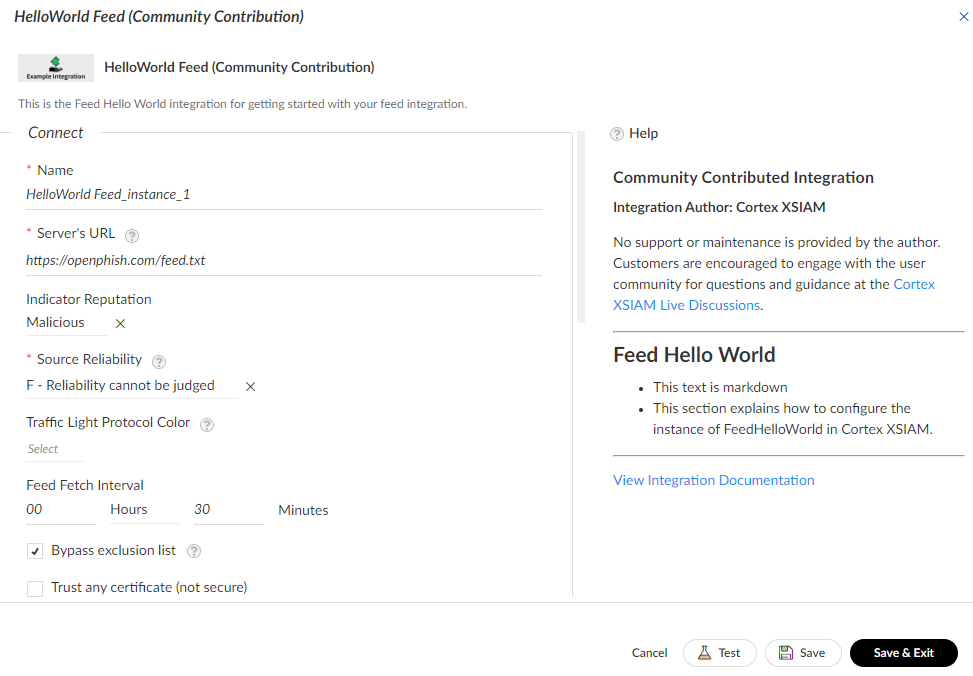
Support level header YAML metadata key
The supportlevelheader key can be set to one of the following values to set the support level header in the content description:
xsoar- The description specifies that Palo Alto Networks supports this integration.partner- The description specifies that this integration is partner supported and list the partner's contact information.community- The description specifies that this integration is community supported or lists the pack's author.
Set the support level header YAML metadata key
To set the key, open the YAML file for the integration in the same folder where the description file is located and add the supportlevelheader key with of the supported values listed above.
If the key is not set in the integration YAML, the support level header is set to the support key in the pack_metadata.json file.
Integration Logo Requirements
Before choosing a logo for your integration, review the following requirements.
- Size: Up to 10KB
- Dimensions: 120x50 pixels
- Background: Transparent (no background color, no borders)
- Color: Black and white or color (no light colors, no reversed logo with white on black background)
- Format: PNG
Developing
Standardized code conventions ensure uniformity across all Cortex XSIAM integrations.
New integrations and scripts should follow these conventions. When working on small fixes and modifications to existing code, follow the conventions used in the existing code.
For example, see the HelloWorld integration and the Templates directory.
Python code conventions
All new integrations and scripts should be written in Python 3.
Follow these Python code conventions for consistency and best practices.
Python integration and script code conventions
Python imports
Define imports and disable insecure warning at the top of the file.
import demistomock as demisto
from CommonServerPython import *
from CommonServerUserPython import *
''' IMPORTS '''

import json
import urllib3

# Disable insecure warnings
urllib3.disable_warnings()
Constants
Define constants in the file below the imports. Do not define global variables in the constants section.
''' CONSTANTS '''
DATE_FORMAT = "%Y-%m-%dT%H:%M:%SZ"
Important
Do NOT name constants as follows:
apiVersion = "v1"
url = demisto.params().get("url")
Python main function
Define the main function as follows:
- Create the
mainfunction and extract all the integration parameters usingdemisto.params()in it. - Implement the
_commandfunction for each integration command, for examplesay_hello_command(client, demisto.args()). - Wrap the commands with
try/exceptin themainto properly handle exceptions. Thereturn_error()function receives error messages and returns error entries back into Cortex XSIAM. It also prints the full error to the Cortex XSIAM logs. - For logging, use the
demisto.debug("write some log here")function. - In the
mainfunction, initialize the client instance and pass that client to_commandfunctions.
def main():
    params = demisto.params()

    client = Client(params.get('insecure'),
                    params.get('proxy'))

    command = demisto.command()
    demisto.info(f'Command being called is {command}')
    # Switch case
    try:
        if demisto.command() == 'fetch-events':
            events, last_run = fetch_events_command(client)
            # we submit the indicators in batches
            send_events_to_xsiam(events=events, vendor='MyVendor', product='MyProduct')
        else:
            results = get_events_command(client)
            return_results(results)
    except Exception as e:
        raise Exception(f'Error in {SOURCE_NAME} Integration [{e}]')
Integration Client class
Follow these best practices for defining the Client class.
- The
Clientclass should inherit fromBaseClient, which is defined inCommonServerPython. - The
Clientclass should contain the_http_requestfunction. - The
Clientclass should implement the third party service API. - The
Clientclass should contain all the necessary parameters to establish connection and authentication with the third party API.
class Client(BaseClient):
    """
    Client will implement the service API, should not contain Cortex XSIAM logic.
    Should do requests and return data
    """

    def get_ip_reputation(self, ip: str) -> Dict[str, Any]:
        """Gets the IP reputation using the '/ip' API endpoint

        :type ip: ``str``
        :param ip: IP address to get the reputation for

        :return: dict containing the IP reputation as returned from the API
        :rtype: ``Dict[str, Any]``
        """

        return self._http_request(
            method='GET',
            url_suffix=f'/ip',
            params={
                'ip': ip
            }
        )

    def get_alert(self, alert_id: str) -> Dict[str, Any]:
        """Gets a specific HelloWorld alert by id

        :type alert_id: ``str``
        :param alert_id: id of the alert to return

        :return: dict containing the alert as returned from the API
        :rtype: ``Dict[str, Any]``
        """

        return self._http_request(
            method='GET',
            url_suffix=f'/get_alert_details',
            params={
                'alert_id': alert_id
            }
        )
Client instance using an API key
api_key = demisto.params().get('apikey')

# get the service API url
base_url = urljoin(demisto.params()['url'], '/api/v1')

# if your Client class inherits from BaseClient, SSL verification is
# handled out of the box by it, just pass ``verify_certificate`` to
# the Client constructor
verify_certificate = not demisto.params().get('insecure', False)

headers = {
    'Authorization': f'Bearer {api_key}'
}

client = Client(
    base_url=base_url,
    verify=verify_certificate,
    headers=headers,
    proxy=proxy
)
Client instance using basic authentication
username = demisto.params().get('credentials', {}).get('identifier')
password = demisto.params().get('credentials', {}).get('password')

# get the service API url
base_url = urljoin(demisto.params()['url'], '/api/v1')

# if your Client class inherits from BaseClient, SSL verification is
# handled out of the box by it, just pass ``verify_certificate`` to
# the Client constructor
verify_certificate = not demisto.params().get('insecure', False)

client = Client(
    base_url=base_url,
    verify=verify_certificate,
    auth=(username, password),
    proxy=proxy
)
HTTP call retries
sleep can cause performance issues so do not use it in the code. Instead, use the retry mechanism implemented in the BaseClient with the _http_request function retries and backoff_factor arguments.
Integration command functions
Follow these best practices for defining the command functions.
- Each integration command should have a corresponding
_commandfunction. - Each
_commandfunction should use Client class functions. - Each
_commandfunction should be unit testable. This means you should avoid using global functions such asdemisto.results(),return_error(), orreturn_results(). - The
_commandfunction will receive the Client instance and theargs(demisto.args()dictionary). - The
_commandfunction will return an instance of the CommandResults class. - To return results to the War Room, in the Main use
return_results(say_hello_command(client, demisto.args()).
def say_hello_command(client, args):
    """
    Returns Hello {somename}

    Args:
        client: HelloWorld client
        args: all command arguments

    Returns:
        Hello {someone}

        readable_output: This will be presented in Warroom - should be in markdown syntax - human readable
        outputs: Dictionary/JSON - saved in incident context in order to be used as input for other tasks in the
                 playbook
        raw_response: Used for debugging/troubleshooting purposes - will be shown only if the command executed with
                      raw-response=true
    """
    name = args.get('name')

    result = client.say_hello(name)

    # readable output will be in markdown format - https://www.markdownguide.org/basic-syntax/
    readable_output = f'## {result}'
    outputs = {
        'name': name,
        'hello': result
    }

    results = CommandResults(
        outputs_prefix='HelloWorld.Result',
        outputs_key_field='name',
        outputs=outputs,

        readable_output=readable_output,
        raw_response=result
    )

    return results


def main():
    """
    SOME CODE HERE...
    """
    try:
        client = Client(
            base_url=server_url,
            verify=verify_certificate,
            auth=(username, password),
            proxy=proxy)

        """
        SOME CODE HERE...
        """
        if demisto.command() == 'helloworld-say-hello':
            return_results(say_hello_command(client, demisto.args()))

    # Log exceptions
    except Exception as e:
        return_error(f'Failed to execute {demisto.command()} command. Error: {str(e)}')
IOC reputation commands
There are two implementation requirements for reputation commands (!file, !email, !domain, !url, and !ip) that are enforced by checks in the Demisto SDK.
- The reputation command's argument of the same name must have
defaultset to True. - The reputation command's argument of the same name must have
isArrayset to True.
For more details on these two command argument properties, see Integration metadata YAML file.
Integration test-module command
The test-module executes when users click the Test button in the integration instance settings page.
If the test module returns the string "ok" then the test will be green (success). Any other string will be red.
if demisto.command() == 'test-module':
    # This is the call made when pressing the integration Test button.
    result = test_module(client)
    return_results(result)
def test_module(client):
    """
    Returning 'ok' indicates that the integration works like it suppose to. Connection to the service is successful.

    Args:
        client: HelloWorld client

    Returns:
        'ok' if test passed, anything else will fail the test
    """

    result = client.say_hello('DBot')
    if 'Hello DBot' == result:
        return 'ok'
    else:
        return 'Test failed because ......'
Fetch-events integration command
The fetch-events function initiates a fetch events request to specific external product endpoint(s) using the relevant chosen parameters, and sends the fetched events to the Cortex XSIAM dataset. If the integration instance setting is configured to Fetch events, then this command is executed at the specified Events Fetch Interval. By default, it runs every minute to retrieve and import events into Cortex XSIAM.
Follow these best practices for defining the fetch-events function.
- Must be unit testable.
- Should receive the
last_runparam instead of executing thedemisto.getLastRun()function. - Should return
next_runback to Main, instead of executingdemisto.setLastRun()inside thefetch-eventsfunction. - Should return incidents back to main instead of executing
demisto.incidents()inside thefetch-eventsfunction.
def get_events(client, alert_status, args):
    limit = args.get('limit', 50)
    from_date = args.get('from_date')
    events = client.search_events(
        prev_id=0,
        alert_status=alert_status,
        limit=limit,
        from_date=from_date,
    )
    hr = tableToMarkdown(name='Test Event', t=events)
    return events, CommandResults(readable_output=hr)
Event collector parsing rules
When developing an event collector, set the Parsing Rules within the collector code. The most common parsing rule is the _time system property which indicates the event time from the remote system. For example, if we use the following events as an example:
 {
    "id": "1234",
    "message": "New user added 'root2'",
    "type": "audit",
    "op": "add",
    "result": "success",
    "host_info": {
      "host": "prod-01",
      "os": "Windows"
    },
    "created": "1676764803"
  }
We see that the created event property is a str representation of a timestamp (without milliseconds). However, The _time system property expects the result to be an str in format %Y-%m-%dT%H:%M:%S.000Z. So we can can transform it using the timestamp_to_datestring function from CommonServerPython.
from datetime import datetime
from CommonServerPython import *

#  ...
  events: List[Dict[str, Any]] = get_events()

  for event in events:
    event["_time"] = timestamp_to_datestring(float(event.get("created")) * 1000)

# ...
To verify that the parsing rule has been applied and is working as expected, run an XQL search to compare the _time and created fields:
dataset = "MyVendor_MyProduct_raw" |
fields
  _time,
  created
Python exceptions and errors
Follow these best practices for defining exceptions and errors.
- Wrap your command block in a "Try-Catch" to avoid unexpected issues.
- Raise exceptions in the code where needed, but in the Main catch them and use the
return_errorfunction. This enables acceptable error messages in the War Room instead of stack trace. - If the
return_errorsecond argument is error, you can pass an Exception object. -
You can use
demisto.error("some error message")to log your error.def main(): try: if demisto.command() == 'test-module': test_get_session() return_results('ok') if demisto.command() == 'atd-login': return_results(get_session_command(client, demisto.args())) except Exception as e: return_error(f'Failed to execute {demisto.command()} command. Error: {str(e)}')
Integration command unit tests
Every integration command must be covered with a unit test.
Python variable naming
When naming variables, use Snake case, not Pascal case or camel case.
Integration command outputs
See Context and outputs.
Follow Context Standards when naming indicator outputs
Link integration command context
Linking context together prevents a command from overwriting existing data or from creating duplicate entries in the context.
Example to link context:
ec = ({
    'URLScan(val.URL && val.URL == obj.URL)': cont_array,
    'URL': url_array,
    'IP': ip_array,
    'Domain': dom_array
})
In this example, val.URL && val.URL == obj.URL links the results retrieved from this integration with results already in the context where the value of the URL is the same. For more information about linking syntax and Cortex XSIAM see Transform Language (DT).
Integration logging
You can pass information to the logs to assist future debugging.
To post to the logs:
demisto.debug('DEBUG level - This is some information we want in the logs')
demisto.info('INFO level - This is some information we want in the logs')
demisto.error('ERROR level - This is some information we want in the logs')
You can also use the @logger decorator in Cortex XSIAM. When the decorator is placed at the top of each function, the logger prints the function name as well as all the argument values to the LOG.
@logger
def get_ip(ip):
    ip_data = http_request('POST', '/v1/api/ip' + ip)
    return ip_data
Important
Do not print sensitive data to the log. When an integration is ready to be used as part of a public release (meaning you are done debugging it), always remove print statements that are not absolutely necessary.
Date and time formats
Cortex XSIAM does not use epoch time for customer facing results (for example context and human readable). If the API you are working with requires the time format to be in epoch, then convert the date string into epoch as needed. Where possible, use the human readable format of the date %Y-%m-%dT%H:%M:%S.
time_epoch = 499137720
formatted_time = timestamp_to_datestring(time_epoch, "%Y-%m-%dT%H:%M:%S")
print(formatted_time)
>>> '1985-10-26T01:22:00'
Note
If the response returned is in epoch, best practice is to convert it to %Y-%m-%dT%H:%M:%S.
Pagination in integration commands
When working on a command that supports pagination (usually has API parameters like page and/or page size) with a maximal page size enforced by the API, best practice is to create a command that supports two different use cases with the following three integer arguments:
pagepage sizelimit
Pagination use cases
- Manual Pagination: The user wants to control the pagination by using the
pageandpage sizearguments, usually as part of a wrapper script for the command. The command passes thepageandpage sizevalues on to the API request. If the limit argument is also provided, it is redundant and should be ignored. - Automatic Pagination: Useful when the user prefers to work with the total number of results returned from the playbook task rather than implementing a wrapper script that works with pages. In this case, the
limitargument aggregates results by iterating over the necessary pages from the first page until collecting all the needed results. This implies a pagination loop mechanism is implemented behind the scenes. For example, if the limit value received is 250 and the maximal page size enforced by the API is 100, the command performs 3 API calls (pages 1,2, and 3) to collect the 250 requested results. Note that when a potentially large number of results may be returned and the user wants to perform filters and/or transformers on them, we still recommend creating a wrapper script for the command for better performance.
Pagination recommendations
- Page Tokens - If an API supports page tokens, instead of the more common 'limit' and 'offset'/'skip' as query parameters:
- The arguments that are implemented are:
limit,page_size, andnext_token. -
The retrieved
next_tokenshould be displayed in human readable output and in the context. It is a single node in the context and overwritten with each command run.{ "IntegrationName": { "Object1NextToken": "TOKEN_VALUE", "Object2NextToken": "TOKEN_VALUE", "Objects1": [], "Objects2": [] } }
- The arguments that are implemented are:
- Standard argument defaults:
limitis a default of '50' in the YAML.page_sizeshould be defaulted in the code to '50', if onlypagewas provided. - There should be no maximum value for the
limitargument. This means that users should be able to retrieve as many records as they need in a single command execution. - When an integrated API doesn't support pagination parameters at all - then only
limitwill be applied, and implemented internally in the code. An additional argument will be added to allow the user to retrieve all results by overriding the defaultlimit: all_result=true. - If the API supports only 'limit' and 'offset'/'skip' as query parameters, then all 3 standard Cortex XSIAMpagination arguments should be implemented.
Integration credentials
When working on integrations that require user credentials (such as username/password and API token/key) best practice is to use the credentials parameter type.
Username and password credentials
-
In the UI:
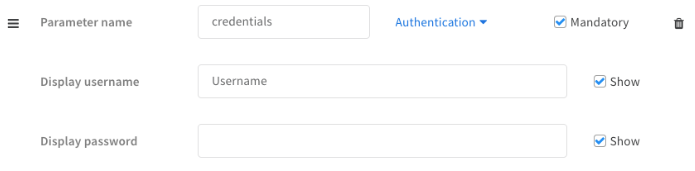
-
In the YAML file:
- display: Username
  name: credentials
  type: 9
  required: true
-
In the code:
params = demisto.params() username = params.get('credentials', {}).get('identifier') password = params.get('credentials', {}).get('password') -
In demistomock.py:
return {
        "base_url": "...",
        "credentials": {"identifier": "<username>",
                        "password": "<password>"},
        ...
    }
API token or key credentials
-
In the UI:
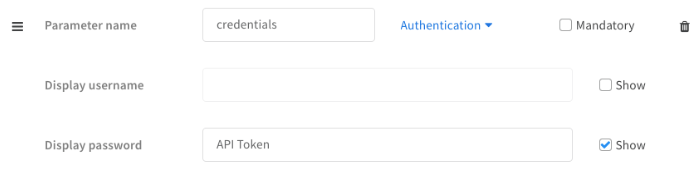
-
In the YAML file:
- displaypassword: API Token
  name: credentials
  type: 9
  required: false
  hiddenusername: true
Using the credentials parameter type is recommended (even when working with API token/key) because it enables using the Cortex XSIAM credentials vault feature when configuring the integration for the first time.
Cortex XSIAM CommonServerPython helper functions
Check the script helper for common predefined functions to facilitate script development. The following are some examples.
fileResult
Returns a file to the War Room by using the following syntax:
filename = "sample.txt",
file_content = "hello sample"

return_results(fileResult(filename, file_content))
You can specify the file type, but it defaults to "None" when not provided.
create_indicator_result_with_dbotscore_unknown
Used when the API response to an indicator is not found and returns a verdict with an unknown score (0).
A generic response is returned to the War Room and to the context path by using the following syntax:
indicator = "www.google.com",
indicator_type = DBotScoreType.URL
reliability = DBotScoreReliability.C

return_results(create_indicator_result_with_dbotscore_unknown(indicator, indicator_type, reliability))
The War Room result shows:

The Context Path shows:
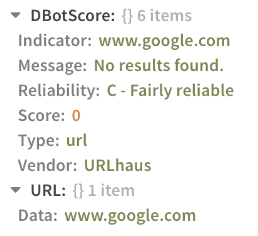
If the integration has a reliability it should be noted, but it defaults to None when not provided.
Note
- If the indicator type is
CustomIndicator, you need to provide thecontext_prefixargument. - If the indicator type is
Cryptocurrency, you need to provide theaddress_typeargument.
tableToMarkdown
Transforms your JSON, dict, or other table into a Markdown table.
name = 'Sample Table'
t = {'first':'Foo', 'second': 'bar', 'third': 'baz', 'fourth': ''}
headers = ['Input', 'Output']
tableToMarkdown(name, t, headers=headers, removeNull=True)
This sample code snippet creates this table:
| Input | Output |
|---|---|
| first | Foo |
| second | bar |
| third | baz |
| fourth |
In the War Room, tables appear as follows:
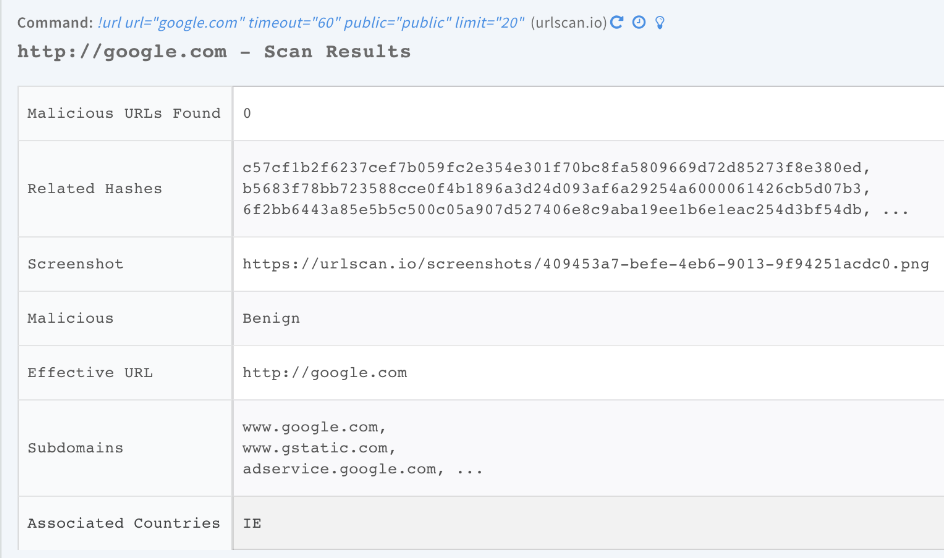
Add table headers
Use headerTransform to convert existing keys into formatted headers.
t = {'header_1': 'a1', 'header_2': 'b1', 'header_3': 'c1'}
tableToMarkdown('headerTransform Example', t, headerTransform=underscoreToCamelCase)
|Header1|Header2|Header3|
|---|---|---|
| a1 | b1 | c1 |
#
You may also use ```removeNull``` to remove empty columns in the table. Default is False.
```python
headers = ['header_1', 'header_2']
data = {
    'header_1': 'foo',
}
tableToMarkdown('removeNull Example', data, removeNull=True, headers=headers)
|header_1|
|---|
| foo |

You may also use ```metadata``` to add text above the table as a secondary title.
#
Use the ```url_keys``` argument to specify a list of keys whose value in the MD table should be a clickable url. This list may contain keys of inner dicts\list of dicts in the data given to the tableToMarkdown function.
For example, for the following data with some of the keys nested:
d = { "id": "23", "url1": " https://url1.com", "result": { "files": [ { "filename": "Screen.jpg", "url2": "https://url2.com" } ] }, "links": { "url3": "https://url2.com" } }
and using ` url_keys=('url1', 'url2', 'url3')
` ```python tableToMarkdown('Data Table', d, headers=('id', 'url1', 'result', 'links'), headerTransform=string_to_table_header, url_keys=('url1', 'url2', 'url3')) `
The resulting table is:

Format date fields
Use the date_fields argument (list) of date fields to format date values to human-readable output.
data = [
    {
        "docker_image": "demisto/python3",
        "create_time": '1631521313466'
    }
]
tableToMarkdown('tableToMarkdown date_fields example', data, headers=["docker_image", "create_time"],
                date_fields=['create_time'])
|---|---|
| demisto/python3 | 2021-09-13 08:21:53 |

#
Use the ```json_transform_mapping``` argument (Dict[str, JsonTransformer]), to map between a header key to the corresponding JsonTransformer.
```python
data_with_list = {
  "Machine Action Id": "5b38733b-ed80-47be-b892-f2ffb52593fd",
  "MachineId": "f70f9fe6b29cd9511652434919c6530618f06606",
  "Hostname": "desktop-s2455r9",
  "Status": "Succeeded",
  "Creation time": "2022-02-17T08:20:02.6180466Z",
  "Commands": [
    {
      "startTime": null,
      "endTime": "2022-02-17T08:22:33.823Z",
      "commandStatus": "Completed",
      "errors": ["error1", "error2", "error3"],
      "command": {
        "type": "GetFile",
        "params": [
          {
            "key": "Path",
            "value": "test.txt"
          }
        ]
      }
    },
    {
      "startTime": null,
      "endTime": "2022-02-17T08:22:33.823Z",
      "commandStatus": "Completed",
      "errors": [],
      "command": {
        "type": "GetFile",
        "params": [
          {
            "key": "Path",
            "value": "test222.txt"
          }
        ]
      }
    }
  ]
}
table = tableToMarkdown("tableToMarkdown test", data_with_list,
            json_transform_mapping={'Commands': JsonTransformer(keys=('commandStatus', 'command'))})
For example, this code snippet generates the following table:
Transform JSON data into a table
Use the is_auto_json_transform argument (bool), to auto-transform a complex JSON.
nested_data_example = {
  "name": "Active Directory Query",
  "changelog": {
    "1.0.4": {
      "path": "",
      "releaseNotes": "\n#### Integrations\n##### Active Directory Query v2\nFixed an issue where the ***ad-get-user*** command caused performance issues because the *limit* argument was not defined.\n",
      "displayName": "1.0.4 - R124496",
      "released": "2020-09-23T17:43:26Z"
    }
  },
  "nested": {
    "item1": {
      "a": 1,
      "b": 2,
      "c": 3,
      "d": 4
    }
  }
}
table = tableToMarkdown("tableToMarkdown test", nested_data_example,
                    headers=['name', 'changelog', 'nested'],
                    is_auto_json_transform=True)
For example, this code snippet generates the following table:
demisto.command()
demisto.command() ties a function to a command in Cortex XSIAM, for example:
    if demisto.command() == 'ip':
        ip_search_command()
demisto.params()
demisto.params() returns a dictionary of parameters for a given integration to grab global variables in an integration, for example:
    APIKEY = demisto.params().get('apikey')
    ACCOUNT_ID = demisto.params().get('account')
    MODE = demisto.params().get('mode')
    INSECURE = demisto.params().get('insecure')
demisto.args()
demisto.args() returns a dictionary of arguments for a given command to get non-global variables, for example:
url = demisto.args().get('url')
This argument can be seen in the integration settings as shown below:
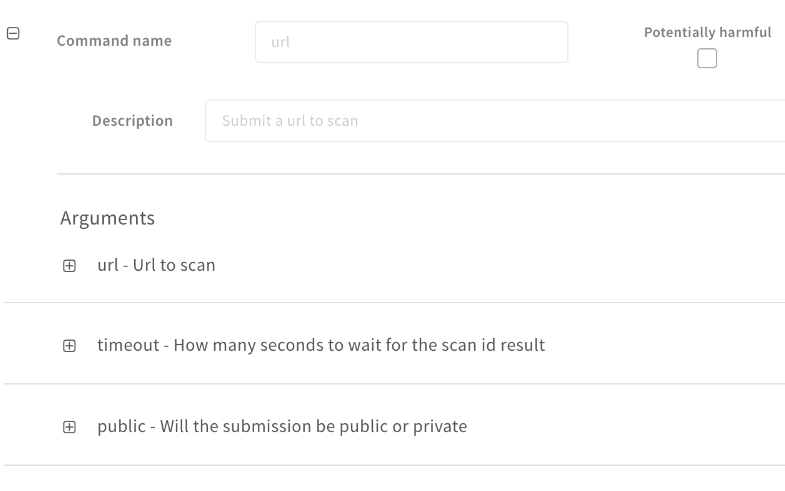
After the command is executed, the arguments are displayed in the War Room as part of the command, for example:
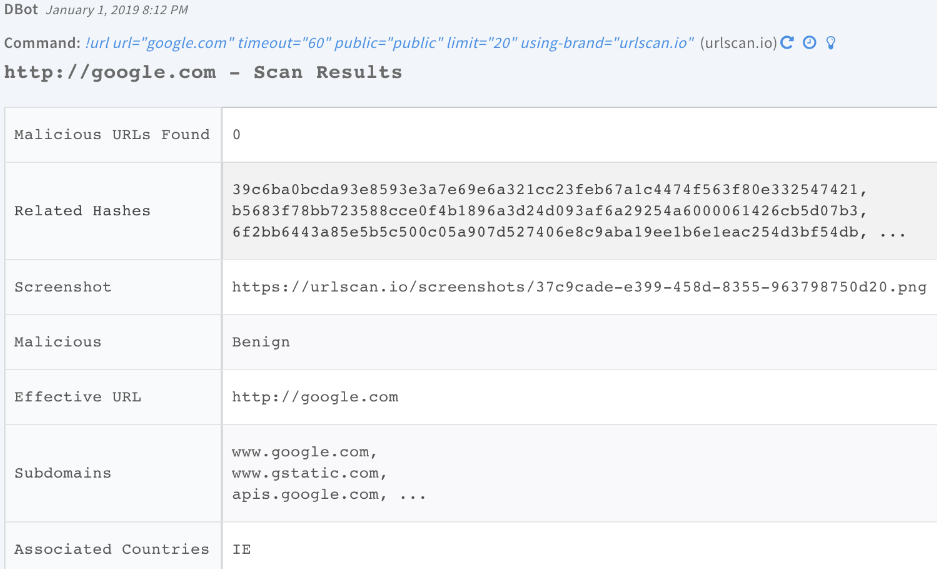
IndicatorsTimeline
IndicatorTimeline is an optional object, applicable only for commands that operate on indicators. It is a dictionary (or list of dictionaries) in the following format:
{
'Value': '127.0.0.1',
'Message': 'System marked the indicator 127.0.0.1 as Benign',
'Category': 'Benign'
}
When IndicatorTimeline data is returned in an entry, the timeline section of the indicator whose value was noted in the timeline data will be updated and is viewable in the indicator's view page in Cortex XSIAM.
Choose a category for timeline data
Any Cortex XSIAM integration command or script that returns timeline data may include the Category value. If not given, when returning timeline data from a Cortex XSIAM integration or script, the value will be Integration Update or Automation Update accordingly.
Include timeline data in War Room entries
A timeline object should be included when a command operates on an indicator. For example, if the command returns a DBotScore or entities as described in context standards documentation to the entry context. A common case is reputation commands, such as !ip, !url, and !file. When implementing these commands in integrations, timeline data should be included in the returned entry.
| Argument | Type | Description |
|---|---|---|
| indicators | list | Expects a list of indicators, if a dictionary is passed it will be put into a list. |
| category | string | Indicator category. |
| message | string | Indicator message. |
For example:
results = [
    CommandResults(
        outputs_prefix='VirusTotal.IP',
        outputs_key_field='Address',
        outputs={
            'Address': '8.8.8.8',
            'ASN': 12345
        }
    ),
    CommandResults(
        outputs_prefix='VirusTotal.IP',
        outputs_key_field='Address',
        outputs={
            'Address': '1.1.1.1',
            'ASN': 67890
        }
    )]
return_results(results)
timeline = IndicatorsTimeline(
      indicators=[args.get('ips')],
      message='Important to note'
)

timeline = IndicatorsTimeline(
      indicators=[args.get('ips')],
      category='Some category',
      message='IP was blocked in Checkpoint'
)
CommandResults
This object returns outputs. It represents an entry in the War Room. A string representation of an object must be parsed into an object before being passed into the field.
| Argument | Type | Description |
|---|---|---|
| outputs_prefix | String | Should be identical to the prefix in the YAML contextPath in YAML file. For example: CortexXDR.Incident. |
| outputs_key_field | String | Primary key field in the main object. If the command returns incidents, and one of the properties of the incident is incident_id, then outputs_key_field='incident_id' |
| outputs | List / dictionary | (Optional) The data to be returned and will be set to context. If not set, no data will be added to the context. |
| readable_output | String | (Optional) Markdown string that will be presented in the War Room, should be human readable - (HumanReadable) - if not set, readable output will be generated via tableToMarkdown function. |
| raw_response | Object | (Optional) Must be dictionary, if not provided then will be equal to outputs. Usually must be the original raw response from the third-party service (originally Contents). |
| indicators | List | DEPRECATED: use 'indicator' instead. |
| indicator | Common.Indicator | Single indicator such as Common.IP, Common.URL, Common.File, etc. |
| indicators_timeline | IndicatorsTimeline | Used by the server to populate an indicator's timeline. |
| ignore_auto_extract | Boolean | If set to True prevents the built-in auto-extract from enriching IPs, URLs, files, and other indicators from the result. Default is False. |
| mark_as_note | Boolean | If set to True marks the entry as note. Default is False. |
| relationships | List | A list of EntityRelationship objects representing all the relationships of the indicator. |
| scheduled_command | ScheduledCommand | Manages the way the command result should be polled. |
CommandResults example
results = CommandResults(
    outputs_prefix='VirusTotal.IP',
    outputs_key_field='Address',
    outputs={
        'Address': '8.8.8.8',
        'ASN': 12345
    },
    indicators_timeline = timeline
)
return_results(results)
For more information on how to return results, see Context and outputs.
return_results
return_results() calls demisto.results(). It accept either a list or single item of the CommandResults object or any object that demisto.results can accept. Use return_results to return the CommandResults object or a basic string.
For example:
results = CommandResults(
    outputs_prefix='VirusTotal.IP',
    outputs_key_field='Address',
    outputs={
        'Address': '8.8.8.8',
        'ASN': 12345
    }
)
return_results(results)
results = CommandResults(
    outputs_prefix='VirusTotal.IP',
    outputs_key_field='Address',
    outputs={
        'Address': '8.8.8.8',
        'ASN': 12345
    },
    indicators_timeline = timeline
)
return_results(results)
return_results('Hello World')
return_error
Returns an error entry to the War Room and calls sys.exit(), meaning the script will stop.
return_error(message="error has occurred: API Key is incorrect", error=ex)
It produces an error in the War Room, for example:

CommandRunner
CommandRunner is a class for executing multiple commands, which returns all valid results together with a human readable summary table of successful commands and commands that return errors.
To use this functionality, create a list of commands using the CommandRunner.Command, and then call CommandRunner.run_commands_with_summary(commands).
The following are CommandRunner.Command arguments.
| Argument | Type | Description |
|---|---|---|
commands |
String or List | The command to run. Can be a single command or list of commands. |
args_lst |
Dictionary or List | The command arguments. If provided in a list and the commands argument is a string, run the command with all the arguments in the list. If the commands argument is a list, args_lst should be the same size and the arguments should correspond to the same command index. |
instance |
String | (Optional) The instance the command should run. |
brand |
String | (Optional) The brand the command should run. |
For example, the following code snippet returns all the results of all commands, including a human readable summary table.
commands = [CommandRunner.Command('command1', {'arg': 'val'},
            CommandRunner.Command('command2', [{'arg1': 'val2'}, {'arg2': 'val2'}])),
            CommandRunner.Command(['command3', 'command4'], [{'arg1': 'val2'}, {'arg2': 'val2'}]),
            CommandRunner.Command('command5', {}, instance='some_instance', brand='some_brand')]

return_results(CommandRunner.run_commands_with_summary(commands))
AutoExtract
As part of CommandResults() there is an argument called ignore_auto_extract, which prevents the built-in indicator extraction feature from enriching IPs, URLs, files, and other indicators from the result.
By default, ignore_auto_extract is set to False.
For example:
results = CommandResults(
    outputs_prefix='VirusTotal.IP',
    outputs_key_field='Address',
    outputs={
        'Address': '8.8.8.8',
        'ASN': 12345
    },
    indicators_timeline = timeline,
    ignore_auto_extract = True
)
return_results(results)
PowerShell
PowerShell integrations and scripts are executed using PowerShell Core. PowerShell Core v6.2 and higher is supported.
PowerShell integration and script development
PowerShell Docker images
Similar to Python, PowerShell integrations and scripts run in a Docker container. All of the Docker images that support PowerShell are named with a prefix of either demisto/powershell or demisto/pwsh. If you need to create a new image follow the instructions at demisto/dockerfiles project: https://github.com/demisto/dockerfiles.
PowerShell integration directory structure
Similar to Python, PowerShell integrations and scripts should follow the same directory structure as Python integrations and scripts, with one difference: unit test files must be named: <IntegrationFileName>.Tests.ps1, following the Pester unit testing naming convention. You can use demisto-sdk split to convert an exported PowerShell integration or script to the correct directory structure. For more information, see the Demisto SDK.
PowerShell linting with PSScriptAnalyzer
PSScriptAnalyzer is used for linting and static code analysis of PowerShell integrations and scripts. If you receive a false positive from the Analyzer, you can suppress the rule by decorating the function/script with SuppressMessageAttribute. Specify a Justification in the attribute as to why the suppression is necessary. An example usage of suppression can be seen in CommonServerPowerShell.ps1. For more information about PSScriptAnalyzer suppression, see the PSScriptAnalyzer documentation .
PowerShell integration unit testing
The Python unit testing guidelines also apply for PowerShell. Unit tests should avoid performing communication with external APIs and should instead use mocking when possible. Testing actual interaction with external APIs should be performed via Test Playbooks. For running unit tests we use Pester.
Import CommonServerPowerShell.ps1
Your code must import CommonServerPowerShell.ps1 by adding the following to the beginning of the file:
. $PSScriptRoot\CommonServerPowerShell.ps1
When the integration or script code is unified by demisto-sdk for deployment to the instance the import line is automatically removed.
Use Main in integration and script code
When writing unit tests you import the integration or script file from the *.Tests.ps1 file. Therefore, the file must be written so that it will not execute when it is imported. This can be done with a simple Main function which is called depending on how the file was executed. Adding the following code ensures the script is not run when imported by the unit tests:
# Execute Main when not in Tests
if ($MyInvocation.ScriptName -notlike "*.Tests.ps1") {
    Main
}
Write PowerShell unit tests
All unit tests should be written in a separate PowerShell file named <IntegrationFileName>.Tests.ps1. The unit test file should import the integration or script code file by adding the following line at the beginning of the file:
. $PSScriptRoot\<IntegrationFileName>.ps1
Group related unit tests using the Describe block. Use Context for grouping tests that use the same mock logic. Write your tests using the It command. Example unit tests can be seen for the VerifyJSON script. For more details, see the Pester documentation.
Mock PowerShell functions
Pester supports mocking PowerShell functions. You can mock any function defined in CommonServerPowerShell.ps1 and functions included in standard PowerShell and imported modules. Pester doesn't support mocking object methods. This includes methods of the $demisto object. You can, however, modify the $demisto object properties in a test. For example, you can set the ContextArgs property to control the return of $demisto.Args() method. Example code:
$demisto.ContextArgs = @{arg1 = 'val1' }
In addition, you can mock functions called by the $demisto object. For example, you can mock DemistoServerLog which is called by the $demisto object methods: Info, Debug, Error. Example of mocking can be seen for the VerifyJSON script script. See more information about mocking with Pester.
Run PowerShell linting and tests
Run with Docker and Demisto SDK
The build runs the unit tests within the Docker image that the integration/script runs with. We recommend using this method to run linting and test as it uses the same environment (Docker container) with all modules and operating system dependencies that are used by the integration/script. To run both linting and testing run: demisto-sdk pre-commit -i <path to code directory>.
For example: demisto-sdk pre-commit -i Packs/Legacy/Scripts/VerifyJSON
Note
You can skip PSScriptAnalyzer or unit testing using the command line parameters --no-pwsh-analyze and --no-pwsh-test.
Run from the PowerShell command line
As a prerequisite, verify you have installed Pester, PSScriptAnalyzer and all dependent modules.
Run demisto-sdk pre-commit -i ... to copy CommonServerPowerShell.ps1 and demistomock.ps1 to the integration/script directory. Enter the pwsh console and go to the integration/script directory.
To run unit tests use Pester: Invoke-Pester.
To run PSScriptAnalyzer: Invoke-ScriptAnalyzer -Path <code file>
Check the command help for information on how to specify which tests to run.
Sample output:
VS Code for PowerShell development
We recommend using VS Code as your PowerShell editor. The PowerShell Extension developed by Microsoft comes with built-in support for PSScriptAnalyzer and Pester unit testing (including debugging).
Sample output of PSScriptAnalyzer in VS Code alerting about an unused variable:
Sample debug session using VS Code:
General naming conventions
When naming integrations, commands, arguments and outputs, use the following conventions:
Cortex XSIAM naming conventions
-
Integration parameters
Use brief and clear names with
snake_case. Example:min_severity -
Command names
Use kebab-case with the structure
!vendor-action-object. Example:!helloworld-get-alert -
Command arguments
Use brief and clear names with
snake_case. Example:alert_id. -
Command outputs
Use
PascalCasewith the structure Vendor.Object.data for the Vendor and Object block. Example:HelloWorld.Alert.owner.nameAfter the Vendor and Object blocks, use the same format as your product's API, but do not include any spaces or dots in the key names, as dots are interpreted as object separators. For example, Cortex XSIAM correctly parses:
```json
{
  "HelloWorld": {
    "Alert": {
      "owner": {
          "name": "Francesco",
          "email": "francesco@cortex.local"
      }
    }
  }
}
```
as:
```
HelloWorld.Alert.owner.name: "Francesco"
HelloWorld.Alert.owner.email: "francesco@cortex.local"
```
Cortex XSIAM does NOT correctly parse:
```json
    {
  "HelloWorld": {
    "Alert": {
      "owner.name": "Francesco",
      "owner.email": "francesco@cortexl.local"
    }
  }
}
```
Integration Parameters
Each integration has parameters that are configured by the customers when they configure an instance on their Cortex XSIAM system. Integration parameters should be named using snake_case.
Cortex XSIAM integration parameter guidance
Supported integration parameter types
- Short text (type 0)
- Encrypted (type 4)
- Boolean Checkbox (type 8)
- Credentials (type 9)
- Long text (type 12)
- Single select (type 15)
- Multi-select (type 16)
Connection and authentication parameters
These parameters determine how Cortex XSIAM connects to the third-party API.
-
url
The URL Cortex XSIAM should connect to. Always expose this parameter even in SaaS applications, as SaaS applications can have variations as well (tenant name or federal cloud, for example).
-
api_key
In most cases, credentials are needed to authenticate to the API you want to interact with. Many times this is in the form of an API key, a secure and unique identifier that is stored in Cortex XSIAM and used somewhere in your code (i.e. to populate HTTP headers) to craft the requests. Sometimes APIs use different authentication parameters: credentials, tokens, client_id and client_secret combination, and so on. Capture all the required parameters that allow a machine-to-machine authentication between Cortex XSIAM and your API.
Note
If you are using authentication mechanisms based on short-lived access tokens such as JSON Web Tokens (JWT) and long-lived refresh tokens, read more about the Integration cache.
-
proxy
Boolean to determine whether to use the system proxy setting. You don't need to handle proxy settings in your code, but you should set environment variables accordingly based on this Boolean.
-
insecure
Boolean to determine whether to avoid verifying SSL certificates.
Event collector integration parameters
If your integration fetches events, you should define what type of entities in the third-party product you are connecting to and are retrieving. Every product has its own nomenclature: they might be called Alerts, Incidents, etc. For the purposes of this topic, we assume they are called Alerts in the third-party product, and they are mapped 1:1 to Cortex XSIAM alerts.
Many products are very verbose, and have the potential to generate many alerts of different types, with different levels of severity. Each alert could have a status (i.e. open or resolved) as well as attributes. SOC analysts might be interested only in a subset of the incoming Alerts. When they configure your integration in Cortex XSIAM, they expect to find parameters that allow them to filter and determine which alerts should generate incidents and which alerts should be discarded.
Common filters for fetching incidents include:
-
Maximum number of alerts per fetch
The parameter name must be
max_fetch. It is a good practice to limit the number of incidents you retrieve every time you fetch, in order to avoid overloading Cortex XSIAM by running many playbooks at the same time. Customers should be allowed to set this value as an integration parameter. Recommended default is 10 to 20, with a maximum of 50. -
Severity
Many SOCs prefer to retrieve only incidents with specific severities, from third-party systems, and to avoid importing lower severity ones incidents. The integration settings should allow customers to choose the severity of the incidents they want to retrieve. This can be done either using a multi-select, or a single-select where they specify the lowest severity level they want to retrieve.
-
Type
Third-party products typically generate different types of alerts/events/issues/incidents. Often SOCs are interested only in a specific subset of types they want to handle automatically through Cortex XSIAM. This integration setting allows end users to specify which types of alerts they want to fetch from the third-party platform. If the types are of finite and known cardinality, we recommend using a multi-select. If the types are not known up front or may change over time, we recommend using a comma-separated text input, with a link in the details to your product documentation where an up-to-date list of those types is available.
-
First fetch
The parameter name must be
first_fetch. When customers configure the integration for the first time, they usually want to retrieve incidents that happened in the past. This common setting is used to specify how far back in time they want to retrieve incidents the first time the integration runs. You can check the HelloWorld integration implementation code for more details.
If the API you are integrating with also supports a query interface using free-form text (i.e. a specific query language implemented in the product), you can also add another parameter (usually called query) that gives users more freedom to generate alerts in Cortex XSIAM based on a specific query. This gives more flexibility to the users and supports more advanced use cases for your integration. The convention is that the query parameter overrides other parameters such as severity and type, as we assume that only advanced users use the query option.
There are additional required parameters for integrations that fetch incidents. You don't need to handle them in your code, but they must be correctly defined in your integration YAML file. You can view the updated list.
Additional integration parameters
Your product is unique, and so are the parameters you might need to add to the integration. Besides connectivity and fetch parameters, you can add more parameters as you see fit. In general, add parameters whenever you want the users to specify settings that are common across several integration commands.
An example is a Threat Intel reputation threshold. In this scenario, you are creating an integration that asks for reputation about network assets (IP addresses, URLs and domains), using different commands (!ip, !url and !domain). Your API returns a score value between 0 and 100 to determine whether the asset is malicious. The higher the score, the higher the chance the asset is bad. Cortex XSIAM reports whether an indicator is good or bad using the concept of DBotScore with a discrete set of values: 0 means unknown, 1 good, 2 suspicious and 3 bad. To map the score that your API returns (0-100) to a DBotScore, you typically define a threshold above which the asset is considered malicious. The value of the threshold is usually a number that you provide as a default (60, for example) but the end user should be able to override the default. Threshold value should be common across all of the different reputation commands (!ip, !url and !domain) of your integration. For this reason, adding threshold as an additional integration parameter is a good practice. Users can set the threshold once and don't have to specify it manually every time to invoke a reputation command. You can still add an optional argument to each command to override the integration parameter if needed.
Context and outputs
The context is a map (dictionary) / JSON object that is created for each incident and is used to store structured results from integration commands and automation scripts. Context keys are strings and the values can be strings, numbers, objects, and arrays/lists.
The main use of the context is to pass data between playbook tasks. One task stores its output in the context and another task reads that output from the context and uses it.
For example, the ThreatStream integration includes the threatstream-analysis-report command, which returns the report of a file or URL that was submitted to the sandbox.
Cortex XSIAM integration context and outputs
REST API response example
{
    "Category": "File",
    "Duration": 68,
    "Network": [
        {
            "UdpDestination": "8.8.8.8",
            "UdpPort": 53,
            "UdpSource": "192.168.2.4"
        },
        {
            "UdpDestination": "192.168.2.4",
            "UdpPort": 65324,
            "UdpSource": "8.8.8.8"
        },
        {
            "UdpDestination": "192.168.2.4",
            "UdpPort": 54896,
            "UdpSource": "8.8.8.8"
        }
    ],
    "ReportID": "413336",
    "Started": "2019-05-30 14:05:25",
    "Verdict": "Benign"
}
Integration YAML command outputs
In the integration YAML file, the command outputs are defined BrandName.Object.PropertyName.
For each output entry, there are three fields:
- Context Path - Dot notation representation of the path to access the context.
- Description - Short description of what this context entry represents.
- Type - The type of value that is located at the path. Enables Cortex XSIAM to format the data correctly.
YAML output definitions
outputs:
- contextPath: ThreatStream.Analysis.ReportID
  description: The ID of the report submitted to the sandbox.
  type: String
- contextPath: ThreatStream.Analysis.Category
  description: The report category.
  type: String
- contextPath: ThreatStream.Analysis.Started
  description: Detonation start time.
  type: String
- contextPath: ThreatStream.Analysis.Duration
  description: Duration of the detonation (in seconds).
  type: Number
- contextPath: ThreatStream.Analysis.Network.UdpSource
  description: The source of UDP.
  type: String
- contextPath: ThreatStream.Analysis.Network.UdpDestination
  description: The destination of UDP.
  type: String
- contextPath: ThreatStream.Analysis.Network.UdpPort
  description: The port of the UDP.
  type: String
- contextPath: ThreatStream.Analysis.Verdict
  description: The verdict of the sandbox detonation.
  type: String
Return command outputs in code
report_id = '413336'

response_from_api = {
    "Category": "File",
    "Duration": 68,
    "Network": [
        {
            "UdpDestination": "8.8.8.8",
            "UdpPort": 53,
            "UdpSource": "192.168.2.4"
        },
        {
            "UdpDestination": "192.168.2.4",
            "UdpPort": 65324,
            "UdpSource": "8.8.8.8"
        },
        {
            "UdpDestination": "192.168.2.4",
            "UdpPort": 54896,
            "UdpSource": "8.8.8.8"
        }
    ],
    "ReportID": "413336",
    "Started": "2019-05-30 14:05:25",
    "Verdict": "Benign"
} # assume that we get this response from the service

command_results = CommandResults(
    outputs_prefix='ThreatStream.Analysis',
    outputs_key_field='ReportID',
    outputs=response_from_api
)
return_results(command_result)
Note
- The code must match the context path outputs specified in the YAML file.
- You can output the API response as is to the context as a raw value, under the brand name key. You do not need to modify the API response and map it to human-readable keys.
- Avoid using dot and space characters in the context path keys.
Integration context output use cases
Important
When setting integration_name with the vendor value, it must match the name of the integration as defined in the YAML file.
Return integration command data
alerts = [
    {
        'id': 100,
        'name': 'alert1'
    },
    {
        'id': 200,
        'name': 'alert2'
    }
]

results = CommandResults(
    outputs_prefix='PrismaCompute.Alert',
    outputs_key_field='id',
    outputs=alerts
)
return_results(results)
YAML output definition
outputs:
- contextPath: PrismaCompute.Alert.id
  description: 'The alert id'
  type: Number
- contextPath: PrismaCompute.Alert.name
  description: 'The alert name'
  type: String
Markdown command output
Results
| id | name |
|---|---|
| 100 | alert1 |
| 200 | alert2 |
Incident context data
{
  "PrismaCompute": {
    "Alert": [
      {
        "id": 100,
        "name": "alert1"
      },
      {
        "id": 200,
        "name": "alert2"
      }
    ]
  }
}
Return results with custom Markdown
alerts = [
    {
        'id': 100,
        'name': 'alert1'
    },
    {
        'id': 200,
        'name': 'alert2'
    }
]

markdown = '### This is the Header\n'
markdown += tableToMarkdown('Table Title', alerts, headers=['id', 'name'])

results = CommandResults(
    readable_output=markdown,
    outputs_prefix='PrismaCompute.Alert',
    outputs_key_field='id',
    outputs=alerts
)
return_results(results)
Custom Markdown results
This it the Header
Table Title
| id | name |
|---|---|
| 100 | alert1 |
| 200 | alert2 |
Return data with multiple unique identifier fields
Note
Key fields are used to determine whether the data is updated or added as new.
alerts = [
    {
        'id': 100,
        'name': 'alert1'
    },
    {
        'id': 200,
        'name': 'alert2'
    }
]

results = CommandResults(
    outputs_prefix='PrismaCompute.Alert',
    outputs_key_field=['id', 'name'],
    outputs=alerts
)
return_results(results)
Return a potentially malicious file
Note
Potentially malicious file - e.g. email attachment
file_entry = fileResult(filename='file.txt', data='file content')
return_results(file_entry)
YAML definition
outputs:
- contextPath: File.Size
  description: The size of the file.
  type: Number
- contextPath: File.SHA1
  description: The SHA1 hash of the file.
  type: String
- contextPath: File.SHA256
  description: The SHA256 hash of the file.
  type: String
- contextPath: File.Name
  description: The name of the file.
  type: String
- contextPath: File.SSDeep
  description: The SSDeep hash of the file.
  type: String
- contextPath: File.EntryID
  description: The entry ID of the file.
  type: String
- contextPath: File.Info
  description: File information.
  type: String
- contextPath: File.Type
  description: The file type.
  type: String
- contextPath: File.MD5
  description: The MD5 hash of the file.
  type: String
- contextPath: File.Extension
  description: The file extension.
  type: String
Return an informational file
Note
Non-malicious files - e.g. reports
file_entry = fileResult(filename='file.txt', data='file content', file_type=EntryType.ENTRY_INFO_FILE)
return_results(file_entry)
YAML Definition
outputs:
- contextPath: InfoFile.Name
  description: FileName
  type: string
- contextPath: InfoFile.EntryID
  description: The EntryID of the report
  type: string
- contextPath: InfoFile.Size
  description: File Size
  type: number
- contextPath: InfoFile.Type
  description: File type e.g. "PE"
  type: string
- contextPath: InfoFile.Info
  description: Basic information of the file
  type: string
Return IP reputation results
For an integration usage example of how the code implements the indicator reputation command, see AutofocusV2 integration.
ip_reputation_from_autofocus = {
    'indicator': '5.5.5.5',
    'asn': '12345',
    'confidence': 95
}

if ip_reputation_from_autofocus['confidence'] >= 90:
    score = Common.DBotScore.BAD
elif ip_reputation_from_autofocus['confidence'] >= 50:
    score = Common.DBotScore.SUSPICIOUS
else:
    score = Common.DBotScore.GOOD

dbot_score = Common.DBotScore(
    indicator='5.5.5.5',
    indicator_type=DBotScoreType.IP,
    integration_name='Autofocus',
    score=score
)

ip = Common.IP(
    ip='5.5.5.5',
    asn=ip_reputation_from_autofocus['asn'],
    dbot_score=dbot_score
)

results = CommandResults(
    outputs_prefix='Autofocus.IP',
    outputs_key_field='indicator',
    outputs=ip_reputation_from_autofocus,
    indicator=ip
)

return_results(results)
Context data - as stored in the incident context data:
{
    "Autofocus": {
        "IP": [
            {
                "indicator": "5.5.5.5",
                "confidence": 95,
                "asn": "12345"
            }
        ]
    }
    "IP": [
        {
            "ASN": "12345",
            "Address": "5.5.5.5"
        }
    ],
    "DBotScore": [
        {
            "Vendor": "Autofocus",
            "Indicator": "5.5.5.5",
            "Score": 2,
            "Type": "ip"
        }
    ]
}
YAML definition:
outputs:
- contextPath: Autofocus.IP.indicator
  description: IP address
  type: String
- contextPath: Autofocus.IP.condidence
  description: Indicator condidence between 0-99
  type: Number
- contextPath: Autofocus.IP.asn
  description: ASSN description
  type: String

# This is standard context output - https://xsoar.pan.dev/docs/integrations/context-standards-mandatory#ip
- contextPath: IP.Address
  description: IP address
  type: String
- contextPath: IP.ASN
  description: 'The autonomous system name for the IP address, for example: AS8948.'
  type: String

# Reputation commands usually should return DBotScore object - https://xsoar.pan.dev/docs/integrations/context-standards-mandatory#dbot-score
- contextPath: DBotScore.Indicator
  description: The indicator that was tested.
  type: String
- contextPath: DBotScore.Type
  description: The indicator type.
  type: String
- contextPath: DBotScore.Vendor
  description: The vendor used to calculate the score.
  type: String
- contextPath: DBotScore.Score
  description: The actual score.
  type: Number
Markdown
Results
| asn | confidence | indicator |
|---|---|---|
| 12345 | 95 | 5.5.5.5 |
Return domain reputation results
For an integration usage example of how the code implements the indicator reputation command, see AutofocusV2 integration.
domain_raw = get_domain_from_autofocus('google.com')

if domain_raw.get('score') > 90:
    score = Common.DBotScore.BAD
elif domain_raw.get('score') > 60:
    score = Common.DBotScore.SUSPICIOUS
else:
    score = Common.DBotScore.GOOD

dbot_score = Common.DBotScore(
    indicator='google.com',
    indicator_type=DBotScoreType.DOMAIN,
    integration_name='Autofocus v2',
    score=score
)

domain = Common.Domain(
    domain='google.com',
    dns=domain_raw.get('dnssec'),
    creation_date=domain_raw.get('creation_date'),
    positive_detections=domain_raw.get('positive_detections'),
    detection_engines=domain_raw.get('detection_engines'),
    sub_domains=domain_raw.get('sub_domains'),
    domain_status=domain_raw.get('status'),
    name_servers=domain_raw.get('name_servers'),
    registrar_name=domain_raw.get('registrar'),
    expiration_date=domain_raw.get('expiration_date'),
    dbot_score=dbot_score
)

results = CommandResults(
    outputs_prefix='Autofocus.Domain',
    outputs_key_field='domain',
    outputs=domain_raw,
    indicator=domain
)

return_results(results)
YAML definition
# Reputation commands usually should return DBotScore object - https://xsoar.pan.dev/docs/integrations/context-standards-mandatory#dbot-score
- contextPath: DBotScore.Indicator
  description: The indicator that was tested.
  type: String
- contextPath: DBotScore.Type
  description: The indicator type.
  type: String
- contextPath: DBotScore.Vendor
  description: The vendor used to calculate the score.
  type: String
- contextPath: DBotScore.Score
  description: The actual score.
  type: Number

# This is standard context output - https://xsoar.pan.dev/docs/integrations/context-standards-mandatory#ip
- contextPath: Domain.Name
  description: 'The domain name, for example: "google.com".'
  type: String
- contextPath: Domain.CreationDate
  description: The date that the domain was created.
  type: Date
- contextPath: Domain.DNS
  description: A list of IP objects resolved by DNS.
  type: String
- contextPath: Domain.WHOIS.NameServers
  description: Name servers of the domain.
  type: String
- contextPath: Domain.WHOIS.Registrar.AbuseEmail
  description: The email address of the contact for reporting abuse.
  type: Unknown
- contextPath: Domain.WHOIS.Registrar.AbusePhone
  description: The phone number of contact for reporting abuse.
  type: Unknown
- contextPath: Domain.WHOIS.Registrar.Name
  description: 'The name of the registrar, for example: "GoDaddy".'
  type: String
- contextPath: Domain.WHOIS.ExpirationDate
  description: The expiration date of the domain.
  type: Date
- contextPath: Domain.WHOIS.DomainStatus
  description: The status of the domain.
  type: Unknown


- contextPath: AutofocusV2.Domain.address
  description: Domain admin address.
  type: String
- contextPath: AutofocusV2.Domain.city
  description: Domain admin city.
  type: String
- contextPath: AutofocusV2.Domain.country
  description: Domain admin country.
  type: String
- contextPath: AutofocusV2.Domain.creation_date
  description: Domain creation date.
  type: Date
- contextPath: AutofocusV2.Domain.dnssec
  description: DNSSEC status.
  type: String
- contextPath: AutofocusV2.Domain.domain
  description: The domain name.
  type: String
- contextPath: AutofocusV2.Domain.domain_name
  description: Domain name options.
  type: String
- contextPath: AutofocusV2.Domain.emails
  description: Contact emails.
  type: String
- contextPath: AutofocusV2.Domain.expiration_date
  description: Expiration date.
  type: Date
- contextPath: AutofocusV2.Domain.name
  description: Domain admin name.
  type: String
- contextPath: AutofocusV2.Domain.name_servers
  description: Name server.
  type: String
- contextPath: AutofocusV2.Domain.org
  description: Domain organization.
  type: String
- contextPath: AutofocusV2.Domain.referral_url
  description: Referral URL.
  type: Unknown
- contextPath: AutofocusV2.Domain.registrar
  description: Domain registrar.
  type: String
- contextPath: AutofocusV2.Domain.score
  description: Reputation score from HelloWorld for this domain (0 to 100, where higher
    is worse).
  type: Number
- contextPath: AutofocusV2.Domain.state
  description: Domain admin state.
  type: String
- contextPath: AutofocusV2.Domain.status
  description: Domain status.
  type: String
- contextPath: AutofocusV2.Domain.updated_date
  description: Updated date.
  type: Date
- contextPath: AutofocusV2.Domain.whois_server
  description: WHOIS server.
  type: String
- contextPath: AutofocusV2.Domain.zipcode
  description: Domain admin zipcode.
  type: Unknown
Context data - as stored in the incident context data:
{
    "Domain": {
        "CreationDate": [
            "1997-09-15 04:00:00",
            "1997-09-15 00:00:00"
        ],
        "Name": "google.com",
        "DNS": "unsigned",
        "WHOIS": {
            "NameServers": [
                "NS1.GOOGLE.COM",
                "NS2.GOOGLE.COM",
                "NS3.GOOGLE.COM",
                "NS4.GOOGLE.COM",
                "ns2.google.com",
                "ns4.google.com",
                "ns3.google.com",
                "ns1.google.com"
            ],
            "Registrar": {
                "AbuseEmail": null,
                "AbusePhone": null,
                "Name": "MarkMonitor, Inc."
            },
            "ExpirationDate": [
                "2028-09-14 04:00:00",
                "2028-09-13 00:00:00"
            ],
            "DomainStatus": [
                "clientDeleteProhibited https://icann.org/epp#clientDeleteProhibited",
                "clientTransferProhibited https://icann.org/epp#clientTransferProhibited",
                "clientUpdateProhibited https://icann.org/epp#clientUpdateProhibited",
                "serverDeleteProhibited https://icann.org/epp#serverDeleteProhibited",
                "serverTransferProhibited https://icann.org/epp#serverTransferProhibited",
                "serverUpdateProhibited https://icann.org/epp#serverUpdateProhibited",
                "clientUpdateProhibited (https://www.icann.org/epp#clientUpdateProhibited)",
                "clientTransferProhibited (https://www.icann.org/epp#clientTransferProhibited)",
                "clientDeleteProhibited (https://www.icann.org/epp#clientDeleteProhibited)",
                "serverUpdateProhibited (https://www.icann.org/epp#serverUpdateProhibited)",
                "serverTransferProhibited (https://www.icann.org/epp#serverTransferProhibited)",
                "serverDeleteProhibited (https://www.icann.org/epp#serverDeleteProhibited)"
            ]
        }
    },
    "DBotScore": {
        "Vendor": "Autofocus v2",
        "Indicator": "google.com",
        "Score": 2,
        "Type": "domain"
    },
    "Autofocus": {
        "Domain": {
            "updated_date": [
                "2019-09-09 15:39:04",
                "2019-09-09 08:39:04"
            ],
            "status": [
                "clientDeleteProhibited https://icann.org/epp#clientDeleteProhibited",
                "clientTransferProhibited https://icann.org/epp#clientTransferProhibited",
                "clientUpdateProhibited https://icann.org/epp#clientUpdateProhibited",
                "serverDeleteProhibited https://icann.org/epp#serverDeleteProhibited",
                "serverTransferProhibited https://icann.org/epp#serverTransferProhibited",
                "serverUpdateProhibited https://icann.org/epp#serverUpdateProhibited",
                "clientUpdateProhibited (https://www.icann.org/epp#clientUpdateProhibited)",
                "clientTransferProhibited (https://www.icann.org/epp#clientTransferProhibited)",
                "clientDeleteProhibited (https://www.icann.org/epp#clientDeleteProhibited)",
                "serverUpdateProhibited (https://www.icann.org/epp#serverUpdateProhibited)",
                "serverTransferProhibited (https://www.icann.org/epp#serverTransferProhibited)",
                "serverDeleteProhibited (https://www.icann.org/epp#serverDeleteProhibited)"
            ],
            "domain": "google.com",
            "name": null,
            "dnssec": "unsigned",
            "city": null,
            "expiration_date": [
                "2028-09-14 04:00:00",
                "2028-09-13 00:00:00"
            ],
            "domain_name": [
                "GOOGLE.COM",
                "google.com"
            ],
            "creation_date": [
                "1997-09-15 04:00:00",
                "1997-09-15 00:00:00"
            ],
            "whois_server": "whois.markmonitor.com",
            "state": "CA",
            "registrar": "MarkMonitor, Inc.",
            "referral_url": null,
            "address": null,
            "name_servers": [
                "NS1.GOOGLE.COM",
                "NS2.GOOGLE.COM",
                "NS3.GOOGLE.COM",
                "NS4.GOOGLE.COM",
                "ns2.google.com",
                "ns4.google.com",
                "ns3.google.com",
                "ns1.google.com"
            ],
            "org": "Google LLC",
            "country": "US",
            "emails": [
                "abusecomplaints@markmonitor.com",
                "whoisrequest@markmonitor.com"
            ],
            "zipcode": null,
            "score": 76
        }


    }
}
Return URL reputation results
For an integration usage example of how the code implements the indicator reputation command, see AutofocusV2 integration.
url_arg = 'https://www.ynetto.co.il'
url_raw_response = {
    'url': 'https://www.ynetto.co.il',
    'verdict': 'Malicious',
    'detection_engines': 10,
    'positive_engines': 10
}

score = Common.DBotScore.GOOD
if url_raw_response.get('verdict') == 'Malicious':
    score = Common.DBotScore.BAD

dbot_score = Common.DBotScore(
    indicator=url_arg,
    indicator_type=DBotScoreType.URL,
    integration_name='Virus Total',
    score=score
)

url = Common.URL(
    url=url_arg,
    detection_engines=url_raw_response.get('detection_engines'),
    positive_detections=url_raw_response.get('positive_engines'),
    dbot_score=dbot_score
)

results = CommandResults(
    outputs_prefix='VirusTotal.URL',
    outputs_key_field='url',
    outputs=url_raw_response,
    indicator=url
)

return_results(results)
YAML definition
# Reputation commands usually should return DBotScore object - https://xsoar.pan.dev/docs/integrations/context-standards-mandatory#dbot-score
outputs:
- contextPath: DBotScore.Indicator
  description: The indicator that was tested.
  type: String
- contextPath: DBotScore.Type
  description: The indicator type.
  type: String
- contextPath: DBotScore.Vendor
  description: The vendor used to calculate the score.
  type: String
- contextPath: DBotScore.Score
  description: The actual score.
  type: Number

# Reputation commands usually should return DBotScore object - https://xsoar.pan.dev/docs/integrations/context-standards-mandatory#url
- contextPath: URL.Data
  description: The URL
  type: String
- contextPath: URL.DetectionEngines
  description: The total number of engines that checked the indicator.
  type: String
- contextPath: URL.PositiveDetections
  description: The number of engines that positively detected the indicator as malicious.
  type: String
- contextPath: URL.Malicious.Vendor
  description: The vendor reporting the URL as malicious.
  type: String
- contextPath: URL.Malicious.Description
  description: A description of the malicious URL.
  type: String

- contextPath: VirusTotal.URL.url
  description: The URL
  type: String
- contextPath: VirusTotal.URL.verdict
  description: Verdict can be Malicious or Benign
  type: String
- contextPath: VirusTotal.URL.detection_engines
  description: Number of engines
  type: Number
- contextPath: VirusTotal.URL.positive_engines
  description: Number of positive engines
  type: Number
Context data - as stored in the incident context data:
{
    "URL": {
        "Data": "https://www.ynetto.co.il",
        "DetectionEngines": 10,
        "PositiveDetections": 10,
        "Malicious": {
            "Vendor": "Virus Total",
            "Description": null
        }
    },
    "DBotScore": {
        "Indicator": "https://www.ynetto.co.il",
        "Type": "url",
        "Vendor": "Virus Total",
        "Score": 3
    },
    "VirusTotal": {
        "URL": {
            "url": "https://www.ynetto.co.il",
            "verdict": "Malicious",
            "detection_engines": 10,
            "positive_engines": 10
        }
    }
}
Return file hash reputation results
For an integration usage example of how the code implements the indicator reputation command, see AutoFocus v2 integration or Crowd Strike Malquery.
md5 = '9498ff82a64ff445398c8426ed63ea5b'
hash_reputation_response = {
    "md5": "9498ff82a64ff445398c8426ed63ea5b",
    "permalink": "https://www.virustotal.com/file/8b2e701e91101955c73865589a4c72999aeabc11043f712e05fdb1c17c4ab19a/analysis/1587134153/",
    "positives": 58,
    "resource": "9498FF82A64FF445398C8426ED63EA5B",
    "response_code": 1,
    "scan_date": "2020-04-17 14:35:53",
    "scan_id": "8b2e701e91101955c73865589a4c72999aeabc11043f712e05fdb1c17c4ab19a-1587134153",
    "sha1": "36f9ca40b3ce96fcee1cf1d4a7222935536fd25b",
    "sha256": "8b2e701e91101955c73865589a4c72999aeabc11043f712e05fdb1c17c4ab19a",
    "total": 70,
    "verbose_msg": "Scan finished, information embedded"
}

score = Common.DBotScore.GOOD
if hash_reputation_response.get('positives') > 20:
    score = Common.DBotScore.BAD
if hash_reputation_response.get('positives') > 3:
    score = Common.DBotScore.SUSPICIOUS


dbot_score = Common.DBotScore(
    indicator=md5,
    indicator_type=DBotScoreType.FILE,
    integration_name='Virus Total',
    score=score,
    malicious_description=hash_reputation_response.get('verbose_msg')
)

file = Common.File(
    md5=md5,
    sha1=hash_reputation_response.get('sha1'),
    sha256=hash_reputation_response.get('sha256'),
    dbot_score=dbot_score
)

results = CommandResults(
    outputs_prefix='VirusTotal.File',
    outputs_key_field='md5',
    outputs=hash_reputation_response,
    indicator=file
)

return_results(results)
YAML definition
outputs:
# Reputation commands usually should return DBotScore object - https://xsoar.pan.dev/docs/integrations/context-standards-mandatory#file
- contextPath: File.Name
  description: The full file name (including file extension).
  type: String
- contextPath: File.MD5
  description: The MD5 hash of the file.
  type: String
- contextPath: File.SHA1
  description: The SHA1 hash of the file.
  type: String
- contextPath: File.SHA256
  description: The SHA256 hash of the file.
  type: String
- contextPath: File.Malicious.Vendor
  description: The vendor that reported the file as malicious.
  type: String
- contextPath: File.Malicious.Description
  description: A description explaining why the file was determined to be malicious.
  type: String

# Reputation commands usually should return DBotScore object - https://xsoar.pan.dev/docs/integrations/context-standards-mandatory#dbot-score
- contextPath: DBotScore.Indicator
  description: The indicator that was tested.
  type: String
- contextPath: DBotScore.Type
  description: The indicator type.
  type: String
- contextPath: DBotScore.Vendor
  description: The vendor used to calculate the score.
  type: String
- contextPath: DBotScore.Score
  description: The actual score.
  type: Number

- contextPath: VirusTotal.File.md5
  description: The MD5 hash of the file.
  type: String
- contextPath: VirusTotal.File.permalink
  description: Link to the file report
  type: String
- contextPath: VirusTotal.File.positives
  description: Number of positive engines
  type: Number
- contextPath: VirusTotal.File.resource
  description: The resource
  type: String
- contextPath: VirusTotal.File.response_code
  description: Response code, it is a number between 1-10
  type: Number
- contextPath: VirusTotal.File.scan_date
  description: Scan date of a format 2010-05-15 03:38:44
  type: Date
- contextPath: VirusTotal.File.scan_id
  description: Scan ID
  type: String
- contextPath: VirusTotal.File.sha1
  description: The SHA1 hash of the file.
  type: String
- contextPath: VirusTotal.File.sha256
  description: The SHA256 hash of the file.
  type: String
- contextPath: VirusTotal.File.total
  description: Total number of engines
  type: Number
- contextPath: VirusTotal.File.verbose_msg
  description: Verbose message about the hash
  type: String
Context data - as stored in the incident context data:
{
    "File": {
        "MD5": "9498ff82a64ff445398c8426ed63ea5b",
        "SHA1": "36f9ca40b3ce96fcee1cf1d4a7222935536fd25b",
        "SHA256": "8b2e701e91101955c73865589a4c72999aeabc11043f712e05fdb1c17c4ab19a"
    },
    "DBotScore": {
        "Indicator": "9498ff82a64ff445398c8426ed63ea5b",
        "Type": "file",
        "Vendor": "Virus Total",
        "Score": 2
    },
    "VirusTotal": {
        "File": {
            "md5": "9498ff82a64ff445398c8426ed63ea5b",
            "permalink": "https://www.virustotal.com/file/8b2e701e91101955c73865589a4c72999aeabc11043f712e05fdb1c17c4ab19a/analysis/1587134153/",
            "positives": 58,
            "resource": "9498FF82A64FF445398C8426ED63EA5B",
            "response_code": 1,
            "scan_date": "2020-04-17 14:35:53",
            "scan_id": "8b2e701e91101955c73865589a4c72999aeabc11043f712e05fdb1c17c4ab19a-1587134153",
            "sha1": "36f9ca40b3ce96fcee1cf1d4a7222935536fd25b",
            "sha256": "8b2e701e91101955c73865589a4c72999aeabc11043f712e05fdb1c17c4ab19a",
            "total": 70,
            "verbose_msg": "Scan finished, information embedded"
        }
    }
}
Return CVE reputation results
For an integration usage example of how the code implements the indicator reputation command, see CVE Search v2.
cve_arg = 'CVE-2015-1653'

cve_raw_response = {
    "Modified": "2018-10-12T22:08:00",
    "Published": "2015-04-14T20:59:00",
    "assigner": "cve@mitre.org",
    "cvss": 4.3,
    "cvss-time": "2018-10-12T22:08:00",
    "cwe": "CWE-79",
    "id": "CVE-2015-1653",
    "references": [
        "http://www.securitytracker.com/id/1032111",
        "https://docs.microsoft.com/en-us/security-updates/securitybulletins/2015/ms15-036"
    ],
    "summary": "Cross-site scripting (XSS) vulnerability in Microsoft ",
}

cve = Common.CVE(
    id=cve_arg,
    cvss=cve_raw_response.get('cvss'),
    description=cve_raw_response.get('summary'),
    published=cve_raw_response.get('Published'),
    modified=cve_raw_response.get('Modified')
)

results = CommandResults(
    outputs_prefix='CVEMitre.CVE',
    outputs_key_field='id',
    outputs=cve_raw_response,
    indicator=cve
)

return_results(results)
YAML definition
outputs:
- contextPath: CVE.ID
  description: 'The ID of the CVE, for example: CVE-2015-1653'
  type: String
- contextPath: CVE.CVSS
  description: 'The CVSS of the CVE, for example: 10.0'
  type: String
- contextPath: CVE.Published
  description: The timestamp of when the CVE was published.
  type: Date
- contextPath: CVE.Modified
  description: The timestamp of when the CVE was last modified.
  type: Date
- contextPath: CVE.Description
  description: A description of the CVE.
  type: String
Context data - as stored in the incident context data:
{
    "CVE": {
        "ID": "CVE-2015-1653",
        "CVSS": 4.3,
        "Published": "2015-04-14T20:59:00",
        "Modified": "2018-10-12T22:08:00",
        "Description": "Cross-site scripting (XSS) vulnerability in Microsoft "
    },
    "CVEMitre": {
        "CVE": {
            "Modified": "2018-10-12T22:08:00",
            "Published": "2015-04-14T20:59:00",
            "assigner": "cve@mitre.org",
            "cvss": 4.3,
            "cvss-time": "2018-10-12T22:08:00",
            "cwe": "CWE-79",
            "id": "CVE-2015-1653",
            "references": [
                "http://www.securitytracker.com/id/1032111",
                "https://docs.microsoft.com/en-us/security-updates/securitybulletins/2015/ms15-036"
            ],
            "summary": "Cross-site scripting (XSS) vulnerability in Microsoft "
        }
    }
}
Return custom indicator results
For more information, see CustomIndicatorDemo. For a usage example of the CustomIndicator helper class, see CustomIndicatorDemo;.
score = Common.DBotScore.GOOD
 indicator_value = 'custom_value'
 dbot_score = Common.DBotScore(
     indicator=indicator_value,
     indicator_type=DBotScoreType.CUSTOM,
     integration_name='DummyIntegration',
     score=score
 )
 data = {
     'param1': 'value1',
     'param2': 'value2',
 }
 custom_indicator = Common.CustomIndicator(
     indicator_type='MyCustomIndicator',
     dbot_score=dbot_score,
     value=indicator_value,
     data=data,
     context_prefix='custom',
 )
 return CommandResults(
     readable_output='custom_value',
     outputs=result,
     outputs_prefix='Demo.Result',
     outputs_key_field='test_key_field',
     indicator=custom_indicator
 )
Context data - as stored in the incident context data:
{
    "DBotScore":
    [
        {
            "Indicator": "custom_value",
            "Score": 1,
            "Type": "MyCustomIndicator",
            "Vendor": "CustomIndicatorDemo"
        }
    ],
    "Demo.Result":
    {
        "dummy": "test"
    },
    "custom":
    [
        {
            "value": "custom_value",
            "param1": "value1",
            "param2": "value2"
        }
    ]
}
YAML definition
   outputs:
    - contextPath: Demo.Result.dummy
      description: The command's output
      type: String
    - contextPath: custom.param1
      description: custom data field of the indicator
      type: String
    - contextPath: custom.param2
      description: custom data field of the indicator
      type: String
    - contextPath: custom.value
      description: value of the indicator
      type: String
    - contextPath: DBotScore.Indicator
      description: The indicator value
      type: String
    - contextPath: DBotScore.Type
      description: The indicator type.
      type: String
    - contextPath: DBotScore.Vendor
      description: The vendor used to calculate the score.
      type: String
    - contextPath: DBotScore.Score
      description: The actual score.
      type: Number
Return multiple indicator results
For an integration usage example of how the code implements the indicator reputation command, see MispV3. In case you need to return multiple indicators (i.e. IPs) in the same call, you should return a list of CommandResults, as shown in the following example.
ip_reputations_from_autofocus = [
    {
      'indicator': '5.5.5.5',
      'asn': '12345',
      'confidence': 95
    },
    {
      'indicator': '4.4.4.4',
      'asn': '54321',
      'confidence': 73
    }
]

command_results_list: List[CommandResults] = []

for ip_reputation in ip_reputations_from_autofocus:
    if ip_reputation['confidence'] >= 90:
        score = Common.DBotScore.BAD
    elif ip_reputation['confidence'] >= 50:
        score = Common.DBotScore.SUSPICIOUS
    else:
        score = Common.DBotScore.GOOD

    dbot_score = Common.DBotScore(
        indicator=ip_reputation['indicator'],
        indicator_type=DBotScoreType.IP,
        integration_name='Autofocus',
        score=score
    )

    ip = Common.IP(
        ip=ip_reputation['indicator'],
        asn=ip_reputation['asn'],
        dbot_score=dbot_score
    )

    command_results_list.append(CommandResults(
        outputs_prefix='Autofocus.IP',
        outputs_key_field='indicator',
        outputs=ip_reputation,
        indicator=ip
    ))

return_results(command_results_list)
Context data - as stored in the incident context data:
{
    "Autofocus": {
        "IP": [
            {
                "indicator": "5.5.5.5",
                "confidence": 95,
                "asn": "12345"
            },
            {
                "indicator": "4.4.4.4",
                "confidence": 73,
                "asn": "54321"
            }
        ]
    },
    "IP": [
        {
            "ASN": "12345",
            "Address": "5.5.5.5"
        },
        {
            "ASN": "54321",
            "Address": "4.4.4.4"
        }
    ],
    "DBotScore": [
        {
            "Vendor": "Autofocus",
            "Indicator": "5.5.5.5",
            "Score": 2,
            "Type": "ip"
        },
        {
            "Vendor": "Autofocus",
            "Indicator": "4.4.4.4",
            "Score": 1,
            "Type": "ip"
        }
    ]
}
YAML definition
outputs:
- contextPath: Autofocus.IP.indicator
  description: IP address
  type: String
- contextPath: Autofocus.IP.condidence
  description: Indicator condidence between 0-99
  type: Number
- contextPath: Autofocus.IP.asn
  description: ASSN description
  type: String

# This is standard context output - https://xsoar.pan.dev/docs/integrations/context-standards-mandatory#ip
- contextPath: IP.Address
  description: IP address
  type: String
- contextPath: IP.ASN
  description: 'The autonomous system name for the IP address, for example: AS8948.'
  type: String

# Reputation commands usually should return DBotScore object - https://xsoar.pan.dev/docs/integrations/context-standards-mandatory#dbot-score
- contextPath: DBotScore.Indicator
  description: The indicator that was tested.
  type: String
- contextPath: DBotScore.Type
  description: The indicator type.
  type: String
- contextPath: DBotScore.Vendor
  description: The vendor used to calculate the score.
  type: String
- contextPath: DBotScore.Score
  description: The actual score.
  type: Number
Markdown
Results
| asn | confidence | indicator |
|---|---|---|
| 12345 | 95 | 5.5.5.5 |
| 54321 | 73 | 4.4.4.4 |
DT (Cortex XSOAR Transform Language)
In the above example, we observe the entry context using (val.ReportID == obj.ReportID). This works to tie together related entry context objects. In this instance, we are using the value of the ReportID key as the unique identifier to search through the existing context and link related objects. This prevents data from being overwritten as well as further enriches an existing entry with more information. Learn more about linking context.
Context standards
Cortex XSIAM organizes incident data in a tree of objects called the incident context. Any integration commands or scripts that run add data into the context at a predefined location. This also applies to commands that run within playbook execution.
The context stores the results from every integration command and every automation script that runs. It is a JSON storage for each incident. Whether you run an integration command from the CLI or from a playbook task, the output result is stored into the JSON context in the incident or the playground. For example, a command like !whois query="cnn.com" returns the data and store the results into the context.
When building new integrations the entry context should be returned according to this standard in addition to the vendor specific context.
The structure should be:
  {
  "Object": {
    ...
  },
  "Vendor": {
    "Object": {
      ...
    }
  }

}
Some standard objects are mandatory and enforced in the code, and some are recommended.
Mandatory Cortex XSIAM context standards
There are standard context schema used for the system indicators and the DBot Score object. You do not need to manually output this in your code, instead, use the builtin classes as described in context use cases.
File
The following is the format for a File. File here refers to the file indicator or a binary file that could potentially be malicious, and might be checked for reputation or sent to a sandbox.
"File": {
        "Name": "STRING, The full file name (including file extension).",
        "EntryID": "STRING, The ID for locating the file in the War Room.",
        "Size": "INT, The size of the file in bytes.",
        "MD5": "STRING, The MD5 hash of the file.",
        "SHA1": "STRING, The SHA1 hash of the file.",
        "SHA256": "STRING, The SHA256 hash of the file.",
        "SHA512": "STRING The SHA512 hash of the file.",
        "SSDeep": "STRING, The ssdeep hash of the file (same as displayed in file entries).",
        "Extension": "STRING, The file extension, for example: 'xls'.",
        "Type": "STRING, The file type, as determined by libmagic (same as displayed in file entries).",
        "Hostname": "STRING, The name of the host where the file was found. Should match Path.",
        "Path": "STRING, The path where the file is located.",
        "Company": "STRING, The name of the company that released a binary.",
        "ProductName": "STRING, The name of the product to which this file belongs.",
        "DigitalSignature": {
            "Publisher": "STRING, The publisher of the digital signature for the file."
        },
        "Actor": "STRING, The actor reference.",
        "Tags": "STRING, Tags of the file.",
        "Signature": {
            "Authentihash": "STRING, The authentication hash.",
            "Copyright": "STRING, Copyright information.",
            "Description": "STRING, A description of the signature.",
            "FileVersion": "STRING, The file version.",
            "InternalName": "STRING, The internal name of the file.",
            "OriginalName": "STRING, The original name of the file."
        },
        "Malicious": {
             "Vendor": "STRING, The vendor that reported the file as malicious.",
             "Description": "STRING, A description explaining why the file was determined to be malicious."
        },
        "EntityA": "STRING, The source of the relationship.",
        "EntityB": "STRING, The destination of the relationship.",
        "Relationship": "STRING, The name of the relationship.",
        "EntityAType": "STRING, The type of the source of the relationship.",
        "EntityBType": "STRING, The type of the destination of the relationship.",
        "FeedRelatedIndicators": {
             "value": "STRING, Indicators that are associated with the file.",
             "type": "STRING, The type of the indicators that are associated with the file",
             "description": "STRING, The description of the indicators that are associated with the file."
        },
        "MalwareFamily": "STRING, The malware family associated with the file.",
        "Campaign": "STRING, The campaign associated with the file.",
        "TrafficLightProtocol": "STRING, The Traffic Light Protocol (TLP) color that is suitable for the file.",
        "CommunityNotes": {
            "note": "STRING, Notes on the file that were given by the community.",
            "timestamp": "DATE, The time in which the note was published."
        },
        "Publications": {
            "source": "STRING, The source in which the article was published.",
            "title": "STRING, The name of the article.",
            "link": "STRING, A link to the original article.",
            "timestamp": "DATE, The time in which the article was published."
        },
        "Behavior": {
            "details": "STRING, The technical details which are relevant to the behavior.",
            "title": "STRING, The behavior associated with the file."
        },
        "ThreatTypes": {
            "threatcategory": "STRING, The threat category associated to this indicator by the source vendor. For example, Phishing, Control, TOR, etc.",
            "threatcategoryconfidence": "STRING, Threat Category Confidence is the confidence level provided by the vendor for the threat type category For example a confidence of 90 for threat type category 'malware' means that the vendor rates that this is 90% confidence of being a malware."
        },
        "Imphash": "STRING, The Imphash hash of the file.",
        "Quarantined": "BOOL, Is the file quarantined or not.",
        "Organization": "STRING, The organization of the file.",
        "AssociatedFileNames": "STRING, File names that are known as associated to the file."
}
In YAML
outputs:
- contextPath: File.Name
  description: The full file name (including file extension).
  type: String
- contextPath: File.EntryID
  description: The ID for locating the file in the War Room.
  type: String
- contextPath: File.Size
  description: The size of the file in bytes.
  type: Number
- contextPath: File.MD5
  description: The MD5 hash of the file.
  type: String
- contextPath: File.SHA1
  description: The SHA1 hash of the file.
  type: String
- contextPath: File.SHA256
  description: The SHA1 hash of the file.
  type: String
- contextPath: File.SHA512
  description: The SHA512 hash of the file.
  type: String
- contextPath: File.SSDeep
  description: The ssdeep hash of the file (same as displayed in file entries).
  type: String
- contextPath: File.Extension
  description: "The file extension, for example: 'xls'."
  type: String
- contextPath: File.Type
  description: The file type, as determined by libmagic (same as displayed in file entries).
  type: String
- contextPath: File.Hostname
  description: The name of the host where the file was found. Should match Path.
  type: String
- contextPath: File.Path
  description: The path where the file is located.
  type: String
- contextPath: File.Company
  description: The name of the company that released a binary.
  type: String
- contextPath: File.ProductName
  description: The name of the product to which this file belongs.
  type: String
- contextPath: File.DigitalSignature.Publisher
  description: The publisher of the digital signature for the file.
  type: String
- contextPath: File.Actor
  description: The actor reference.
  type: String
- contextPath: File.Tags
  description: (List) Tags of the file.
  type: Unknown
- contextPath: File.FeedRelatedIndicators.value
  description: Indicators that are associated with the file.
  type: String
- contextPath: File.FeedRelatedIndicators.type
  description: The type of the indicators that are associated with the file.
  type: String
- contextPath: File.FeedRelatedIndicators.description
  description: The description of the indicators that are associated with the file.
  type: String
- contextPath: File.MalwareFamily
  description: The malware family associated with the file.
  type: String
- contextPath: File.Signature.Authentihash
  description: The authentication hash.
  type: String
- contextPath: File.Signature.Copyright
  description: Copyright information.
  type: String
- contextPath: File.Signature.Description
  description: A description of the signature.
  type: String
- contextPath: File.Signature.FileVersion
  description: The file version.
  type: String
- contextPath: File.Signature.InternalName
  description: The internal name of the file.
  type: String
- contextPath: File.Signature.OriginalName
  description: The original name of the file.
  type: String
- contextPath: File.Malicious.Vendor
  description: The vendor that reported the file as malicious.
  type: String
- contextPath: File.Malicious.Description
  description: A description explaining why the file was determined to be malicious.
  type: String
- contextPath: File.Relationships.EntityA
  description: The source of the relationship.
  type: string
- contextPath: File.Relationships.EntityB
  description: The destination of the relationship.
  type: string
- contextPath: File.Relationships.Relationship
  description: The name of the relationship.
  type: string
- contextPath: File.Relationships.EntityAType
  description: The type of the source of the relationship.
  type: string
- contextPath: File.Relationships.EntityBType
  description: The type of the destination of the relationship.
  type: string
- contextPath: File.Campaign
  description: The campaign associated with the file.
  type: String
- contextPath: File.TrafficLightProtocol
  description: The Traffic Light Protocol (TLP) color that is suitable for the file.
  type: String
- contextPath: File.CommunityNotes.note
  description: Notes on the file that were given by the community.
  type: String
- contextPath: File.CommunityNotes.timestamp
  description: The time in which the note was published.
  type: Date
- contextPath: File.Publications.source
  description: The source in which the article was published.
  type: String
- contextPath: File.Publications.title
  description: The name of the article.
  type: String
- contextPath: File.Publications.link
  description: A link to the original article.
  type: String
- contextPath: File.Publications.timestamp
  description: The time in which the article was published.
  type: Date
- contextPath: File.Behavior.details
  description: The technical details which are relevant to the behavior.
  type: String
- contextPath: File.Behavior.title
  description: The behavior associated with the file.
  type: String
- contextPath: File.ThreatTypes.threatcategory
  description: The threat category associated to this indicator by the source vendor. For example, Phishing, Control, TOR, etc.
  type: String
- contextPath: File.ThreatTypes.threatcategoryconfidence
  description: Threat Category Confidence is the confidence level provided by the vendor for the threat type category For example a confidence of 90 for threat type category 'malware' means that the vendor rates that this is 90% confidence of being a malware.
  type: String
- contextPath: File.Imphash
  description: The Imphash hash of the file.
  type: String
- contextPath: File.Quarantined
  description: Is the file quarantined or not.
  type: Bool
- contextPath: File.Organization
  description: The organization of the file.
  type: String
- contextPath: File.AssociatedFileNames
  description: File names that are known as associated to the file.
  type: String
IP
The following is the format for an IP entity:
"IP": {
    "Address": "STRING, IP address",
    "EntityA": "STRING, The source of the relationship.",
    "EntityB": "STRING, The destination of the relationship.",
    "Relationship": "STRING, The name of the relationship.",
    "EntityAType": "STRING, The type of the source of the relationship.",
    "EntityBType": "STRING, The type of the destination of the relationship.",
    "ASN": "STRING, The autonomous system name for the IP address, for example: 'AS8948'.",
    "Hostname": "STRING, The hostname that is mapped to this IP address.",
    "Geo":{
        "Location": "STRING, The geolocation where the IP address is located, in the format: latitude:longitude.",
        "Country": "STRING, The country in which the IP address is located.",
        "Description": "STRING, Additional information about the location."
    },
    "DetectionEngines": "NUMBER, The total number of engines that checked the indicator.",
    "PositiveDetections": "NUMBEr, The number of engines that positively detected the indicator as malicious.",
    "Malicious":{
        "Vendor": "STRING, The vendor reporting the IP address as malicious.",
        "Description": "STRING, A description explaining why the IP address was reported as malicious."
    },
    "Tags": "STRING, Tags of the IP.",
    "FeedRelatedIndicators": {
         "value": "STRING, Indicators that are associated with the IP.",
         "type": "STRING, The type of the indicators that are associated with the IP",
         "description": "STRING, The description of the indicators that are associated with the IP."
    },
    "MalwareFamily": "STRING, The malware family associated with the IP.",
    "Organization": {
         "Name": "STRING, The organization of the IP.",
         "Type": "STRING, The organization type of the IP."
    },
    "ASOwner": "STRING, The autonomous system owner of the IP.",
    "Region": "STRING, The region in which the IP is located.",
    "Port": "STRING, Ports that are associated with the IP.",
    "Internal": "BOOL, Whether or not the IP is internal or external.",
    "UpdatedDate": "DATE, The date that the IP was last updated.",
    "Registrar": {
        "Abuse":{
            "Name": "STRING, The name of the contact for reporting abuse.",
            "Address": "STRING, The address of the contact for reporting abuse.",
            "Country": "STRING, The country of the contact for reporting abuse.",
            "Network": "STRING, The network of the contact for reporting abuse.",
            "Phone": "STRING, The phone number of the contact for reporting abuse.",
            "Email": "STRING, The email address of the contact for reporting abuse.",
    }},
    "Campaign": "STRING, The campaign associated with the IP.",
    "TrafficLightProtocol": "STRING, The Traffic Light Protocol (TLP) color that is suitable for the IP.",
    "CommunityNotes": {
        "note": "STRING, Notes on the IP that were given by the community.",
        "timestamp": "DATE, The time in which the note was published."
    },
    "Publications": {
        "source": "STRING, The source in which the article was published.",
        "title": "STRING, The name of the article.",
        "link": "STRING, A link to the original article.",
        "timestamp": "DATE, The time in which the article was published."
    },
    "ThreatTypes": {
        "threatcategory": "STRING, The threat category associated to this indicator by the source vendor. For example, Phishing, Control, TOR, etc.",
        "threatcategoryconfidence": "STRING, Threat Category Confidence is the confidence level provided by the vendor for the threat type category For example a confidence of 90 for threat type category 'malware' means that the vendor rates that this is 90% confidence of being a malware."
    }
}
In YAML
outputs:
- contextPath: IP.Address
  description: IP address
  type: String
- contextPath: IP.Relationships.EntityA
  description: The source of the relationship.
  type: string
- contextPath: IP.Relationships.EntityB
  description: The destination of the relationship.
  type: string
- contextPath: IP.Relationships.Relationship
  description: The name of the relationship.
  type: string
- contextPath: IP.Relationships.EntityAType
  description: The type of the source of the relationship.
  type: string
- contextPath: IP.Relationships.EntityBType
  description: The type of the destination of the relationship.
  type: string
- contextPath: IP.ASN
  description: 'The autonomous system name for the IP address, for example: "AS8948".'
  type: String
- contextPath: IP.Hostname
  description: The hostname that is mapped to this IP address.
  type: String
- contextPath: IP.Geo.Location
  description: 'The geolocation where the IP address is located, in the format: latitude:longitude.'
  type: String
- contextPath: IP.Geo.Country
  description: The country in which the IP address is located.
  type: String
- contextPath: IP.Geo.Description
  description: Additional information about the location.
  type: String
- contextPath: IP.DetectionEngines
  description: The total number of engines that checked the indicator.
  type: Number
- contextPath: IP.PositiveDetections
  description: The number of engines that positively detected the indicator as malicious.
  type: Number
- contextPath: IP.Malicious.Vendor
  description: The vendor reporting the IP address as malicious.
  type: String
- contextPath: IP.Malicious.Description
  description: A description explaining why the IP address was reported as malicious.
  type: String
- contextPath: IP.Tags
  description: (List) Tags of the IP.
  type: Unknown
- contextPath: IP.FeedRelatedIndicators.value
  description: Indicators that are associated with the IP.
  type: String
- contextPath: IP.FeedRelatedIndicators.type
  description: The type of the indicators that are associated with the IP.
  type: String
- contextPath: IP.FeedRelatedIndicators.description
  description: The description of the indicators that are associated with the IP.
  type: String
- contextPath: IP.MalwareFamily
  description: The malware family associated with the IP.
  type: String
- contextPath: IP.Organization.Name
  description: The organization of the IP.
  type: String
- contextPath: IP.Organization.Type
  description: The organization type of the IP.
  type: String
- contextPath: IP.ASOwner
  description: The autonomous system owner of the IP.
  type: String
- contextPath: IP.Region
  description: The region in which the IP is located.
  type: String
- contextPath: IP.Port
  description: Ports that are associated with the IP.
  type: String
- contextPath: IP.Internal
  description: Whether or not the IP is internal or external.
  type: Bool
- contextPath: IP.UpdatedDate
  description: The date that the IP was last updated.
  type: Date
- contextPath: IP.Registrar.Abuse.Name
  description: The name of the contact for reporting abuse.
  type: String
- contextPath: IP.Registrar.Abuse.Address
  description: The address of the contact for reporting abuse.
  type: String
- contextPath: IP.Registrar.Abuse.Country
  description: The country of the contact for reporting abuse.
  type: String
- contextPath: IP.Registrar.Abuse.Network
  description: The network of the contact for reporting abuse.
  type: String
- contextPath: IP.Registrar.Abuse.Phone
  description: The phone number of the contact for reporting abuse.
  type: String
- contextPath: IP.Registrar.Abuse.Email
  description: The email address of the contact for reporting abuse.
  type: String
- contextPath: IP.Campaign
  description: The campaign associated with the IP.
  type: String
- contextPath: IP.TrafficLightProtocol
  description: The Traffic Light Protocol (TLP) color that is suitable for the IP.
  type: String
- contextPath: IP.CommunityNotes.note
  description: Notes on the IP that were given by the community.
  type: String
- contextPath: IP.CommunityNotes.timestamp
  description: The time in which the note was published.
  type: Date
- contextPath: IP.Publications.source
  description: The source in which the article was published.
  type: String
- contextPath: IP.Publications.title
  description: The name of the article.
  type: String
- contextPath: IP.Publications.link
  description: A link to the original article.
  type: String
- contextPath: IP.Publications.timestamp
  description: The time in which the article was published.
  type: Date
- contextPath: IP.ThreatTypes.threatcategory
  description: The threat category associated to this indicator by the source vendor. For example, Phishing, Control, TOR, etc.
  type: String
- contextPath: IP.ThreatTypes.threatcategoryconfidence
  description: Threat Category Confidence is the confidence level provided by the vendor for the threat type category For example a confidence of 90 for threat type category 'malware' means that the vendor rates that this is 90% confidence of being a malware.
  type: String
Endpoint
The following is the format for an Endpoint:
"Endpoint": {
    "Hostname": "STRING, The endpoint's hostname.",
    "EntityA": "STRING, The source of the relationship.",
    "EntityB": "STRING, The destination of the relationship.",
    "Relationship": "STRING, The name of the relationship.",
    "EntityAType": "STRING, The type of the source of the relationship.",
    "EntityBType": "STRING, The type of the destination of the relationship.",
    "ID": "STRING, The endpoint's ID.",
    "IPAddress": "STRING, The endpoint's IP address OR LIST, one or more IP addresses.",
    "Domain": "STRING, The endpoint's domain.",
    "MACAddress": "STRING, The endpoint's MAC address.",
    "DHCPServer": "STRING, The DHCP server of the endpoint.",
    "OS": "STRING, The endpoint's operation system.",
    "OSVersion": "STRING, The endpoint's operation system version.",
    "BIOSVersion": "STRING, The endpoint's BIOS version.",
    "Model": "STRING, The model of the machine or device.",
    "Memory": "INT, Memory on this endpoint.",
    "Processors": "INT, The number of processors.",
    "Processor": "STRING, The model of the processor.",
    "IsIsolated": "STRING, The endpoint's isolation status.",
    "Status": "STRING, The endpoint's status.",
    "Vendor": "STRING, The integration name of the endpoint vendor.",

}
In YAML
    outputs:
    - contextPath: Endpoint.Hostname
      description: The endpoint's hostname.
      type: String
    - contextPath: Endpoint.Relationships.EntityA
      description: The source of the relationship.
      type: string
    - contextPath: Endpoint.Relationships.EntityB
      description: The destination of the relationship.
      type: string
    - contextPath: Endpoint.Relationships.Relationship
      description: The name of the relationship.
      type: string
    - contextPath: Endpoint.Relationships.EntityAType
      description: The type of the source of the relationship.
      type: string
    - contextPath: Endpoint.Relationships.EntityBType
      description: The type of the destination of the relationship.
      type: string
    - contextPath: Endpoint.OS
      description: The endpoint's operation system.
      type: String
    - contextPath: Endpoint.IPAddress
      description: The endpoint's IP address.
      type: String
    - contextPath: Endpoint.ID
      description: The endpoint's ID.
      type: String
    - contextPath: Endpoint.Status
      description: The endpoint's status.
      type: String
    - contextPath: Endpoint.IsIsolated
      description: The endpoint's isolation status.
      type: String
    - contextPath: Endpoint.MACAddress
      description: The endpoint's MAC address.
      type: String
    - contextPath: Endpoint.Vendor
      description: The integration name of the endpoint vendor.
      type: String
    - contextPath: Endpoint.Domain
      description: The endpoint's domain.
      type: String
    - contextPath: Endpoint.DHCPServer
      description: The DHCP server of the endpoint.
      type: String
    - contextPath: Endpoint.OSVersion
      description: The endpoint's operation system version.
      type: String
    - contextPath: Endpoint.BIOSVersion
      description: The endpoint's BIOS version.
      type: String
    - contextPath: Endpoint.Model
      description: The model of the machine or device.
      type: String
    - contextPath: Endpoint.Memory
      description: Memory on this endpoint.
      type: Int
    - contextPath: Endpoint.Processors
      description: The number of processors.
      type: Int
    - contextPath: Endpoint.Processor
      description: The model of the processor.
      type: String
Email Object
The following is the format for an Email Object:
"Email": {
    "To": "STRING, The recipient of the email.",
    "From": "STRING, The sender of the email.",
    "CC": "STRING, Email addresses CC'ed to the email.",
    "BCC": "STRING, Email addresses BCC'ed to the email.",
    "EntityA": "STRING, The source of the relationship.",
    "EntityB": "STRING, The destination of the relationship.",
    "Relationship": "STRING, The name of the relationship.",
    "EntityAType": "STRING, The type of the source of the relationship.",
    "EntityBType": "STRING, The type of the destination of the relationship.",
    "Format": "STRING, The format of the email.",
    "Body/HTML": "STRING, The HTML version of the email.",
    "Body/Text": "STRING, The plain-text version of the email.",
    "Subject": "STRING, The subject of the email.",
    "Headers": "STRING, The headers of the email."
}
In YAML
outputs:
- contextPath: Email.To
  description: The recipient of the email.
  type: String
- contextPath: Email.From
  description: The sender of the email.
  type: String
- contextPath: Email.CC
  description: Email addresses CC'ed to the email.
  type: String
- contextPath: Email.BCC
  description: Email addresses BCC'ed to the email.
  type: String
- contextPath: Email.Format
  description: The format of the email.
  type: String
- contextPath: Email.Relationships.EntityA
  description: The source of the relationship.
  type: string
- contextPath: Email.Relationships.EntityB
  description: The destination of the relationship.
  type: string
- contextPath: Email.Relationships.Relationship
  description: The name of the relationship.
  type: string
- contextPath: Email.Relationships.EntityAType
  description: The type of the source of the relationship.
  type: string
- contextPath: Email.Relationships.EntityBType
  description: The type of the destination of the relationship.
  type: string
- contextPath: Email.Body/HTML
  description: The HTML version of the email.
  type: String
- contextPath: Email.Body/Text
  description: The plain-text version of the email.
  type: String
- contextPath: Email.Subject
  description: The subject of the email.
  type: String
- contextPath: Email.Headers
  description: The headers of the email.
  type: String
- contextPath: Email.Attachment
  description: List<String> Entry IDs of email attachments
  type: Unknown
Domain
The following is the format for a Domain. Please note that for WHOIS, the entity is a dictionary nested for the key "WHOIS".
"Domain": {
    "Name": "STRING, The domain name, for example: 'google.com'.",
    "EntityA": "STRING, The source of the relationship.",
    "EntityB": "STRING, The destination of the relationship.",
    "Relationship": "STRING, The name of the relationship.",
    "EntityAType": "STRING, The type of the source of the relationship.",
    "EntityBType": "STRING, The type of the destination of the relationship.",
    "DNS": "STRING, A list of IP objects resolved by DNS.",
    "DetectionEngines": "NUMBER, The total number of engines that checked the indicator.",
    "PositiveDetections": "NUMBER, The number of engines that positively detected the indicator as malicious.",
    "CreationDate": "DATE, The date that the domain was created.",
    "UpdatedDate": "DATE, The date that the domain was last updated.",
    "ExpirationDate": "DATE, The expiration date of the domain.",
    "DomainStatus": "STRING, The status of the domain.",
    "NameServers": "STRING, Name servers of the domain.",
    "Organization": "STRING, The organization of the domain.",
    "Subdomains": "STRING, Subdomains of the domain.",
    "Admin": {
        "Country": "STRING, The country of the domain administrator.",
        "Email": "STRING, The email address of the domain administrator.",
        "Name": "STRING, The name of the domain administrator.",
        "Phone": "STRING, The phone number of the domain administrator."
    },
    "Registrant": {
        "Country": "STRING, The country of the registrant.",
        "Email": "STRING, The email address of the registrant.",
        "Name": "STRING, The name of the registrant.",
        "Phone": "STRING, The phone number for receiving abuse reports."
    },
    "Tags": "STRING, Tags of the domain.",
    "FeedRelatedIndicators": {
         "value": "STRING, Indicators that are associated with the domain.",
         "type": "STRING, The type of the indicators that are associated with the domin",
         "description": "STRING, The description of the indicators that are associated with the domain."
    },
    "MalwareFamily": "STRING, The malware family associated with the domain.",
    "WHOIS": {
        "DomainStatus": "STRING, The status of the domain.",
        "NameServers": "STRING, A list of name servers, for example: 'ns1.bla.com, ns2.bla.com'.",
        "CreationDate": "DATE, The date that the domain was created.",
        "UpdatedDate": "DATE, The date that the domain was last updated.",
        "ExpirationDate": "DATE, The date that the domain expires.",
        "Registrant": {
            "Name": "STRING, The name of the registrant.",
            "Email": "STRING, The email address of the registrant.",
            "Phone": "STRING, The phone number of the registrant."
        },
        "Registrar": {
            "Name": "STRING, The name of the registrar, for example: 'GoDaddy'.",
            "AbuseEmail": "STRING, The email address of the contact for reporting abuse.",
            "AbusePhone": "STRING, The phone number of contact for reporting abuse."
        },
        "Admin": {
            "Name": "STRING, The name of the domain administrator.",
            "Email": "STRING, The email address of the domain administrator.",
            "Phone": "STRING, The phone number of the domain administrator."
        }
    },
    "WHOIS/History": "List of Whois objects",
    "Malicious":{
        "Vendor": "STRING, The vendor reporting the domain as malicious.",
        "Description": "STRING, A description explaining why the domain was reported as malicious."
    },
   "DomainIDNName": "STRING, The internationalized domain name (IDN) of the domain.",
   "Port": "STRING, Ports that are associated with the domain.",
   "Internal": "BOOL, Whether or not the domain is internal or external.",
   "Category": "STRING, The category associated with the indicator.",
   "Campaign": "STRING, The campaign associated with the domain.",
   "TrafficLightProtocol": "STRING, The Traffic Light Protocol (TLP) color that is suitable for the domain.",
   "ThreatTypes": {
        "threatcategory": "STRING, The threat category associated to this indicator by the source vendor. For example, Phishing, Control, TOR, etc.",
        "threatcategoryconfidence": "STRING, Threat Category Confidence is the confidence level provided by the vendor for the threat type category For example a confidence of 90 for threat type category 'malware' means that the vendor rates that this is 90% confidence of being a malware."
   },
   "Geo":{
        "Location": "STRING, The geolocation where the domain address is located, in the format: latitude:longitude.",
        "Country": "STRING, The country in which the domain address is located.",
        "Description": "STRING, Additional information about the location."
   },
   "Tech": {
       "Country": "STRING, The country of the domain technical contact.",
       "Name": "STRING, The name of the domain technical contact.",
       "Organization": "STRING, The organization of the domain technical contact.",
       "Email": "STRING, The email address of the domain technical contact."
   },
   "CommunityNotes": {
        "note": "STRING, Notes on the domain that were given by the community.",
        "timestamp": "DATE, The time in which the note was published."
   },
   "Publications": {
        "source": "STRING, The source in which the article was published.",
        "title": "STRING, The name of the article.",
        "link": "STRING, A link to the original article.",
        "timestamp": "DATE, The time in which the article was published."
   },
   "Billing": "STRING, The billing address of the domain.",

}
In YAML
outputs:
- contextPath: Domain.Name
  description: 'The domain name, for example: "google.com".'
  type: String
- contextPath: Domain.Relationships.EntityA
  description: The source of the relationship.
  type: string
- contextPath: Domain.Relationships.EntityB
  description: The destination of the relationship.
  type: string
- contextPath: Domain.Relationships.Relationship
  description: The name of the relationship.
  type: string
- contextPath: Domain.Relationships.EntityAType
  description: The type of the source of the relationship.
  type: string
- contextPath: Domain.Relationships.EntityBType
  description: The type of the destination of the relationship.
  type: string
- contextPath: Domain.DNS
  description: A list of IP objects resolved by DNS.
  type: String
- contextPath: Domain.DetectionEngines
  description: The total number of engines that checked the indicator.
  type: Number
- contextPath: Domain.PositiveDetections
  description: The number of engines that positively detected the indicator as malicious.
  type: Number
- contextPath: Domain.CreationDate
  description: The date that the domain was created.
  type: Date
- contextPath: Domain.UpdatedDate
  description: The date that the domain was last updated.
  type: String
- contextPath: Domain.ExpirationDate
  description: The expiration date of the domain.
  type: Date
- contextPath: Domain.DomainStatus
  description: The status of the domain.
  type: Datte
- contextPath: Domain.NameServers
  description: (List<String>) Name servers of the domain.
  type: Unknown
- contextPath: Domain.Organization
  description: The organization of the domain.
  type: String
- contextPath: Domain.Subdomains
  description: (List<String>) Subdomains of the domain.
  type: Unknown
- contextPath: Domain.Admin.Country
  description: The country of the domain administrator.
  type: String
- contextPath: Domain.Admin.Email
  description: The email address of the domain administrator.
  type: String
- contextPath: Domain.Admin.Name
  description: The name of the domain administrator.
  type: String
- contextPath: Domain.Admin.Phone
  description: The phone number of the domain administrator.
  type: String
- contextPath: Domain.Registrant.Country
  description: The country of the registrant.
  type: String
- contextPath: Domain.Registrant.Email
  description: The email address of the registrant.
  type: String
- contextPath: Domain.Registrant.Name
  description: The name of the registrant.
  type: String
- contextPath: Domain.Registrant.Phone
  description: The phone number for receiving abuse reports.
  type: String
- contextPath: Domain.Tags
  description: (List) Tags of the domain.
  type: Unknown
- contextPath: Domain.FeedRelatedIndicators.value
  description: Indicators that are associated with the domain.
  type: String
- contextPath: Domain.FeedRelatedIndicators.type
  description: The type of the indicators that are associated with the domain.
  type: String
- contextPath: Domain.FeedRelatedIndicators.description
  description: The description of the indicators that are associated with the domain.
  type: String
- contextPath: Domain.MalwareFamily
  description: The malware family associated with the domain.
  type: String
- contextPath: Domain.WHOIS.DomainStatus
  description: The status of the domain.
  type: String
- contextPath: Domain.WHOIS.NameServers
  description: (List<String>) Name servers of the domain.
  type: String
- contextPath: Domain.WHOIS.CreationDate
  description: The date that the domain was created.
  type: Date
- contextPath: Domain.WHOIS.UpdatedDate
  description: The date that the domain was last updated.
  type: Date
- contextPath: Domain.WHOIS.ExpirationDate
  description: The expiration date of the domain.
  type: Date
- contextPath: Domain.WHOIS.Registrant.Name
  description: The name of the registrant.
  type: String
- contextPath: Domain.WHOIS.Registrant.Email
  description: The email address of the registrant.
  type: String
- contextPath: Domain.WHOIS.Registrant.Phone
  description: The phone number of the registrant.
  type: String
- contextPath: Domain.WHOIS.Registrar.Name
  description: 'The name of the registrar, for example: 'GoDaddy"'
  type: String
- contextPath: Domain.WHOIS.Registrar.AbuseEmail
  description: The email address of the contact for reporting abuse.
  type: String
- contextPath: Domain.WHOIS.Registrar.AbusePhone
  description: The phone number of contact for reporting abuse.
  type: String
- contextPath: Domain.WHOIS.Admin.Name
  description: The name of the domain administrator.
  type: String
- contextPath: Domain.WHOIS.Admin.Email
  description: The email address of the domain administrator.
  type: String
- contextPath: Domain.WHOIS.Admin.Phone
  description: The phone number of the domain administrator.
  type: String
- contextPath: Domain.WHOIS/History
  description: List of Whois objects
  type: String
- contextPath: Domain.Malicious.Vendor
  description: The vendor reporting the domain as malicious.
  type: String
- contextPath: Domain.Malicious.Description
  description: A description explaining why the domain was reported as malicious.
  type: String
- contextPath: Domain.DomainIDNName
  description: The internationalized domain name (IDN) of the domain.
  type: String
- contextPath: Domain.Port
  description: Ports that are associated with the domain.
  type: String
- contextPath: Domain.Internal
  description: Whether or not the domain is internal or external.
  type: Bool
- contextPath: Domain.Category
  description: The category associated with the indicator.
  type: String
- contextPath: Domain.Campaign
  description: The campaign associated with the domain.
  type: String
- contextPath: Domain.TrafficLightProtocol
  description: The Traffic Light Protocol (TLP) color that is suitable for the domain.
  type: String
- contextPath: Domain.ThreatTypes.threatcategory
  description: The threat category associated to this indicator by the source vendor. For example, Phishing, Control, TOR, etc.
  type: String
- contextPath: Domain.ThreatTypes.threatcategoryconfidence
  description: Threat Category Confidence is the confidence level provided by the vendor for the threat type category For example a confidence of 90 for threat type category 'malware' means that the vendor rates that this is 90% confidence of being a malware.
  type: String
- contextPath: Domain.Geo.Location
  description: 'The geolocation where the domain address is located, in the format: latitude:longitude.'
  type: String
- contextPath: Domain.Geo.Country
  description: The country in which the domain address is located.
  type: String
- contextPath: Domain.Geo.Description
  description: Additional information about the location.
  type: String
- contextPath: Domain.Tech.Country
  description: The country of the domain technical contact.
  type: String
- contextPath: Domain.Tech.Name
  description: The name of the domain technical contact.
  type: String
- contextPath: Domain.Tech.Organization
  description: The organization of the domain technical contact.
  type: String
- contextPath: Domain.Tech.Email
  description: The email address of the domain technical contact.
  type: String
- contextPath: Domain.CommunityNotes.note
  description: Notes on the domain that were given by the community.
  type: String
- contextPath: Domain.CommunityNotes.timestamp
  description: The time in which the note was published.
  type: Date
- contextPath: Domain.Publications.source
  description: The source in which the article was published.
  type: String
- contextPath: Domain.Publications.title
  description: The name of the article.
  type: String
- contextPath: Domain.Publications.link
  description: A link to the original article.
  type: String
- contextPath: Domain.Publications.timestamp
  description: The time in which the article was published.
  type: Date
- contextPath: Domain.Billing
  description: The billing address of the domain.
  type: String
URL
The following is the format for a URL entity:
"URL": {
    "Data": "STRING, The URL",
    "EntityA": "STRING, The source of the relationship.",
    "EntityB": "STRING, The destination of the relationship.",
    "Relationship": "STRING, The name of the relationship.",
    "EntityAType": "STRING, The type of the source of the relationship.",
    "EntityBType": "STRING, The type of the destination of the relationship.",
    "Malicious": {
        "Vendor": "STRING, The vendor reporting the URL as malicious.",
        "Description": "STRING, A description of the malicious URL."
    },
    "DetectionEngines": "NUMBER, The total number of engines that checked the indicator.",
    "PositiveDetections": "NUMBER, The number of engines that positively detected the indicator as malicious.",
    "Category": "STRING, The category associated with the indicator.",
    "Tags": "STRING, Tags of the URL.",
    "FeedRelatedIndicators": {
         "value": "STRING, Indicators that are associated with the URL.",
         "type": "STRING, The type of the indicators that are associated with the URL",
         "description": "STRING, The description of the indicators that are associated with the URL."
    },
    "MalwareFamily": "STRING, The malware family associated with the URL.",
    "Port": "STRING, Ports that are associated with the URL.",
    "Internal": "STRING, Whether or not the URL is internal or external.",
    "Campaign": "STRING, The campaign associated with the URL.",
    "TrafficLightProtocol": "STRING, The Traffic Light Protocol (TLP) color that is suitable for the URL.",
    "ThreatTypes": {
        "threatcategory": "STRING, The threat category associated to this indicator by the source vendor. For example, Phishing, Control, TOR, etc.",
        "threatcategoryconfidence": "STRING, Threat Category Confidence is the confidence level provided by the vendor for the threat type category For example a confidence of 90 for threat type category 'malware' means that the vendor rates that this is 90% confidence of being a malware."
    },
    "ASN": "STRING, The autonomous system name for the URL, for example: 'AS8948'.",
    "ASOwner": "STRING, The autonomous system owner of the URL.",
    "Geo": {
      "Country": "STRING, The country in which the URL is located."
    },
    "Organization": "STRING, The organization of the URL.",
    "CommunityNotes": {
        "note": "STRING, Notes on the URL that were given by the community.",
        "timestamp": "DATE, The time in which the note was published."
    },
    "Publications": {
        "source": "STRING, The source in which the article was published.",
        "title": "STRING, The name of the article.",
        "link": "STRING, A link to the original article.",
        "timestamp": "DATE, The time in which the article was published."
    }
}
In YAML
outputs:
- contextPath: URL.Data
  description: The URL
  type: String
- contextPath: URL.Relationships.EntityA
  description: The source of the relationship.
  type: string
- contextPath: URL.Relationships.EntityB
  description: The destination of the relationship.
  type: string
- contextPath: URL.Relationships.Relationship
  description: The name of the relationship.
  type: string
- contextPath: URL.Relationships.EntityAType
  description: The type of the source of the relationship.
  type: string
- contextPath: URL.Relationships.EntityBType
  description: The type of the destination of the relationship.
  type: string
- contextPath: URL.DetectionEngines
  description: The total number of engines that checked the indicator.
  type: String
- contextPath: URL.PositiveDetections
  description: The number of engines that positively detected the indicator as malicious.
  type: String
- contextPath: URL.Category
  description: The category associated with the indicator.
  type: String
- contextPath: URL.Malicious.Vendor
  description: The vendor reporting the URL as malicious.
  type: String
- contextPath: URL.Malicious.Description
  description: A description of the malicious URL.
  type: String
- contextPath: URL.Tags
  description: (List) Tags of the URL.
  type: Unknown
- contextPath: URL.FeedRelatedIndicators.value
  description: Indicators that are associated with the URL.
  type: String
- contextPath: URL.FeedRelatedIndicators.type
  description: The type of the indicators that are associated with the URL.
  type: String
- contextPath: URL.FeedRelatedIndicators.description
  description: The description of the indicators that are associated with the URL.
  type: String
- contextPath: URL.MalwareFamily
  description: The malware family associated with the URL.
  type: String
- contextPath: URL.Port
  description: Ports that are associated with the URL.
  type: String
- contextPath: URL.Internal
  description: Whether or not the URL is internal or external.
  type: Bool
- contextPath: URL.Campaign
  description: The campaign associated with the URL.
  type: String
- contextPath: URL.TrafficLightProtocol
  description: The Traffic Light Protocol (TLP) color that is suitable for the URL.
  type: String
- contextPath: URL.ThreatTypes.threatcategory
  description: The threat category associated to this indicator by the source vendor. For example, Phishing, Control, TOR, etc.
  type: String
- contextPath: URL.ThreatTypes.threatcategoryconfidence
  description: Threat Category Confidence is the confidence level provided by the vendor for the threat type category For example a confidence of 90 for threat type category 'malware' means that the vendor rates that this is 90% confidence of being a malware.
  type: String
- contextPath: URL.ASN
  description: "The autonomous system name for the URL, for example: 'AS8948'."
  type: String
- contextPath: URL.ASOwner
  description:The autonomous system owner of the URL.
  type: String
- contextPath: URL.GeoCountry
  description: The country in which the URL is located.
  type: String
- contextPath: URL.Organization
  description:The organization of the URL.
  type: String
- contextPath: URL.CommunityNotes.note
  description: Notes on the URL that were given by the community.
  type: String
- contextPath: URL.CommunityNotes.timestamp
  description: The time in which the note was published.
  type: Date
- contextPath: URL.Publications.source
  description: The source in which the article was published.
  type: String
- contextPath: URL.Publications.title
  description: The name of the article.
  type: String
- contextPath: URL.Publications.link
  description: A link to the original article.
  type: String
- contextPath: URL.Publications.timestamp
  description: The time in which the article was published.
  type: Date
CVE
The following is the format for a CVE:
"CVE": {
    "ID": "STRING, The ID of the CVE, for example: CVE-2015-1653",
    "EntityA": "STRING, The source of the relationship.",
    "EntityB": "STRING, The destination of the relationship.",
    "Relationship": "STRING, The name of the relationship.",
    "EntityAType": "STRING, The type of the source of the relationship.",
    "EntityBType": "STRING, The type of the destination of the relationship.",
    "CVSS": "STRING, The CVSS of the CVE, for example: 10.0",
    "Published": "DATE, The timestamp of when the CVE was published.",
    "Modified": "DATE, The timestamp of when the CVE was last modified.",
    "Description": "STRING, A description of the CVE."
}
In YAML
outputs:
- contextPath: CVE.ID
  description: 'The ID of the CVE, for example: CVE-2015-1653'
  type: String
- contextPath: CVE.Relationships.EntityA
  description: The source of the relationship.
  type: string
- contextPath: CVE.Relationships.EntityB
  description: The destination of the relationship.
  type: string
- contextPath: CVE.Relationships.Relationship
  description: The name of the relationship.
  type: string
- contextPath: CVE.Relationships.EntityAType
  description: The type of the source of the relationship.
  type: string
- contextPath: CVE.Relationships.EntityBType
  description: The type of the destination of the relationship.
  type: string
- contextPath: CVE.CVSS
  description: 'The CVSS of the CVE, for example: 10.0'
  type: String
- contextPath: CVE.Published
  description: The timestamp of when the CVE was published.
  type: Date
- contextPath: CVE.Modified
  description: The timestamp of when the CVE was last modified.
  type: Date
- contextPath: CVE.Description
  description: A description of the CVE.
  type: String
Rule
The following is the format for a Rule:
"Rule": {
    "Name": "STRING, The name of the rule.",
    "Condition": "STRING, The condition for the rule."
}
In YAML:
outputs:
    - contextPath: Rule.Name
      description: The name of the rule.
    - contextPath: Rule.Condition
      description: The condition of the rule.
DBot Score
The following is the format for a DBot Score entry:
"DBotScore": {
    "Indicator": "The indicator that was tested.",
    "Type": "The indicator type.",
    "Vendor": "The vendor used to calculate the score.",
    "Score": "The actual score.",
    "Reliability": "Reliability of the source providing the intelligence data."
}
In YAML
- contextPath: DBotScore.Indicator
  description: The indicator that was tested.
  type: String
- contextPath: DBotScore.Type
  description: The indicator type.
  type: String
- contextPath: DBotScore.Vendor
  description: The vendor used to calculate the score.
  type: String
- contextPath: DBotScore.Score
  description: The actual score.
  type: Number
- contextPath: DBotScore.Reliability
  description: Reliability of the source providing the intelligence data.
  type: String
Certificate
The following is the format for an X509 certificate:
"Certificate": {
        "Name": "STRING, Name (CN or SAN) appearing in the certificate.",
        "SubjectDN": "STRING,  The Subject Distinguished Name of the certificate. This field includes the Common Name of the certificate.",
        "PEM": "STRING, Certificate in PEM format.",
        "IssuerDN": "STRING, The Issuer Distinguished Name of the certificate.",
        "SerialNumber": "STRING, The Serial Number of the certificate.",
        "ValidityNotAfter": "DATE, End of certificate validity period.",
        "ValidityNotBefore": "DATE, Start of certificate validity period.",
        "SubjectAlternativeName": {
          "Type": "STRING, Type of the SAN.",
          "Value": "STRING, Name of the SAN."
        },
        "SHA512": "STRING, SHA512 Fingerprint of the certificate in DER format.",
        "SHA256": "STRING, SHA256 Fingerprint of the certificate in DER format.",
        "SHA1": "STRING, SHA1 Fingerprint of the certificate in DER format.",
        "MD5": "STRING, MD5 Fingerprint of the certificate in DER format.",
        "PublicKey": {
          "Algorithm": "STRING, Algorithm used for public key of the certificate.",
          "Length": "NUMBER, Length in bits of the public key of the certificate.",
          "Modulus": "STRING, Certificate.PublicKey.Modulus",
          "Exponent": "NUMBER, Exponent of the public key for RSA keys.",
          "PublicKey": "STRING, The public key for DSA/Unknown keys.",
          "P": "STRING, The P parameter for DSA keys.",
          "Q": "STRING, The Q parameter for DSA keys.",
          "G": "STRING, The G parameter for DSA keys.",
          "X": "STRING, The X parameter for EC keys.",
          "Y": "STRING, The Y parameter for EC keys.",
          "Curve": "STRING, Curve of the Public Key for EC keys.",
          "Y": "STRING, The Y parameter for EC keys."
        },
        "SPKISHA256": "STRING, SHA256 fingerprint of the certificate Subject Public Key Info.",
        "Signature": {
          "Algorithm": "STRING, Algorithm used in the signature of the certificate.",
          "Signature": "STRING, Signature of the certificate."
        },
        "Extension": {
          "Critical": "BOOL, Critical flag of the certificate extension.",
          "OID": "STRING,  OID of the certificate extension.",
          "Name": "STRING, Name of the certificate extension.",
          "Value": "STRING, Value of the certificate extension."
        },
        "Malicious": {
             "Vendor": "STRING, The vendor that reported the certificate as malicious.",
             "Description": "STRING, A description explaining why the certificate was determined to be malicious."
        }
}
In YAML
outputs:
- contextPath: Certificate.Name
  description: Name (CN or SAN) appearing in the certificate.
  type: String
- contextPath: Certificate.SubjectDN
  description: |
    The Subject Distinguished Name of the certificate.
    This field includes the Common Name of the certificate.
  type: String
- contextPath: Certificate.PEM
  description: Certificate in PEM format.
  type: String
- contextPath: Certificate.IssuerDN
  description: The Issuer Distinguished Name of the certificate.
  type: String
- contextPath: Certificate.SerialNumber
  description: The Serial Number of the certificate.
  type: String
- contextPath: Certificate.ValidityNotAfter
  description: End of certificate validity period.
  type: Date
- contextPath: Certificate.ValidityNotBefore
  description: Start of certificate validity period.
  type: Date
- contextPath: Certificate.SubjectAlternativeName.Type
  description: Type of the SAN.
  type: String
- contextPath: Certificate.SubjectAlternativeName.Value
  description: Name of the SAN.
  type: String
- contextPath: Certificate.SHA512
  description: SHA512 Fingerprint of the certificate in DER format.
  type: String
- contextPath: Certificate.SHA256
  description: SHA256 Fingerprint of the certificate in DER format.
  type: String
- contextPath: Certificate.SHA1
  description: SHA1 Fingerprint of the certificate in DER format.
  type: String
- contextPath: Certificate.MD5
  description: MD5 Fingerprint of the certificate in DER format.
  type: String
- contextPath: Certificate.PublicKey.Algorithm
  description: Algorithm used for public key of the certificate.
  type: String
- contextPath: Certificate.PublicKey.Length
  description: Length in bits of the public key of the certificate.
  type: Number
- contextPath: Certificate.PublicKey.Modulus
  description: Modulus of the public key for RSA keys.
  type: String
- contextPath: Certificate.PublicKey.Exponent
  description: Exponent of the public key for RSA keys.
  type: Number
- contextPath: Certificate.PublicKey.PublicKey
  description: The public key for DSA/Unknown keys.
  type: String
- contextPath: Certificate.PublicKey.P
  description: The P parameter for DSA keys.
  type: String
- contextPath: Certificate.PublicKey.Q
  description: The Q parameter for DSA keys.
  type: String
- contextPath: Certificate.PublicKey.G
  description: The G parameter for DSA keys.
  type: String
- contextPath: Certificate.PublicKey.X
  description: The X parameter for EC keys.
  type: String
- contextPath: Certificate.PublicKey.Y
  description: The Y parameter for EC keys.
  type: String
- contextPath: Certificate.PublicKey.Curve
  description: Curve of the Public Key for EC keys.
  type: String
- contextPath: Certificate.SPKISHA256
  description: SHA256 fingerprint of the certificate Subject Public Key Info.
  type: String
- contextPath: Certificate.Signature.Algorithm
  description: Algorithm used in the signature of the certificate.
  type: String
- contextPath: Certificate.Signature.Signature
  description: Signature of the certificate.
  type: String
- contextPath: Certificate.Extension.Critical
  description: Critical flag of the certificate extension.
  type: Bool
- contextPath: Certificate.Extension.OID
  description: OID of the certificate extension.
  type: String
- contextPath: Certificate.Extension.Name
  description: Name of the certificate extension.
  type: String
- contextPath: Certificate.Extension.Value
  description: Value of the certificate extension.
  type: Unknown
- contextPath: Certificate.Malicious.Vendor
  description: The vendor that reported the file as malicious.
  type: String
- contextPath: Certificate.Malicious.Description
  description: A description explaining why the file was determined to be malicious.
  type: String
Recommended Cortex XSIAM context standards
The following are examples of how each entity should be formed in the entry context.
Ticket
"Ticket": {
    "ID": "STRING, The ID of the ticket.",
    "Creator": "STRING, The user who created the ticket.",
    "Assignee": "STRING, The user assigned to the ticket.",
    "State": "STRING, The status of the ticket. Can be "closed", "open", or "on hold".",
    "Description": "STRING The summary of the ticket."
}
In YAML
outputs:
- contextPath: Ticket.ID
  description: The ID of the ticket.
  type: String
- contextPath: Ticket.Creator
  description: The user who created the ticket.
  type: String
- contextPath: Ticket.Assignee
  description: The user assigned to the ticket.
  type: String
- contextPath: Ticket.State
  description: The status of the ticket. Can be "closed", "open", or "on hold".
  type: String
- contextPath: Ticket.Description
  description: The summary of the ticket.
  type: String
Account
"Account": {
    "Type": "STRING, The account type. The most common value is 'AD', but can be 'LocalOS', 'Google', 'AppleID', ... ",
    "ID": "STRING, The unique ID for the account (integration specific). For AD accounts this is the Distinguished Name (DN).",
    "Username": "STRING, The username in the relevant system.",
    "DisplayName": "STRING, The display name.",
    "Groups": "STRING, Groups to which the account belongs (integration specific). For example, for AD these are groups of which the account is memberOf.",
    "Domain": "STRING, The domain of the account.",
    "OrganizationUnit": "STRING, The Organization Unit (OU) of the account.",
    "Email": {
        "Address": "STRING, The email address of the account."
    },
    "TelephoneNumber": "STRING, The phone number associated with the account.",
    "Office": "STRING, The office where the person associated with the account works.",
    "JobTitle": "STRING, The job title of the account.",
    "Department": "STRING, The department of the account.",
    "Country": "STRING, The country associated with the account.",
    "State": "STRING, The state where the account works.",
    "City": "STRING, The city associated with the account.",
    "Street": "STRING, The street associated with the account.",
    "IsEnabled": "BOOL, Whether the account is enabled or disabled. 'True' means the account is enabled.",
    "CloudApplications": [
      {
        "ApplicationName": "STRING, Cloud application name that is assosciated with this account"
      }
    ],
    "ChangePasswordAtNextLogin": "BOOL, Whether this account should change its password at the next login",
    "IsInternal": "BOOL, Whether this account is internal or external to the organization",
    "Manager": {
      "Email": "STRING, The email address of the manager.",
      "DisplayName": "STRING, The display name of the manager."
    },
    "RiskLevel": "STRING, The risk level associated with the account. This could be 'LOW', 'MED' or 'HIGH'.",
}
In YAML
outputs:
- contextPath: Account.Type
  description: The account type. The most common value is 'AD', but can be 'LocalOS', 'Google', 'AppleID'
  type: String
- contextPath: Account.ID
  description: The unique ID for the account (integration specific). For AD accounts this is the Distinguished Name (DN).
  type: String
- contextPath: Account.Username
  description: The username in the relevant system.
  type: String
- contextPath: Account.DisplayName
  description: The display name.
  type: String
- contextPath: Account.Groups
  description: Groups to which the account belongs (integration specific). For example, for AD these are groups of which the account is memberOf.
  type: String
- contextPath: Account.Domain
  description: The domain of the account.
  type: String
- contextPath: Account.OrganizationUnit
  description: The Organization Unit (OU) of the account.
  type: String
- contextPath: Account.Email.Address
  description: The email address of the account.
  type: String
- contextPath: Account.TelephoneNumber
  description: The phone number associated with the account.
  type: String
- contextPath: Account.Office
  description: The office where the person associated with the account works.
  type: String
- contextPath: Account.JobTitle
  description: The job title of the account.
  type: String
- contextPath: Account.Department
  description: The department of the account.
  type: String
- contextPath: Account.Country
  description: The country associated with the account.
  type: String
- contextPath: Account.State
  description: The state where the account works.
  type: String
- contextPath: Account.City
  description: The city associated with the account.
  type: String
- contextPath: Account.Street
  description: The street associated with the account.
  type: String
- contextPath: Account.IsEnabled
  description: Whether the account is enabled or disabled. 'True' means the account is enabled.
  type: Bool
- contextPath: Account.CloudApplications.Application Name
  description: Cloud application name that is assosciated with this account.
  type: String
- contextPath: Account.ChangePasswordAtNextLogin
  description: Whether this account should change its password at the next login. 'True' means the account have to change its password.
  type: Bool
- contextPath: Account.IsInternal
  description: Whether the account is internal or external to the organization. 'True' means the account is internal.
  type: Bool
- contextPath: Account.Manager.Email
  description: The email address of the manager.
  type: String
- contextPath: Account.Manager.DisplayName
  description: The display name of the manager.
  type: String
- contextPath: Account.RiskLevel
  description: The risk level associated with the account. This could be 'LOW', 'MEDIUM', or 'HIGH'.
  type: String
Registry Key
"RegistryKey": {
    "Path": "STRING, The path to the registry key",
    "Name": "STRING, The name of registry key.",
    "Value": "STRING, The value at the given RegistryKey."
}
In YAML
outputs:
- contextPath: RegistryKey.Path
  description: The path to the registry key
  type: String
- contextPath: RegistryKey.Name
  description: The name of registry key.
  type: String
- contextPath: RegistryKey.Value
  description: The value at the given RegistryKey.
  type: String
Event
"Event": {
    "Type": "STRING, The type of event, for example: "ePO", "Protectwise", "DAM".",
    "ID": "STRING, The unique identifier of the event.",
    "Name": "STRING, The name of the event.",
    "Sensor": "STRING, The sensor that indicated the event.",
    "Rule": "STRING, The rule that triggered the event."
}
In YAML
outputs:
- contextPath: Event.Type
  description: "The type of event, for example: "ePO", "Protectwise", "DAM"."
  type: String
- contextPath: Event.ID
  description: "The unique identifier of the event"
  type: String
- contextPath: Event.Name
  description: "The name of the event."
  type: String
- contextPath: Event.Sensor
  description: "The sensor that indicated the event."
  type: String
- contextPath: Event.Rule
  description: "The rule that triggered the event."
  type: String
Service
"Service": {
    "Name": "STRING, The name of the service.",
    "BinPath": "STRING, The path of the /bin folder.",
    "CommandLine": "STRING, The full command line (including arguments).",
    "StartType": "STRING, How the service was started.",
    "State": "STRING, The status of the service."
}
In YAML
outputs:
- contextPath: Service.Namee
  description: "The name of the service."
  type: String
- contextPath: Service.BinPath
  description: "The path of the /bin folder."
  type: String
- contextPath: Service.CommandLine
  description: "The full command line (including arguments)."
  type: String
- contextPath: Service.StartType
  description: "How the service was started."
  type: String
- contextPath: Service.State
  description: "The status of the service."
  type: String
Process
"Process": {
    "Name": "STRING, The name of the process.",
    "PID": "STRING, The PID of the process.",
    "Hostname": "STRING, The endpoint on which the process was seen.",
    "MD5": "STRING, The MD5 hash of the process.",
    "SHA1": "STRING, The SHA1 hash of the process.",
    "CommandLine": "STRING, The full command line (including arguments).",
    "Path": "STRING, The file system path to the binary file.",
    "Start Time": "DATE, The timestamp of the process start time.",
    "End Time": "DATE, The timestamp of the process end time.",
    "Parent": "STRING, Parent process objects.",
    "Sibling": "LIST, Sibling process objects.",
    "Child": "LIST, Child process objects."
}
In YAML
outputs:
- contextPath: Process.Name
  description: "The name of the process."
  type: String
- contextPath: Process.PID
  description: "The PID of the process."
  type: String
- contextPath: Process.Hostname
  description: "The endpoint on which the process was seen."
  type: String
- contextPath: Process.MD5
  description: "The MD5 hash of the process."
  type: String
- contextPath: Process.SHA1
  description: "The SHA1 hash of the process."
  type: String
  - contextPath: Process.CommandLine
  description: "The full command line (including arguments)."
  type: String
- contextPath: Process.Path
  description: "The file system path to the binary file."
  type: String
- contextPath: Process.Start Time
  description: "The timestamp of the process start time."
  type: String
- contextPath: Process.End Time
  description: "The timestamp of the process end time."
  type: String
- contextPath: Process.Parent
  description: "Parent process objects."
  type: String
  - contextPath: Process.Sibling
  description: "Sibling process objects."
  type: String
- contextPath: Process.Child
  description: "Child process objects."
  type: String
Generic commands
The Cortex XSIAM platform supports hundreds of integrations. Among similar integrations, some commands can be generalized to enable combining data from various sources or running integrations in parallel.
For example, reputation commands such as !file can gather reputation from multiple connected integrations to one indicator.
These commands can be used on all integrations or with the using parameter on specific integration instances.
Cortex XSIAM generic reputation commands
Cortex XSIAM supports many integrations with reputation providers, for example, VirusTotal, AlienVault OTX, and MISP. Every integration that returns a reputation about an indicator must implement the generic reputation commands and calculate a DBot Score.
When creating commands that enrich indicators, the commands should be named according to the indicator, such as !ip and !domain. This naming convention allows commands from multiple integrations to be run together to enrich an indicator. For example, running !ip ip=8.8.8.8 can trigger multiple integrations that gather information about the IP address.
The recommended way to return indicator context is using one of the classes under Common (Common.IP, Common.URL). For more information, see Return IP Reputation in Context and outputs. An example of returning indicators is the IPinfo v2 integration.
The following are available generic reputation commands.
File reputation command
Runs reputation on files.
- name: file
   arguments:
   - name: file
     default: true
     description: List of files.
     isArray: true
IP reputation command
Runs reputation on IPs.
- name: ip
   arguments:
   - name: ip
     default: true
     description: List of IPs.
     isArray: true
URL reputation command
Runs reputation on URLs.
- name: url
   arguments:
   - name: url
     default: true
     description: List of URLs.
     isArray: true
Domain reputation command
Runs reputation on domains.
- name: domain
   arguments:
   - name: domain
     default: true
     description: List of domains.
     isArray: true
Email reputation command
Runs reputation on emails.
- name: email
   arguments:
   - name: email
     default: true
     description: List of emails.
     isArray: true
CVE reputation command
Runs reputation on CVEs.
- name: cve
   arguments:
   - name: cve
     default: true
     description: List of CVEs.
     isArray: true
Cortex XSIAM generic endpoint command
Cortex XSIAM supports many integrations with endpoint providers, for example, GuardiCoreV2.
The following is the generic endpoint command.
Endpoint command
Returns information about an endpoint.
- name: endpoint
   arguments:
   - default: false
     description: The endpoint ID.
     isArray: false
     name: id
     required: false
     secret: false
    - default: true
     description: The endpoint IP address.
     isArray: false
     name: ip
     required: false
     secret: false
    - default: false
     description: The endpoint hostname.
     isArray: false
     name: hostname
     required: false
     secret: false
    deprecated: false
Reputation and DBot score
DBot is the Cortex XSIAM machine learning bot, which ingests information about indicators to determine if they are malicious. Since DBot requires a very specific dataset, you must format the data as follows. As described in Generic reputation commands, when developing an integration that implements a generic reputation command, it is necessary also to create a corresponding DBot score object.
DBot score context format
"DBotScore": {
  "Indicator" : "foo@demi.com",
  "Type": "email",
  "Vendor": "JoeSecurity",
  "Score": 3,
  "Reliability": "A - Completely reliable"
}
The DBot score must be at the root level of the context and contain all the following required keys.
| Key | Meaning | Required? |
|---|---|---|
| Indicator | The indicator value. | Yes |
| Type | The indicator type. Can be: ip, file, email, url, cve, account, cider, domainglob, certificate, or cryptocurrency. | Yes |
| Vendor | The vendor reporting the score of the indicator. | Yes |
| Score | An integer regarding the status of the indicator. See Score Types below. | Yes |
| Reliability | The reliability of the source providing the intelligence data. See Reliability Level below. | Yes |
| Message | Optional message to show an API response. For example, Not found. |
Optional |
DBot score reliability level
When merging indicators, the reliability of an intelligence data source influences the reputation of an indicator and the values assigned to indicator fields. An integration that outputs a DBotScore object and defines each indicator's reliability should allow the user to manually configure the default reliability for the created indicator's DBot Score. This is done by implementing a Source Reliability parameter (named integration_reliability) in the YAML file. This parameters is later used to determine the reliability level when creating the DBotScore object.
Add a reliability parameter to integration YAML
- name: integration_reliability
  display: Source Reliability
  additionalinfo: Reliability of the source providing the intelligence data.
  defaultvalue: C - Fairly reliable
  options:
  - A+ - 3rd party enrichment
  - A - Completely reliable
  - B - Usually reliable
  - C - Fairly reliable
  - D - Not usually reliable
  - E - Unreliable
  - F - Reliability cannot be judged
  required: true
  type: 15
Note
The values are case sensitive.
DBot score values
DBot uses an integer to represent the reputation of an indicator.
| Number | Reputation |
|---|---|
| 0 | Unknown |
| 1 | Benign |
| 2 | Suspicious |
| 3 | Malicious |
Unknown DBot score
An unknown score can be interpreted in the following ways:
- The vendor returns an
Unknownscore for the indicator. - The vendor returns nothing on the indicator.
Malicious DBot score
If the DBot score is returned as a 3 or Malicious, you need to add to the context that a malicious indicator was found. To do this, add an additional key to the URL, IP, or File context called Malicious as follows:
demisto.results({
     "Type": entryTypes["note"],
     "EntryContext": {
        "URL": {
            "Data": "STRING, The URL",
            "Malicious": {
                "Vendor": "STRING, Vendor reporting the malicious status",
                "Description": "STRING, Description of the malicious url"
            }
        },
         "File": {
            " SHA1/MD5/SHA256": "STRING, The File Hash",
            "Malicious": {
                "Vendor": "STRING, Vendor reporting the malicious status",
                "Description": "STRING, Description of the malicious hash"
            }
        },
         "IP": {
            "Address": "STRING, The IP",
            "Malicious":{
                "Vendor": "STRING, Vendor reporting malicious",
                "Description": "STRING, Description about why IP was determined malicious"
        },
        },
         "Domain": {
            "Name": "STRING, The Domain",
            "Malicious": {
                "Vendor": "STRING, Vendor reporting the malicious status",
                "Description": "STRING, Description of the malicious domain"
            }
        }
    }
})
Malicious has two key values: Vendor and Description. The vendor is the entity reporting the malicious indicator. The description explains briefly what was found. For example:
"URL": {
    "Data": "http://viruswarehouse.com",
    "Malicious": {
        "Vendor": "VirusTotal",
        "Description": "Wannacry ransomware detected"
    }
}
Note
It is not possible to use the Cortex XSIAM Transformers (DT) within the DBot score context. For example, using the following in your DBot context, will not work:
DBotScore(val.Indicator == obj.Indicator)
Integration commands
In addition to fetching incidents or indicators, your integration can map product APIs in commands that you want to expose to Cortex XSIAM.
Every command takes inputs (arguments) and returns outputs.
Command names follow a naming convention that makes it easy for users to understand their function: !vendor-object-action. Use kebab-case for command names. For example, a command of an integration from vendor HelloWorld that performs an update action of an object of type alert, should be named: !helloworld-alert-update.
Integration commands are used in two ways in Cortex XSIAM:
- Playbooks - integration commands can be used for playbook tasks.
- CLI - users can manually run commands within an incident using the Cortex XSIAM CLI by typing
!commandnameand specifying the arguments.
Customers typically use a combination of both methods. They use commands to automate processes through playbooks. When they are conducting manual investigations, they run commands from the CLI to analyze the data.
It is important to understand how arguments and outputs work in Cortex XSIAM and to understand design best practices.
Cortex XSIAM integration command design
Commands should ideally run a single API call to your product. This simplifies the handling of conditions where some calls fail and others succeed. Whenever possible such logic should be implemented in playbooks rather than in integrations.
Verify that commands run quickly and are non-blocking. A command should never take more than 2 to 3 seconds to run and return the information, or it can have significant performance impacts in Cortex XSIAM.
Important
Do not use sleep() in your code. If you have commands that need to run for longer periods of time, there are two options:
- Make the commands asynchronous and implement a generic polling mechanism, as used in the HelloWorld integration. For example, if you need to run a search across your endpoints, instead of a single command that waits until the search is completed, you should implement three separate commands.
- A command that triggers the search and returns immediately a job ID as output. For example,
!helloworld-start-scan. - A command that checks the status of the job taking the job ID as input. For example,
!helloworld-scan-status. - A command that retrieves the results of a job when it's complete, taking the job ID as input. For example,
!helloworld-scan-results.
- A command that triggers the search and returns immediately a job ID as output. For example,
- Use long running containers. This is suitable for services that need to keep a connection open for a long time or need to open a listening TCP port. For example, Slack.
In some cases you want to build commands that perform generic well-known actions that are common across several use cases. For example, reputation commands that return enrichment and reputation information about indicators, such as IPs. For those scenarios, we have standardized ways to define command names, inputs and outputs that make interoperability easier. For more information, see Generic commands and DBotScore.
Cortex XSIAM integration command arguments
Arguments are the inputs of your integration commands. They can be mandatory or optional, and can have default and predefined values. For more information, see the commands section of the Metadata YAML file documentation.
Command arguments should be named using snake_case.
When you design commands and their inputs, keep in mind how they are invoked. If a user, either manually or through a playbook, has to provide an input, where do they get that input data from? Is it an input they are likely to know? Or the output of another command?
We recommend making the argument values consistent with what the user needs to provide in the user interface of the original product you are integrating with, not necessarily with what the API requires. For example, if in the product UI you have three options for an argument: Low, Medium and High, but the product API takes corresponding numbers (1, 2 and 3), then your integration's command argument should support Low, Medium and High and you should take convert the argument values to numbers in your integration code. The user experience of the integration should be consistent with what the user is already familiar with.
Another important design rule is to avoid having the SOC analyst waste time and focus by switching across multiple consoles to retrieve data from many different places. If they need to provide an input value in a command, there should be a way to get that information from within Cortex XSIAM.
For example, imagine that you are designing a command that modifies an existing firewall policy. For simplicity, assume you have only two arguments: the ID of the policy and the action (allow or deny). The latter argument is obvious: depending on what the user wants to do, they will set the value to allow or deny (you can set predefined values so the user can only choose between these two options). But what about the ID of the policy? It may not be something that they know. They may know the policy name, but you don't want them to switch context and log in to a different console to find the ID that corresponds to the name. In this case, design your integration to include a command that returns a list of all policies and shows their IDs, or allows the user to retrieve the ID from the name, so that the user doesn't have to switch consoles.
Cortex XSIAM integration command outputs
Every automation script and integration command returns several types of outputs:
-
Human readable
Human readable output is shown to the user in the War Room and is typically formatted in a way that is understandable by the SOC analyst. The human readable data is usually a subset of the entire information returned by your command. In most cases, you show the most relevant data that is also present in the user interface of the product you are integrating with. The ordering is important, display the most relevant fields (and the ones the user is most familiar with) in the leftmost columns.
-
Context data
Outputs are also saved in a structured format (JSON backed) within an incident, so they can be retrieved later and used as inputs of other tasks (either within playbooks or from the CLI).
The context stores the results from every integration command and every automation script that is run. Whether you run an integration command from the CLI or from a playbook task, the output result is stored into the JSON context in the incident or the playground. When you run a command such as
!whois query="cnn.com"the data is returned and the results stored in the context. -
Additional outputs such as images or files.
When you design your outputs, the data must be properly formatted for both human consumption and machine consumption. The following are best practices for outputs:
- Keep human readable information to the reasonable minimum. Remove data that is not relevant to a human analyst and present the remaining data in an orderly manner. We recommend using tableToMarkdown() to automatically format lists into tables. The tableToMarkdown() function also supports arguments that allow you to filter and order columns and improve the formatting of the column headers.
- Keep context data organized:
- Return data using a prefix, such as
VendorName.Entitytype. For example, if your Pack is calledHelloWorldand you are returning a list of hosts, the prefix of the output should beHelloWorld.Host. - Use the CommandResults class to return data to make sure it's properly formatted, and use the
outputs_key_fieldparameter to identify the primary keys. - Adhere to the Standard Context.
- Return data using a prefix, such as
More information is available about context and outputs.
If you are returning files, it's important to understand the difference between Files and InfoFiles, as you should specify the right return type in your command output:
Filesare potentially malicious files (i.e. attachments from potential phishing emails) that should be treated as such. They are automatically enriched (by checking their reputation against configured threat intel sources) and detonated in sandboxes. For more information, see the File section of the Mandatory context standards topic.InfoFilesare not malicious by definitions. They can be reports, CSVs, and other artifacts that your API returns. They are not automatically enriched and detonated. For more information, see the InfoFile section of the Mandatory context standards topic.
Built-in Cortex XSIAM filters and commands
Use the following built-in elements to facilitate your investigation and response.
getEntries filter
When building a script, you can fetch entries from an incident. If you do not specify the incident ID number, the script fetches from the current incident. You can create a filter to limit the search results.
| Filter | Description |
|---|---|
| pageSize | The number of entries to return. |
| lastId | Return entries starting from the specified entry ID and backward. |
| firstID | Return entries starting from the specified entry ID and forward. |
| selectedEntryID | Return entries before and after the specified entry ID. |
| categories | Return entries with the specified categories (array). {commandAndResults, playbookTaskResult, playbookTaskStartAndDone, playbookErrors, justFound, deleted, incidentInfo, chats, evidence, notes, attachments} |
| tags | Return entries with the specified tags (array). |
| users | Return entries with the specified users (array). |
| tagsAndOperator | Return entries that include all specified tags. |
| fromTime | Return entries from this time and forward. |
| parentID | The ID of the parent entry. |
Get entries marked as notes
res = demisto.executeCommand("getEntries", {"filter": {"categories": ["notes"]}})
demisto.results(str(res))
Response
[{
        u 'Category': u 'Builtin',
        u 'ModuleName': u 'InnerServicesModule',
        u 'System': u '',
        u 'Note': True,
        u 'Version': 2,
        u 'ReadableContentsFormat': u '',
        u 'Type': 1,
        u 'Metadata': {
            u 'reputationSize': 0,
            u 'startDate': u '0001-01-01T00:00:00Z',
            u 'recurrent': False,
            u 'sortValues': None,
            u 'file': u '',
            u 'retryTime': u '0001-01-01T00:00:00Z',
            u 'previousAllReadWrite': False,
            u 'endingDate': u '0001-01-01T00:00:00Z',
            u 'id': u '96@42646',
            u 'contents': u '',
            u 'cronView': False,
            u 'category': u 'chat',
            u 'note': True,
            u 'isTodo': False,
            u 'format': u 'markdown',
            u 'system': u '',
            u 'mirrored': False,
            u 'hasRole': False,
            u 'pinned': False,
            u 'instance': u 'Builtin',
            u 'version': 2,
            u 'parentId': u '',
            u 'type': 1,
            u 'brand': u 'Builtin',
            u 'timezoneOffset': 0,
            u 'scheduled': False,
            u 'parentEntryTruncated': False,
            u 'previousRoles': None,
            u 'allRead': False,
            u 'allReadWrite': False,
            u 'incidentCreationTime': u '0001-01-01T00:00:00Z',
            u 'ShardID': 0,
            u 'reputations': None,
            u 'user': u 'admin',
            u 'taskId': u '',
            u 'parentContent': u '!getEntries filter="{\\"categories\\":[\\"notes\\"]}"',
            u 'fileMetadata': None,
            u 'tags': None,
            u 'tagsRaw': None,
            u 'errorSource': u '',
            u 'entryTask': None,
            u 'roles': None,
            u 'created': u '2021-03-08T18:47:47.786120529Z',
            u 'IndicatorTimeline': None,
            u 'modified': u '2021-03-08T18:47:51.032485206Z',
            u 'times': 0,
            u 'investigationId': u '42646',
            u 'dbotCreatedBy': u 'admin',
            u 'playbookId': u '',
            u 'contentsSize': 14,
            u 'previousAllRead': False,
            u 'fileID': u ''
        },
        u 'ContentsFormat': u 'markdown',
        u 'Tags': None,
        u 'Brand': u 'Builtin',
        u 'HumanReadable': None,
        u 'ID': u '96@42646',
        u 'FileID': u '',
        u 'IgnoreAutoExtract': False,
        u 'IndicatorTimeline': None,
        u 'Evidence': False,
        u 'EntryContext': None,
        u 'Contents': u 'This is a note',
        u 'File': u '',
        u 'EvidenceID': u '',
        u 'FileMetadata': None,
        u 'ImportantEntryContext': None
    }
]
taskComplete command
Use this command to mark a playbook task as completed. For example, you might need to include the taskComplete command in a SLA breach script, to close a task and force the playbook to continue running after the SLA has been breached. You can also use the taskComplete command to add an action button in an incident layout, that can be used to mark a specific playbook task as complete.
| Argument | Description |
|---|---|
| id | Specify the task ID or tag to complete. |
| parentPlaybookID | Parent playbook task ID, limits task identification by tags to this sub-playbook only. |
| incdientId | Incident ID this task belongs to. Defaults to current incident. |
| comment | Task completion comment. |
| input | Conditional task completion selection. |
| allowSkipped | Allow performing actions on skipped tasks (default is Yes). |
| isAutoRun | When set to True, the task is executed. Default is False. Relevant only for script/playbook tasks. When set to False, the task is completed immediately. |
| args | Set only if isAutoRun=true. Passing input arguments to the task script/playbook for execution. The args must be JSON format where the key is the name of the script/command/playbook argument name. Example: {"ARG_NAME":"ARG_VALUE"} |
reopenInvestigation command
Use this command to reopen a closed incident. For example, you can use the reopenInvestigation command to add an action button in the incident layout that can reopen a closed incident and take a specific action, such as rerunning the incident's playbook. You can also include the reopenInvestigation command in a loop in a script to reopen multiple incidents.
| Argument | Description |
|---|---|
| id | Which incident to reopen. If no incident ID is provided, the current incident is reopened. |
Using Docker
Docker is a tool used by developers to package together dependencies into an image. Docker enables you to run Python scripts and integrations in a controlled environment, isolated from the server. By packaging libraries and dependencies together, a consistent environment is maintained. You are not required to run pip install to install all the required packages to use your integration. They are part of an image and the image contains all of the libraries you need. See the Docker site for more information.
Configure Docker for Cortex XSIAM scripts and integrations
When creating a script within the Cortex XSIAM IDE, you can specify the Docker image to use, within the script settings. If you don't specify a Docker image, a default Docker image using Python 3.9 is used.
The selected Docker image is configured in the script/integration YAML file under the dockerimage key. See Integration metadata YAML file.
Automatically update Docker images with pull requests
Every integration/script that utilizes either demisto/python or demisto/python3 Docker images is updated automatically whenever a newer tag is available. This happens via an automatic recurring job that updates the Docker image of the content item by a pull request in the content Git repository. The pack is then distributed in Marketplace.
Enable or disable Docker image updates
If your integration/script does not use either demisto/python or demisto/python3 Docker images, you can still update it automatically by adding the autoUpdateDockerImagekey to the YAML file. For example, the following will update the integration MyIntegration docker image:
commonfields:
  id: MyIntegration
  version: -1
name: MyIntegration
display: MyIntegration
script:
 dockerimage: demisto/oauthlib:1.0.0.16907
autoUpdateDockerImage: true
If your integration/script uses either demisto/python or demisto/python3 Docker images and you don't want to automatically update it, you can set the autoUpdateDockerImage field to false.
autoUpdateDockerImage: false
Docker images
Palo Alto Networks maintains a large repository of Docker images. All Docker images are available via DockerHub under the Demisto organization. The Docker image creation process is managed via Dockerfiles repository. Before trying to create a new Docker image, check if there is one available already. You can search https://github.com/demisto/dockerfiles-info/blob/master/used_packages.csv which is updated nightly with image metadata and the os/python packages used in the images. To create a custom Docker image to use in your integration or script, follow the Contributing section.
Important
For security reasons, we cannot accept images which are not part of the Docker hub Palo Alto Networks organization.
Docker package requirements
Considerations when choosing a package to be used in an integration:
- Does the package have known security issues?
- Is the package licensed? If so, what type of license is being used?
You must perform due diligence on packages you choose to use. This includes verifying the package name is correct. For example, in the past, scans of PyPI resulted in the detection of 11 "typo-squatted" packages which were found to be malicious.
Docker image licensing
The Cortex XSIAM content repository is produced with an MIT (Massachusetts Institute of Technology) license, which means that we use only packages that have a license compatible with the MIT license. As a rule, we only use permissive licenses. For a complete list of OSS licenses and their types see: https://en.wikipedia.org/wiki/Comparison_of_free_and_open-source_software_licenses.
Note
Other licenses may be permitted with specific approval.
Add Dockerfiles to the Dockerfiles repository
In most cases, if your integration is for public release, you need to push Docker files into the dockerfiles repository located here. Pushing into this repository adds the image (after an approval process) to the Docker hub Palo Alto Networks organization. See the README.md for details.
Advanced topics
Fetching credentials
You can integrate with third-party credential vaults for Cortex XSIAM to use when authenticating with integrations. This topic provides an example of a vault integration.
Credential vault integration requirements
To fetch credentials to the Cortex XSIAM credentials store, the vault integration needs to retrieve credential objects in the format of a username and password (key:value).
Implement credential fetching
Configure the isFetchCredentials parameter
For this example we look at the HashiCorp Vault integration. The integration contains a Boolean parameter called isFetchCredentials. When this parameter is set to true, Cortex XSIAM fetches credentials from the vault integration.
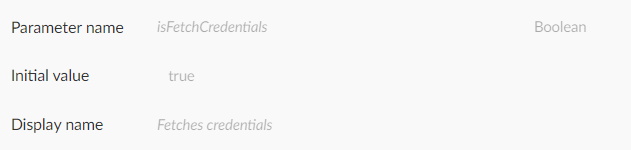
When you configure an instance of this integration, the parameter appears:
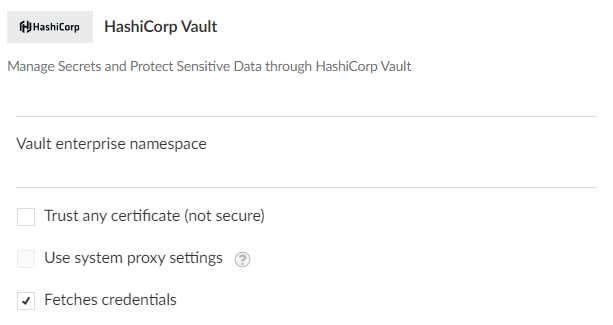
Implement the fetch-credentials command
When Cortex XSIAM fetches credentials from vault integrations, it calls a command called fetch-credentials. This is where you implement the credentials retrieving logic:
if demisto.command() == 'fetch-credentials':
   fetch_credentials()
In the fetch_credentials function, you retrieve the credentials from the vault and create new JSON objects in the format:
{
  "user": "username",
  "password": "password",
  "name": "name"
}
You should now have a credentials list that contains the above objects.
[
  {
    "user": "username_foo",
    "password": "password_foo",
    "name": "name_foo"
  },
  {
    "user": "username_bar",
    "password": "password_bar",
    "name": "name_bar"
  }
]
When you're done creating the credentials objects, send them to the credentials store:
demisto.credentials(credentials)
With the fetch_credentials command, you can either fetch all credentials or fetch a specific set of credentials.
Fetch all vault credentials
To have all relevant credentials from a vault integration visible and usable in other integrations, the fetch-credentials command needs to support the logic of pulling multiple credentials. We recommend creating a dedicated parameter in the vault integration which allows the user to specify which credentials should be pulled. For our example, we name this parameter credential_names:
params: dict = demisto.params()
credentials_str = params.get('credential_names')
credentials_names_from_configuration = argToList(credentials_str)  # argToList is a wrapper to safely execute the str.split() function
credentials = []
for credentials_name in credentials_names_from_configuration:
    credentials.append(get_credentials(credentials_name))

demisto.credentials(credentials)
You can now see the credentials in the Cortex XSIAM credentials store, found at Settings → Configurations → Integrations → Credentials.
These credentials cannot be edited or deleted, they reflect exactly what's in the vault. You can stop fetching credentials by clearing the Fetch Credentials checkbox in the integration settings.
Fetch specific vault credentials
A user might choose to configure another integration using a set of credentials fetched by a vault integration:
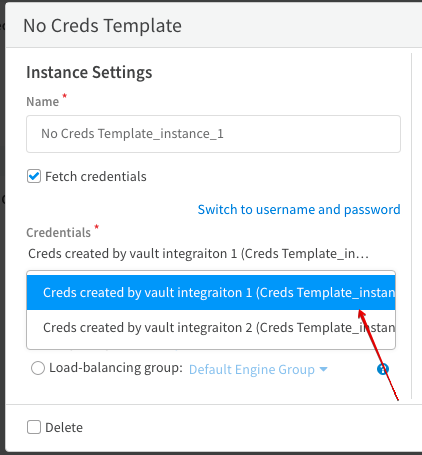
Since Cortex XSIAM does not store the credentials in its database, each time these credentials are used in the new configured integration, Cortex XSIAM queries the vault integration for it. To extract the specific credentials name use the identifier argument stored in demisto.args():
args: dict = demisto.args()
credentials_name: str = args.get('identifier')
try:
    credentials: list = [get_credentials(credentials_name)]
except Exception as e:
    demisto.debug(f"Could not fetch credentials: {creds_name}. Error: {e}")
    credentials = []

demisto.credentials(credentials)
Important
When working with a specific credentials name (the identifier key), always return a list containing up to one set of credentials. It is important to catch errors that are part of this flow, and instead of raising them, return an empty list. If no list or a list with more than one element is returned, the credentials tab will fail to load.
Both options together:
params: dict = demisto.params()
args: dict = demisto.args()
credentials_str = params.get('credential_names')
credentials_names_from_configuration = argToList(credentials_str)  # argToList is a wrapper to safely execute the str.split() function
credentials_name: str = args.get('identifier')
if credentials_name:
    try:
        credentials: list = [get_credentials(credentials_name)]
    except Exception as e:
        demisto.debug(f"Could not fetch credentials: {creds_name}. Error: {e}")
        credentials = []
else:
    credentials = []
    for credentials_name in credentials_names_from_configuration:
        credentials.append(get_credentials(credentials_name))

demisto.credentials(credentials)
Troubleshoot credential fetching
- If there is an error during the process, you can debug your code by adding a test command that calls the
fetch_credentialsfunction. Send a credentials list in the right format and as a valid JSON. - To save API calls every time a credential is used, Cortex XSIAM uses a short time caching mechanism for fetched credentials. This can cause issues when you are trying to debug fetching a specific set of credentials.
Event collector integrations
Event collector integrations enable fetching events and logs from external products, for example from OKTA and Jira. They are developed the same as other integrations, with a few extra configuration parameters and APIs.
Create a Cortex XSIAM event collector integration
To create an event collector integration use the demisto-sdk init --xsiam command. This creates a new content pack with all necessary Cortex XSIAM content items. The event collector integration can be found at Packs/Integrations/${VENDOR_NAME}EventCollector.
Event collector integration naming conventions
Event collector integration names (id, name, and display fields) should end with EventCollector so users can easily understand what the integration is used for.
Required event collector YAML keys
Use the demisto-sdk init --xsiam command to automatically generate the necessary integration YAML configuration keys for an event collector. If you create the YAML manually, verify the following keys are set:
isfetcheventskey in the integration YAML file to indicate the integration is an event collector integration.- Must have the
fromversion: 6.8.0field. - The
marketplaceskey set with the-marketplacev2value. This ensures that the event collector is only available for installation on Cortex XSIAM.
Event collector YAML example
script:
  isfetchevents: true
fromversion: 6.8.0
marketplaces:
- marketplacev2
Configure Collect section parameters
For event collector integration instance settings, the event collector related parameters should be organized in one section by adding the Collect key to each relevant parameter in the integration YAML file:
sectionOrder:
- Connect
- Collect
configuration:
  # ...
- name: ...
  # ...
  section: Collect
For example, since the first_fetch and fetch_limit are event collector related parameters, add them to the Collect section:
- name: first_fetch
  defaultvalue: 3 days
  display: First fetch time
  required: false
  type: 0
  section: Collect # <--- Added
- name: fetch_limit
  defaultvalue: '1000'
  display: Fetch Limit
  additionalinfo: Maximum amount of detections to fetch. Audits API does not include a fetch limit therefore this configuration is only relevant to detections.
  required: false
  type: 0
  section: Collect # <--- Added
In the integration instance modal, it looks like this:
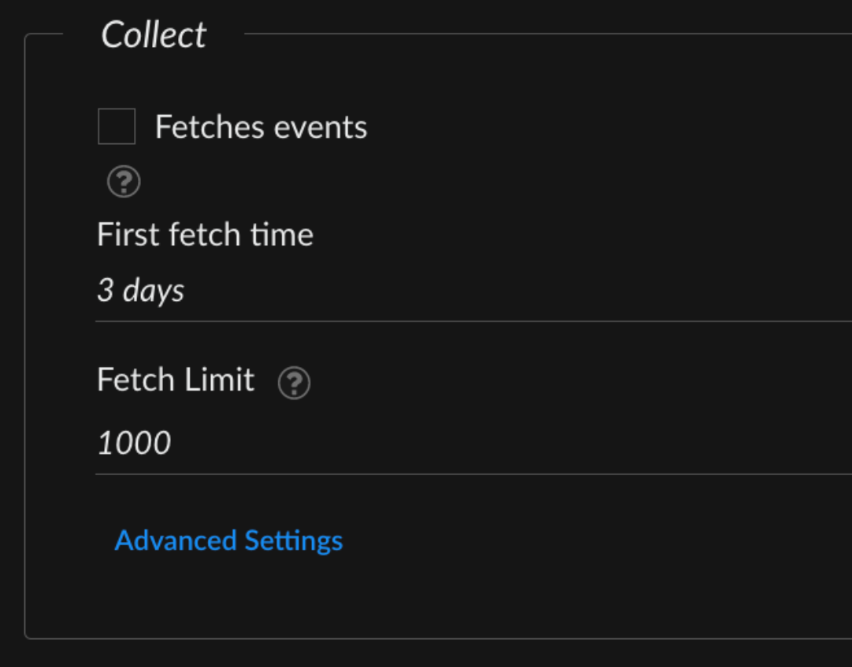
Event collector integration commands
Every event collector integration supports at least three commands:
-
fetch-events- This command initiates a fetch events request to specific external product endpoint(s) using the relevant chosen parameters, and sends the fetched events to the Cortex XSIAM dataset. If the integration instance setting is configured toFetch events, then this command is executed at the specifiedEvents Fetch Interval. By default, it runs every minute to retrieve and import events into Cortex XSIAM.When creating an event collector integration with the
demisto-sdk init --xsiamcommand, thePacks/Integrations/${VENDOR_NAME}EventCollector/${VENDOR_NAME}EventCollector.ymlfile includes the keyscript.isfetchevents: true, which indicates that the integration can fetch events. test-module- This command runs when theTestbutton is clicked in the integration instance settings configuration.-
<product-prefix>-get-events- This command fetches a limited number of events from the external source and displays them in the War Room. Replace<product-prefix>with the name of the product or vendor source providing the events. For example, for an event collector integration for Microsoft Intune, the command might be calledmsintune-get-events.In the
Packs/Integrations/${VENDOR_NAME}EventCollector/${VENDOR_NAME}EventCollector.ymlfile under thescript.commandspath, the SDK by default provides ahello-world-get-eventscommand. This command is used primarily for debugging to retrieve the events that thefetch-eventscommand would run. It includes an optional argument,should_push_events, that has the same functionality asfetch-eventswhen set totrue.
Send events with send_events_to_xsiam
Call the send_events_to_xsiam() function from CommonServerPython when the fetch-events command is executed.
This command expects the following arguments:
eventsThe events to send to the Cortex XSIAM tenant. Should consist of one of the following:- List of strings or dictionaries where each string or dictionary represents an event.
- String containing raw events separated by new lines.
vendor(string): The vendor represented by the event collector integration.product(string): The specific product integrated in the event collector integration.data_format(string) - Should only be included if the events parameter contains a string in theleeforcefformat. Otherwise thedata_formatis set automatically.
Example: main() function from an event collector integration:
This example assumes the events are not in cef or leef formats, therefore the data_format argument is not used.
def main():
    params = demisto.params()

    client = Client(params.get('insecure'),
                    params.get('proxy'))

    command = demisto.command()
    demisto.info(f'Command being called is {command}')
    # Switch case
    try:
        if demisto.command() == 'fetch-events':
            events, last_run = fetch_events_command(client)
            # we submit the indicators in batches
            send_events_to_xsiam(events=events, vendor='MyVendor', product='MyProduct')
            demisto.setLastRun(next_fetch)
        else:
            results = get_events_command(client)
            return_results(results)
    except Exception as e:
        raise Exception(f'Error in {SOURCE_NAME} Integration [{e}]')
Important
- The
send_events_to_xsiam()function should only be used with a system integration. For custom data ingestion needs, use the HTTP Log Collector or contact support to request an official integration. - Always pass events to the
send_events_to_xsiam()function, even if no events were fetched, because thesend_events_to_xsiam()function also updates the UI for the number of events fetched, which could also be 0. Empty data will not be sent to the database. - Only call
demisto.setLastRunafter callingsend_events_to_xsiam().
For more info on the send_events_to_xsiam() function, see the API reference.
Send event data with multiple types
If within fetch-events different API endpoints are called, then events may consist of multiple types with different structures. In this case, call send_events_to_xsiam() with an aggregated list of events from both endpoints. For example, for detections: List[Dict[str, Any]] and audits: List[Dict[str, Any]], send them as:
audits, detections, last_run = fetch_events_command(client)
send_events_to_xsiam(events=audits + detections, vendor='MyVendor', product='MyProduct')
For more details, see https://xsoar.pan.dev/docs/reference/api/common-server-python#send_events_to_xsiam.
Configure the first event collection run
When an integration runs for the first time, the last run time is not in the integration context. To set up the first run properly, use an if statement with a time that is specified in the integration settings.
It is best practice to specify in the integration settings how far back in time to fetch events for the first run.
Configure event queries and parameters
Queries and parameters are configurable parameters in the integration settings that enable filtering events. For example, to import only certain event types into Cortex XSIAM, you need to query the API for only that specific event type.
The following example uses the First Run if statement and query.
# usually there will be some kind of query based on event creation date,
    # or get all the events with id greater than X id and their status is New
    query = 'status=New'

    day_ago = datetime.now() - timedelta(days=1)
    start_time = day_ago.time()
    if last_run and 'start_time' in last_run:
        start_time = last_run.get('start_time')

    # execute the query and get the events
    events = query_events(query, start_time)
Create event collector parsing rules
When developing an event collector integration, you can implement parsing rules in the event collector code.
The most common parsing rule is the _time system property, which indicates the event time from the remote system. For example, using the following events:
{   "id": "1234",
    "message": "New user added 'root2'",
    "type": "audit",
    "op": "add",
    "result": "success",
    "host_info": {
        "host": "prod-01",
        "os": "Windows"    },
    "created": "1676764803"  }
The created event property is a str representation of a timestamp (without milliseconds). However, the _time system property expects the result to be an str in format %Y-%m-%dT%H:%M:%S.000Z. Transform it using the timestamp_to_datestring function from CommonServerPython:
from datetime import datetime
from CommonServerPython import *
#  ...
events: List[Dict[str, Any]] = get_events()
for event in events:
   event["_time"] = timestamp_to_datestring(float(event.get("created")) * 1000)
# ...
To ensure the parsing rule has been applied and is working as expected, run an XQL query to compare the _time and created fields:
dataset = "MyVendor_MyProduct_raw" | fields _time, created
View collected event data in Cortex XSIAM
After events are received by Cortex XSIAM, they are stored in a dataset in the structure of <vendor>_<product>_raw. If it's the first time fetching events, this dataset will be created. For more information about dataset management, see Dataset management.
To see the events sent by the send_events_to_xsiam() function in your Cortex XSIAM instance:
- Go to the left toolbar and navigate to Incident response → Investigation → Query Builder .
- Click the XQL button.
-
In the query builder box, type a query to search for the events you want to view. For example, to view all events type the following and then click Run.
dataset = MyVendor_MyProduct_raw
You should see the events sent by your integration in the table of results.
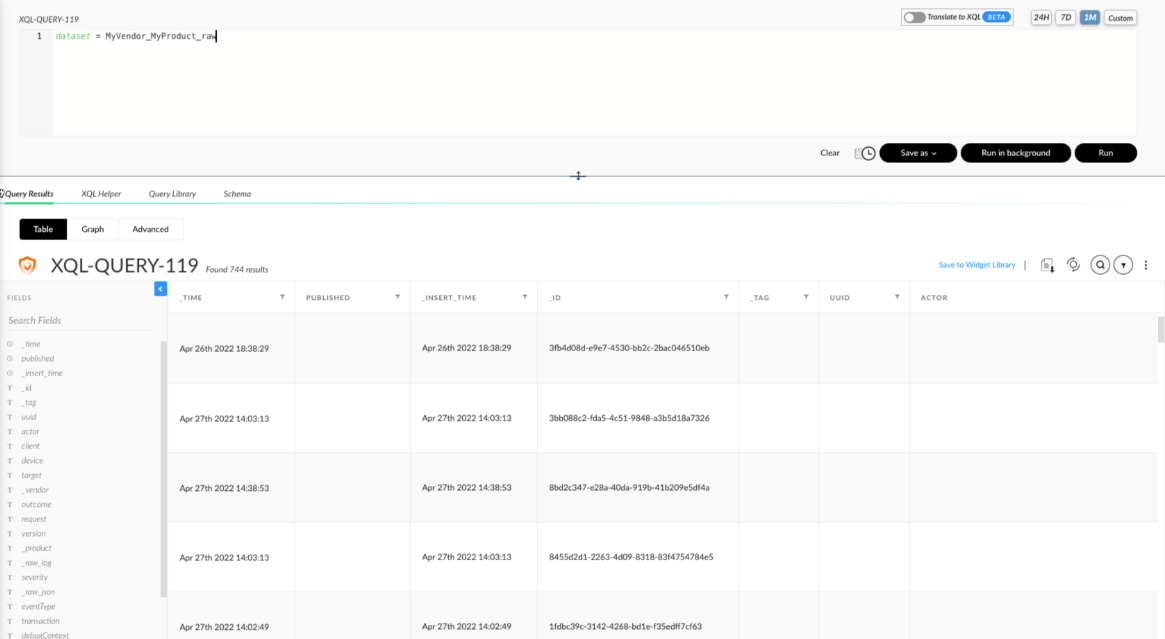
Feed Integrations
Feed integrations allow fetching indicators from feeds, such as TAXII and Office 365.
An example feed integration can be seen here.
While feed integrations are developed the same as other integrations, they include several extra configuration parameters and APIs.
Feed integration naming convention
Feed integration names (id, name and display fields) should end with the word Feed. This consistent naming convention ensures that users can easily understand what the integration is used for.
Required feed integration parameters
Every feed integration should have the following parameters in the integration YAML file:
- display: Fetch indicators
  name: feed
  defaultvalue: true
  type: 8
  required: false
- display: Indicator Reputation
  name: feedReputation
  defaultvalue: feedInstanceReputationNotSet
  type: 18
  required: false
  options:
  - None
  - Good
  - Suspicious
  - Bad
  additionalinfo: Indicators from this integration instance will be marked with this
    reputation.
- display: Source Reliability
  name: feedReliability
  defaultvalue: F - Reliability cannot be judged
  type: 15
  required: true
  options:
  - A - Completely reliable
  - B - Usually reliable
  - C - Fairly reliable
  - D - Not usually reliable
  - E - Unreliable
  - F - Reliability cannot be judged
  additionalinfo: Reliability of the source providing the intelligence data.
- display: ""
  name: feedExpirationPolicy
  defaultvalue: indicatorType
  type: 17
  required: false
  options:
  - never
  - interval
  - indicatorType
  - suddenDeath
- display: ""
  name: feedExpirationInterval
  defaultvalue: "20160"
  type: 1
  required: false
- display: Feed Fetch Interval
  name: feedFetchInterval
  defaultvalue: "240"
  type: 19
  required: false
- display: Bypass exclusion list
  name: feedBypassExclusionList
  defaultvalue: ""
  type: 8
  required: false
  additionalinfo: When selected, the exclusion list is ignored for indicators from
    this feed. This means that if an indicator from this feed is on the exclusion
    list, the indicator might still be added to the system.
The defaultvalue of the feedReputation, feedReliability, feedExpirationPolicy, and feedFetchInterval parameters should be set according to the qualities associated with the feed source for which you are developing a feed integration.
Configure incremental feed integrations
Incremental feeds pull only new or modified indicators that have been sent from the third party vendor. As the determination if the indicator is new or modified happens on the third-party vendor's side, and only indicators that are new or modified are sent to Cortex XSIAM, all indicators coming from these feeds are labeled new or modified.
Examples of incremental feeds usually include feeds that fetch based on a time range. For example, a daily feed which provides new indicators for the last day or a feed which is immutable and provides indicators from a search date onwards.
To indicate to Cortex XSIAM that a feed is incremental, add the configuration parameter: feedIncremental. If the user is not able to modify this setting, set the parameter to hidden with a defaultValue of true. For example:
- additionalinfo: Incremental feeds pull only new or modified indicators that have been sent from the integration. The determination if the indicator is new or modified happens on the third-party vendor's side, so only indicators that are new or modified are sent to Cortex XSIAM. Therefore, all indicators coming from these feeds are labeled new or modified.
  defaultvalue: 'true'
  display: Incremental feed
  hidden: true
  name: feedIncremental
  required: false
  type: 8
If the feed supports both incremental and non-incremental modes, provide the configuration parameter as non-hidden. Thus, a user will be able to modify this settings as they see fit. In the feed code inspect the feedIncremental parameter to perform the proper fetch logic.
Code example of incremental feeds:
Feed integration commands
Every feed integration has a minimum of three commands:
test-module- The command that is run when the Test button in the configuration panel of an integration is clicked.<product-prefix>-get-indicators- Where <product-prefix> is replaced by the name of the Product or Vendor source providing the feed. For example, if you were developing a feed integration for Microsoft Intune, this command might be called msintune-get-indicators. This command should fetch a limited number of indicators from the feed source and display them in the War Room.fetch-indicators- this command will initiate a request to the feed endpoint, format the data fetched from the endpoint to conform to Cortex XSIAM's expected input format, and create new indicators. If the integration instance is configured to fetch indicators, then this is the command that will be executed at the specified feed fetch Interval.
Create indicators with demisto.createIndicators()
Use the demisto.createIndicators() function when the fetch-indicators command is executed. Here is an example from an existing feed integration:
def main():
    params = demisto.params()

    client = Client(params.get('insecure'),
                    params.get('proxy'))

    command = demisto.command()
    demisto.info(f'Command being called is {command}')
    # Switch case
    commands = {
        'test-module': module_test_command,
        'tor-get-indicators': get_indicators_command
    }
    try:
        if demisto.command() == 'fetch-indicators':
            indicators = fetch_indicators_command(client)
            # we submit the indicators in batches
            for b in batch(indicators, batch_size=2000):
                demisto.createIndicators(b)
        else:
            readable_output, outputs, raw_response = commands[command](client, demisto.args())
            return_outputs(readable_output, outputs, raw_response)
    except Exception as e:
        raise Exception(f'Error in {SOURCE_NAME} Integration [{e}]')
The batch function is imported from CommonServerPython. We see that indicators are returned from calling fetch_indicators_command and are passed to demisto.createIndicators in batches.
Feed indicator objects
Indicator Objects are passed to demisto.createIndicators. An example:
{
    "value": value,
    "type": raw_json['type'],
    "rawJSON": raw_json,
    "fields": {'recordedfutureevidencedetails': lower_case_evidence_details_keys},
    "score": score
}
The object key and values:
"value"- required. The indicator value, e.g.,"8.8.8.8".-
"
type"- required. The indicator type (types as defined in Cortex XSIAM), e.g.,"IP". One can use theFeedIndicatorTypeclass to populate this field. This class, which is imported fromCommonServerPythonhas all of the indicator types that come out-of-the-box with Cortex XSIAM.class FeedIndicatorType(object): """Type of Indicator (Reputations), used in TIP integrations""" Account = "Account" CVE = "CVE" Domain = "Domain" DomainGlob = "DomainGlob" Email = "Email" File = "File" FQDN = "Domain" MD5 = "File MD5" SHA1 = "File SHA-1" SHA256 = "File SHA-256" Host = "Host" IP = "IP" CIDR = "CIDR" IPv6 = "IPv6" IPv6CIDR = "IPv6CIDR" Registry = "Registry Key" SSDeep = "ssdeep" URL = "URL"
"rawJSON"- required. This dictionary should contain the"value"and"type"fields as well as any other unmodified data returned from the feed source about an indicator."fields"- optional. A dictionary that maps values to existing indicator fields defined in Cortex XSIAM where the key is theclinameof an indicator field. To see the full list of existing fields:- In Cortex XSIAM, go to Settings → Configurations → Object Setup → Indicators and click on the Fields tab.
- To inspect a specific field, Edit the field. Note that the field's
clinameis listed asmachinename.
-
"relationships"- optional. This list should contain a dictionary of values of the relationships. There are two ways to create relationships:- When creating an indicator.
- Creating relationships by themselves without indicators associated with the relationships.
For both ways, use
demisto.createIndicators.To create a relationship:
-
Create an
EntityRelationshipobject with the relationships data. If more than one relationship exists, create a list and append all of theEntityRelationshipobjects to it.The name of the relationships should be one of the existing relationships:
For more information, see entity relationship.
- Use the
to_indicator()function of the object to convert each object (or a list of objects) to the required format. -
If the relationships is part of an indicator, add the list to the relationship key of the indicator after running
to_indicator.If the relationship is not attached to an indicator, create a dummy indicator with the value
$$DummyIndicator$$and add the relationships key with the list after runningto_indicator.
Note
In indicators of type "File", if you have multiple hash types for the same file (i.e., MD5, SHA256, etc.), you can use the corresponding "fields" to associate all hashes to the same object. The supported fields are: md5, sha1, sha256, sha512, ssdeep. You can use any of the aforementioned hash types as the indicator value for an indicator of type "File".
Long Running Containers
You can use long running containers to run specific processes in an integration indefinitely. To use long running containers, the integration must be written in Python.
Enable the longRunning integration property
To make an integration long running, to enable the longRunning property:
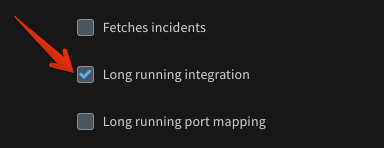
You can then see the Long running integration parameter in the instance configuration options.
When you select the checkbox, the server launches a long running container each time an instance is enabled. When the checkbox is cleared or the instance is disabled, the container dies. Long running containers contain LongRunning in the container name.

Integrations that run continuously by default
Some integrations are long running by default. These integrations do not include the Long running integration checkbox. Example of such integrations include:
- Generic Export Indicators Service (EDL)
- Generic Webhook
- AWS SNS Listener
- TAXII2 Server
- TAXIIServer
For these integrations, the long-running behavior is inherent and cannot be modified.
These integrations can operate in Single engine mode or No engine mode. When using single engine mode, select your engine in the integration configuration and specify the port number for the Listen Port. When using no engine mode, select No engine in the integration configuration. The server automatically assigns a port for the instance.
Implement a long-running integration command
When the container runs, it calls a dedicated command in the integration, similar to fetch-incidents. The command is called long-running-execution. To use a long running container, you need to implement long-running-execution in your integration code. For the code to run code forever, it must never stop executing. For example, you can use a never ending loop (while True).
Interact with the Cortex XSIAM server
Since the long running container does not run within a scope of an incident, it has no standard place to output results to. Instead there are dedicated functions to interact with the server:
addEntry- Adds an entry to a specified incident War Room. For more details, see the API reference.createIncidents- Creates incidents according to a provided JSON. For more details, see the API reference.findUser- Finds a Cortex XSIAM user by a name or email. Useful for creating incidents. For more details, see the API reference.handleEntitlementForUser- Adds an entry with entitlement to a provided investigation. For more details, see the API reference.-
updateModuleHealth- Updates the instance status. This is a way to reflect the container state to the user. For more details, see the API reference.
mirrorInvestigation- For chat based integrations, mirrors a provided Cortex XSIAM investigation to the corresponding chat module.directMessage- For chat based integrations, handles free text sent from a user to the chat module and processes it in the server.
Manage long-running container states
One of the most important and useful aspects of the long running process is the integration context: demisto.setIntegrationContext(context) demisto.getIntegrationContext() You can use the integration context to store information and manage the state of the container per integration instance. This context is stored in a format of a dict of {'key': 'value'}, where the value must be a string. To store complex objects as values, parse them to JSON.
Use logging to notify and report different states inside the long running process: demisto.info(str) and demisto.error(str). These will show up in the server log.
Troubleshoot long-running containers
Use updateModuleHealth, info and error to report errors and debug. It's also important to segregate the logic into functions so you can unit test them.
Long-running container best practices
- Do not use
sys.exit(), usereturn_errorinstead. - Always catch exceptions and log them.
- Run in a never ending loop.
To run multiple processes in parallel, you can use async code. For example, view the Slack v2 and Microsoft Teams integrations.
Invoke long-running HTTP integrations
For details, see Invoking long running HTTP integrations via server's HTTPS endpoint.
Transform Language (DT)
Cortex XSIAM Transform Language (commonly referred to as DT) is used for various context related functions in Cortex XSIAM. DT is a query language for JSON objects, similar to JSONQuery.
Transform Language context example
The following sample context data shows the various ways DT can access, aggregate, and mutate data.
{
    "URL": {
        "Data": "google.com"
    },
    "IP": {
        "Hostname": "google-public-dns-a.google.com",
        "RecordedFuture": {
            "FirstSeen": "2010-04-27T12:46:51.000Z",
            "Criticality": "None",
            "LastSeen": "2019-02-06T11:13:38.139Z"
        },
        "Address": "8.8.8.8",
        "Geo": {
            "Country": "United States",
            "Location": "37.751, -97.822"
        },
        "ASN": 15169
    },
    "DBotScore": [{
        "Vendor": "urlscan.io",
        "Indicator": "google.com",
        "Score": 0,
        "Type": "url"
    }, {
        "Vendor": "ipinfo",
        "Indicator": "8.8.8.8",
        "Score": 0,
        "Type": "ip"
    }, {
        "Vendor": "Recorded Future",
        "Indicator": "8.8.8.8",
        "Score": 0,
        "Type": "ip"
    }, {
        "Vendor": "VirusTotal",
        "Indicator": "8.8.8.8",
        "Score": 1,
        "Type": "ip"
    }],
    "URLScan": {
        "URL": "google.com",
        "Country": ["IE"],
        "Certificates": [{
            "SubjectName": "<span>www.google</span>.com",
            "ValidFrom": "2018-12-19 08:16:00",
            "ValidTo": "2019-03-13 08:16:00",
            "Issuer": "Google Internet Authority G3"
        }, {
            "SubjectName": "*.google.com",
            "ValidFrom": "2018-12-19 08:17:39",
            "ValidTo": "2019-03-13 08:17:00",
            "Issuer": "Google Internet Authority G3"
        }, {
            "SubjectName": "<span>www.google</span>.de",
            "ValidFrom": "2018-12-19 08:16:00",
            "ValidTo": "2019-03-13 08:16:00",
            "Issuer": "Google Internet Authority G3"
        }, {
            "SubjectName": "*.g.doubleclick.net",
            "ValidFrom": "2018-12-19 08:17:00",
            "ValidTo": "2019-03-13 08:17:00",
            "Issuer": "Google Internet Authority G3"
        }, {
            "SubjectName": "*.apis.google.com",
            "ValidFrom": "2018-12-19 08:16:00",
            "ValidTo": "2019-03-13 08:16:00",
            "Issuer": "Google Internet Authority G3"
        }],
        "ASN": "AS15169"
    },
    "MaxMind": {
        "Address": "8.8.8.8",
        "ISP": "Google",
        "UserType": "business",
        "Organization": "Google LLC",
        "ISO_Code": "US",
        "Geo": {
            "Location": "37.751, -97.822",
            "Country": "United States",
            "Continent": "North America",
            "Accuracy": 1000
        },
        "ASN": 15169,
        "RegisteredCountry": "United States"
    }
}
Access nested context values with DT
DT can access keys from nested dictionaries as well as dictionaries.
Using the above context data sample, you can access the following key values:
- The "Continent" key value, located in the "Geo" dictionary, which is located in the "MaxMind" dictionary.
- The "Hostname" key value, located in the "IP" dictionary.
- The "FirstSeen" key value, located in the "RecordedFuture" dictionary, which is located in the "IP" dictionary.
Access the key values using the following DT statements:
| Example | Result |
|---|---|
${MaxMind.Geo.Continent} |
North America |
${IP.Hostname} |
google-public-dns-a.google.com |
${IP.RecordedFuture.FirstSeen} |
2010-04-27T12:46:51.000Z |
Access context arrays with DT
Access array values as you access any other dictionary (or JSON) key in dot notation, with an index.
Note
Indices start with 0, not 1.
Using the above context data sample:
Under "URLScan", there is an array called "Certificates". If you want to access the "SubjectName" value of the first entry, use the following DT statement.
| Example | Result |
|---|---|
${URLScan.Certificates.SubjectName} |
["www.google.com", "*.google.com", "www.google.de", "*.g.doubleclick.net", "*.apis.google.com"] |
${URLScan.Certificates.[0].SubjectName} |
www.google.com |
${URLScan.Certificates.[0:2].SubjectName} |
["www.google.com", "*.google.com", "www.google.de"] |
If you want to retrieve a range of results, you can use [0:9] where "0" is the beginning of the array and "9" is the 9th position in the array.
Filter context data with DT selectors
DT also allows for conditions within the statement itself and uses JavaScript to select the context items. This is a way to bind results together by embedding a selection into the DT string.
Notice that val is used quite often in the DT string. This is a JavaScript method that exposes the value at the given context path.
The following are a few examples of selector methods:
| Example | Result | Description |
|---|---|---|
${DBotScore.Vendor(val == 'urlscan.io')} |
urlscan.io |
Returns only vendors that exactly match the urlscan.io description. |
${URLScan.Certificates.SubjectName( val.indexOf('www') == 0)} |
[<span>www.google</span>.com, <span>www.google</span>.de] |
Returns any SubjectName that starts with "www". |
${URLScan.Certificates.SubjectName( val.indexOf('doubleclick') >= 0)} |
*.g.doubleclick.net |
Returns any SubjectName that contains doubleclick. |
${URLScan.Country( val.toUpperCase().indexOf('IE') >= 0)} |
IE |
Returns any country that contains IE or ie or any mixed case. |
${URLScan.Certificates(val.SubjectName.indexOf('de') == val.length-2).ValidTo} |
2019-03-13 08:16:00 |
Returns all ValidTo for certificates that have SubjectName ending with de. Notice that we tested a relative path to “SubjectName” (“de”) and returned a different path (“ValidTo”). |
${URLScan.Certificates(val.ValidFrom == val1---URLScan.Certificates.[0].ValidFrom).SubjectName} |
["<span>www.google</span>.com", "<span>www.google</span>.de", "*.apis.google.com"] |
Returns all SubjectNames for certificates that have the same ValidTo time as the first certificate in the array. Note that the bind value (val1) does not start with ‘.’ and will DT the context from the top context. |
Selectors help avoid duplicate entries and can be used to add context to existing entries.
An example of how this can be used in your code:
ec = {
    "Data": "www.demisto.com",
    "Malicious": {
        "Vendor": "Palo Alto Networks",
        "Description": "This indicator found to be malicious by Palo Alto Networks"
    }
}


demisto.results({
 Type: entryTypes.note,
 Contents: 'related',
 ContentsFormat: formats.json,
 HumanReadable: 'md',
 EntryContext: {'URL(val.Data && val.Data == obj.Data)': ec
})
The code snippet 'URL(val.Data && val.Data == obj.Data)' will look for entries in the context whose name found under "Data" are the same. If it finds a match, it will update the existing context, If it does not, it will create a new entry in the context because it views the entry as "unique" to the existing values.
Transform context data with DT mutators
Since DT is JavaScript based, it can also mutate a result if your integration needs a different result format. A classic use case for this is joining a server address obtained from another integration to an endpoint found by your integration to create a URL which may be used by your integration at a later time.
Following are a few examples:
| Example | Result | Description |
|---|---|---|
${URLScan.Certificates(val.SubjectName.indexOf("doubleclick") > -1).ValidFrom=foo(val);function foo(aa) { return aa + "Z"; }} |
2018-12-19 08:17:00Z |
Returns the timestamp where the SubjectName contains the word "doubleclick". Then it appends "Z" to the value. |
${MaxMind.Organization=val.toLowerCase()} |
google llc |
Returns all the organizations but in lower case. |
${DBotScore.Vendor(val.indexOf('Recorded')>=0)=val.toLowerCase()} |
"Recorded Future" |
Returns all the vendors containing “Recorded” but in lower case. |
${DBotScore.type=val.ip +': ' + val.Vendor} |
["ip: ipinfo", "ip: Recorded Future", "ip: VirusTotal"] |
Returns the concatenated ip and vendor for all DBotScores. |
Integration cache
In some cases, you might need to store data between integration command runs. A common use case would be storing API tokens which have an expiration time, such as JSON Web Tokens (JTWs). Often JWTs are generated through an API call and have a validity of several minutes or hours. To avoid re-generating tokens every time a command is executed in Cortex XSIAM, you can cache them using integrationContext and retrieve them until they expire.
To store objects in the database per integration instance, Cortex XSIAM uses the cached object integrationContext.
Note
The integrationContext object cannot be retrieved or set in the test-module command.
Implement integration caching
The integrationContext supports two methods, getter and setter. Both methods are provided by the demisto class that have wrappers in the CommonServerPython script. If no object is stored, the method returns an empty dictionary.
- The
get_integration_context()method is the getter of the cached object, which returns a key-value dictionary. - The
set_integration_context()method is the setter of the cached object. This method takes as argument the object to store. Its keys and values must be strings. Note that this method overrides the existing object which is stored. In order to update a stored object, get it, make the requested changes, and then set it.
Integration cache examples
General integration cache usage
integration_context: Dict = get_integration_context()
demisto.results(integration_context)
>>> {}
integration_context_to_set = {'token': 'TOKEN'}
set_integration_context(integration_context_to_set)
integration_context = get_integration_context()
demisto.results(integration_context['token'])
>>> "TOKEN"
integration_context_to_set = {'token': 'NEW-TOKEN'}
set_integration_context(integration_context_to_set)
integration_context = get_integration_context()
demisto.results(integration_context['token'])
>>> "NEW-TOKEN"
Cache an access token with expiration
integration_context = get_integration_context()
token = integration_context.get('access_token')
valid_until = integration_context.get('valid_until')
time_now = int(time.time())
if token and valid_until:
    if time_now < valid_until:
        # Token is still valid - did not expire yet
        return token
# get_token() should be the implementation of retrieving the token from the API
token = get_token()
integration_context = {
    'access_token': token,
    'valid_until': time_now + 3600  # Assuming the expiration time is 1 hour
}
set_integration_context(integration_context)
For more examples, see the Microsoft Graph and ServiceNow integrations.
OpenAPI (Swagger) Codegen
You can generate a Cortex XSIAM integration package (YAML and Python files) using the openapi-codegen command in the Demisto SDK. The integration can be used immediately after you generate it.
Postman code generator
You can use the demisto-sdk postman-codegen command to generate an integration (YAML file) from a Postman Collection v2.1. Note the generated integration is in the YAML format.
Generate Integration Python Code from JSON
You can use the demisto-sdk generate-integration command to generate a Cortex XSIAM integration from an integration config JSON file. The JSON config file can be generated from a Postman collection via the demisto-sdk postman-codegen command.
Generate YAML from Python
You can use the demisto-sdk generate-yml-from-python command to create a YAML file from your Python code. Currently, only generation for integrations is supported.
For more information and examples, see the Demisto SDK guide.
Scheduled Commands
A command can schedule the future execution of another command. In playbook tasks using scheduled commands, the task does not proceed to the next task until it is done with all scheduled commands and there is no future execution scheduled. When a playbook waits for a command execution, it does not use a worker, since workers are only used at the time commands are executed.
You can use scheduled commands in a polling flow when a command cannot return the full result in a single execution (for example, when a remote process hasn't finished execution). Scheduled commands enable you to try the command again later and return the full results when available. For an example, see Cortex XDRIR Endpoint Isolation.
Scheduled command YAML prerequisites
- Integration - in the integration YAML, under the command root, add
polling: true. - Script - in the script YAML, in the root of the file, add
polling: true
Use the polling_function decorator
The polling_function decorator can be used to avoid much of the code you would otherwise need to implement to write a polling function.
All functions implementing this decorator must always return a PollResult object.
Note
Args must be the first parameter in the function definition and call.
polling_function decorator example
In the example below, we are polling against the client.call_api function. If the API has a successful response, we return our results wrapped in a PollResult object. If the response is not successful, we return whether to continue_to_poll according to the results of the should_not_keep_polling function. A Boolean or a predicate can be passed to continue_to_poll
@polling_function('cs-falcon-sandbox-result')
def some_polling_command(args: Dict[str, Any], client: Client):
    key = get_api_id(args)
    api_response = client.call_api()
    successful_response = api_response.status_code == 200

    if successful_response:
        success_return = show_successful_response()
        return PollResult(success_return)

    else:
        error_response = CommandResults(raw_response=report_response,
                                        readable_output='API returned an error',
                                        entry_type=entryTypes['error'])

        return PollResult(continue_to_poll=lambda: not should_not_keep_polling(client, key), response=error_response)
polling_function decorator arguments
| Arg | Type | Description | Default |
|---|---|---|---|
| name | str | The name of the command. | Not applicable |
| interval | int | How many seconds until the next run. | 30 |
| timeout | int | How long to poll until timeout. | 600 |
| poll_message | str | The message to display in the war room while polling. | Fetching Results: |
| polling_arg_name | str | The name of the argument to indicate polling should be done. | polling |
| requires_polling_arg | bool | Whether a polling argument should be expected as one of the demisto args. | True |
PollResult class
| Arg | Type | Description |
|---|---|---|
| response | any | The response of the command in the event of success, or in case of failure but Polling is false. |
| continue_to_poll | union [bool, Callable] | Whether to return a ScheduledCommand to the server to keep polling. |
| args_for_next_run | dict | <p>The arguments to use in the next iteration. Will use the input args in case of None.</p><div data-gb-custom-block data-tag="hint" data-style="info" class="hint hint-info"><p>Note</p><p>If you are using this argument, you must add it to the YAML file with the attribute "hidden: true", so that the polling command recognizes the argument for the next run.</p></div> |
| partial_result | CommandResults | CommandResults to return, even though we will poll again. |
Note
To ignore scheduled War Room entries, add hide_polling_output as a Boolean argument to the command in the YAML file. For an example, see the cs-falcon-sandbox-scan command.
Advanced scheduled command example
In this example, we are trying to implement a command that submits a URL for analysis and then polls for the result. The proper way to implement this is to split the flow into two commands, the submit command and the find command. The find command is a polling command, and is useful on its own without the context of submit. We want to perform the submit command once and poll on the get_result command until we have a response. We will then have the submit-file command call the find-url command.
@polling_function('find-url')
def find_url_command(args: Dict[str, Any], client: Client):
    api_response = client.call_api(args.get('url')
    successful_response = api_response.status_code == 200

    if successful_response:
        success_return = show_successful_response(api_response)
        return PollResult(success_return)

    else:
        error_response = CommandResults(raw_response=report_response,
                                        readable_output='API returned an error',
                                        entry_type=entryTypes['error'])

        return PollResult(continue_to_poll=True, response=error_response)

def submit_url_command(args: Dict[str, Any], client: Client):
    client.submit_url(args.get('url))
    return find_url_command(args, client)
ScheduledCommand class
For scenarios the polling_function decorator does not cover, you can use the ScheduledCommand class for more advanced control over polling. ScheduledCommand is an optional class that enables scheduling commands via the command results.
| Arg | Type | Description |
|---|---|---|
| command | str | The command that runs after next_run_in_seconds has passed. |
| next_run_in_seconds | int | <p>How long to wait before executing the command.</p><p>The interval between each run is determined by next_run_in_seconds, however it will never be less than 10 seconds.</p> |
| args (optional) | dict | Arguments to use when executing the command. |
| timeout_in_seconds (optional) | int | Number of seconds until the polling sequence timeouts. |
When provided to CommandResults it transforms the result into a schedule result. After the next_run_in_seconds delay, the command will be executed. The scheduled command can return another schedule result that schedules another scheduled command and so on.
The schedule sequence completes when any one of three terminating actions occur:
- Done: The integration finishes a schedule sequence by not returning a schedule result. Otherwise, the sequence continues as long as a schedule result is returned.
- Error: The schedule sequence finishes with an error when a command in the sequence returns an error result.
- Timeout (automatically handled): The schedule sequence finishes execution with a timeout error when the timeout is reached. Cortex XSIAM returns the timeout error entry automatically.
Polling scripts and ScheduledCommand
When a script with polling: true is re-run because it still has work to do (for example, items_remaining > 0), it ignores any new arguments you try to pass it. Instead, it re-runs with the original arguments from the very first time the script was executed in that sequence. This behavior is by design for polling scripts, which are meant to repeatedly check on a single, long-running task. The system assumes you want to keep checking on the same task with the same initial parameters. If you need to pass new information or manage different stages of a task, the best and most reliable way to do this is to store the data in the incident context. This ensures your script can access and update the necessary information throughout its different runs, regardless of the polling logic.
Hide scheduled War Room entries
You can prevent printing the Scheduled Entries to the War Room when there is no output. However, this is possible only for entries that are subsequent to the first entry, since the first entry is expected to provide context about the expected final result. This means the first entry is always expected to have a result, but the entries that come after it may be empty until a non-scheduled result is returned.
It is recommended to prevent printing to the War Room until the final result is available, since the schedule icon provides the scheduling context via its tooltip . To prevent War Room entries while using a ScheduledCommand, return a CommandResults with just a scheduled_command.
For example: return_results(CommandResults(scheduled_command=scheduled_command))
Polling script ScheduledCommand example
In the following example, if the status is not complete then a result with scheduled_command is returned. After interval_in_seconds seconds (60 by default), the result schedules a poll for the search status and result. This is done in the next run as well, and repeats until the status is complete.
def run_polling_command(args: dict, cmd: str, search_function: Callable, results_function: Callable):
    interval_in_secs = int(args.get('interval_in_seconds', 60))
    if 'af_cookie' not in args:
        # create new search
        command_results = search_function(args)
        outputs = command_results.outputs
        af_cookie = outputs.get('AFCookie')
        if outputs.get('Status') != 'complete':
            polling_args = {
                'af_cookie': af_cookie,
                'interval_in_seconds': interval_in_secs,
                'polling': True,
                **args
            }
            scheduled_command = ScheduledCommand(
                command=cmd,
                next_run_in_seconds=interval_in_secs,
                args=polling_args,
                timeout_in_seconds=600)
            command_results.scheduled_command = scheduled_command
            return command_results
        else:
            # continue to look for search results
            args['af_cookie'] = af_cookie
    # get search status
    command_results, status = results_function(args)
    if status != 'complete':
        # schedule next poll
        polling_args = {
            'af_cookie': args.get('af_cookie'),
            'interval_in_seconds': interval_in_secs,
            'polling': True,
            **args
        }
        scheduled_command = ScheduledCommand(
            command=cmd,
            next_run_in_seconds=interval_in_secs,
            args=polling_args,
            timeout_in_seconds=600)

        # result with scheduled_command only - no update to the war room
        command_results = CommandResults(scheduled_command=scheduled_command)
    return command_results
Use scheduled commands with demisto.executeCommand
When using demisto.executeCommand() a command or a script that returns a schedule result will not schedule a command execution. However, its result will contain the schedule metadata.
We recommend creating a new result with the ScheduledCommand class to schedule a future script execution.
Advanced users can extract the schedule metadata, and use it when scheduling the future script execution. The schedule metadata fields are: PollingCommand, NextRun, Timeout, and PollingArgs (for more information, see return_results in Python code conventions).
demisto.executeCommand example
For the autofocus-search-samples command that may return a schedule result (if it has Metadata.polling in its fields and af_cookie in its Contents) or a non-scheduled result, the wrapping script AutoFocusSearchScript can handle it as follows.
args = demisto.args()
samples_result = demisto.executeCommand('autofocus-search-samples', **args)
script_results = []
if samples_result and not isError(samples_result[0]):
    if demisto.get(samples_result[0], 'Metadata.polling'):  # result has polling metadata
        # extract the af_cookie from the results
        af_cookie = demisto.get(samples_result[0], 'Contents.AFCookie')
        if not af_cookie:
            raise ValueError('af_cookie is missing from schedule result.')
        schedule_args = {
            'af_cookie': af_cookie,
            'polling': True
        }
        schedule_command = 'AutoFocusSearchScript'
        # take the timeout and next_run from the polling fields
        schedule_timeout = demisto.get(samples_result[0], 'Timeout')
        schedule_next_run = demisto.get(samples_result[0], 'NextRun')
        scheduled_command = ScheduledCommand(
            command=schedule_command,
            next_run_in_seconds=int(schedule_next_run),
            args=schedule_args,
            timeout_in_seconds=int(schedule_timeout)
        )
        readable_output = "Autofocus search created successfully."
        script_results.append(CommandResults(
            readable_output=readable_output,
            scheduled_command=scheduled_command
        ))
    else:
        readable_output = "Autofocus search is done, see result below."
        script_results.append(CommandResults(readable_output=readable_output))
        script_results.extend(samples_result)
return_results(script_results)
Fetch missing incidents with generic lookback methods
During a fetch-incidents run, some edge case scenarios may cause you to miss incidents from the third-party product.
The most common scenarios are:
- Indexing issues in the product: For example, if incident A was created before incident B and only B was indexed,
fetch-incidentsfetches only B and not A. If A was indexed after the fetch was called, the next fetch fetches only from the created time of B. - An update in the incident information: Some implementations of
fetch-incidentsuse a query filter to fetch only specific incidents. If initially an incident did not match the query (meaning, it was not fetched) but at some point was updated so that it now matches the query,fetch-incidentsdoes not pull the updated incident because the time to fetch it already passed.
Configure the look_back parameter
The look_back parameter enables configuring how far back in time (in minutes) fetch-incidents will look to get the incidents that were created a while ago but indexed a few minutes ago. In addition, the LastRun object stores the following fields to be used by the lookback methods:
time- The time to fetch the next fetch call (as in a regular fetch).limit- The maximum number of incidents retrieved in the next fetch. If the current fetch run has the samestart_timeas the last fetch (determined inget_fetch_run_time_range()), this field is increased by the limit instance parameter value, and then incidents retrieved in the last fetch are filtered out.found_incident_ids- The IDs of incidents fetched in previous runs. Used for filtering duplicates in the next runs.
Generic incident lookback methods
Lookback is implemented using the following generic methods. For more information about lookback generic methods, see CommonServerPython.
get_fetch_run_time_range()- Using the last run object and other parameters, this method calculates and retrieves the time range in which to fetch. If thelook_backparameter is defined, then the start time will always be greater than or equal tonow - look_back.-
filter_incidents_by_duplicates_and_limit()- After getting the incidents using the third-party API call, you need to filter out the duplicate incidents. From the example above, after incident A is indexed the next fetch gets incidents A and B, but B must be filtered out since it was already fetched.Note
If after filtering duplicates you have more incidents than the limit,
fetch-incidentswill get only up to the limit number of incidents. update_last_run_object()- Updates the existing last run object. The function updates the found IDs from theget_found_incident_idsfunction and also updates the new time and limit from thecreate_updated_last_run_objectfunction and returns the updated last run object.
Incident lookback helper methods
The following helpers are used in the above lookback methods, and should not be used when implementing fetch-incidents in the integration.
get_latest_incident_created_time()- Given a list of incidents and the created time field, this function will return the latest incident created time.remove_old_incidents_ids()- Removes old incident IDs from the last run object to avoid overloading.get_found_incident_ids()- Returns a list of the new fetched incident IDs. This is saved in the last run object and used to filter duplicates in the nextfetch-incidentscall.create_updated_last_run_object()- Creates a new last run object with a new time and limit for the next fetch.
Fetch incidents with lookback example
def fetch_incidents(params: dict):

    incidents = []

    fetch_limit_param = params.get('limit')
    look_back = int(params.get('look_back', 0))
    first_fetch = params.get('first_fetch')
    time_zone = params.get('time_zone', 0)

    last_run = demisto.getLastRun()

    # If the start time in the current fetch is the same as the start time in the previous fetch, the fetch_limit may be different from the fetch_limit_param.
    fetch_limit = last_run.get('limit') or fetch_limit_param

    # It's important to get here the end_fetch_time to pass it into the update_last_run_object function.
    start_fetch_time, end_fetch_time = get_fetch_run_time_range(last_run=last_run, first_fetch=first_fetch,
                                                                look_back=look_back, timezone=time_zone)

    # Here you insert functions for building the query and sending the API call to get the incidents. For example:
    query = build_query(start_fetch_time, end_fetch_time, fetch_limit)
    incidents_res = get_incidents_request(query)

    incidents = filter_incidents_by_duplicates_and_limit(incidents_res=incidents_res, last_run=last_run,
                                                         fetch_limit=fetch_limit_param, id_field='incident_id')

    last_run = update_last_run_object(last_run=last_run, incidents=incidents, fetch_limit=fetch_limit_param,
                                      start_fetch_time=start_fetch_time, end_fetch_time=end_fetch_time, look_back=look_back,
                                      created_time_field='created', id_field='incident_id')

    demisto.incidents(incidents)
    demisto.setLastRun(last_run)
Incident lookback notes
- Fetching incidents is flexible and you can use the various functions according to your needs.
- You can also use the generic methods for regular
fetch-incidentswithout lookback. - If the
look_backvalue is increased bykminutes, you may get duplicate incidents for thekminutes that overlap with the previous fetch.
Create a sample integration
You can develop integrations using the built-in IDE in the Cortex XSIAM UI or using Visual Studio Code with the Visual Studio extension.
In this example, we use the IDE in the Cortex XSIAM UI, which includes access to Script Helper (a library of many common server functions within Cortex XSIAM) as well as a graphical user interface for editing integration settings, commands, and arguments.
Use CommonServerPython and CommonServerUserPython
The CommonServerPython (CSP) and CommonServerUserPython (CSUP) scripts are implicitly imported at the beginning of every Python script in Cortex XSIAM. CSP is imported first, enabling you to create your own common methods in CSUP to use across scripts and integrations.
Note
CSP and CSUP can’t be attached to integrations you create, so any changes you implement are not available for other users.
Use Script Helper for common integration functions
In many cases, there is already an existing script for common server functions. With the Script Helper, you can find tools for example to format a table, manipulate data, and post to the War Room. If a function you want to create seems like it could be used in many different scripts, there’s a good chance it already exists in Script Helper. If you do create a new function that you believe would be useful across many scripts, we encourage you to contribute that function to CommonServerPython scripts.
Follow these steps to create an integration from the IDE in the Cortex XSIAM UI.
-
In Cortex XSIAM, navigate to Settings → Data Collection → Automation & Feed Integrations and click BYOI in the top right corner.
Note
If you don’t see this button, it means you don’t have the correct permissions required for creating new integrations. Contact your admin for assistance.
- Define integration settings.
- Write the integration code.
- Test the integration.
Define sample integration settings
When you click on the BYOI button, you enter the Cortex XSIAM IDE. By default, the HelloWorld integration template is loaded. You will replace it with the integration you create. This includes replacing the existing HelloWorld integration settings with new settings, and deleting unused parameters or arguments.
Behind the scenes, the settings you enter are saved in a YAML file which you can export and import. To learn more about Cortex XSIAM integration YAML files, see Integration metadata YAML file.
As an example, we are going to create an English to Yoda translator, which translates normal English into the way Yoda, the Star Wars character, speaks. This is a simple integration that lets us explore important aspects of integration development. With our integration, we can try calling an API, parsing data, and posting it to the War Room. We will use the Yoda-Speak translate API available at FunTranslations.
Configure basic sample integration settings
In the Basic section, name the integration, add a description, choose a category, and set several additional options.
- Under Integration Name, replace the
HelloWorldintegration name withYoda Speak. - Under Description, include basic information about the integration, common troubleshooting steps, and any required setup instructions. For the purposes of this tutorial, enter
Creating an Integration, we are. - Under Category, select
Utilities. See the full list of available categories. -
Add a Logo. You can drag and drop the logo or click the box to open a file browser to select a file for upload.
Logo requirements:
- No larger than 10KB
- Transparent background
- PNG format
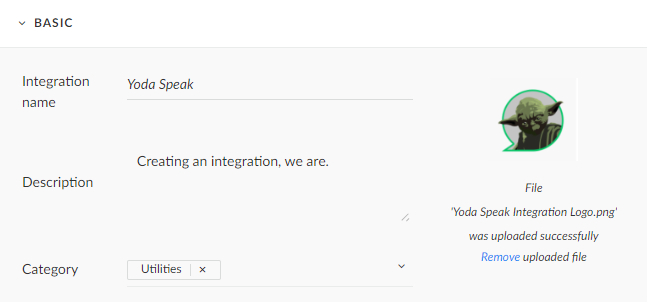
Note
The Fetches alerts checkbox tells Cortex XSIAM that the integration runs periodically to ingest events and create alerts in Cortex XSIAM. Our Yoda Speak integration does not need to fetch incidents, so make sure this checkbox is empty. While we don’t need this feature for our Yoda Speak integration, fetching alerts is an essential part of many integrations. There are additional options available here including external schema support and long running integration, but these are less commonly used.
Configure sample integration parameters
This section lets you set parameters that can be used across all commands in the integration. Some common parameters include the API key used for communicating with the product, your username, whether to use proxy, etc.
For the Yoda Speak integration, we want to include the API key and proxy settings, and to allow for insecure requests. We also include a URL parameter, which tells the integration where to send requests. For each parameter, we include a display name that tells the user what the value is used for.
Add the API key parameter
Enter the following values for the apikey parameter.
- Parameter name: apikey
- Type: Authentication
- Mandatory: unselected
- Display password: API Key
For the Yoda Speak integration, the free service does not require an API key and allows up to 60 API calls a day with up to 5 calls an hour. If you require more API calls, FunTranslations offers a paid service that you can access with an API key. In this case, we provide the option for users with a paid subscription to enter their API key, but we don’t make it mandatory. The Authentication parameter type enables using Cortex XSIAM's built-in credential management system to save and use the API key, and ensures that the API key is not displayed to the user and is not stored in logs.
Note
Many integrations that connect to third-party services require an API key for authentication, which is sent with every request to the third party service. Since it’s used by every command that performs an API call, we add it as a global parameter and not an argument.
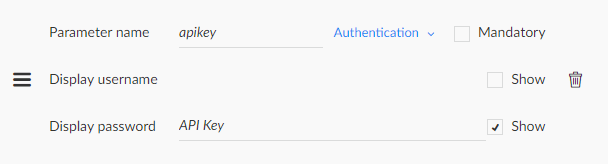
Add the API URL parameter
Enter the following values for the url parameter.
- Parameter name: url
- Type: Short Text
- Mandatory: selected
- Initial value: https://api.funtranslations.com/translate/
- Display name: API URL
Note
In some cases, the URL parameter may be used for third-party services that enable connecting to more than one server, such as servers in different geographic regions (https://login.example.de or https://login.example.com).
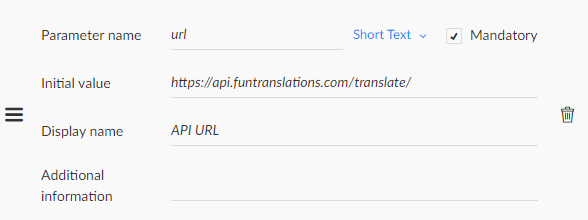
Add the insecure connection parameter
Enter the following values for the insecure parameter.
- Parameter name: insecure
- Type: Boolean
- Initial value: false
- Display name: Trust any certificate (not secure)
When Trust any certificate is set to true, the integration ignores TLS/SSL certificate validation errors. Use this to test connection issues or connect to a service while ignoring SSL certificate validity. We do not recommend setting this option to true in a production environment.
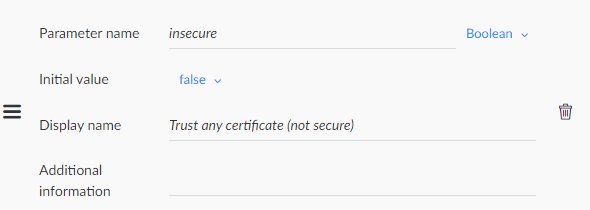
Add the proxy parameter
Enter the following values for the proxy parameter:
- Parameter name: proxy
- Type: Boolean
- Initial value: false
- Display name: Use system proxy settings
When Use system proxy settings is set to true, the integration runs using the proxy server (HTTP or HTTPS) defined in the server configuration. In most cases, a proxy is not required.
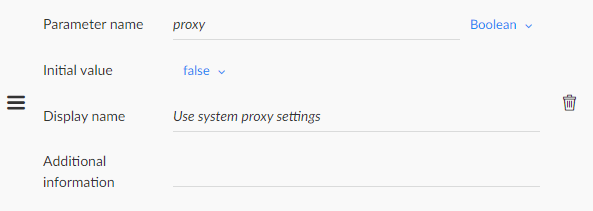
Configure the sample integration command
Create commands to be used in the integration code.
- Click +Add command.
- Enter the following values.
- Command name: yoda-speak-translate
- Description: Translates a text from English to Yoda
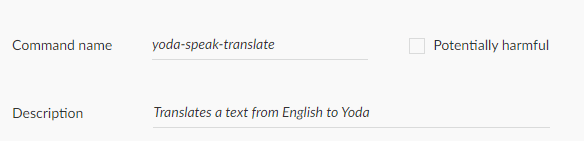
Note
Command names should follow “brand-function” name formatting convention. For example, VirusTotal has a command named vt-comments-add that adds a comment to a scan. An exception to this rule is when creating commands that enrich indicators, the commands should be named according to the indicator, for example !ip and !domain. This naming convention allows commands from multiple integrations to be run together to enrich an indicator. For example, running !ip ip=8.8.8.8 can trigger multiple integrations that gather information about the IP address. For more information, see Generic reputation commands.
Add the translation command argument
Arguments are parameters specific to a command.
In this example, we want to translate English text to Yoda-style text, so we add an argument called text. Users can provide a different text string on every call. The argument is mandatory, since the command can’t run if there’s nothing to translate.
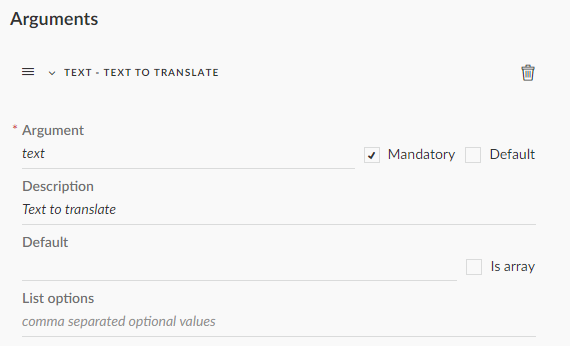
Configure translation command outputs
In Cortex XSIAM, the context is a JSON object that is created for each incident and stores results from integration commands and automation scripts. Context is important because it enables you to add information to an incident and run playbooks and integrations utilizing that information.
To write the translation to context, add an output to the yoda-speak-translate command.
- Click +Add output.
- Enter the following values.
-
Context Path: YodaSpeak.TheForce.Translation
The naming convention for the context path is
Brandname.Object.Property. - Description: Translation this is
- Type: String
-
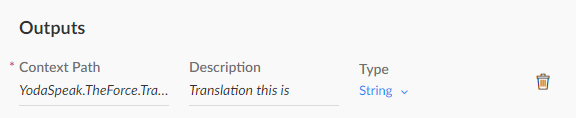
Write integration code
Once we've finished adding our parameters, command, argument, and outputs, we can write the integration code.
Note
The sample code uses standard Python error handling mechanisms, such as try. For more information about errors and exceptions in Python, see the Python documentation. In our integration code, we raise exceptions when errors occur. The convention is to have a main try/except block on main() that catches errors and calls return_error.
The return_error function ensures that playbooks calling these functions will fail and stop, alerting the user to a problem. In integrations and scripts, we refrain from calling return_error in other places in the code.
Import Python libraries for the integration
To begin, we have the option to import Python libraries, so that their commands are available for our integration. Every integration runs inside a Docker image, and our standard Docker image includes most of the common packages, such as JSON and collections. In our Yoda Speak integration, we don’t need to import any libraries, as it only uses the BaseClient class, implicitly imported from CommonServerPython.
When working in Visual Studio Code, we recommend importing the following at the top of your code for debugging purposes.
# uncomment the import statements for debugging in PyCharm, VS Code or other IDEs.
# import demistomock as demisto
# from CommonServerPython import *  # noqa # pylint: disable=unused-wildcard-import
# from CommonServerUserPython import *  # noqa
If you want to use Python libraries that are not included in the standard Cortex XSIAM Docker image, you can create a customized Docker image.
Define the output context key prefix
Set the term Phrase as a prefix for the output context keys.
TRANSLATE_OUTPUT_PREFIX = 'Phrase'
Disable insecure request warnings
Next we prevent Python from raising a warning when accessing resources insecurely.
# Disable insecure warnings
requests.packages.urllib3.disable_warnings()  # pylint: disable=no-member
Since we created the insecure parameter that allows the integration to ignore TLS/SSL certificate validation errors, we also need to disable the warning.
Create the integration API client
class Client(BaseClient):
    def __init__(self, api_key: str, base_url: str, proxy: bool, verify: bool):
       super().__init__(base_url=base_url, proxy=proxy, verify=verify)

       self.api_key = api_key

       if self.api_key:
            self._headers = {'X-Funtranslations-Api-Secret': self.api_key}

    def translate(self, text: str):
        return self._http_request(method='POST', url_suffix='yoda', data={'text': text}, resp_type='json',  ok_codes=(200,))
The Client is an object that communicates with the API. We create a class called Client. When a Client object is created, it instantiates a parent BaseClient using the parameters we have set up (whether to use proxy, whether to allow insecure connections, and the base URL). If the user provided values to the api_key parameter, the Client sets the relevant headers it will use.
In this example, when using the Yoda Speak API with an API key, the API key is passed as a header.
The number of methods our Client class has usually matches the number of commands in our integration. The Yoda Speak integration only has the translation command, so our Client object should have a matching method to the API request which returns its result.
Implement the test_module command
def test_module(client: Client) -> str:
    """
    Tests API connectivity and authentication'

    Returning 'ok' indicates that connection to the service is successful.
    Raises exceptions if something goes wrong.
    """

    try:
        response = client.translate('I have the high ground!')

        success = demisto.get(response, 'success.total')  # Safe access to response['success']['total']
        if success != 1:
            return f'Unexpected result from the service: success={success} (expected success=1)'

        return 'ok'

    except Exception as e:
        exception_text = str(e).lower()
        if 'forbidden' in exception_text or 'authorization' in exception_text:
            return 'Authorization Error: make sure API Key is correctly set'
        else:
            raise e
The test_module function is run whenever the Test integration button is clicked in the integration instance settings. The test_module function sends a hard coded preset string (here, it’s I have the high ground) to the Yoda-Speak translate API to test API connectivity and authentication. There are three possible results:
- HTTP response code is 200, which means the request is successful. We return the string
okper the convention for a successful test. - The request is not successful and the problem is related to authorization:
Authorization Error: make sure API Key is correctly set. - The request is not successful for any other reason: The error text is displayed.
Implement the translation command
def translate_command(client: Client, text: str) -> CommandResults:
    if not text:
        raise DemistoException('the text argument cannot be empty.')

    response = client.translate(text)
    translated = demisto.get(response, 'contents.translated')

    if translated is None:
        raise DemistoException('Translation failed: the response from server did not include `translated`.',
                               res=response)

    output = {'Original': text, 'Translation': translated}

    return CommandResults(outputs_prefix='YodaSpeak',
                          outputs_key_field=f'{TRANSLATE_OUTPUT_PREFIX}.Original',
                          outputs={TRANSLATE_OUTPUT_PREFIX: output},
                          raw_response=response,
                          readable_output=tableToMarkdown(name='Yoda Says...', t=output))
The translate_command function uses the client that is provided as an argument for the function and it calls translate using the text provided. The client is created outside of the function (in main()). The function performs several steps.
- Confirms that there is a non-empty string to translate. If the string input is empty, it raises an exception.
- Tells the Client to send the appropriate API call. If the translation fails (for example due to an API rate limit, authentication, or connection error), an exception is raised.
- If the translation succeeds, we want to return it to Cortex XSIAM. To do that, we use a class called
CommandResult(which is declared in CSP). We supply it with the following arguments:outputs: We create a dictionary calledoutputswhere both the original text and the translation are stored.outputs_prefix: The first level of the output in the context data. It usually matches the name of the integration or service.raw_response: The argument used to attach the raw response received from the service, which can be useful when debugging unexpected behaviors.outputs_key_field: Since we can run the translation command multiple times, and possibly receive different results for the same string of text, the system needs to know where to update or append each result. In this example we tell the system thatPhrase.Originalis the key that represents the original text we translated, so that the next time the command is run on the same string of text, the translated values will update.-
readable_output: This is what users see in the War Room when calling the command, so it should be formatted. We can use thetableToMarkdownfunction (from CSP) to turn the JSON into a user-friendly table. We providetableToMarkdownwith both the JSON values and a title for the table.Tip
The Script Helper provides an easy way to insert common functions into your code. If you click the Script Helper button and search for the
tableToMarkdowncommand, you have the option to insert it directly into the code with placeholders for itsname(title) andt(JSON) arguments.
Implement the integration main function
Everything actually runs within main. We pull in the integration parameters, arguments, and the translate command. The parameters are assigned to variables. Notice that the parameters are the same ones we set up in the integration settings earlier.
def main() -> None:
    params = demisto.params()
    args = demisto.args()
    command = demisto.command()

    api_key = params.get('apikey', {}).get('password')
    base_url = params.get('url', '')
    verify = not params.get('insecure', False)
    proxy = params.get('proxy', False)
When the function runs, the command will be logged for debugging purposes.
demisto.debug(f'Command being called is {command}')
We now create a Client using the given parameters. The Client is defined.
try:
    client = Client(api_key=api_key, base_url=base_url, verify=verify, proxy=proxy)
There are two possible commands that can be passed to the main function in our integration.
-
test-module: If the command name istest-module, it means the user has clicked the integration Test button while setting up or editing an integration instance.Note
We did not explicitly create a command called
test-module. It is a built-in command.When returning
ok, the user is shown a greenSuccessmessage. If any value other thanokis returned, an error is displayed. Make sure you return errors that help the user understand what to change in the integration settings in order to fix connection issues. -
yoda-speak-translate: This is the primary command for our integration and lets us translate strings of text.
if command == 'test-module':
    # This is the call made when clicking the integration Test button.
    return_results(test_module(client))

elif command == 'yoda-speak-translate':
    return_results(translate_command(client, **args))

else:
    raise NotImplementedError(f"command {command} is not implemented.")
There is also an else option. This returns an error if someone tries to run a command that was created in the YAML file but does not exist in the Python (PY) file. For example, if you added a command yoda-interpret in the integration settings, but did not add it to this file, and then tried to run that command, you would see Yoda-interpret is not implemented.
Log and return integration errors
# Log exceptions and return errors
except Exception as e:
    demisto.error(traceback.format_exc())  # print the traceback
    return_error("\n".join(("Failed to execute {command} command.",
                            "Error:",
                            str(e))))
If any errors occur during the execution of our code, show those errors to the user and also return an error.
Run the integration main function
if __name__ in ('__main__', '__builtin__', 'builtins'):
    main()
This line tells the system where to start running our code. By convention, we call the main function main.
Test the integration
-
Go to Settings → Data Collection → Automation & Feed Integrations, and search for Yoda. Click Add instance.

We will not enter an API key, but will instead use the free option with a limited number of API calls.
-
To test connectivity, click the Test button. If the connection is successful, you will see Success and the date/time displayed.
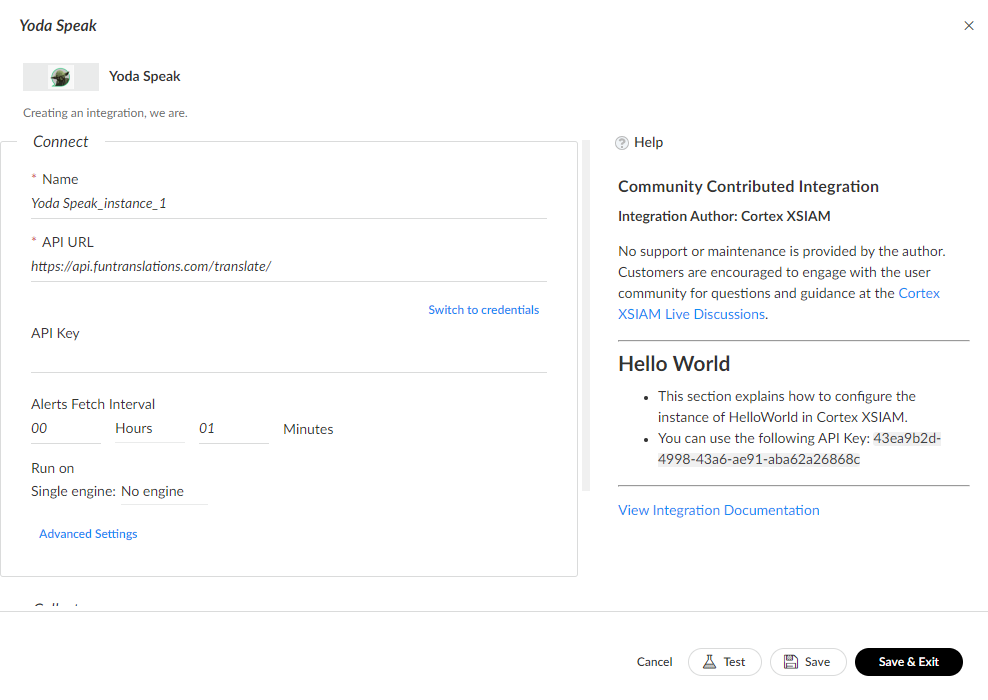
-
Click Save & Exit.
Note
If you have an integration open in two different tabs, you may encounter an error where your changes aren’t saved. In this case, take a screenshot of your changes, close both tabs, and then reopen one tab. Enter your changes again and save.
-
To test the integration, create a new incident. At the CLI, enter
!yoda-speak-translateand any English string for the argument, for example "Hello, my name is John Smith. We are learning about integrations."
In the War Room, you can see the table we created with the
tableToMarkdownfunction, with the results.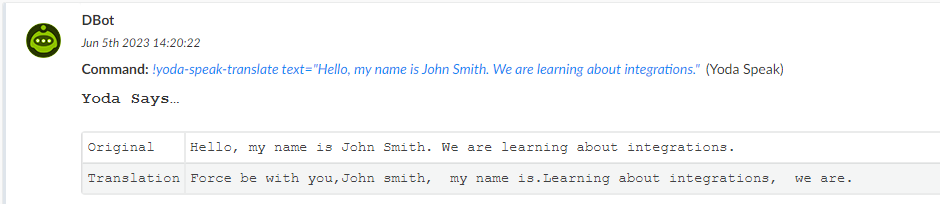
-
View the integration output in the context.
In this example,
YodaSpeakis the root forThe Force. If the translation changes the next time we run the command, the translation field will be updated.
Add the sample integration to a playbook
You can see the power of integrations when you include them in a playbook. We will create a playbook that translates the Details field in an incident into Yoda Speak and then prints it to the War Room.
- Go to the Playbooks page and click +New Playbook.
- Name the playbook Yoda Speak.
- In the task library, search for yoda and click Add.
-
You can see there is a field for text, which is a required argument. Instead of typing our text here, we want to pull the text string from incident
Details.- Click the curly brackets, then Alert details+Details.
- Click Close and then Save.
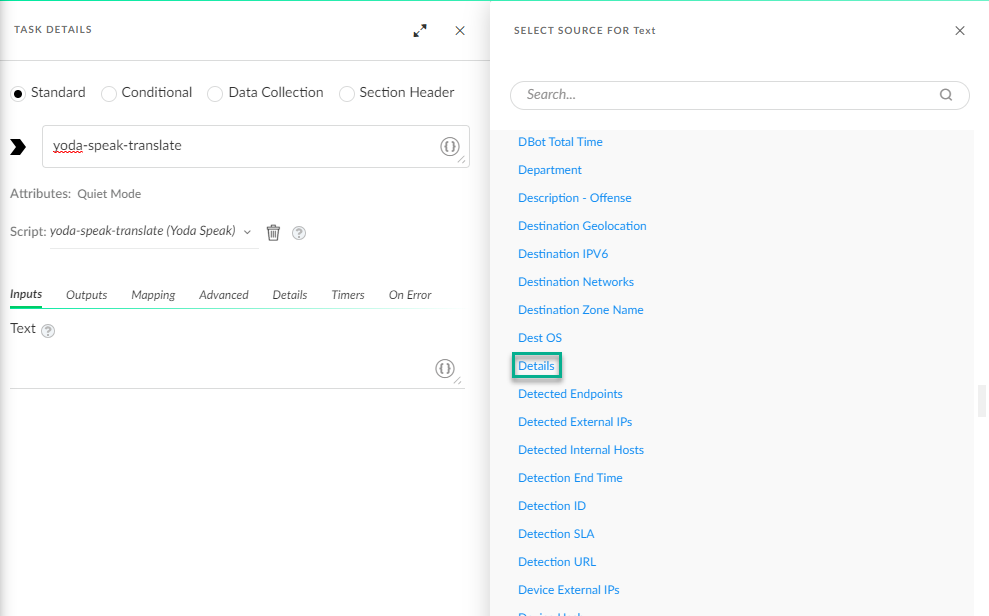
- Add a print task. Click +Create Task and name it print. In the task library, search for
printand select the Print script. - Once again, we want to pull our text from the incident, so click the curly brackets. Our options now include
yoda-speak-translate. -
Under
yoda-speak-translate, choose Translation and click Close and then Save.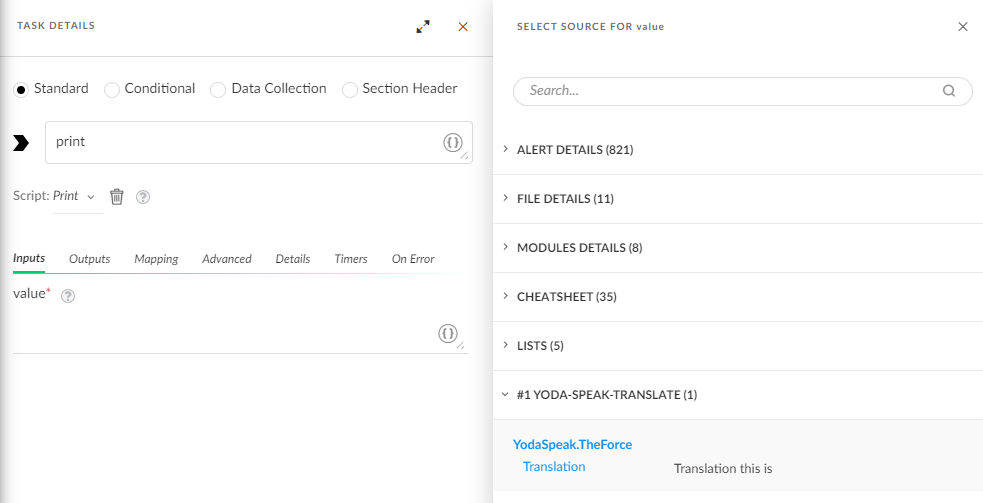
-
Connect the tasks in the playbook. Use your cursor to create lines between Playbook Triggered and yoda-speak-translate and between yoda-speak-translate and print.
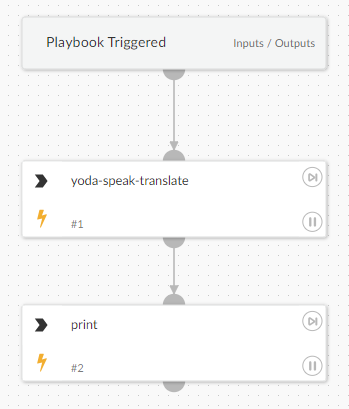
- Save the playbook.
-
Test the playbook. Click Edit, then click Debugger Panel and then click New Mock Alert. Select an alert with a Description field. Click Run.
Check the Context in the Debugger Panel for the YodaSpeak output. See Debugging for more details.
This example integration is now complete, and we can use it throughout Cortex XSIAM.
Real world integrations are usually more complex than our example. Like any code, integrations require maintenance and can be extended over time, for example with new features and commands.
To ensure integrations perform as expected, packs can have unit tests, as well as test playbooks. Learn more about contributing content.
Playbooks
Playbooks are a series of tasks, conditions, scripts, conditions, commands, and loops that run in a predefined flow to save time and improve efficiency and results of the investigation and response process.
Playbooks enable you to automate complex workflows in Cortex XSIAM without requiring complicated coding, and they are created and edited directly in the UI via the Playbook Editor. For more information, see Playbooks.
After the playbook is complete, it can be downloaded and added to a content pack for submission.
Playbooks can be triggered by:
-
Issues
Playbooks can run automatically for incoming issues by issue type. Consider whether your content pack needs a new issue type.
Add a trigger to run a playbook for an issue with specific characteristics. For example, set a condition based on the issue source, severity, or MITRE TTP. For more information, see Playbook triggers.
-
Indicator queries
TIM playbooks can run based on indicator queries. Determine what indicator query (for example, all IP indicators retrieved from a particular feed) should be used.
-
Sub-playbooks
A parent playbook can invoke a sub-playbook. If you use sub-playbooks, consider what inputs and outputs your playbook should support and determine the default values. See the Cortex XSIAM Playbook Design Guide for more details.
Add a Playbook to a Content Pack
Use the demisto-sdk download --item-type Playbook -i "PLAYBOOK NAME" to add a playbook to a content pack.
Playbook triggers should be added to the content pack Triggers folder.
Currently, Cortex XSIAM does not support exporting playbook triggers into the Content repo unless you turn on a feature flag.
Playbook conventions
When creating playbooks to contribute, you need to following conventions and standards that keep playbooks consistent, usable, and readable.
Cortex XSIAM playbook naming conventions
- Names are Title Case.
-
Playbook names cannot contain the following special characters:
Punctuation marks: ! " # $ % & ' ( ) * + , . / : ; < = > ? @ [ \ ] ^ ` { | } ~ Symbols: © ® ™ ° µ ± ß Formatting characters: ¶ § -
After the playbook name, but before specifying a version number or integration name, use a dash (-).
Example:
Endpoint Enrichment - Generic v2. -
If adding
Testto the playbook name, use a dash and add it to the end of the name.Example:
Phishing - Core - Test -
When adding
testto a later version of a playbook, use- Testat the end.Example:
Phishing - Core v2 - Test -
In the descriptions of playbooks, specify the supported integrations or file types. File types are in capital letters. Integration names are in title case.
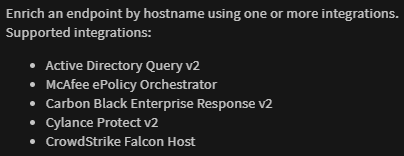
Cortex XSIAM playbook task conventions
- The first letter of task names is capitalized. The rest of the task name is sentence case, but integration names should be capitalized.
- When using verbs, the verb form should be the simple command. For example,
Save, and notSavingorSaves. - Conditional tasks should end with a question mark. For example,
Is there a file?,Is there an endpoint to enrich?,Is there an email file attached?,Is Carbon Black Enterprise Response enabled?,Is there a Word file? - Descriptions of tasks, unlike the names of tasks, should use the verb form
Savesand notSave. For example,Checks if this is the first iteration.
Playbook design and configuration best practices
- To automatically extract indicators from an output of a command, in the task Advanced tab, select one of the options provided: Use system default, None, Inline, Out of Band. See Indicator extraction for more information about each option.
- When outputting to context in integrations or scripts, use generic descriptions. For example, Extract Indicators From File - Generic v2 has two different tasks outputting to
File.Textbut in the playbook outputs there is a description for only one. - Set defaults for playbook inputs as needed, by clicking Playbook Triggered at the top of the playbook.
- Avoid programming terms, as playbooks can be used by non-programmers.
- When working with indicators or data that should be unique, use
Uniqtransformers to prevent duplications in the returned list. Do the same for playbook inputs. - Avoid using DT (Transform Language) if not required. Instead, use selectors (Get step), filters, and transformers. This is easier to work with and also prevents a common error where data is passed by value instead of reference. An exception to this rule is when using the
Setscript, which sets a value to an output. You can not "get" that key, as it does not exist. - Use the Ignore case option when checking user inputs, such as True/False in playbook inputs.
- Confirm task changes in all relevant sub-windows. Do not cancel, switch tasks, or navigate to another page, as your changes will not be saved.
- When editing a playbook that has a sub-playbook, if you changed the inputs/outputs of the sub-playbook, the changes are not reflected in the parent playbook, until you refresh the page. Saving the parent playbook and reopening the playbook may not show the changes until you refresh the page.
Design readable Cortex XSIAM playbooks
- When visually designing a playbook, the most important factor is to provide a clear understanding of the workflows, followed by overall readability, followed by general aesthetics.
- Group similar tasks.
- Align tasks/headers of the same level.
- Use section headers to split playbook tasks into different phases.
- Avoid headers as timer starts/stoppers.
Generic playbooks
The Common Playbooks content pack, installed by default, provides support for common tasks that are part of many analyst workflows. These playbooks can support multiple integrations, and can be used independently or as a sub-playbook for your larger use case.
You can view a full list of the playbooks in the Common Playbooks content pack and their descriptions in the Content tab of the pack.
A few examples of generic playbooks include:
-
Detonate URL - Generic
Detonates URLs through active integrations that support URL detonation.
-
File Enrichment - File reputation
Get file reputation using one or more integrations.
-
Get File Sample - Generic
Retrieves files from endpoints by the file hash or the file path.
Lists
After creating a list in Cortex XSIAM, you can download it and add it to your content pack.
- In Cortex XSIAM, when viewing a list, click the more options icon (three vertical dots) to Download list.
- Add
list-to the beginning of the file name and change the file extension to.json. For example, for a JSON list, rename the filelist-mylistname.json. -
Edit the file to change the
idfield to be identical to thenamefield. and edit the value in theversionfield to-1to prevent user changes.Your JSON file should include the following:
id: <name of your list>
version: -1
name: <name of your list>
- Save your list in the lists directory:
Packs/<pack_name>/Lists/.
Note
If you download the list via the demisto-sdk download command, you do not need to change the file extension, as it downloads as mylist.json.
The following is an example of a list-checked_integrations.json file.
    {
        "allRead": false,
        "allReadWrite": false,
        "data": "Cylance Protect v2_instance_1,Core REST API_instance_1,Image OCR_default_instance,McAfee ESM v2_instance_1,Microsoft Defender Advanced Threat Protection_instance_2,Rasterize_default_instance,Trend Micro Deep Security_instance_1,Where is the egg?_default_instance,d2,fcm_default_instance,vt,ad-login,ad-query,splunk",
        "dbotCreatedBy": "",
        "description": "",
        "fromVersion": "6.5.0",
        "hasRole": false,
        "id": "checked integrations",
        "itemVersion": "",
        "locked": false,
        "name": "checked integrations",
        "nameLocked": false,
        "packID": "",
        "previousAllRead": false,
        "previousAllReadWrite": false,
        "previousRoles": [],
        "roles": [],
        "system": false,
        "tags": null,
        "toVersion": "",
        "truncated": false,
        "type": "plain_text",
        "version": -1
    }
Issues
When you create a content pack for Cortex XSIAM, you can include custom issue layouts, fields, and rules, as well as classifiers and mappers. Develop these items in the UI.
- Issue fields - Issue fields support mapping, correlation rules, custom issue layouts, and display in the Issues table.
- Issue layouts - Custom issue layouts let you choose fields and buttons for issues that meet specific rules. You can include custom and out-of-the-box issue fields.
- Issue layout rules - Issue layouts are applied according to layout rules. You can assign a custom layout based on the issue source, including issues from your integration.
- Classifiers - Classification determines the issue type created for events from a specific integration. Create and define the classifier in the integration.
- Mappers - Map fields from your third-party integration to issue fields.
After these items have been created and finalized, we can add them to the content pack by downloading them using demisto-sdk download -i "Resource Name" -o Packs/MyPack. The SDK will put the content item in the correct subfolder per the type of resource it is.
Data modeling rules
Data modeling rules enable you to map your logs into a single, unified data model. This data model provides a consolidated schema and a simpler way to interact with your data, regardless of its source or dataset.
Create data model rules
To create a local data model rule in the Cortex XSIAM UI, see Data modeling rules. Follow the steps in this topic to contribute the rule you created.
Once events are ingested in the dataset, create data model rules in the repository and then map the ingested raw events to Cortex XSIAM system fields.
Create data model rules in the content repository
Create a new directory named Packs/MyVendorMyProduct/ModelingRules/MyVendorMyProduct_1_3 inside your content pack. Create the following files within this directory:
MyVendorMyProduct_1_3.xif: This file holds the XDM rule we created in the Data Model Editor in the Cortex XSIAM UI. . Copy and paste the rule directly into this file.-
MyVendorMyProduct_1_3.yml: This file contains additional metadata about the data model. The file has the following structure:fromversion: 6.10.0 id: MyVendorMyProduct name: MyVendorMyProduct Modeling Rules rules: '' schema: '' tags: MyVendor,MyProduct
-
MyVendorMyProduct_1_3_schema.json: This file contains the fields that came directly from the raw response and were used in the development of the XDM rules. The file has the following structure:{ "MyVendor_MyProduct_raw": { "field_1": { "type": "string|int|datetime", "is_array": true|false // Specify whether the field is an array/list of types. }, "field_2": { "type": "string|int", "is_array": true|false } }
If the raw response is not a JSON-formatted string, the schema has only a
_raw_logattribute, for example:{ "MyVendor_MyProduct_raw": { "_raw_log": { "type": "string", "is_array": false } } }
Map event data to data model rules
The next step is to map the data set of raw events to relevant data model rules. See Data modeling rules in the Cortex XSIAM documentation for instructions for creating data model rules.
The data model definition begins with:
[MODEL: dataset="MyVendor_MyProduct_raw"]
Where MyVendor is the vendor name and MyProduct is the name of the vendor's product/service which we use to generate events.
Under the data model definition, write a query that maps the fields in the raw event JSON to XDM (Cortex XSIAM data model) system fields. This mapping adds the out-of-the-box enrichment capability available to all XDM system fields.
For example, the following events are sent to Cortex XSIAM and are currently in the data set MyVendor_MyProduct_raw:
[
  {
    "id": "1234",
    "message": "New user added 'root2'",
    "type": "audit",
    "op": "add",
    "result": "success",
    "host_info": {
      "host": "prod-01",
      "os": "Windows"
    },
    "created": "1676764803"
   },
   {
    "id": "1235",
    "message": "User 'root2' delete failed, permission denied",
    "type": "audit",
    "op": "delete",
    "result": "failed",
    "host_info": {
      "host": "prod-01",
      "os": "Windows"
    },
    "created": "1676764823"
    }
]
Map each one of the JSON keys to XDM system fields. To find the relevant XDM system fields (which are prefixed with `XDM_CONST`), either use the auto-completion offered by the data rules editor, or search for the fields in the XDM field reference.
For example, the data model rules would be defined as below:
[MODEL: dataset="MyVendor_MyProduct_raw"]
ALTER
  xdm.event.id = id,
  xdm.event.description = message,
  xdm.event.type = type,
  xdm.event.operation = if(
    op = "add", XDM_CONST.OPERATION_TYPE_CREATE,
    op = "delete", XDM_CONST.OPERATION_TYPE_MODIFY,
    op = "login", XDM_CONST.OPERATION_TYPE_LOGIN,
    op = null, null, to_string(op)
  ),
  xdm.event.outcome = if(
    result = "success", XDM_CONST.OUTCOME_SUCCESS,
    result = "failed", XDM_CONST.OUTCOME_FAILED,
    result = null, null, to_string(result)
  ),
  xdm.event.is_completed = if(result != pending),
  xdm.source.hostname = json_extract_scalar(host_info, "$.host"),
  xdm.source.os_family = if(
    json_extract_scalar(host_info, "$.os") = "Windows", XDM_CONST.OS_FAMILY_WINDOWS,
    json_extract_scalar(host_info, "$.os") = null, null, to_string(json_extract_scalar(host_info, "$.os"))
  )
Note
- To map the
opfield to the appropriate XDM system field, in this case theOPERATION_TYPE, use the XQL if function. In the example above, set thexdm.event.operationfield to the enumXDM_CONST.OPERATION_TYPE_CREATEif the value of theopfield in the raw response isadd. - When you use an
iffunction, best practice is to have an additional argument which is used as default. You can see this additional argument at the end of the function, and it has thefield_name = null, null, to_string(field_name)structure. You can see an example of this when defining theop,resultandos_familyfields. - When you need to access nested fields from within the JSON, use the
json_extract_scalarfunction. - See the XQL Functions Reference for more information about other functions.
If the query or the parsing is incorrect, the editor notifies you of the error.
After writing the rules, you can test them to verify they are mapped correctly.
Test Data Model Rules
After writing data model rules, test them to ensure the rules work as expected.
There are two ways to test the modeling rules:
- Use an XQL query in the Cortex XSIAM UI.
- Create a data model test configuration and execute the test using
demisto-sdk.
Example JSON and data modeling rules
Use the sample JSON and data model rules as described in Create data model rules.
The JSON file represents the ingested events:
[
  {
    "id": "1234",
    "message": "New user added 'root2'",
    "type": "audit",
    "op": "add",
    "result": "success",
    "host_info": {
      "host": "prod-01",
      "os": "Windows"
    },
    "created": "1676764803"
   },
   {
    "id": "1235",
    "message": "User 'root2' delete failed, permission denied",
    "type": "audit",
    "op": "delete",
    "result": "failed",
    "host_info": {
      "host": "prod-01",
      "os": "Windows"
    },
    "created": "1676764823"
    }
]
The following are sample data model rules:
[MODEL: dataset="MyVendor_MyProduct_raw"]
ALTER
  xdm.event.id = id,
  xdm.event.description = message,
  xdm.event.type = type,
  xdm.event.operation = if(
    op = "add", XDM_CONST.OPERATION_TYPE_CREATE,
    op = "delete", XDM_CONST.OPERATION_TYPE_MODIFY,
    op = "login", XDM_CONST.OPERATION_TYPE_LOGIN,
    op = null, null, to_string(op)
  ),
  xdm.event.outcome = if(
    result = "success", XDM_CONST.OUTCOME_SUCCESS,
    result = "failed", XDM_CONST.OUTCOME_FAILED,
    result = null, null, to_string(result)
  ),
  xdm.event.is_completed = if(result != pending),
  xdm.source.hostname = json_extract_scalar(host_info, "$.host"),
  xdm.source.os_family = if(
    json_extract_scalar(host_info, "$.os") = "Windows", XDM_CONST.OS_FAMILY_WINDOWS,
    json_extract_scalar(host_info, "$.os") = null, null, to_string(json_extract_scalar(host_info, "$.os"))
  )
Test data model rules using the Cortex XSIAM UI
After creating the XDM rules and ensuring no errors were raised, construct a new XQL query with the fields mapped in the data model. Using the data model above, the query looks like this:
datamodel dataset in("MyVendor_MyProduct_raw") |
FIELDS
xdm.event.id,
xdm.event.description,
xdm.event.type,
xdm.event.outcome,
xdm.event.operation,
xdm.event.is_completed,
xdm.source.hostname,
xdm.source.os_family
Tip
Only select fields are mapped in the data model to make it easier to review the actual and expected results.
Indicators
Indicators are artifacts associated with alerts, and are an essential part of the alert management and remediation process. They help correlate alerts, create hunting operations, and enable you to easily analyze alerts and reduce Mean Time to Response (MTTR).
Cortex XSIAM includes integrations that fetch indicators from either a vendor-specific source or from a generic source, such as a CSV or JSON file.
When indicators are ingested, regardless of their source, they have a unified, common set of indicator fields, including traffic light protocol (TLP), expiration, verdict, and tags
URL extraction
The Cortex XSIAM URL indicator type is built using regular expression and a formatting script. The following describes the URL extraction components and what output you should expect when extracting URL indicators.
Cortex XSIAM URL indicator extraction components
There are two components when extracting URL indicators:
- Regular expression
- Formatting script
URL indicator regular expression
From a given text, a URL regular expression tries to catch a valid URL based on the following characteristics:
- A URL prefixed by one of the following protocols:
- HTTP
- HTTPS
- FTP
- FTPS
- HXXP (defanged HTTP)
- HXXPS (defanged HTTPS)
- A URL with ASCII or non-ASCII characters
- Escaped and unescaped URLs
- URL with or without query parameters
Format extracted URL indicators
After extracting the URL using regular expression, a FormatURL formatting script iterates on each given URL and does the following:
- If the URL is prefixed by a URL defense system, Proofpoint or ATP, the script extracts the redirected URL and continues with steps 3-6 for the original and extracted redirected URL.
-
If the URL is NOT prefixed by a URL defense system, Proofpoint or ATP, the script checks if the first query parameter is a redirected URL query parameter by checking if the first parameter value starts with HTTP or HTTPS.
For example:
https://www.good.site/index.html?redirectURL=https://evil.com/mal.htmlIf the query parameter exists, the script extracts the redirected URL and performs steps 3-6 both for the given URL and the one extracted from the query parameter.
-
Replaces "[.]" with "." .
For example:
https://www[.]example.combecomeshttps://www.example.com -
Decodes the URL.
For example:
https://www.example.com%2F%21%40becomeshttps://www.example.com/!@ -
Converts obfuscated characters.
For example:
hxxp → httpbecomeshxxps → https - Returns the formatted URL.
Supported URL indicator structures
The following are the most common supported URL structures:
- http://öevil.tld/
- https://evilö.tld/evil.html
- www.evilö.tld/evil.aspx
- https://www.evöl.tld/
- www.evil.tld/resource
- http://xn--e1v2i3l4.tld/evilagain.aspx
- https://www.xn--e1v2i3l4.tld
- hxxps://www.xn--e1v2i3l4.tld
- hxxp://www.xn--e1v2i3l4.tld
- www.evil.tld:443/path/to/resource.html
- https://1.2.3.4/path/to/resource.html
- 1.2.3.4/path
- 1.2.3.4/path/to/resource.html
- http://1.2.3.4:8080/
- http://1.2.3.4:8080/resource.html
- http://☺.evil.tld/
- http://1.2.3.4
- ftp://foo.bar/resource
- ftps://foo.bar/resource
For more information, see Indicator extraction.
Domain extraction
The Cortex XSIAM domain indicator type is built using regular expression and a formatting script. The following describes the domain extraction components and what output you should expect when extracting indicators of type domain.
Cortex XSIAM domain indicator extraction components
There are two components when extracting domain indicators:
- Regular expression
- Formatting script
Domain indicator regular expression
When text is given, a domain regular expression will try to catch a valid domain based on the following characteristics:
- A domain with ASCII and non-ASCII characters
- Escaped and unescaped domains
The regular expression can extract domains from one of the following:
- Explicit domain
- URL
- Email address
Format extracted domain indicators
After extracting the domain using a regular expression, an ExtractDomainAndFQDNFromUrlAndEmail formatting script iterates on each given domain and does the following:
-
Replaces "[.]" with ".".
For example:
www[.]example.com --> www.example.com -
Validate the Top-Level-Domain to avoid file extension false positives.
Excludes ‘.zip’ Top-Level-Domain by default.
-
Returns the formatted domain.
Supported domain indicator structures
example.comwww.example.comxn--t1e2s3t4.comwww.xn--t1e2s3t4.comwww.example.co.ukexample.co.uksubtest.example.comwww.example.example.comöexample.comexampleö.comwww.exampleö.comwww.examöle.com
For more information, see Indicator extraction.
Relationships
The create_relationships parameter in integrations creates relationships between indicators.
- defaultvalue: 'true'
  additionalinfo: Create relationships between indicators as part of enrichment.
  display: Create relationships
  name: create_relationships
  required: false
  type: 8
To create a relationship:
-
Create an
EntityRelationshipobject with the relationship's data. If more than one relationship exists, create a list and append all of theEntityRelationshipobjects to it.EntityRelationship( name='contains', entity_a='1.1.1.1', entity_a_type='IP', entity_b='2.2.2.2', entity_b_type='IP', source_reliability='B - Usually reliable', brand='My Integration ID')
- When setting the name of the relationship, choose a value that appears in the the predefined list of relationships.
- Use the
Commonobject when creating the indicator and in the relationships key set the list ofEntityRelationshipobjects. - Use
CommandResultsto set the relationships key to the list ofEntityRelationshipobjects.
For more information about creating a relationship entity, see EntityRelationship.
Example integrations
Documentation
Content pack documentation includes:
-
pack_metadata.json
Contains the pack description, pack keywords, tags, use-cases, and categories
-
Content Pack README.md
Packs that provide at least one end-to-end use case should contain a detailed README file that will be displayed in the Details tab of the pack in Marketplace. The README file can contain external images and videos, as needed.
- README.md files for integrations, scripts, and playbooks.
-
Release notes
Track changes made in specific content entities, such as integrations or playbooks.
-
integrationname_description.md
Describes how to set up an integration.
Integrations, scripts, and playbooks and their components (i.e., integration command arguments and outputs) have descriptions that show up both within the product and in the Reference section of xsoar.pan.dev.
While designing your contribution, we recommend reviewing the design best practices and documentation best practices.
Documentation best practices
This article describes the desired documentation standards in Cortex XSIAM content entities, and contains examples that can be useful when writing documentation.
Note
If you are writing documents for Cortex XSOAR and Cortex XSIAM that contains similar content, you can use special formatted strings that enable you to filter the correct entity. For more information, see Cortex XSOAR and Cortex XSIAM Formatting.
Write descriptions for Cortex XSIAM content entities
Write playbook and script descriptions
- Should start with the verb that describes what the entity does.
- There is limited space for descriptions, do not use unnecessary words.
Before: The XYZ playbook is a playbook that...
After shortening the description: Executes as a sub-playbook and enriches indicators from the list.
Additional examples of concise descriptions:
- Investigates an access incident by gathering user and IP information, and handles the incident based on the stages in "Handling an incident - Computer Security Incident Handling Guide" by NIST.
- Blocks domains using Palo Alto Networks Panorama or Firewall External Dynamic Lists.
- Enables you to get all of the corresponding file hashes for a file even if there is only one hash type available.
- Uses generic polling to get saved question results.
Write integration descriptions
The description should summarize all of the currently supported endpoints into a sentence that users can easily understand.
For example:
- Use the
IronDefenseintegration to rate alerts, update alert statuses, add comments to alerts, and report observed bad activity. - Use the
Gmailintegration to send/receive emails, manage user accounts, and listen to specified mailboxes and folders.
Document incident and indicator fetching settings
Common parameters for this section are:
| Parameter name | Display name |
|---|---|
| First fetch | First fetch timestamp (<number> <time uni>, e.g., 12 hours, 7 days, 3 months, 1 year). |
| Fetch size | The maximum number of results to return per fetch. The default is 50. |
Any other important information needed for fetching incidents from the service should be added as a parameter.
Add documentation about the fetch function (especially the first fetch) that is not obvious from looking at the integration. This can be done in the README file or the integration detailed description file .
For example: All incidents created in the minute prior to the configuration of Fetch Incidents and up to the current time will be imported.
Configure common Cortex XSIAM integration parameters
The most commonly used integration parameters:
| Parameter name | Display name | Notes |
|---|---|---|
| API token/key | API Token/ API Key/ API Secret. | Provided by the third party integration. |
| URL | Server URL | |
| insecure | Trust any certificate (not secure) | When ‘trust any certificate’ is selected, the integration ignores TLS/SSL certificate validation errors. Used to test connection issues or connect to a server without a valid certificate. |
| proxy | Use system proxy settings | Runs the integration instance using the proxy server (HTTP or HTTPS) that you defined in the server configuration. |
| Threshold | The minimum number/severity/score ... | |
| Limit | The maximum number of... |
Document default Cortex XSIAM integration parameters
| Parameter | Notes |
|---|---|
| Run on Single engine / Run on Load Balancing Group | Communications between Cortex XSIAM and the third-party service are executed through the selected engine or load balancing group, not directly. |
| Do not use by default | <p>Use to avoid exceeding API quotas</p><ul><li>When enabled, commands from this integration are not available through the CLI, when you run a generic command that uses all available integration commands.</li><li>To use a command at the CLI from an instance with do not use by default enabled, you need to specify the instance with the using argument.</li></ul> |
Document common Cortex XSIAM command arguments
| Argument type | Description template | Example |
|---|---|---|
| Boolean | If true... If false... Default is true. |
If true, return full results. If false, return partial results. Default is true. |
| String | The... | The user name of the user whose endpoint is being blocked. |
| Integer | - The number of...\n - The total number of…\n - The maximum number\n | <p>- The number of times the script attempted to run. - The total number of matches.</p><p>- The maximum number of results to return.</p> |
| Array | A comma-separated list of | A comma-separated list of IP addresses... |
| List of predetermined options | The…. Can be “optionA”, “optionB”, or “optionC”. | The severity of the incident to fetch. Can be "Low", "High" or "Critical". |
Document Cortex XSIAM command outputs
Try to be as specific as possible explaining what the output does.
For example, if the context path is: Tripwire.Version.exists
A poor description: Exists of element versions.
A good description: True if the version of the element exists.
| Argument type | Description template | Example |
|---|---|---|
| Boolean | If true... If false... Default is true. |
If true, will return full results. If false, will return partial results. Default is true. |
| String | The... | The user name of the user whose endpoint is being blocked. |
| Integer | <p>- The number of...\n</p><p>- The total number of…\n</p><p>- The maximum number\n</p> | <p>- The number of times the script attempted to run.</p><p>- The total number of matches.</p><p>- The maximum number of results to return.</p> |
| Array | A comma-separated list of | A comma-separated list of IP addresses... |
| List of predetermined options | The…. Can be “optionA”, “optionB”, or “optionC”. | The severity of the incident to fetch. Can be "Low", "High" or "Critical" |
| Unknown | <p>- An array of...\n - A list of…\n</p><p>-A dictionary of...</p> | A list of indicators associated to.. |
| Date | <p>- The date and time that...\n</p><p>- The date and time when...</p> | The date and time when the indicator was last updated. The date format is: YYYYMMDDThhmmss, where "T" denotes the start of the value for time, in UTC time. |
Use Cortex XSOAR and Cortex XSIAM conditional formatting
Rather than creating separate documents, you can add the following format to the release notes, Description.md or README.md documents:
| Format | Description |
|---|---|
| <~XSOAR>Text</~XSOAR> | Applies to Cortex XSOAR only. |
| <~XSIAM>Text</~XSIAM> | Applies to Cortex XSIAM only. |
In this example, we only want to show Cortex XSOAR text:
<~XSOAR>Some XSOAR text</~XSOAR>
<~XSIAM>Some XSIAM text</~XSIAM>
<~XSOAR>XSOAR</~XSOAR><~XSIAM>XSIAM</~XSIAM> is the best.
When the pack is deployed in the the Cortex XSOAR marketplace the generated file will only have the following:
Some XSOAR text
XSOAR is the best.
And in the Cortex XSIAM marketplace like this:
Some XSIAM text XSIAM is the best.
Content pack metadata file
Each content pack contains a pack_metadata.json file that contains a short description of the content pack that is displayed in Marketplace. The metadata file also contains tags, categories, and use cases for the content pack.
When displayed in Marketplace, content packs contain the following documentation sections:
-
Description: Displayed in the content pack card when browsing Marketplace and at the top of the Details tab.
Example: Content pack card
Example: Details tab with Description and README
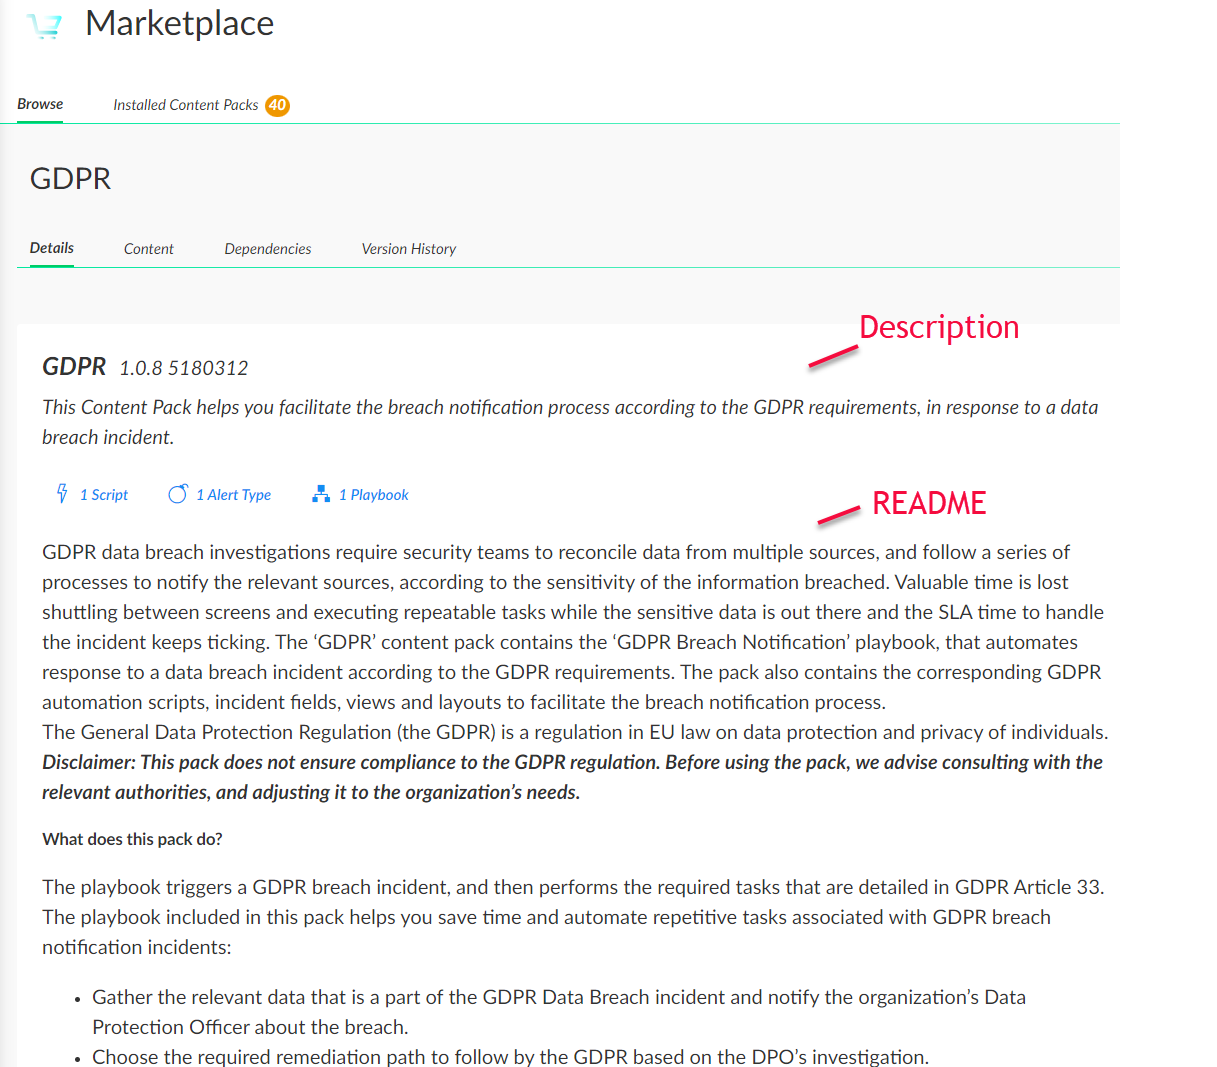
- Videos: Displayed in the main display area and in the middle of the Details tab.
- README: The content pack README file, if it exists, is displayed in the main display area and in the bottom of the Details tab.
Write a Marketplace content pack description
The pack description is the first information users see when they go to your content pack. It's important to give a detailed, thorough description of what the pack contains, use cases, and overall benefits of the pack. The pack description is maintained in the pack_metadata.json file under the description field. Packs should always contain a description, even if a README file is provided with more details. This enables users to get a short overview of the pack when browsing the Marketplace.
Content pack description guidelines
- Short and to the point
- Convey gain/benefit for the user
- If possible - what is unique about this pack (for example, minimal, extended, fast, thorough, streamlined)
- Use active voice (you, yours, do, use, investigate) where possible
- Omit redundancy (do not repeat the name of the pack, do not start with "Use this…")
- Capitalize product names
- Use present tense consistently (for example, if "engages" than "investigates", not "investigating")
- Up to 150 chars
- Up to 4 lines
| Examples | Before | After |
|---|---|---|
| Turn a "fat" description into a "lean" description | <p>300 chars / 44 words</p><p>Use this content pack to investigate and remediate a potential phishing incident. The playbook simultaneously engages with the user that triggered the incident, while investigating the incident itself and enriching the relevant IOCs. The final remediation tasks are always decided by a human analyst.</p> | <p>139 chars / 10 words</p><p>Streamline investigation and remediation of Phishing incidents. Playbook engages with users while simultaneously investigates and enriches.</p> |
| Turn a "passive" description into a "active" description: | <p>Passive and impersonal</p><p>Provides data enrichment for domains and IP addresses.</p> | <p>Active and personal</p><p>Enrichment for your domains and IP addresses.</p> |
Example sentences:
- "Streamline your ___ process for ___. Optimized for _ and ____ this ___ targeted content pack is ideal for _"
- "Eliminate ____ by improving your__. Rich with layouts and playbooks, this content pack is right for ____"
- "Get smarter. This pack utilizes _ and ___for when _ is heavily needed"
Add Marketplace videos to a content pack
For larger packs that provide at least one end-to-end use case, you are encouraged to create a short video or a few videos for the pack that are displayed in the Details tab of the pack in Marketplace. The videos files should be hosted on YouTube, and they should contain a more detailed overview of the pack compared to the Description section.
Add the video link to the pack_metadata.json file. For example, for the Malware Investigation and Response content pack:
{
"name": "Malware Investigation and Response",
"description": "Accelerate the investigation of your endpoint malware alerts and incidents and trigger containment activities quickly.",
"support": "xsoar",
"videos": [
"https://www.youtube.com/watch?v=DtGIefyoTao"
],
Configure content pack keywords, tags, use cases, and categories
To classify packs and make them easier to find, you can use the following pack metadata elements in the pack metadata file.
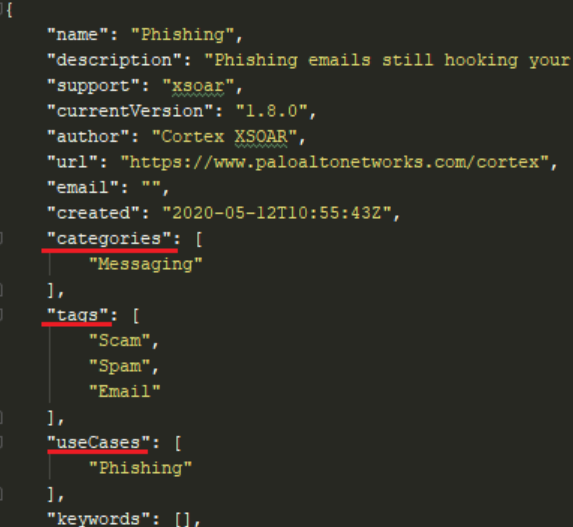
Choose approved content pack use cases
The use case must be one or more of the approved use cases.
Add approved content pack tags
Tags make it easier to find packs using filters or the search bar, and are visible on the screen to help understand what the pack is and its benefit to users.
Tags must be from thelist of approved tags.
Select a content pack category
The high level field/subject the pack relates to. Your pack should fall into one of the approved existing categories.
Add searchable content pack keywords
Keywords operate like tags to assist in searching for packs, but they aren't displayed in the UI. You can add keywords as needed.
For example, for a pack related to messaging, you may want to add "msg" as a keyword so when a user searches for "msg" they will find the pack, but the word "msg" won't display in the UI.
You can add any keywords you want, the list is not restricted.
Content pack release notes
Release notes files help users keep track of changes made in specific content entities, such as integrations or playbooks.
To generate a release notes Markdown file, first commit the changes to your branch and then run the following command:
demisto-sdk update-release-notes -i Packs/PACK_NAME -u [major|minor|revision]
Note
Changes that have not been committed are not detected automatically by the update-release-notes command.
The update-release-notes command automatically updates the currentVersion found in the pack_metadata.json file according to the update version (as denoted by the -u flag). The versioning format is as follows: MAJOR.MINOR.REVISION.
| Versioning Type | Description |
|---|---|
| major | Use for a new version of the pack, or a new version of one of its integrations. For example, a rewrite of an integration or a large change. |
| minor | Use for adding new functionality (for example, adding mirroring, fetching incidents, or indicators) or adding many new commands. |
| revision | Use when you add new content items or a few commands, or when updating content items or commands. |
| documentation | Use when adding or updating documentation. |
In most cases, run the command when you are ready to merge and when you expect no further changes. If you need to make additional changes after running the update-release-notes command, remove the -u argument. This updates the release notes file for you to fill out.
demisto-sdk update-release-notes -i [Changed pack path]
For more information regarding the update-release-notes command in the demisto-sdk, please refer to the command documentation.
Locate generated content pack release notes
The release notes file is generated for you and is found in the ReleaseNotes folder within each pack. If this folder does not already exist, it is created for you. Do not change the names of the files that are automatically generated, as this can cause potential issues later in the development process.
Format content pack release notes
After running the demisto-sdk update-release-notes command, the release notes file contains a section for each entity changed in the pack as well as a placeholder (%%UPDATE_RN%%). This placeholder should be replaced with a line describing what was changed for that specific entity.
For example, if changes are detected in the Cortex XDR pack for the items IncidentFields, Integrations, and Playbooks, the following is created:
#### Incident Fields ##### XDR Alerts - %%UPDATE_RN%% #### Integrations ##### Cortex XDR - IR - %%UPDATE_RN%% #### Playbooks ##### Cortex XDR - Isolate Endpoints - %%UPDATE_RN%% ##### Cortex XDR - Port Scan - %%UPDATE_RN%%
Use Markdown formatting in release notes
For single line RNs, follow this format:
#### Integrations ##### Cortex XDR - IR Release note here.
For single line RNs with a nested list, follow this format:
#### Integrations ##### Cortex XDR - IR Release note here. - List item 1 - List item 2
For multiline RNs, follow this format:
#### Integrations ##### Cortex XDR - IR - Release note 1 here. - Release note 2 here. - Release note 2 here.
For multiline RNs with nested content, follow this format:
#### Integrations ##### Cortex XDR - IR - Release note 1 here. - List item 1 - List item 2 - Release note 2 here. - List item 1 - List item 2 - Release note 2 here.
Write effective content pack release notes
Log the following in the corresponding release notes file:
- Any change(s) made
- New command(s)
- New or updated parameters
- New or updated arguments
- Updated outputs
- Bug fixes
Content pack release note writing guidelines
- Release notes should be simple, informative, and clearly written. Consider the impact of changes on the user and what they need to know about this version. A poorly written release note with inadequate information can lead to a Customer Support ticket. For example, instead of writing
Added a timeout parameter, we recommend adding additional detail explaining the new parameter, such asAdded a timeout parameter, that enables you to define the amount of time (in minutes) that the integration tries to execute commands before it throws an error. - Single line release notes do not need a bullet point.
-
Release notes must start with one of the following prefixes:
- Added support for
- Added the
- Added a
- Added an
- Fixed an issue
- Improved implementation
- Updated the
- You can now
- Deprecated
- Deprecated the
- Improved layout
- Created a new layout
- Playbook now supports
- Created a new playbook
- New:
Release notes that do not start with one of these prefixes will generate an error when running
demisto-sdk doc-review:Line is not using one of our templates, consider changing it to fit our standard.
Format content entity names in release notes
- Command names should be wrapped with three stars - ***command_name***
- Content pack names, integrations, scripts, playbooks, and other content entities (incident fields, dashboards, etc.) should be wrapped with two stars - **entity_name**
- Parameters, arguments, functions, and outputs names should be wrapped with one star - *parameter_name*
Content pack release note examples
Enhancement release note example
```programlisting - **MISP V2** You can now filter an event by attribute data fields. - **WhatIsMyBrowser** Added support for the *extend-context* argument in the ***ua-parse*** command. - **Microsoft Graph Mail** Added 3 commands: - ***msgraph-mail-list-folders*** - ***msgraph-mail-list-child-folders*** - ***msgraph-mail-create-folder*** ```
Bug fix release note example
```programlisting - **Slack v2** - Fixed an issue where mirrored investigations contained mismatched user names. - Added the **reporter** and **reporter email** labels to incidents that are created by direct messages. - **CrowdStrike Falcon** Fixed an issue with ***fetch incidents***, which caused incident duplication. - **IBM QRadar** Fixed an issue in which the ***qradar-delete-reference-set-value*** command failed to delete reference sets with the "\" character in their names. - **GitHub** Improved implementation of the default value for the *fetch_time* parameter. ```
Docker update release note example
```programlisting - Updated the Docker image to: *demisto/python3:3.9.1.15759*. ```
General change release note example
<div data-gb-custom-block data-tag="hint" data-style="info" class="hint hint-info"><p><strong>Note</strong></p><p>Use this type only if the change has no clear or visible impact on the user.</p></div> ```programlisting - Documentation and metadata improvements. ```
Exclude items from generated release notes
Release notes must contain all changed items included in the generated file. Validation fails if detected items are removed from the generated release notes file.
However, you may encounter a scenario where certain changes are not necessary to document in the release notes. In this case, to pass validation, comment out the entries using the following syntax:
<!-- #### Integrations ##### Cortex XDR - IR - Renamed an item. Not necessary to document in release notes. -->
Validate release notes with demisto-sdk doc-review
demisto-sdk includes the doc-review command to assist with the documentation review process. The doc-review command checks the spelling of the release notes and provides guidance if you are not using one of our standardized templates. Example usage: demisto-sdk doc-review -i Packs/Base/ReleaseNotes/1_11_10.md.
Create release notes for breaking changes
In some cases, a new version is introduced which breaks backward compatibility. You can mark a new version as a breaking changes version. Marking a version as a breaking changes version provides the user with an alert before installation.
To mark a new version as a breaking changes version, run the demisto-sdk update-release-notes command with the -bc flag. For example:
demisto-sdk update-release-notes -i Packs/<Pack Name> -u revision -bc
The -bc flag generates a corresponding configuration JSON file to the new release notes. For example, if the newly created release notes version is 1_1_0.md, a new configuration file 1_1_0.json is created in the corresponding ReleaseNotes directory.
The configuration JSON file is generated with the following fields:
breakingChanges: Indicates whether the version has breaking changes or not, is created withtruevalue when using the-bcflag.-
breakingChangesNotes: Contains the text to be displayed to the customer before installation. IfbreakingChangesNotesis not specified, the default is to present the entire release notes text to the user prior to the content pack installation. The field can be in Markdown format. For example, to add a list of changes:{ "breakingChanges": true, "breakingChangesNotes": "<ul><li>The `ip` command returns a list/array of IPs in the `HelloWorld.IP` context path (instead of a single IP).</li><li>The `ip` command context output paths `HelloWorld.IP.Objects`, `HelloWorld.IP.Names` were stripped of the leading whitespace (e.g. `HelloWorld.IP. Objects` -> `HelloWorld.IP.Objects`).</li><li>The `ip` command will now return a maximum of 50 results.</li></ul>Make sure to check and update any Playbooks/Scripts that use the above context paths." }
Troubleshoot content pack release notes
Excluded item fails release note validation
Remove the %%UPDATE_RN%% from the generated file and leave the other generated items intact.
update-release-notes does not find changes
First check you have committed your files. Then verify that the type of file you changed requires a release notes entry. TestPlaybooks, Images, READMEs, and TestData do not require release notes.
Completed release notes fail validation
On rare occasions, it's possible that the pack you are working on has already had the version updated. To resolve this, delete the generated release notes Markdown (.md) file and restore the currentVersion in the pack_metadata.json file to its original version. Next, pull from the master branch. Lastly, run the update-release-notes command again.
Release notes for new content packs
The build process automatically creates the initial release notes. You do not need to generate release notes for new content packs.
Content Pack README
For larger packs that provide at least one end-to-end use case you should create a detailed README file for the pack that is displayed in the Details tab of the pack in the Marketplace. The README.md file should be markdown formatted and placed in the Packs root directory. The file should contain a more detailed overview of the pack compared to the Description section. You can add any information you see fit to include about the pack. We recommend providing an overview of what the pack does and how to start working with the pack.
Structure a Cortex XSIAM content pack README
If the pack is a beta pack, add the following at the beginning of the pack README file:
Note: This is a beta pack, which lets you implement and test pre-release software. Since the pack is beta, it might contain bugs. Updates to the pack during the beta phase might include non-backward compatible features. We appreciate your feedback on the quality and usability of the pack to help us identify issues, fix them, and continually improve.
If the pack is adopted, add the correct text as specified on the Adopt-a-Pack page.
Each pack README should contain:
- A short paragraph connecting real-life situations to the pack use cases.
- A "What does this pack do?" section, explaining point-by-point the capabilities of the pack or the main playbook of the pack.
- (Optional): a sentence or two detailing the contents of the pack.
- When content packs contain multiple playbooks, the content pack README should contain a reference to the README of the main playbook that contains the playbook logic. For example, include: For more information, visit the Parent Playbook Name documentation.
- For packs that contains playbooks, a YouTube video is helpful.
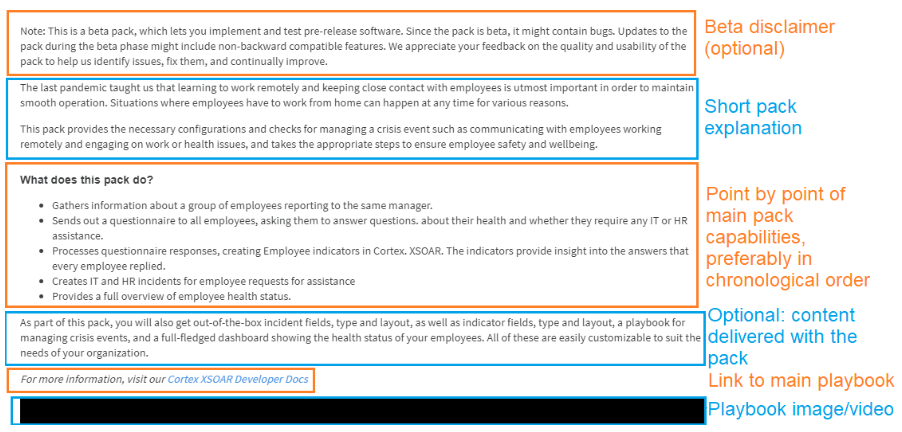
Use the Cortex XSIAM content pack README template
# Product Name This pack includes Cortex XSIAM content. ## Configuration on Server Side ## Collect Events from Vendor (Add the options for collections) ### Collection method (Replace with the collection method name) #### Filebeat Configuration File (if applicable)
README example
# Microsoft DNS
This pack includes Cortex XSIAM content.
## Configuration on Server Side
1. Open the RUN window and enter: dnsmgmt.msc.
2. Right-click the name of the DNS server in the left-hand panel and select **Properties**.
3. In the Debug logging tab, add a check in **Log packets for debugging**
4. Ensure the following are checked: **Outgoing**, **Incoming**, **Queries/Transfers**, **Updates**.
5. For long (detailed) logs, select **Details** and enter the log file path: ```c:\Windows\System32\dns\DNS.log```
*Note: Detailed captures will heavily bloat the logs.*
## Collect Events from Vendor
In order to use the collector, use the [XDRC (XDR Collector)](#xdrc-xdr-collector) option.
### XDRC (XDR Collector)
To create or configure the Filebeat collector, use the information described [here](https://docs.paloaltonetworks.com/cortex/cortex-xdr/cortex-xdr-pro-admin/cortex-xdr-collectors/xdr-collector-datasets#id7f0fcd4d-b019-4959-a43a-40b03db8a8b2).
You can configure the vendor and product by replacing [vendor]\_[product]\_raw with *msft_dns_raw*.
When configuring the instance, you should use a YML file that configures the vendor and product, as shown in the below configuration for the Microsoft DNS product.
Copy and paste the following in the *Filebeat Configuration File* section (inside the relevant profile under the *XDR Collectors Profiles*).
#### Filebeat Configuration File
```filebeat.inputs:
- type: filestream
paths:
- c:\Windows\System32\dns\DNS.log
processors:
- add_fields:
fields:
vendor: msft
product: dns
```
**Note**: The above configuration uses the default location of the logs.
How the README fie is displayed:
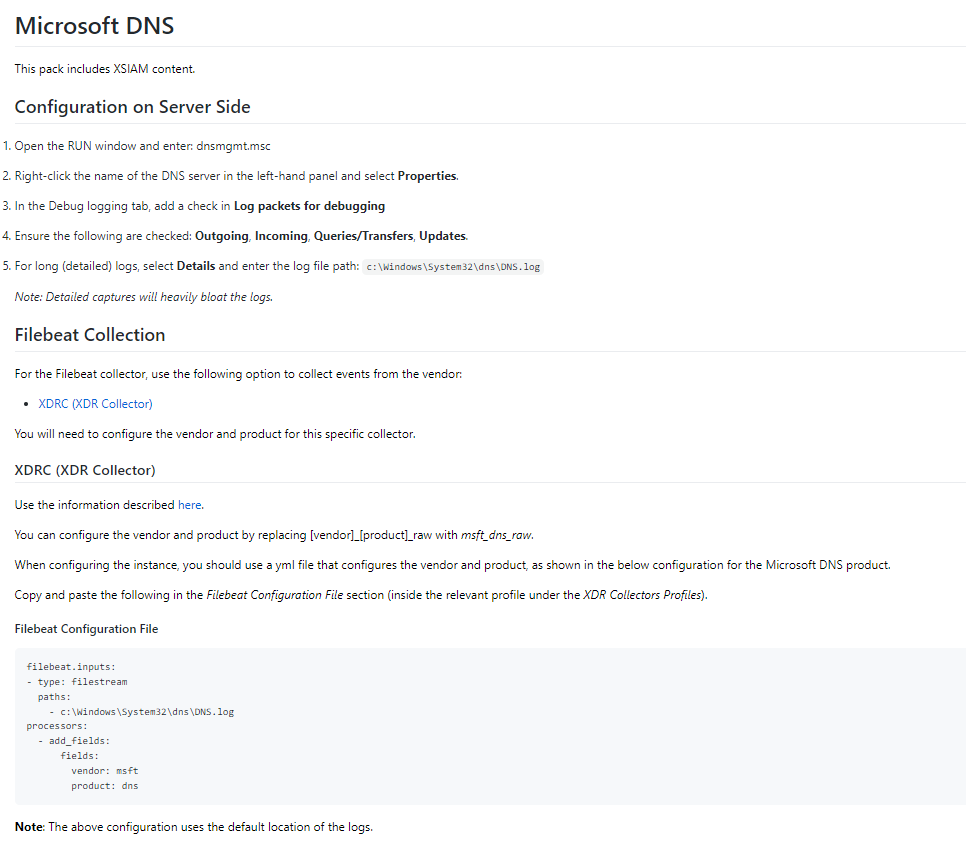
Add images and videos to content pack READMEs
Add images to a content pack README
Images can provide a useful addition to the pack README.md to help users get a quick understanding of the pack. Images in a content pack README can be included only as absolute URLs.
Embed YouTube videos in a content pack README
You can add an image placeholder which links to an external video.
To add an external video hosted on YouTube, use this snippet template (replace [YOUTUBE_VIDEO_ID] with your YouTube video ID):
[](https://www.youtube.com/watch?v=[YOUTUBE_VIDEO_ID] "Video Name")
README files for content entities
Documentation is a critical step that assists customers who may use your integration/script/playbook by providing insight into how the content entity is supposed to work. From creating custom playbooks, to providing background information to assist in debugging, it is important to ensure that the documentation explains every aspect of the integration. Documentation is maintained as README.md per integration/script/playbook and made available for customers as part of the reference docs of the Cortex XSIAM Developer Hub.
We recommend reviewing the HelloWorld integration README file as you create the README files for your content entities.
Note
Images and videos can be added to documentation.
Generate README documentation for content entities
- If the content entity is new.
- If the content entity exists but is missing documentation.
- If the content entity exists and some of it has changed. For example, a new command was added or context was changed.
Content entity README examples
- Azure Sentinel: Shows how the commands and examples should be presented.
- Slack v2: Shows an example of the troubleshooting section.
- Get Email From Email Gateway - Mimecast: show an embedded playbook image.
- JSON Feed: Shows use of embedding a video.
- CentrifyVault: Shows use of embedding a YouTube video.
Publish content entity README documentation
After the pull request with the documentation README file is merged into master, it becomes available as part of the Developer Hub, and can be viewed in the reference docs section. The site is updated with the latest content on a daily basis. If you wish to preview how the documentation looks at the Developer Hub, before merging to master, you can either run locally the content-docs project to preview the Reference Docs site locally or create a PR at the content-docs repo.
Preview content entity reference docs locally
Clone or download the content-docs repo. Follow the instructions at the project's README to run the site locally and generate Reference Docs for the content repo you have locally. For example run in the content-docs checkout dir:
CONTENT_REPO_DIR=~/dev/demisto/content npm run reference-docs && npm start
Preview reference docs with a content-docs pull request
Create a PR at the content-docs repo with the same branch name as the PR you are working on in the content repo. Mention in the PR that it is related to a PR from the content repo. Your PR in the content-docs repo will include a preview link in the GitHub Checks section from deploy/netlify. You can perform a dummy white space change for the PR that will re-trigger the build and create a new preview. Example screenshot for preview link:
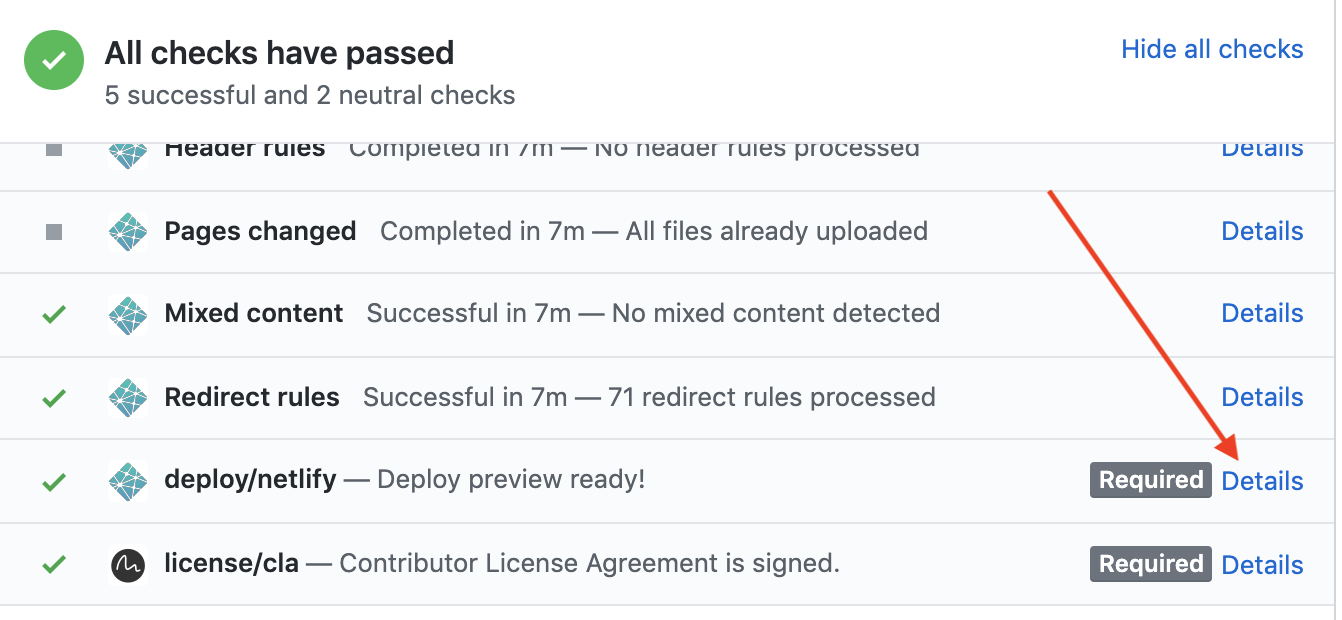
Use MDX in content entity README files
We use MDX for the Markdown generation. MDX is a superset of standard Markdown, but it requires that any HTML used in the document must be JSX compliant. This means all HTML tags need to contain a closing tag. For example don't use <br>, use <br/>. Additionally, HTML entities < >, not in code blocks need to be HTML encoded. Use < and > to encode. As part of the build, the README.md file is validated for MDX compliance.
Images in documentation
There are two types of images in documentation markdown files:
- Images that appear in integration/script/playbook README files. These images only appear in https://xsoar.pan.dev/. They do not appear in the product UI.
- Images that appear in pack README files and integration description files. These images appear in both https://xsoar.pan.dev/ and in the product UI.
Use relative image URLs in content entity READMEs
When creating markdown README documents for playbooks, integrations, or scripts that appear in https://xsoar.pan.dev/ only, you can use relative or absolute URLs. Relative URLs can NOT be used for content pack READMEs and integration description file images. For content pack READMEs and integration description file images, see the Absolute URLs section below.
You can use relative URLs to documentation images stored in the doc_files or doc_imgs directories. To use relative URLs, link the image using a relative path.
For example:

View the README.md file in GitHub's web interface and verify that the images display properly.
Examples of documentation using relative URLs:
Use absolute image URLs in content pack documentation
When creating markdown README documents for playbooks, integrations, or scripts that appear in https://xsoar.pan.dev/ only, you can use relative or absolute URLs. When creating markdown files for content pack READMEs and integration description file images, you can only use absolute URLs.
To obtain an absolute URL to an image from GitHub:
- Commit the image and push to GitHub.
- View the file in the GitHub web interface.
-
Copy the URL from the Download button.
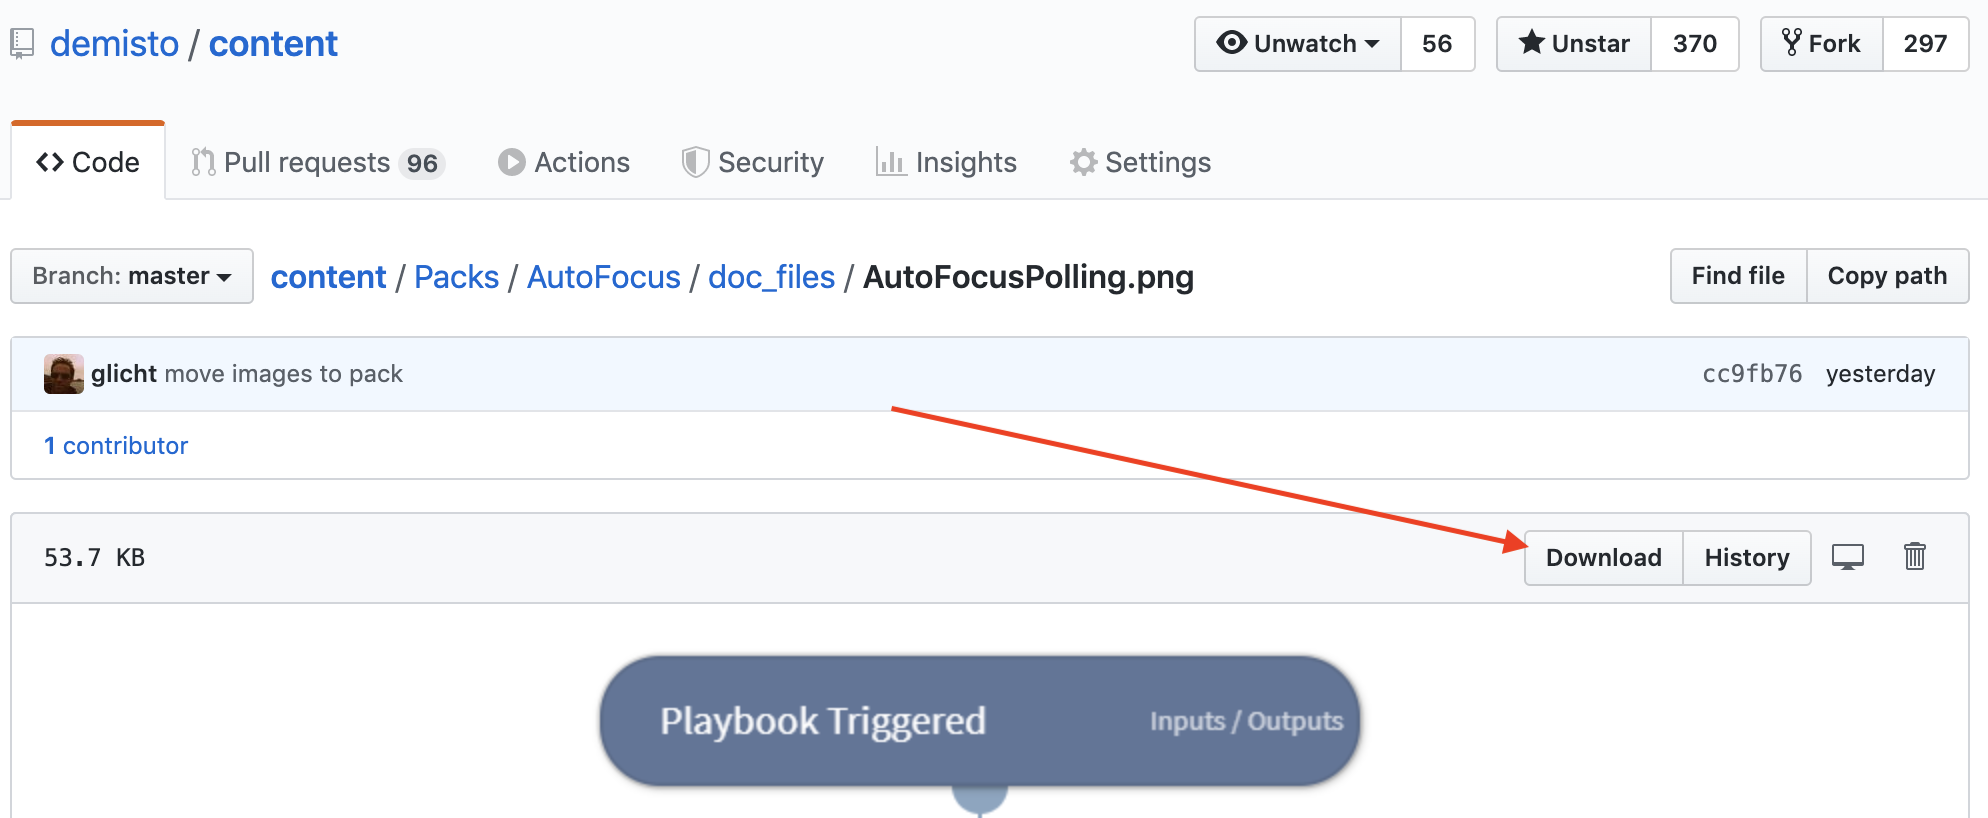
Verify the URL you are copying is not referring to a branch which will be deleted after the pull request is merged. The URL should refer to a commit hash or the master branch.
If you click the Download button, GitHub performs a redirect and the URL in the browser points to the domain:
raw.githubusercontent.com. You can also use this URL as the absolute URL. -
Embed the image in the README.md using a Markdown Image Link. For example: ``
For more control of how the image displays, you can use the HTML \ tag. For example: ``
Examples of documentation using absolute URLs:
- URL to commit hash
- URL to master branch
- URL after redirection (also valid)


Note
To keep the main content repository small, images are limited to 2 MB. For larger images, follow the instructions for Videos about how to store large media files in the content-assets repository.
Videos in documentation
A video can provide a strong addition to the documentation either as a demo video or tutorial. The preferred video format is MP4.
Store documentation videos in the content-assets repository
Because of their size and to keep the main content repository small, large media files are stored in a separate repository.
To add a video file, open a pull request with the video file at content-assets repository. The file should be placed in the directory: Assets/<PackName>/.
All videos should be included with absolute URLs. To obtain a URL to a video from GitHub follow the same steps as detailed for images, but use the content-assets repository.
Include the video using the HTML <video> tag, such as:
<video controls> <source src="https://github.com/demisto/content-assets/raw/7982404664dc68c2035b7c701d093ec026628802/Assets/FeedJSON/Json_generic_feed_demo.mp4" type="video/mp4"/> Sorry, your browser doesn't support embedded videos. You can download the video at: https://github.com/demisto/content-assets/blob/7982404664dc68c2035b7c701d093ec026628802/Assets/FeedJSON/Json_generic_feed_demo.mp4 </video>
Note
GitHub markdown preview does not display the video (it shows the browser not supported message). The xsoar.pan.dev site does display the video properly. You can see an example video in the JSON Feed integration documentation.
Add documentation videos larger than 50 MB with Git LFS
For files larger than 50MB, we require using git-lfs to add these files to the content repo. See the GIT LFS Tutorial at the GithHub site for more details.
To add a large file:
- Clone or fork the content-assets repository.
- Verify you have git-lfs installed. See instructions here.
- Install git-lfs in the repo:
git lfs install. - Copy the video file to the correct directory:
Assets/<PackName>. - Add the video as a tracked file:
git lfs track Assets/<PackName>/<video_file_name>.mp4. - Add the file to git:
git add Assets/<PackName>/<video_file_name>.mp4. - Add the
.gitattributesfile:git add .gitattributes. - Commit and push using:
git commitandgit push. - Open a pull request.
Embed externally hosted documentation videos from YouTube
You can also embed videos from external services such as YouTube via an iframe. From the external service choose to share the video and choose the Embed option. Then choose to Copy the embed snippet.
Share Dialog
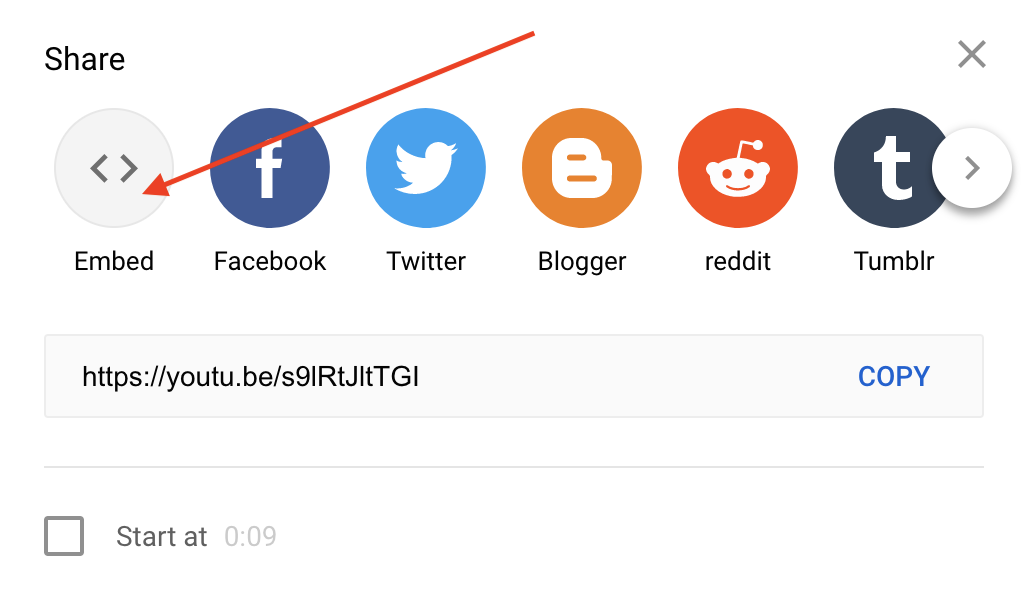
Embed Dialog
Paste the embed snippet in the README file. Change the allowfullscreen option to include allowfullscreen="true". For example:
<iframe width="560" height="315" src="https://www.YouTube.com/embed/s9lRtJltTGI" frameborder="0" allow="accelerometer; autoplay; encrypted-media; gyroscope; picture-in-picture" allowfullscreen="true"></iframe>
Documentation Contributions
Our developer docs and reference content docs are open source and hosted on GitHub. The editing experience is integrated via GitHub directly into the pan.dev doc site to make it easy to contribute and suggest improvements.
Edit Cortex XSIAM documentation with a GitHub pull request
To fix small errors and omissions in existing documents we recommend editing the document directly via a pull request (PR). While you can create an issue to report the error, it is often faster and easier to edit the document with the suggested fix via a pull request.
Create a pull request to fix a documentation error
-
Most pages include the
 option at the bottom of the page.
Note
If the Edit this page option is not available, it means the page is not open for public contribution. You can still report an issue, but you can not create a pull request with edits.
-
Once the Edit this page link is clicked, a new GitHub window opens. The window contains the page in markdown view with an option to edit the page. Click the pencil icon to start editing the page.
Note
If the pencil icon is grayed out, you need to log in to your GitHub account or if necessary create an account.
- Edit the page with your changes. Use the Preview changes tab to check the formatting of your changes.
-
Once editing is completed, scroll to the bottom of the page. Enter a title and description for your proposed change and click Propose changes.
-
After clicking on Propose changes you are taken to a new page: Comparing changes. On this page you can compare your changes and create a pull request. Click the Create pull request button.
-
You are taken to a new page: Open a pull request. Edit the title for the pull request and fill out the description of the PR. Click Create pull request.
- You've created a pull request. A team member will review and merge your PR. If you've made larger changes, you may get feedback or questions via the comments on the PR.
Report a Cortex XSIAM documentation issue on GitHub
If you've found an issue with one of our docs and you are not sure how to fix it via a pull request or the edit option is not available, report an issue. Reporting issues helps improve the documentation.
- You can report an issue for a specific document by clicking the
 button at the bottom of the page.
 -
Once the Report an issue button is clicked, a new window from GitHub opens. The window contains GitHub's issue form. Fill out the issue template with a clear and concise description. If applicable, include screenshots to help explain the issue you encountered. Click Submit new issue.
- A team member reviews the issue and may ask for additional clarifications via comments on the issue.
- Once a PR is created, it is linked to the issue. You cam review and comment on the PR. After the PR is merged the issue is resolved and closed.
Testing
Cortex XSIAM provides you with tools for linting, unit testing, and debugging. In addition, you can use test playbooks to test integrations and scripts.
Linting
As part of the build process, we run linters to catch common programming errors, stylistic errors, and possible security issues. Linters are run only when working with the package (directory) structure.
All linters are run via the pre-commit command.
Note
This script is also used to run pytest. See: Unit Testing
An example of the result from running pre-commit checks on the HelloWorld package:
Running pre-commit using template /Users/sfainberg/dev/demisto/content/.pre-commit-config_template.yaml Running pre-commit with Python 3.11 on: Packs/HelloWorld/Integrations/HelloWorld/HelloWorld.py Packs/HelloWorld/Integrations/HelloWorld/HelloWorld.yml Packs/HelloWorld/Integrations/HelloWorld/HelloWorld_description.md Packs/HelloWorld/Integrations/HelloWorld/HelloWorld_image.png Packs/HelloWorld/Integrations/HelloWorld/HelloWorld_test.py Packs/HelloWorld/Integrations/HelloWorld/README.md Packs/HelloWorld/Integrations/HelloWorld/command_examples Packs/HelloWorld/Integrations/HelloWorld/test_data/get_alert.json Packs/HelloWorld/Integrations/HelloWorld/test_data/incident_note_list_command.json Packs/HelloWorld/Integrations/HelloWorld/test_data/ip_reputation.json check json...............................................................Passed check yaml...............................................................Passed check python ast.........................................................Passed check for merge conflicts................................................Passed debug statements (python)................................................Passed python tests naming......................................................Passed check for added large files..............................................Passed check for case conflicts.................................................Passed poetry-check.........................................(no files to check)Skipped pycln....................................................................Passed ruff-py3.11..............................................................Passed autopep8.................................................................Passed mypy-py3.11..............................................................Passed xsoar-lint...............................................................Passed pylint-in-docker-demisto/python3:3.11.10.115186..........................Passed pytest-in-docker-demisto/python3:3.11.10.115186..........................Passed validate-deleted-files...................................................Passed validate-content-paths...................................................Passed validate-conf-json...................................(no files to check)Skipped validate.................................................................Passed secrets..................................................................Passed merge-pytest-reports.....................................................Passed coverage-pytest-analyze..................................................Passed
Flake8
Flake8 is a basic linter. It can be run without having all the dependencies available and will catch common errors. We also use this linter to enforce the standard python pep8 formatting style. On rare occasions you may encounter a need to disable an error/warning returned from this linter. To disable, add an inline comment on the line where you want to disable the error:
# noqa: <error-id>
For example:
example = lambda: 'example' # noqa: E731
When adding an inline comment always also include the error code you are disabling for. If there are other errors on the same line they will be reported. For more information, see In-line Ignoring Errors.
Pylint
Pylint is similar to flake8 but is able to catch additional errors. We run this linter with error reporting only. It requires access to dependent modules and thus we run it within a Docker image similar with all dependencies (similar to how we run pytest unit tests). On rare occasions you may encounter a need to disable an error/warning returned from this linter. Disable by adding an inline comment on the line where you want to disable the error:
# pylint: disable=<error-name>
For example:
a, b = ... # pylint: disable=unbalanced-tuple-unpacking
You can also disable and then enable a block of code. For example (taken from CommonServerPython.py):
# pylint: disable=undefined-variable if IS_PY3: STRING_TYPES = (str, bytes) # type: ignore STRING_OBJ_TYPES = (str) else: STRING_TYPES = (str, unicode) # type: ignore STRING_OBJ_TYPES = STRING_TYPES # type: ignore # pylint: enable=undefined-variable
Note
Pylint can take both the error name and error code when doing inline comment disables. We recommend using the name, which is clearer to understand.
For more information, see messages control.
For classes that generate members dynamically (such as goolgeapi classes) pylint generates multiple no-member errors as it can't detect the members of the class. In this case, we recommend adding a .pylintrc file which includes the following:
[TYPECHECK] ignored-classes=<Class Name List>
For an example of ignored-classes, see here.
mypy
mypy uses type annotations to check code for common errors. It contains type information for many popular libraries (via typeshed project). Additionally, it allows you to define type annotations for your own functions and data structures. Type annotations are fully supported as a language feature in Python 3.6 and above. In earlier versions, type annotations are provided via the use of comments.
We run mypy in a relatively aggressive mode, and it also type checks functions which don't contain type definitions. In some cases, this may cause additional errors. You can ignore errors, if needed, with an inline comment:
# type: ignore[<error-name>]
For example:
a = 1 b = "2" a = b # type: ignore[assignment]
Note
Mypy introduced the ignore[<error-name>] syntax in version 0.730. See Error code docs. You might also see in the code ignores such as type: ignore without the error-name. This is usually from older code written before the support for error-name ignores. We do not recommend using this ignore style as it ignores all errors and increases the risk of ignoring unexpected serious errors.
If you receive a Need type annotation error, we recommend defining the type of the variable which is missing type annotation, instead of adding an ignore comment. This error is usually received when an empty dict or list is defined and mypy can not infer the type of the object. In this case, it is better to define the type as dict or list:
my_list: list = []
If you know the type that the list will hold, use the type constructor list that can specify also what type it holds. For example a list that we know that will hold strings:
my_list: list[str] = []
Note
When using type besides list, dict, str, int, tuple, you need to import the type from the typing module.
Read more about mypy.
Bandit
Bandit is a tool designed to find common security issues in Python code.
We run bandit with a confidence level of HIGH. In the rare case that it reports a false positive, you can exclude the code by adding a comment: # nosec. For more information, see: https://github.com/PyCQA/bandit#exclusions.
XSOAR linter
This is a custom linter, based on pylint, whose main purpose is to catch errors regarding Cortex XSIAM code standards. The linter is activated using the pylint load plugins ability. We run this linter only with custom Cortex XSIAM error and warning messages (all other messages are disabled). On rare occasions, you may encounter a scenario in which you need to disable an error or warning message from being returned by the XSOAR linter. To do this add an inline comment, as shown below, on the line where you want to disable the error:
# pylint: disable=<error-name>
For example:
print('Success!') # pylint: disable=print-exists
You can also disable and then enable a block of code. The following example is taken from CommonServerPython.py:
# pylint: disable=sys-exit-exists if IS_PY3: pass else: sys.exit(1) # pylint: enable=sys-exit-exists
Note
Pylint can take both the error name and error code when using an inline comment disable message. We recommend using the error name instead of the error code, as it is easier to understand.
Unit testing
Unit testing should be used to test small units of code in an isolated and deterministic fashion. Unit tests should avoid performing communication with external APIs and should instead use mocking. Testing actual interaction with external APIs should be performed via test playbooks. Unit testing is currently supported for Python and PowerShell. This topic outlines the Python setup. For PowerShell see here.
Before unit testing, you need to set up the development environment and set up the integration and script environment for VS Code.
To work with unit testing, the integration or automation script needs to be developed in package (directory) structure, where the YAML file is separated from the python file and resides in its own directory.
Note
To verify the content runs with all the required dependencies, we recommend using VS Code with the Cortex XSOAR extension to write, run, and debug the unit tests locally with the corresponding image. You can alternatively use other IDEs such as PyCharm to run and debug the unit tests locally with the corresponding image. If you are using PyCharm, choose the poetry environment interpreter and enable pytest.
Use main in the integration or script
When writing unit tests, you need to import the integration/script file in order to test specific files. Therefore, the file must be written in a way that prevents it from executing when it is imported. This can be done with a simple main function which is called depending on how the file was executed. When the integration/script is called by Cortex XSIAM it has the property __name__ set to builtins. Adding the following code ensures the script is not run when imported by the unit tests:
if __name__ == "builtins": main()
Write unit tests
Unit tests should be written in a separate Python file named INTEGRATION_NAME_test.py. Within the unit test file, each unit test function should be named: test_$FUNCTION_TESTED_NAME. More information on writing unit tests and their formats is available at the pytest documentation. For an example of unit tests, see the Proofpoint TAP v2 integration.
Use a Docker network for unit tests
By default, unit tests are not run with access to the network; the network is disabled within the container that runs the unit-tests. If the integration/script requires access to the network during a unit test run, see .pack-ignore documentation.
Mock dependencies in unit tests
We use pytest-mock for mocking. pytest-mock is enabled by default and installed in the base environment mentioned above. To use a mocker object, pass it as a parameter to your test function. The mocker can then be used to mock both the demisto object and also external APIs. See an example of using a mocker object.
Run unit tests
Run unit tests from the command line
Run your unit tests from the command line from within the virtual env:
pytest -v
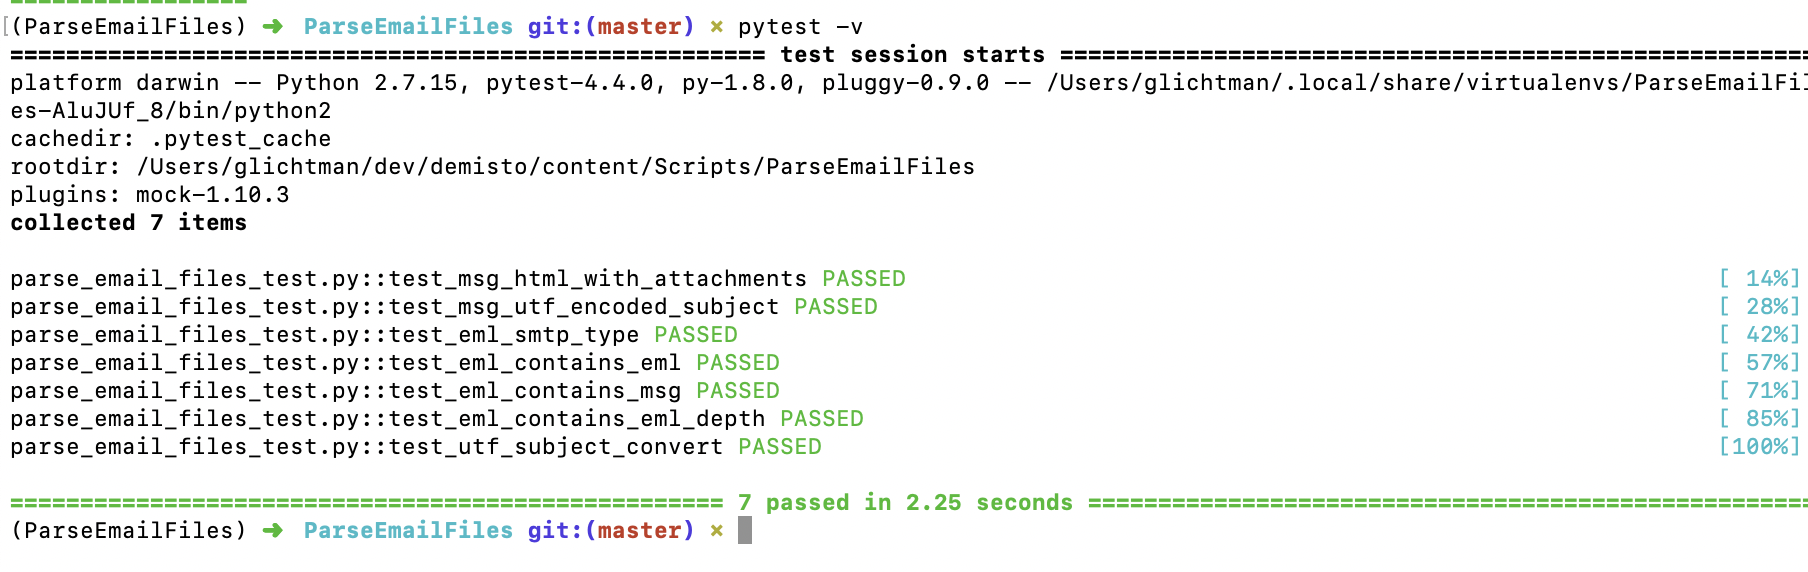
You can also run tests from outside the virtual environment:
pipenv run pytest -v
Run unit tests with Docker
The build runs the unit tests within the Docker image that the integration/script will run with. To test and run locally the same way the build runs the tests, run the pre-commit command
Run the script with -h to see command line options.
Use remote Docker for unit tests
When running unit tests within Docker, you can use a remote Docker engine accessible via SSH. For example, you can use a Docker engine running on a remote Linux machine in the cloud. This is useful when testing advanced integrations that you need to test on a Linux machine (for example, the Rasterize integration which uses Chrome). Set the following env variable with an SSH connection URL to use a remote Docker engine DOCKER_HOST.
For example:
DOCKER_HOST=ssh://myuser@myhost.com demisto-sdk pre-commit -i Packs/rasterize/Integrations/rasterize
Verify you can SSH to the target machine without a password prompt. Read more about Passwordless SSH using public-private key pairs.
To use a GCP machine accessed via an IAP Tunnel, see Remote to a VM over an IAP tunnel with VS Code which describes how to adda proper Host entry to the ~/.ssh/config, to be used for the DOCKER_HOST environment variable.
Common unit testing use cases
Test multiple input and output values
Most functions have several edge cases. When writing a unit test all edge cases need to be tested. See the following Python function:
def convert_string_to_type(string: str) -> Union[str, bool, int]: """ Converts the input string to it's object type :param string: The input string :return: The converted object """ if string.isnumeric(): return int(string) elif string in ['true', 'false', 'True', 'False']: return bool(string) return string
A native unit test:
def test_convert_string_to_type(): from File import convert_string_to_type string = 'true' assert convert_string_to_type(string) == True string = '432' assert convert_string_to_type(string) == 432 string = 'str' assert convert_string_to_type(string) == 'str'
The correct way to test this function is by using the @pytest.mark.parametrize fixture:
@pytest.mark.parametrize('string, output', [('true', True), ('432', 432), ('str', 'str')]) def test_convert_string_to_type(string, output): assert convert_string_to_type(string) == output
We declare the inputs and outputs in the following format: 'input, output', [(case1_input, case1_output), (case2_input, case2_output), ...] Note that more than two variables can be delivered.
After declaring the variables and assigning their values, assign the variables to the test function. In the example above we assign the variables string and output to the test function.
Read more about how to parametrize fixtures and test functions. You can view an example of a test using the parametrize fixture.
Test exceptions
If a function is raising an exception, in some cases we need to test that the right exception is raised and that the error message is correct. For example, for the following function:
def function(): raise ValueError('this is an error msg')
We need to import the raises function from pytest:
from pytest import raises
Then we test the exception being raised:
def test_function(): from File import function with raises(ValueError, match='this is an error msg'): function()
If the function raises a ValueError with proper error message, the test passes.
Troubleshoot unit tests
- The
demisto-sdk pre-commitby default prints out minimal output. If it fails and the reason is not clear, run the script with-vfor verbose output. -
The script creates a container image which is used to run pytest and pylint. The container image is named: devtest<origin-image>-[deps hash]. For example:
devtestdemisto/python:1.3-alpine-1b9f5bee16a24c3f5463e324c1bb075. You can examine the image if needed by usingdocker run. For example:docker run --rm -it devtestdemisto/python:1.3-alpine-1b9f5bee16a24c3f5463e324c1bb075e sh
Test playbooks
Use test playbooks to check integrations and scripts. Test playbooks provide full end-to-end testing. For testing small units of code, use unit testing. Test playbooks are run using the CI framework. They are run both as part of the build process and on a nightly basis.
Note
By default, test playbooks do not run in the CI for packs that are not supported by Cortex XSIAM. For content packs not supported by Cortex XSIAM, test playbooks are not required unless specifically requested by Cortex XSIAM.
A test playbook has several steps, including testing commands, verifying the results, and closing the investigation.
The naming convention for playbook tests is: Integration_Name_Test.
Generate a test playbook
To auto generate a test playbook based on an integration or script use the demisto-sdk generate-test-playbook command. You can then import the playbook and modify it to meet your needs. You can also manually create a test playbook, by navigating to Playbooks in the UI and clicking New Playbook.
Add DeleteContext
When creating a test playbook, we recommend for the first step to be DeleteContext, which deletes all of the context data. While not always necessary, this ensures that a test playbook has a clean beginning to test from without conflicting data. This can be useful while rerunning a playbook during the development process and can prevent existing data from creating unrelated issues.
- Search for
deletecontextin the Task Library and add theDeleteContextutility task to the playbook. - On the Inputs tab, for all ,select yes.
-
Click OK and connect the
DeleteContexttask to thePlaybook Triggeredtask.
Test a command
We recommend testing as many commands of the integration as possible as tasks. Each command should have a task. For this example we will look at the integration IPInfo v2, which accepts only one command called !ip.
- Navigate to Playbooks and click New Playbook.
- In the Task Library, search for
ipinfo. - Add the IPinfo v2 task to your playbook.
- Enter an IP address in the ip field. This should be an entity that will produce consistent results, such as
8.8.8.8, the Google DNS server. - Click OK to save your changes.
- Connect the DeleteContext task to the ip task
Verify command results
After you run the command, you should verify you have received the expected results.
- Open the Task Library and Create Task.
-
Configure the task:
Option Configuration Conditional Select the Conditional task option Task Name Verify Command Results Condition for: Above From previous tasks, click {} to display the Select source options. Click the #2 ip task that you created. IPinfo.IP Click Address and close the window. IPinfo.IP.Address is now displayed. This is the context path. From previous tasks Wrap the context path using the format ${IP.Address}. Wrapping the context path tells Cortex XSIAM to retrieve the value located in the curly brackets.As value Type 8.8.8.8 and click the checkmark. Note
If you need to edit the value in a field, you can click on the value and edit it. For example, click on the value in the From previous tasks field and edit the ${IP.Address} value.
- (Optional) - If you need to filter or format the result, click Filters and Operations located in the Select source dialog box.
- Click OK.
- Connect the ip task to the Verify Command Results task.
Close the investigation
- In the Task Library, search for
closeinvestigation. - Add the closeInvestigation task found under Builtin Commands.
- Connect the Verify Command Results task to the closeInvestigation task.
- In the pop up dialog box, select yes.
Name and export the playbook
Cortex XSIAM uses a standard naming convention for playbook tests that follows this format: Integration_Name_Test.
- Save Playbook.
- Close the playbook editor.
- Download the playbook from the more options icon.
Add the playbook to your project
- Save your newly created test playbook to the
TestPlaybooksdirectory in your content pack. - In the playbook YAML file that you created, edit the
idso that it is identical to thenamefield. - Change the value in the
versionfield to-1to prevent user changes. -
Using the example above, the beginning of your YAML file should look like this:
id: IPInfo_Test version: -1 name: IPInfo_Test
-
Add the ID of the test playbook to the YAML of your content-item under the
testskey.tests: - Test Playbook Name
Add tests to conf.json
To associate integrations with a test playbook, we create or update a conf.json file (at the root of the repository). The conf.json file is located in the Tests directory.
The following is an example of a conf.json entry for an integration.:
{
"integrations": "Forcepoint",
"playbookID": "Forcepoint_Test",
"timeout": 500,
"nightly": true
},
The following table describes the fields:
| Name | Description |
|---|---|
| integrations | The ID of the integration that you are testing. |
| playbookID | The ID of the test playbook that you are running. |
| timeout | (Optional) - The time in seconds to extend the timeout to. |
| nightly | (Optional) - Boolean that indicates if the test should be part of only the nightly tests. |
Additional Resources

Debugging
During the development phase of integrations and scripts, debugging allows you to understand what is happening behind the scenes when your code exhibits unexpected behavior. There are a few strategies that you can implement to debug code in Cortex XSIAM, described in the following sections.
Printing to the War Room
Seeing your statements in print is often useful when diagnosing issues. To do this, add the following to your integration/script code:
error_msg = "Here's your completely broken code" demisto.log(error_msg)
This prints the statements in the War Room, for you to review. Remove the error messages when you are done debugging, so that they do not appear in the final code.
Debugging using the IDE
Sometimes debugging via printing or using the logs is not sufficient. In that case you might want to use the debugger and go through the code line by line or breakpoint by breakpoint. See Debugging configurations for Python Apps in Visual Studio Code.
Note
We recommend using the Visual Studio Code extension when you are developing content.
Python environment
- Prepare a Python environment with all the base dependencies. Follow the instructions in Set up a local development environment.
- After the Python environment is prepared, open the integration in a virtual environment using the Cortex XSIAM Visual Studio Code Extension in VS Code.
Using demistomock
The content repository includes demistomock.py file, which usually appears as the first import in an integration or script:
import demistomock as demisto from CommonServerPython import * from CommonServerUserPython import *
The demistomock module can be used to mock integration configuration, arguments and commands passed.
| Function | Description |
|---|---|
demisto.params() |
Returns the connection details inserted into the create instance in the UI. |
demisto.command() |
Returns the name of the command you want to run. |
demisto.args() |
Returns the arguments for that command. |
In some cases, you might need to use other functions, and the following guidelines applies to those as well. In the demistomock file we can see a params function defined:
def params(): return {}
This is what is returned if we run the Python file. Instead, we can fill it with the connection credentials needed to connect to our instance.
def params(): return { "credentials":{ "identifier": "demisto", "password": "password" }, "server": "https://1.2.3.4/", "insecure": True }
and now commands such as:
params: dict = demisto.params()
username = params.get('credentials').get('identifier') # demisto
password = params.get('credentials').get('password') # password
verify_certificate = not params.get('insecure', False)
take their information from there.
This is called mocking demisto.
Verify that all Cortex XSIAM functions used in the functions we are testing are mocked correctly. Now we can use the debugger from the IDE or ipdb to debug the code as we would any other simple Python file.
Contributing content
Contributing enables clients and partners who create new content, or who modify existing content (enhancements, bug fixes, etc.) to share their work with the community by making it publicly available in the Marketplace. Content can be Cortex XSIAM, partner, or community supported.
If you are beginning development, we recommend you first review Getting started. If you have questions or need support with the development or contribution process, contact us via the #demisto-developers slack channel.
Note
This topic is only related to Cortex XSIAM content. For documentation contributions, see Documentation Contributions.
All content is open source and resides in the Cortex XSIAM GitHub Repository, with a MIT license.
Support and Requirements
Contributions can be either officially supported (by Palo Alto Networks or a Technology Partner), or community supported. Officially supported content packs have a stricter quality-control process and provide an email address or website for support. Community supported content packs do not have a support contact. Customers can ask questions about community supported packs on the Live Community
Note
If you contribute content that integrates with one of Palo Alto Networks' products, we require the pack to be supported by Cortex XSIAM. Due to this support requirement, in some cases we may adopt your pack and push it into the Cortex XSIAM development pipeline to be released as Cortex XSIAM supported.
For more information about the different support levels, see the support types documentation.
How to Contribute
Before you begin contributing content, we recommend reviewing the Contribution SLA, which details the requirements for content contributions. After you have created your content, you must submit your content to Palo Alto Networks for review. The Cortex XSIAM content team reviews and approves all content before it becomes available to customers.
To submit your content:
-
Contribute through a GitHub pull request on the public Cortex XSIAM content repository. We recommend using this workflow in the following scenarios:
- You are a Technology Partner contributing partner supported new content.
- Your contribution is large and contains many different parts (integrations, scripts, playbooks, layouts, etc.) and is likely to lead to a complex review process.
- You are proficient with GitHub.
Note
We recommend using a GitHub Codespace, which provides you with a pre-configured ready-to-use development environment. This method is still experimental, but makes the contribution, development, and review processes easier. For more information and a step-by-step guide, see Set up a GitHub Codespace environment.
This document describes the main workflow for supported and community contributions, and summarizes everything you must do before and after opening a pull request on GitHub to contribute your pack. These steps are not required if you are contributing community supported content, but we recommend reviewing this document to be aware of best practices.
Contributor Guidelines
Please read the following guidelines carefully. Following these guidelines will provide for a fast, easy, and effective review process for everyone involved. If anything is unclear, please reach out to us via Slack on the #demisto-developers channel.
- Start by designing your contribution. Follow the design guidelines to identify exactly what you want to build and to verify it's aligned with our best practices.
- Verify that you have met all the requirements for contributions.
- Set up a development environment, a preconfigured GitHub Codespace environment, or a containerized development environment.
- Follow the content pack structure to build your contribution. Use demisto-sdk init to help create it.
- If you are updating an existing content pack, verify it is updated with the latest version available in the Marketplace before proceeding.
- Depending on the content entities you need to build, navigate to the specific sections of this website for more details. If you are creating integrations and/or scripts), verify that you:
- Use the proper integrations/scripts directory structure. Use demisto-sdk init to help create it. If working on existing code, beyond minor changes, convert to this structure as it allows you to run linting and unit tests and provides a clearer review process.
- Understand the structure of the YAML file and the parameter types.
- Verify your integration follows our logo guidelines.
- Read and follow Python code conventions (recommended) or Powershell code conventions.
- Verify your commands make proper use of the context, including context standards and DBotScore.
- Create unit tests and verify the various linters we support pass as detailed here.
- Document your integration or script by generating the README files for content entities.
- Create the appropriate content pack documentation.
- Follow the documentation best practices.
- As you build newer versions of your content pack, document your changes in relevant release notes files.
After completing these steps, you should be ready to submit a pull request.
A working example that summarizes all of the above is the Hello World content pack that you can use as a reference. We also recommend reviewing the Hello World Design Document.
Pull requests
Before opening a pull request
To submit a pull request to the Cortex XSIAM GitHub repository, you need to:
- Review the file checklist to verify you have included all necessary files.
-
Verify you are working on a GitHub fork of the Cortex XSIAM content repository, and create a branch for your contribution. Do NOT submit changes to the master branch.
- Validate your content. The validation hook runs automatically every time you run
git commit. You can also run the validation manually by using demisto-sdk validate. Example:demisto-sdk validate -i Packs/YourPackName. If you get an error that is unclear, ask for help on the #demisto-developers channel on our Slack DFIR Community. - If your contribution has integrations or scripts, verify it passes lint checks and unit tests with
demisto-sdk pre-commit -i Packs/YourPackName. - Create a short video to demo your product and your pack, and provide the link to the video. The video is used by our reviewers to understand what your product does and how the content pack works.
Open a pull request
After you have completed all of the above the requirements and are ready to open your pull request, commit and push your work to the branch you have created in your forked repository. After you push your changes to the remote branch on GitHub, GitHub automatically detects the changes and a green Compare & pull request button appears at the top.
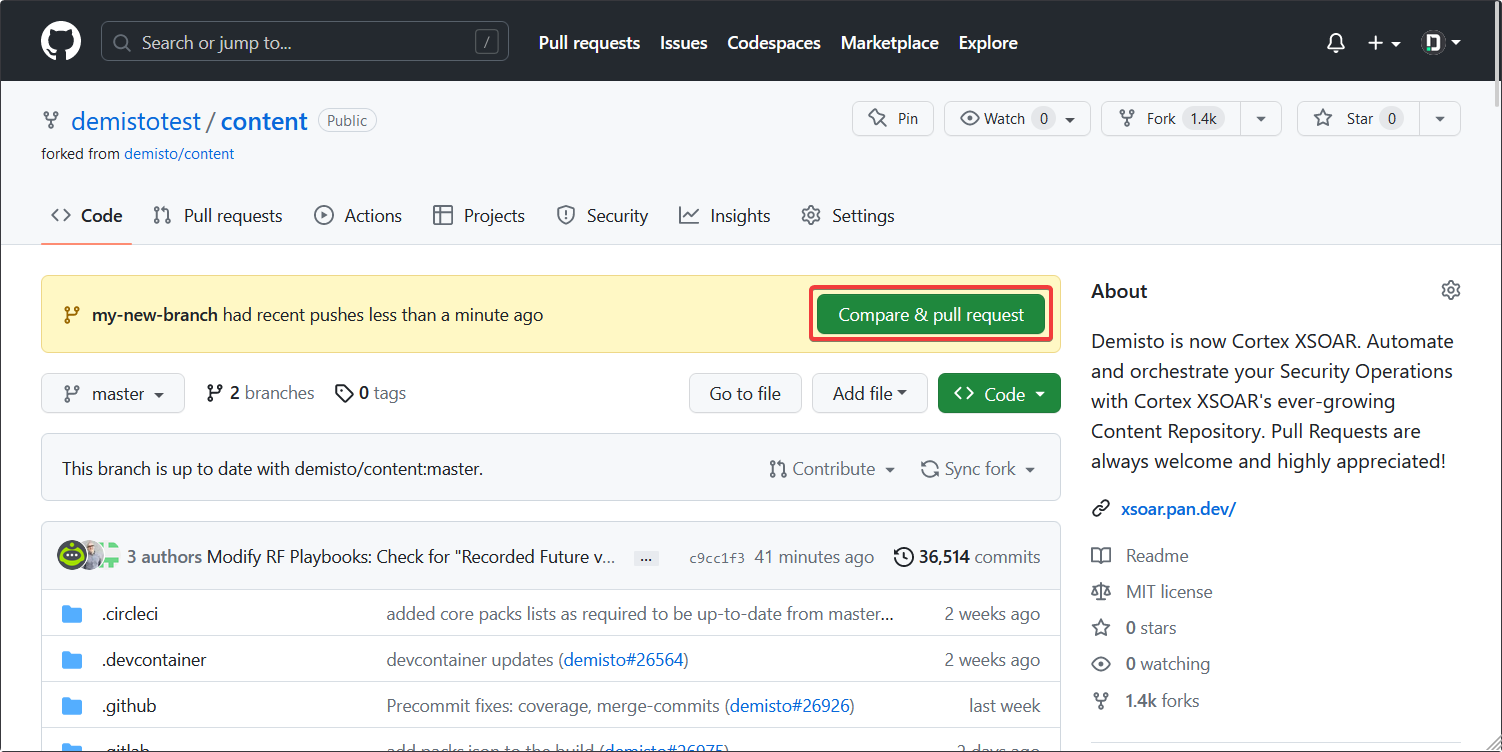
Click Compare & pull request. When the form opens, update the title and the description, using the pre-existing template, and Create pull request.
For more information about creating a pull request from a fork, see the GitHub documentation.
Note
By default, the pull request is opened from your fork on the branch you created, to the master branch of the base Cortex XSIAM content repository. After a few minutes, the target branch (master) is replaced with a different custom branch. This is intentional and should not be changed.
After opening a pull request
- Sign the CLA. Every contributor must sign our Contributor License Agreement in order for their contribution to be added to our content. If there are CLA issues, see the FAQ.
- Fill out the registration form.
- A contributions team member will begin reviewing your contribution.
- Monitor your pull request on GitHub. Our content team adds comments to the pull request, asking questions and requesting changes as needed. To proceed with your contribution, you are asked to respond to the reviewer's code review and apply the required changes within 14 days. Stale pull requests may be closed.
- We may contact you to schedule an interactive demo. You will need a working instance of Cortex XSIAM with your pack fully configured and ready for presentation. Check out our contribution demo page for more details.
Note
As part of the pull request template, you are asked to fill in the contribution registration form. The form must be completed for us to review your contribution.
For more information about pull requests, see Pull request conventions.
Contribution requirements
There are requirements to develop and contribute content (including integrations and scripts) to Cortex XSIAM. If you are unsure whether this article applies to you, more details can be found in the getting started chapter.
Cortex XSIAM
You need an active Cortex XSIAM tenant.
Development operating system
We recommend using macOS or Linux for development, as we use bash and Docker in some of our validation/testing flows. We also support Windows through WSL. For Windows, you can work either with a Linux VM or use Windows Subsystem for Linux.
Note
When using WSL2 you may experience performance issues if working on the Windows mounted file system (for example /mnt/c/). See the following WSL issue for more info. In that cases, we recommend using the Linux file system (ext4 partition) WSL2 provides, and the local content and the SDK are located on the WSL file system, using an editor that supports remote WSL. Editors supporting remote WSL include VS Code and PyCharm Professional Edition.
GitHub
You will need a GitHub account, as the contribution process requires you to submit a pull request in the Cortex XSIAM content repository. To learn more about pull requests and contributing , check out the collaborating with issue and pull requests tutorial on GitHub.
You will also need git - a distributed version control system, installed in your development environment. In the examples, we'll use the git command-line tool. Visit the Git - Getting Started Guide for installation instructions.
Python
If you are planning on contributing code, (i.e., integrations or scripts) you recommend using Python. While some content is built via JavaScript and Python 2, we require Python 3.7+ for contributions.
We recommend having a dedicated Python 3 installed on your system for development purposes. Pyenv allows you to easily manage multiple versions of Python on your system.
Optionally, macOS users can install via homebrew.
While you don't need to be a Python expert to write a good integration, intermediate level Python knowledge is preferred. Be sure to adhere to our Code Conventions.
PowerShell
We also support PowerShell. However, we recommend PowerShell only for advanced users, as the number of content examples is limited.
Docker
If you are writing code (i.e. integrations and scripts), you need to run several linters and unit tests to validate your code, as we do in our build process. In this case, you must install Docker. Visit the Docker site installation page for installation options. If you're using WSL, you should enable the integration with Docker Desktop.
Node.js and npm
(Optional) We use Node.js for validating README documentation files for integrations, scripts and playbooks. If you are creating README documentation files, we recommend installing Node.js to be able to validate the files locally. Node.js installation instructions for your target platform are available at: https://nodejs.org/en/download/package-manager.
File checklist
Before contributing and opening a pull request, verify you prepared all the files you need to contribute to the Cortex XSIAM content repository. Note that content packs can contain multiple types of entities, such as integrations, scripts, playbooks, incident types, and incident fields.
Content pack checklist
All content packs must include the following:
- Pack metadata file. For example,
Packs/YourPackName/pack_metadata.jsoncontains the information about your content pack. It should be compiled with all the required information. - Pack README. For example,
Packs/YourPackName/README.md) - the README of the pack file.
If you are updating an existing content pack, the content pack must include release notes. For example, Packs/YourPackName/ReleaseNotes/1_0_1.md.
Note
Use PascalCase (e.g. YourPackName) for the name of the pack, its directories and its entities (integrations, scripts, playbooks, etc.) For reference, view the tree of the Hello World pack on GitHub.
How do I create these files?
To create a new content pack directory tree and structure, you should use the demisto-sdk init command , as described in the tutorial for setting up your development environment.
Integrations and scripts should be written with your favorite IDE.
All other entity types (playbooks, test playbooks, incident/indicator fields and types, layouts, classifiers and mappers, widgets, and dashboards) should be created in the Cortex XSIAM UI and exported using the demisto-sdk download command (using the -fmt argument). You can also export the files manually via the Cortex XSIAM UI (either individually using the download icons, or using the Export Custom Content feature. If you export the files instead of using demisto-sdk download command, you'll need to format them using demisto-sdk format.
Integrations
If your pack contains an integration, the integration directory must contain the following:
| File | Sample Path and Description |
|---|---|
| Code | <p>Packs/YourPackName/Integrations/YourIntegrationName/YourIntegrationName.py</p><p>Integration implementation code</p> |
| YAML | <p>Packs/YourPackName/Integrations/YourIntegrationName/YourIntegrationName.yml</p><p>YAML file with integration metadata.</p> |
| Description | <p>Packs/YourPackName/Integrations/YourIntegrationName/YourIntegrationName_description.md</p><p>Markdown file with instructions for the customer to configure the integration instance. The Markdown file shows up as a snippet when the user clicks the question mark icon in the integration configuration panel.</p> |
| Image | <p>Packs/YourPackName/Integrations/YourIntegrationName/YourIntegrationName_image.png</p><p>The integration logo.</p> |
| README | <p>Packs/YourPackName/Integrations/YourIntegrationName/README.md</p><p>The integration documentation, mostly autogenerated.</p> |
| Command Examples | <p>Packs/YourPackName/Integrations/YourIntegrationName/command_examples</p><p>Required to autogenerate the documentation.</p> |
| Unit Tests | <p>Packs/YourPackName/Integrations/YourIntegrationName/YourIntegrationName_test.py</p><p>This file must be included to automatically test the code during the review phase. Although we encourage extensive testing, we do not enforce testing each and every function in the code. We recommend you focus on the most important functions and the helper functions.</p> |
| Unit Tests Data | <p>Packs/YourPackName/Integrations/YourIntegrationName/test_data/*.json</p><p>Contains example responses from your product API, to be used in unit tests. See examples from Hello World.</p> |
| Custom Alert Types, Fields, Classifiers, Mappers and Layouts | If your integration has the ability to fetch alerts, you usually need to provide custom alert types and related entities. You should plan for this during the design phase, and speak with your Palo Alto Networks Alliance contact person if you have any questions. |
Note
If you use PowerShell instead of Python, the code files extension will be .ps1 instead of .py.
Playbooks
| File | Sample Path and Description |
|---|---|
| Playbook | <p>Packs/YourPackName/Playbooks/playbook-YourPlaybookName.yml</p><p>If the file is exported directly from the Cortex XSIAM UI, it must be formatted with demisto-sdk format.</p> |
| README | <p>Packs/YourPackName/Playbooks/playbook-YourPlaybookName_README.md</p><p>Documentation file for the playbook, mostly autogenerated.</p> |
| Image | <p>Packs/YourPackName/doc_files/YourPlaybookName.png</p><p>Image of the playbook as exported from the Cortex XSIAM UI. Its link should be added to the README file.</p> |
Note
The playbook README file must be updated with the correct image link after the pull request is opened, as explained in README files for content entities.
Incident or indicator fields
If your pack contains at least one custom incident or indicator field, it must contain a incident field or indicator field JSON file. For example, Packs/YourPackName/IncidentTypes/YourIncidentTypeName.json or Packs/YourPackName/IndicatorType/YourIndicatorTypeName.json. If the file is exported directly from the Cortex XSIAM UI, it must be formatted with demisto-sdk format.
Incident or indicator types
If your pack contains at least one custom incident or indicator type, it must contain a incident type or indicator type JSON file. For example, Packs/YourPackName/IncidentFields/YourIncidentFieldName.json or Packs/YourPackName/IndicatorFields/YourIndicatorFieldName.json. If the file is exported directly from the Cortex XSIAM UI, it must be formatted with demisto-sdk format.
If you have a custom incident or indicator type, in most situations you also need to include corresponding classifiers, mappers and layouts.
Classifiers and mappers
| File | Sample Path and Description |
|---|---|
| Classifier | <p>Packs/YourPackName/Classifiers/classifier-YourIntegrationName.json</p><p>If the file is exported directly from the Cortex XSIAM UI, it must be formatted with demisto-sdk format.</p> |
| Mapper | <p>Packs/YourPackName/Classifiers/classifier-mapper-incoming-YourIntegrationName.json</p><p>If the file is exported directly from the Cortex XSIAM UI, it must be formatted with demisto-sdk format.</p> |
Incident or indicator layouts
If your pack contains at least one custom incident or indicator layout, it must contain a incident layout or indicator layout JSON file. For example, Packs/YourPackName/Layouts/layoutscontainer-YourIncidentTypeName.json. If the file is exported directly from the Cortex XSIAM UI, it must be formatted with demisto-sdk format.
Scripts
If your content pack contains at least one automation script, the scripts directory must contain the following:
| File | Sample Path and Description |
|---|---|
| Code | <p>Packs/YourPackName/YourScriptName/Scripts/YourScriptName.py</p><p>Script implementation code</p> |
| YAML | <p>Packs/YourPackName/Scripts/YourScriptName/YourScriptName.yml</p><p>YAML file with script metadata.</p> |
| README | <p>Packs/YourPackName/Scripts/YourScriptName/README.md</p><p>The script documentation, mostly autogenerated.</p> |
| Unit Tests | <p>Packs/YourPackName/Scripts/YourScriptName/YourScriptName_test.py</p><p>This file must be included to automatically test the code during the review phase.</p> |
| Unit Tests Data | <p>Packs/YourPackName/Scripts/YourScriptName/test_data/*.json</p><p>Contains example responses from your product API, to be used in unit tests.</p> |
Note
If you use PowerShell instead of Python, the code files extension will be .ps1 instead of .py.
Note
If your pack contains both integrations and scripts, you can use a single test playbook to test both.
Widgets
If your pack contains at least one custom widget, it must contain a widget JSON file. For example, Packs/YourPackName/Widgets/widget-YourWidgetName.json. If the file is exported directly from the Cortex XSIAM UI, it must be formatted with demisto-sdk format.
Dashboards
If your pack contains at least one custom dashboard, it must contain a dashboard JSON file. For example, Packs/YourPackName/Dashboard/dashboard-YourDashboardName.json. If the file is exported directly from the Cortex XSIAM UI, it must be formatted with demisto-sdk format.
Checklist table
The requirements above are also summarized in the following table:
| Entity Type | All Contributions | Partner/Cortex XSIAM Only |
|---|---|---|
| Pack | <ul><li>Pack metadata</li><li>Pack README file</li><li>Release notes</li></ul> | |
| Design | Must follow use case guidelines and review the design document with the Alliances team. | |
| Integration | <ul><li>Code file</li><li>YAML file</li><li>Description file</li></ul> | <ul><li>Image file</li><li>README file</li><li>Command examples file</li><li>Unit tests file</li><li>Unit tests data</li></ul> |
| Playbook | Playbook file | <ul><li>README file</li><li>Playbook image file</li></ul> |
| Incident/Indicator Field | Incident and/or indicator field JSON file | |
| Incident/Indicator Type | Incident and/or indicator type JSON file | |
| Classifier and Mapper | <ul><li>Classifier JSON file</li><li>Mapper JSON file</li></ul> | |
| Incident/Indicator Layout | Layout JSON files | |
| Script | <ul><li>Code file</li><li>YAML file</li><li>README file</li></ul> | <ul><li>Unit tests file</li><li>Unit tests data</li></ul> |
| Widget | Widget JSON file | |
| Dashboard | Dashboard JSON file |
Content pack structure
For better separation between content artifacts from different use cases and partners, we use a directory structure called content packs. Each content pack behaves like a mini content repo. It contains all relevant content items within its directory.
For example, the Cortex XDR pack can be seen in the content repository Packs/CortexXDR.
To generate a new pack, use demisto-sdk init --pack
Directories
The directories within the pack represent all the possible content entities. Each pack is located in the Content repo under Packs/<Pack Name>.
- Integrations - Scripts - Playbooks - Reports - Dashboards - IncidentTypes - IncidentFields - Layouts - Classifiers - IncidatorTypes - IndicatorFields - Connections - TestPlaybooks - ParsingRules - ModelingRules - CorrelationRules - ReleaseNotes - Triggers - XSIAMDashboards
Content pack files
The pack directory contains multiple configuration files used for metadata and documentation.
Note
All ofthe following files are created using the demisto-sdk init --pack command, and some of them need to be manually populated.
pack_metadata.json
This file contains all the relevant metadata about the pack.
The following fields are populated in the pack metadata.
| Field Name | Field Type | Field Description |
|---|---|---|
| name | String | The pack name, usually the name of the integration the pack contains (for example Cortex XDR) or the use case implemented in it. |
| description | String | A short overview of the pack. |
| support | String | <p>Should be one of the following:</p><p>xsoar - Supported by Cortex XSIAM.</p><p>partner - Supported by a Cortex XSIAM partner.</p><p>developer - Supported by an independent developer/organization.</p><p>community - Not officially supported, but available for the community to use.</p><div data-gb-custom-block data-tag="hint" data-style="info" class="hint hint-info"><p>Note</p><p>For partner and developer, either email address or URL fields must be filled out.</p></div> |
| currentVersion | String | The pack version, in the format of x.x.x. For the initial release, this should be set to "1.0.0". See Content Pack Versioning. |
| author | String | The name of the organization (for partners) or developer (for individual contributions) that developed the integration. |
| url | String | The URL users should refer to for support regarding the pack. Usually, it is the organization support URL or the developer GitHub repository. If left empty the default support site presented to users is the Live Community site. |
| videos | String | The pack Youtube video link. |
| String | The email address users should reach out to for support regarding the pack. | |
| categories | List | The use case categories that are implemented in the pack, usually set by the integration. See the category list. |
| tags | List | Tags to be attached to the pack in the Marketplace. |
| created | String | Pack creation time in ISO 8601 format - YYYY-MM-DDTHH:flag_mm:ssZ. For example 2020-01-25T10:00:00Z. |
| useCases | List | Use cases implemented by the pack. |
| keywords | List | List of strings by which the pack can be found in Marketplace. |
| marketplaces | List | <p>The Marketplace(s) in which the pack can be found.</p><ul><li>For Cortex XSIAM: marketplacev2</li><li>For Cortex XSOAR 6 and 8: xsoar</li><li>For Cortex XSOAR 6: xsoar_on_prem</li><li>For Cortex XSOAR 8 (Cloud and On-prem): xsoar_saas</li></ul> |
| hidden | Boolean | (Optional) Whether to hide the pack from Marketplace. If hidden, updates to this pack will not be published to the Marketplace and the pack cannot be installed. |
| dependencies | Dictionary | (Optional) The content packs that the pack is dependent on. Should be empty on pack creation, as it is calculated by Cortex XSIAM content infrastructure. |
| displayedImages | List | (Optional) Images to be displayed in Marketplace. Should be empty on pack creation, as it is calculated by Cortex XSIAM content infrastructure. |
| githubUser | List | (Optional) List of Github usernames to receive notification in the PR in case pack files were modified. |
| devEmail | List | (Optional) List of emails to receive notification in case contributed pack files were modified. |
| certification | String | (Optional) If the pack is certified, the value of this field should be certified. The possible values are certified and verified. |
| itemPrefix | String | (Optional) String to overwrite pack fields prefix. You can specify an alternate string instead of the default pack name enforced by the validation process. |
| defaultDataSource | String | (Optional) Default data source integration in Cortex XSIAM for packs that have more than one fetching integration. We recommend setting the default data source integration to the event collector or the most used integration. |
Pack metadata file contents example
{ "name": "Palo Alto Networks Cortex XDR - Investigation and Response", "description": "Cortex XDR is the world's first detection and response app that natively integrates network, endpoint and cloud data to stop sophisticated attacks.", "support": "xsoar", "currentVersion": "1.0.0", "author": "Cortex XSOAR", "url": "https://www.paloaltonetworks.com/cortex", "videos": "https://www.youtube.com/watch?v=ium2969zgn8", "email": "", "categories": [ "Endpoint" ], "tags": [ "Recommended by Cortex XSOAR", "xdr" ], "created": "2020-03-11T13:16:53Z", "useCases": [ "Malware" ], "keywords": [ "adaptive cyber protection", "apt" ], "dependencies": { "Base": { "mandatory": true, "name": "Base" }, "CortexXDR": { "mandatory": false, "name": "Palo Alto Networks - Cortex XDR" } }, "marketplaces": [ "marketplacev2" ], "displayedImages": [ "CortexXDR" ] }
Supported Partner pack metadata contents example
{ "name": "Product name", "description": "Pack description", "support": "partner", "currentVersion": "1.1.0", "author": "Partner name", "url": "https://support.<partner>.com", "email": "support@<partner>.com", "devEmail": "dev@<partner>.com", "categories": [ "Deception" ], "tags": [], "created": "2020-03-19T09:39:30Z", "useCases": [], "keywords": [], "dependencies": {}, "marketplaces": ["marketplacev2"] "githubUser": [ "<partner Github username>" ] }
Content pack versioning
Pack versions have the format MAJOR.MINOR.REVISION:
Revision when you make backward compatible bug fixes.
Minor when you add functionality in a backward compatible manner.
Major when you make incompatible API changes or revamp the pack by adding significant new backward compatible functionality.
README.md
This file contains a general explanation for the pack. You can add any information relevant for the pack. For more details see the Content Pack README.
.secrets-ignore
This file is used while running demisto-sdk secrets as an allow list of approved words for the PR.
Note
We use demisto-sdk secrets as part of our pre-commit hook to check that possible secrets in the PR aren't exposed to a public repository.
.pack-ignore
This file allows ignoring linter errors while lint checking and ignoring tests in the test collection.
To add ignored tests/linter errors in a file:
- Add the file name to the
.pack-ignorein the format[file:integration-to-ignore.yml] - On the following line add
ignore= flag, with one or more comma-separated values:auto-test- Ignore the test file in the build test collection.linter code- For example, IN126, ignore linter error codes.
By default, script/integration unit tests run without a Docker network.
If one of the integrations/scripts inside a pack needs a network during the unit tests run, use this format:
[tests_require_network] integration-id-1 script-id-1
Example: .pack-ignore
[file:playbook-Special-Test-Not-To-Run-Directly.yml] ignore=auto-test [file:integration-to-ignore.yml] ignore=IN126,PA116 [tests_require_network] integration-id-1 script-id-1
Author_image.png
You can add an author image (logo of the contributing company) which is displayed on the Marketplace page for the content pack, under the the PUBLISHER section. The image should be saved in the root directory of the content pack, for example content/packs/MyPackName, and be named Author_image.png). Make sure to use this exact file name for the image to appear. The image size should be up to 4 KB and dimensions of 120x50 pixels.
For Partners, this image is mandatory and is validated as part of the build process. If the file is missing, the build fails with the following validationerror:
- Issues with unique files in pack: $PACK_NAME Packs/$PACK_NAME/Author_image.png: [IM109] - Partners must provide a non-empty author image under the path Packs/$PACK_NAME/Author_image.png
If the file Author_image.png does not exist, the name of the author is displayed in the PUBLISHER section instead.
CONTRIBUTORS.json
If you are contributing to an existing pack, you can add a CONTRIBUTORS.json file to the root of the pack if one does not already exist. The file should contain a list of strings including your name.
Example: CONTRIBUTORS.json file
[ "Jane Doe", "John Smith" ]
Once your contribution is merged, pack details shows the following:
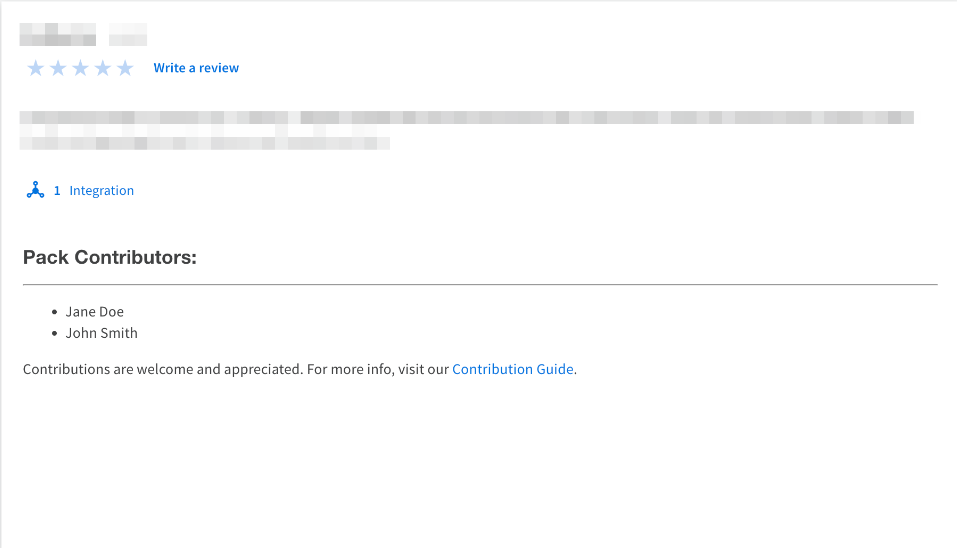
Content pack dependencies
A content pack dependency is when a content pack is needed in order to use another content pack. Dependencies can be categorized as either optional or required/mandatory. Optional means the pack benefits from the pack it depends on, but can function without it. Mandatory means the pack does not work without the pack it depends on. You can depend on core content packs that are included with Cortex XSIAM, without an issue. Requiring non-core content packs in order to use your content pack is not recommended.
Examples of dependencies
- A playbook from QRadar pack uses a playbook from the Access Investigation pack.
- A playbook from the Employee Offboarding pack uses a script from the Impossible Traveler pack.
- A classifier from the Microsoft Exchange On-premise pack uses incident fields from the Phishing pack.
Find content pack dependencies
Use the demisto-sdk graph get-dependencies command to find dependencies between content packs.
Handle dependencies
When a dependency is required, it means that in order to use a certain content pack, the user MUST install a different pack. You want to avoid this scenario as much as possible. In some cases, dependencies are logical and required. For example, the Gmail content pack depends on the Phishing content pack, and it would not make sense to duplicate the content in both packs. In most cases, however, (when the required pack is not a core content pack), we want to find and remove dependencies.
Fix dependencies
Fixing a dependency usually involves three stages:
- Make the necessary adaptation in the content. For example, you may need to change the playbook, merge packs, move files to another pack, replace a deprecated script with newer script, etc.
- Manually change
mandatorytofalsein the pack dependencies - only if the dependency is actually optional and not mandatory. An example of an optional content pack would be if an integration is used after a condition that ensures that it's enabled, and the flow continues normally otherwise. Another possible optional dependency is when a script or a sub-playbook is configured to be skipped if the pack is unavailable (through the advanced task settings). - Remove the
displayedImagessection from thepack_metadata.json.
Example: Slack pack dependency on Active Directory Query
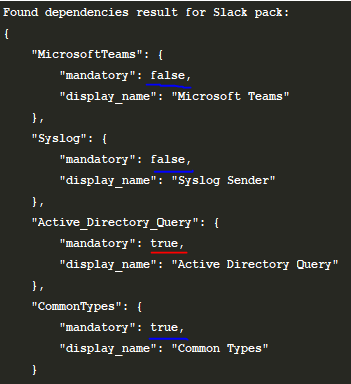
- Understand the dependencies. We have two optional dependencies which do not cause an issue. We also have two required dependencies. The first is the CommonTypes content pack. This is a core pack, and does not cause an issue. The Active Directory Query content pack, however, should not be required for the Slack content pack to work.
- Locate the reason for the dependency. In this case, we find that the playbook Slack - General Failed Logins v2.1 uses the command
ad-expire-passwordin the Expire Password task. - Solve the problem. In this case, we can add a condition before the Expire Password task, that checks if Active Directory is enabled. If not, a different path is taken and the Active Directory content pack is no longer required for the Slack content pack to work.
- Change the
mandatoryvalue tofalseinpack_metadata.json.
Example: Cortex XDR Pack dependency on PortScan Pack
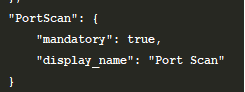
- Reviewing the content of the Cortex XDR pack shows that the
Cortex XDR Port Scanincident type is configured to run thePort Scan - Genericplaybook from the PortScan pack, creating a dependency. This is a bug, as the correct playbook should beCortex XDR - Port Scanand not the generic port scan playbook. - Change the playbook that the incident type is associated with.
- Change the
mandatoryvalue tofalseinpack_metadata.json.
Note
You should use a conditional task to check if an integration is available when a playbook uses a task that is tied to a specific integration. The Skip this branch if this script/playbook is unavailable option should be used to check for sub-playbooks.
Important
Any content from the Core pack should not be changed to "mandatory": false".
Pull request conventions
If you open a GitHub pull request (PR) against the Cortex XSIAM repository, a reviewer from the content team is assigned to the PR and accompanies you through the process of releasing your contribution.
We recommend you check the PR updates often. If you think the process has stalled, feel free to "ping" the assigned reviewer by adding a new comment to the PR with a mention or reach out in the #demisto-developers channel in our Slack Community.
We value your contributions. By following our best practices for pull requests, you can help expedite the contribution process.
Pull request best practices
Use the following guidelines when working on changes requested by our reviewers.
- Always create PRs from your own fork using a dedicated branch. Do NOT use the
master/mainbranch. - Use clear and brief messages for your commits. See this article for good examples.
- Do NOT use force pushes, for example:
git push --force). If you need to force push, contact us first via the pull request or Slack. - During the process our reviewers might ask for multiple changes. Work through the entire list and commit all the changes.
- When you push changes to your fork's branch that was used to open the PR, the PR is automatically updated, you don't need to open a new PR. Do NOT open a new PR unless absolutely necessary (i.e. unless asked by the reviewer), as it will make it hard for the reviewer to track their comments.
-
The review usually has a summary and several conversations: make sure you address all the comments, including the ones in the summary:
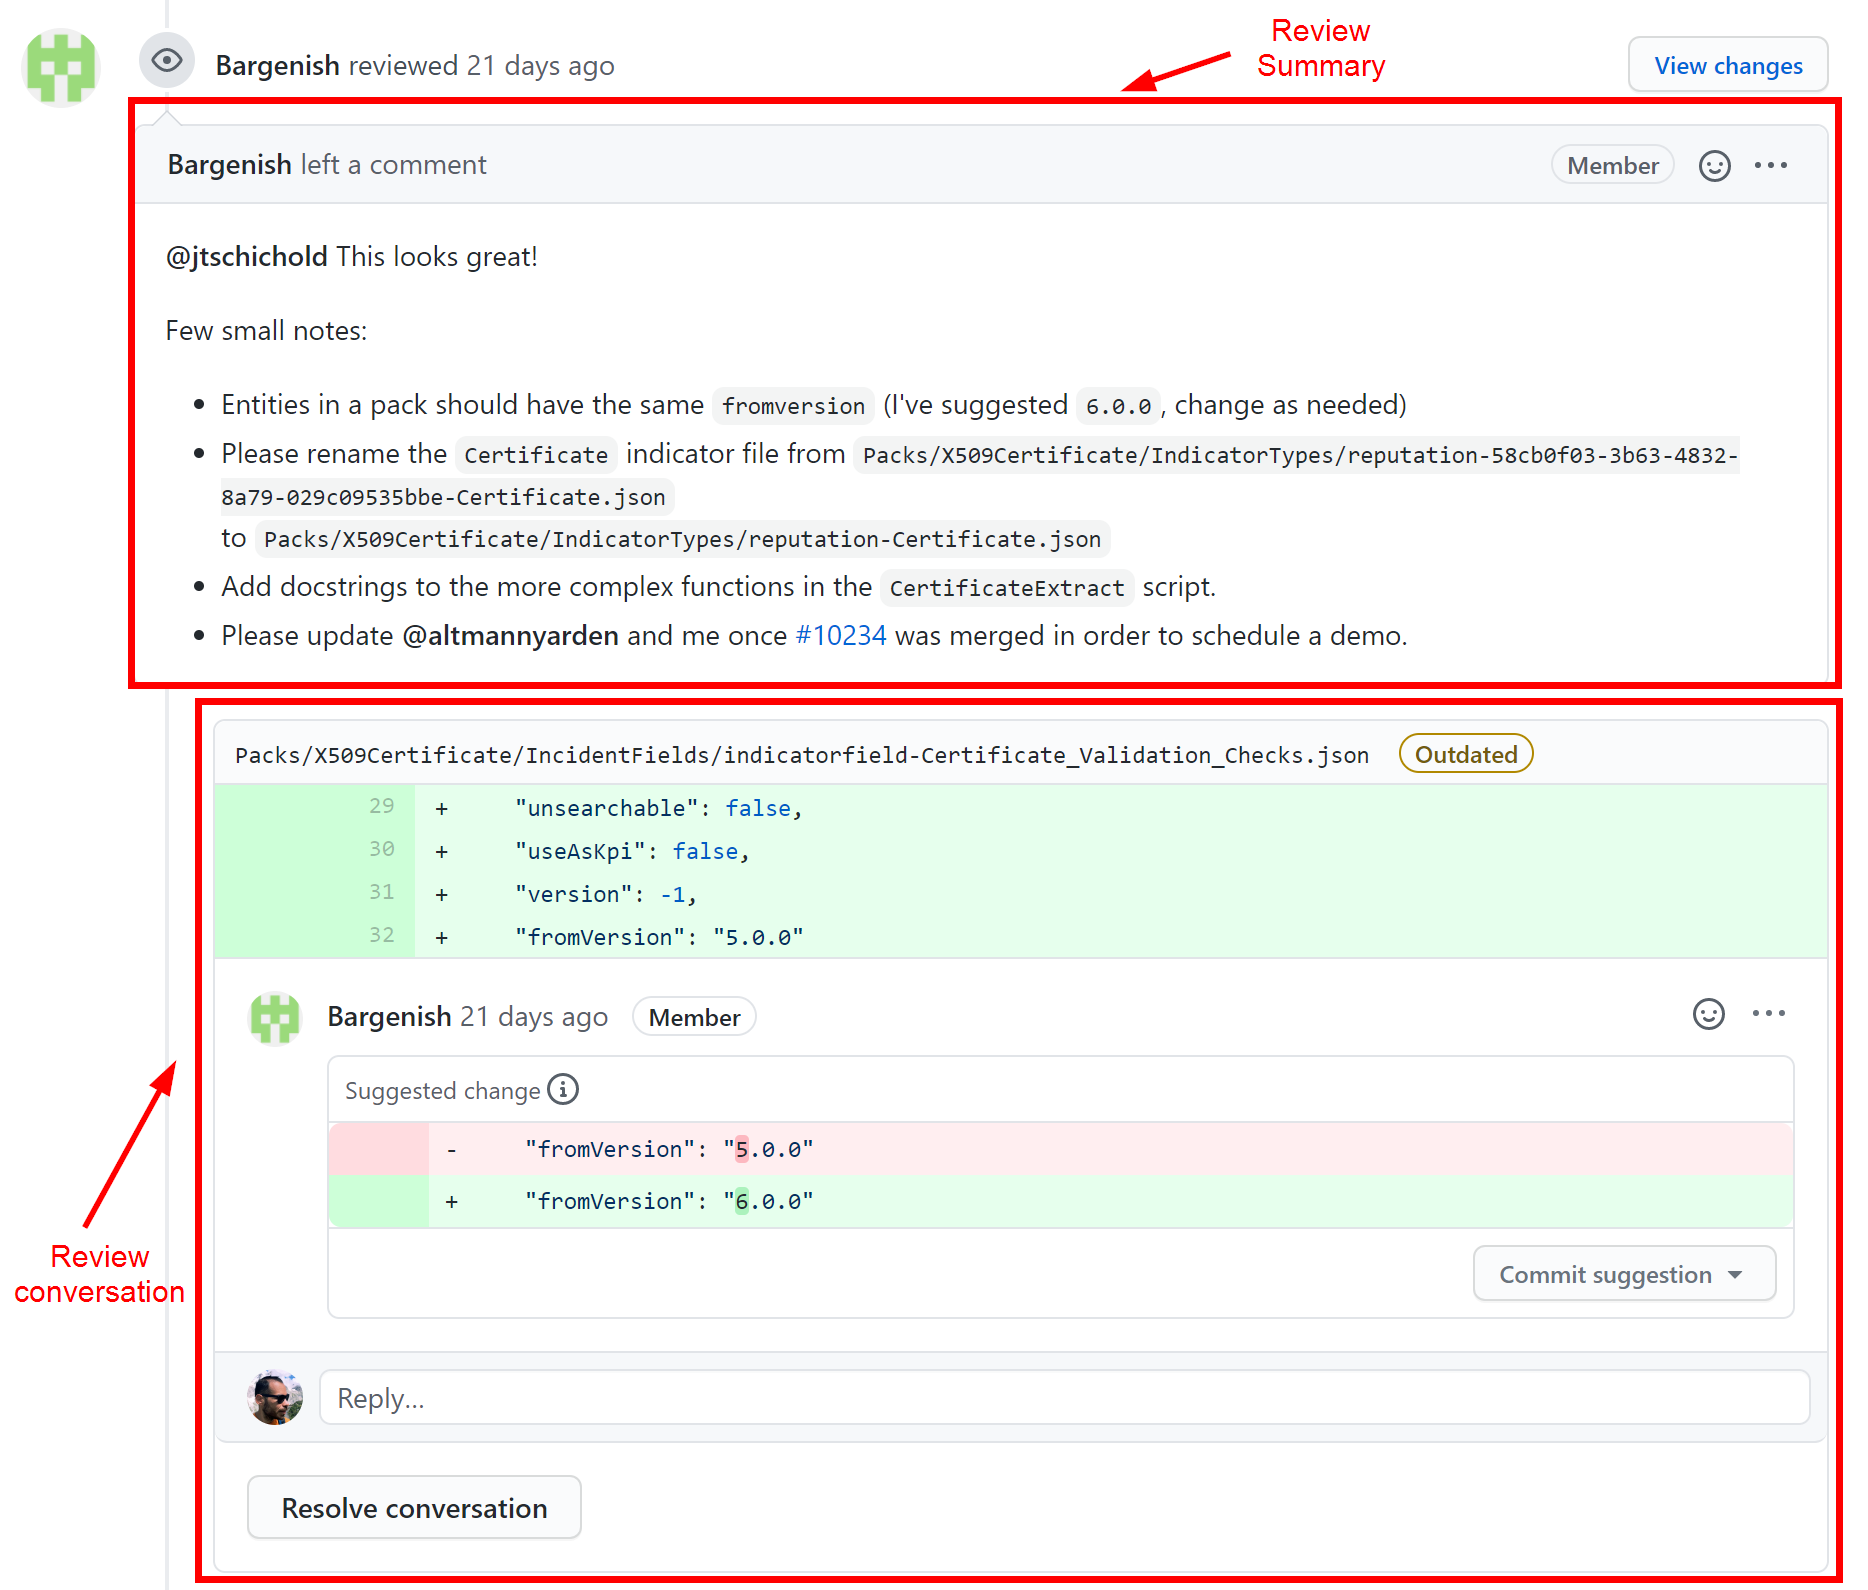
-
When addressing the review's conversations, do NOT mark them as resolved. Write
donein a comment, so the reviewer can keep track of them.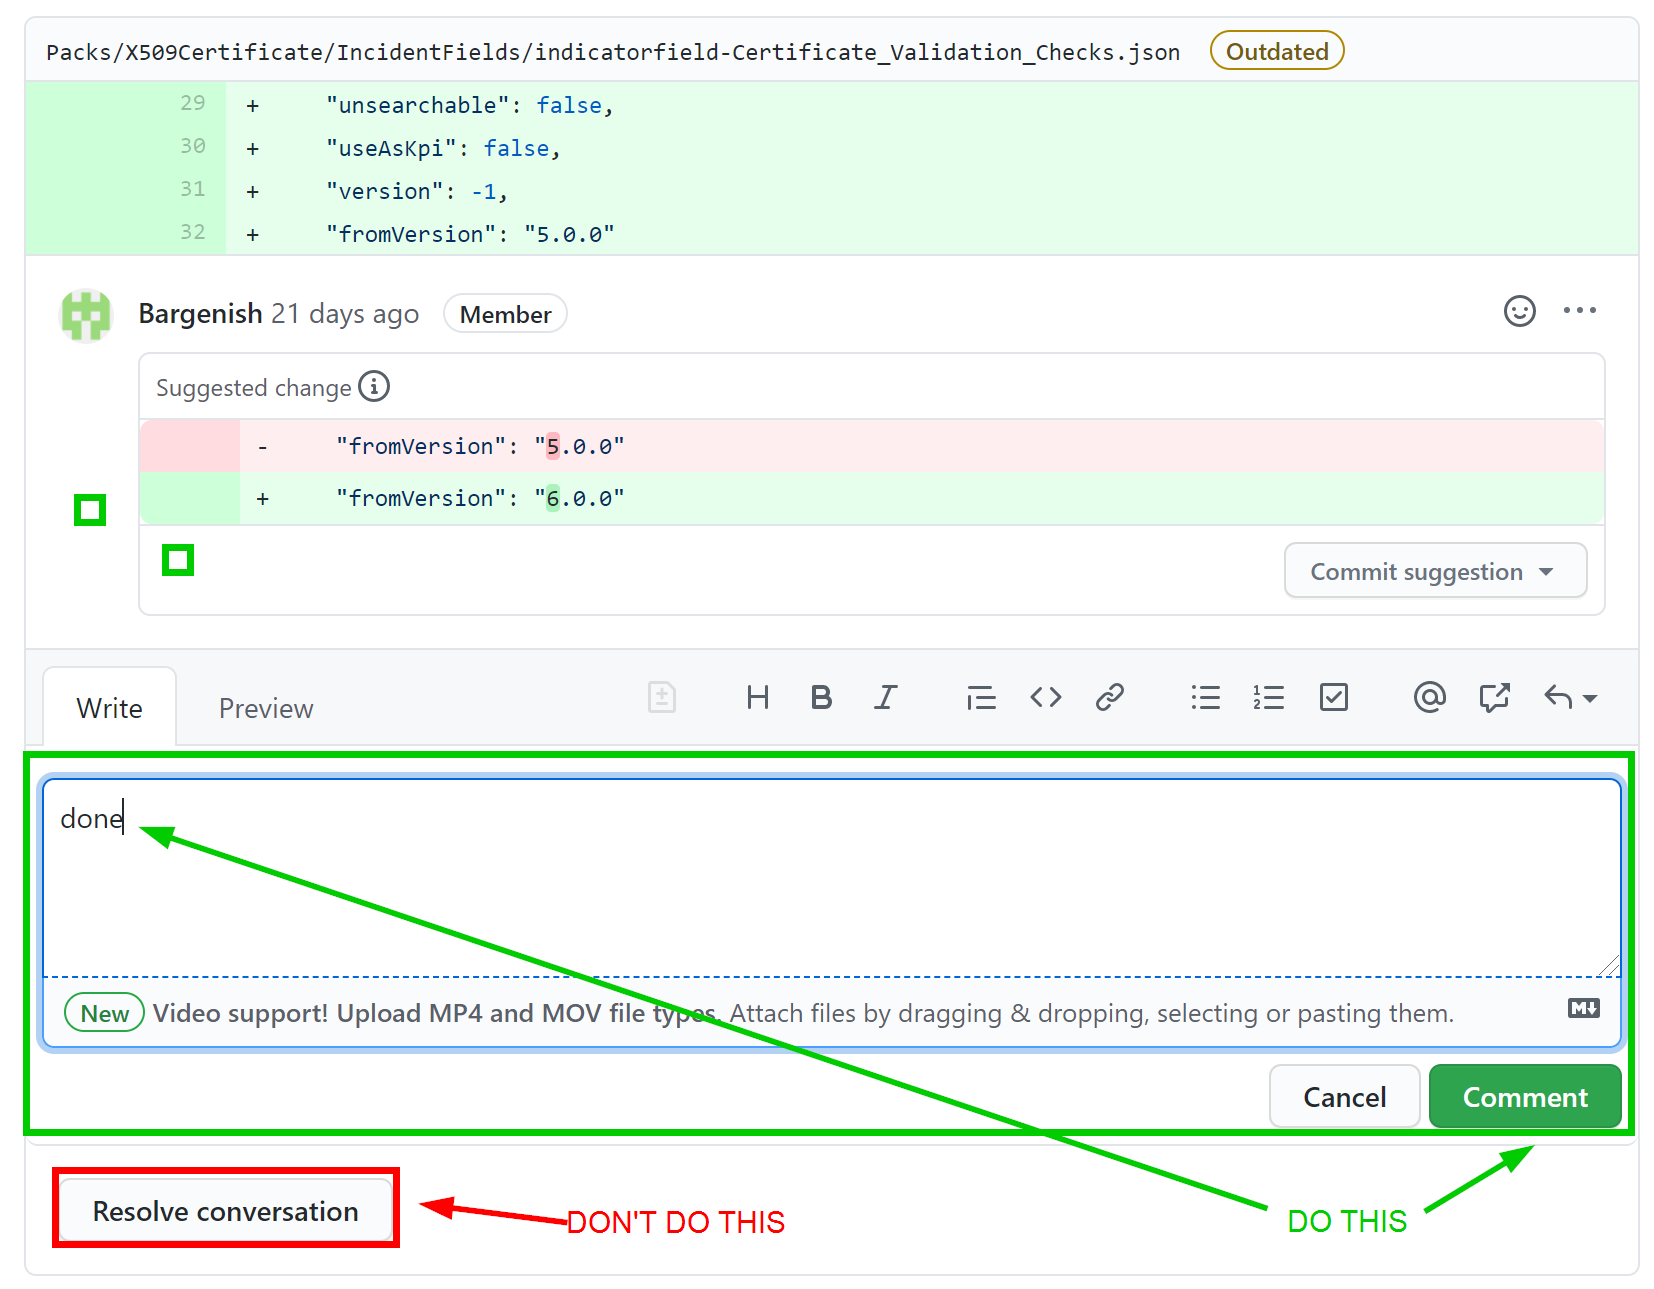
- Once you have pushed all requested changes, please ask for a new review by navigating to Reviewers section in the right sidebar in GitHub and click the
 icon next to the reviewer's name.
 -
If the branch you'll be using as the basis for the pull request includes more than 50 commits, squash all commits into a single commit before creating the pull request. This makes the git history cleaner and easier for reviewers. Below is an example of a squash merge after consolidating 122 commits into one:
COMMITS=122 git reset --hard HEAD~$COMMITS git merge --squash HEAD@{1} git commit -m "squash last $COMMITS into one"Alternatively, you can use a specific commit to squash from:
COMMIT_HASH=0d1ddfc42 git reset --hard $COMMIT_HASH git merge --squash HEAD@{1} git commit -m "squash from $COMMIT_HASH into one"
The build process
The commit hooks of the repository automatically run several commands locally on your system, such as demisto-sdk validate, that verify your content is valid before you commit and push the changes to your pull request.
There are also jobs that run automatically on your pull request after every push that validate the changes and run the same tests to verify the contribution can be merged and become part of the content. You see several GitHub Status Checks that help validate that your pull request is according to our standards.
After you push changes, go back to the pull request and check the status of the build after it's completed. Pay special attention to the checks for unit testing and validations.
If the error is unclear or you are in doubt, add a comment to the PR to ask the reviewer or post a question in the #demisto-developers channel on Slack.
Contribution demo preparation
A demo is the last stage required before the contribution is merged into the content internal repo. To be as prepared as possible and to avoid post-demo change requests, review all of the steps below.
Note
A contribution demo is not required for community-supported content packs.
General notes
- The purpose of the demo is to verify the contribution meets Cortex XSIAM standards and to check that features work as expected, while providing a satisfactory user experience.
- The contributor, the PR reviewer, and in some cases a security reviewer, participate in the the demo.
- The demo can take up to one hour.
Before the demo
- Verify the change requests from your code review are fully addressed and fixed.
- Prepare a Cortex XSIAM tenant that has all recent changes and has the most updated version of your content pack. The demo is performed in this environment.
Demo agenda and workflow
The following may vary based on the size and scope of the contribution.
| Section | Description |
|---|---|
| Product Overview | Short general explanation about the product. |
| Use Cases Overview | The specific use cases for the customer. |
| Integration Commands Overview | Review which commands are implemented. |
| Demo Integration Instance Configuration | <ul><li>Verify it's clear how to retrieve required credentials.</li><li>Verify correct error handling - what happens when credentials are incorrect.</li></ul> |
| Demo Integration Commands | <p>Verify that commands, arguments, and outputs (including descriptions) are according to standard:</p><ul><li>Python code conventions</li><li>Context and outputs</li><li>Context standards</li></ul> |
| Demo Fetch Incidents (if applicable) | Verify that incidents are fetched and displayed correctly. |
| Demo Playbooks (if applicable) | Verify that playbooks run as expected. |
| Review Layouts, Alert and Indicator Types, Alert and Indicator Fields, and Classifiers (if applicable). | <ul><li>Verify layout is bound to incident/indicator type.</li><li></li><li>Verify alert/indicator fields are bound to alert/indicator types.</li><li>Verify classifier is bound to incident type.</li><li>Verify playbook is bound to an incident type.</li></ul> |
After the demo
- If changes were requested during the demo by the reviewers, make and commit these changes.
- After all requested changes are made, the PR is merged.
Contribution SLA
You can contribute content to the Cortex XSIAM Marketplace by contributing through a GitHub pull request on the public content repository. For more information, see Contributing content.
A review phase begins with the opening of the GitHub pull request containing your changes or new content.
Cortex XSIAM content team commitments
Once your PR is open, the content team commits to the following time frames:
- After the PR is opened, a reviewer is assigned to your PR and publishes the initial response to your submission within five business days.
- If you are asked to make changes, you need to make those changes, and add a corresponding message in the pull request. Your reviewer responds within three business days. You might have multiple rounds of fixes. These commitments are the same for each round.
- Your reviewer is available for any questions during the review process. You can contact your reviewer via the PR itself or on Slack (DFIR Slack Community).
- Once your PR is approved and merged by your reviewer, an internal PR including your changes is opened within an hour. The internal PR allows us to run our internal validity and security checks on your final code. The internal PR is merged within three business days. If during the internal PR phase we discover issues related to the code changes made in the contribution, the contributor may be asked to help resolve them.
- Once the internal PR is merged, your changes are published in the Marketplace within three business days.
Contributor commitments
The content team requires contributors to:
- Provide the content team with as much information as possible about changes made or about new content you have created. Provide this information in the pull request body by filling in the template.
-
Register your contribution by filling out the contribution registration form, and sign the CLA (Contributor License Agreement). The review process does not start until those forms are completed.
Links to the Contribution registration form and to the CLA appear on your PR:

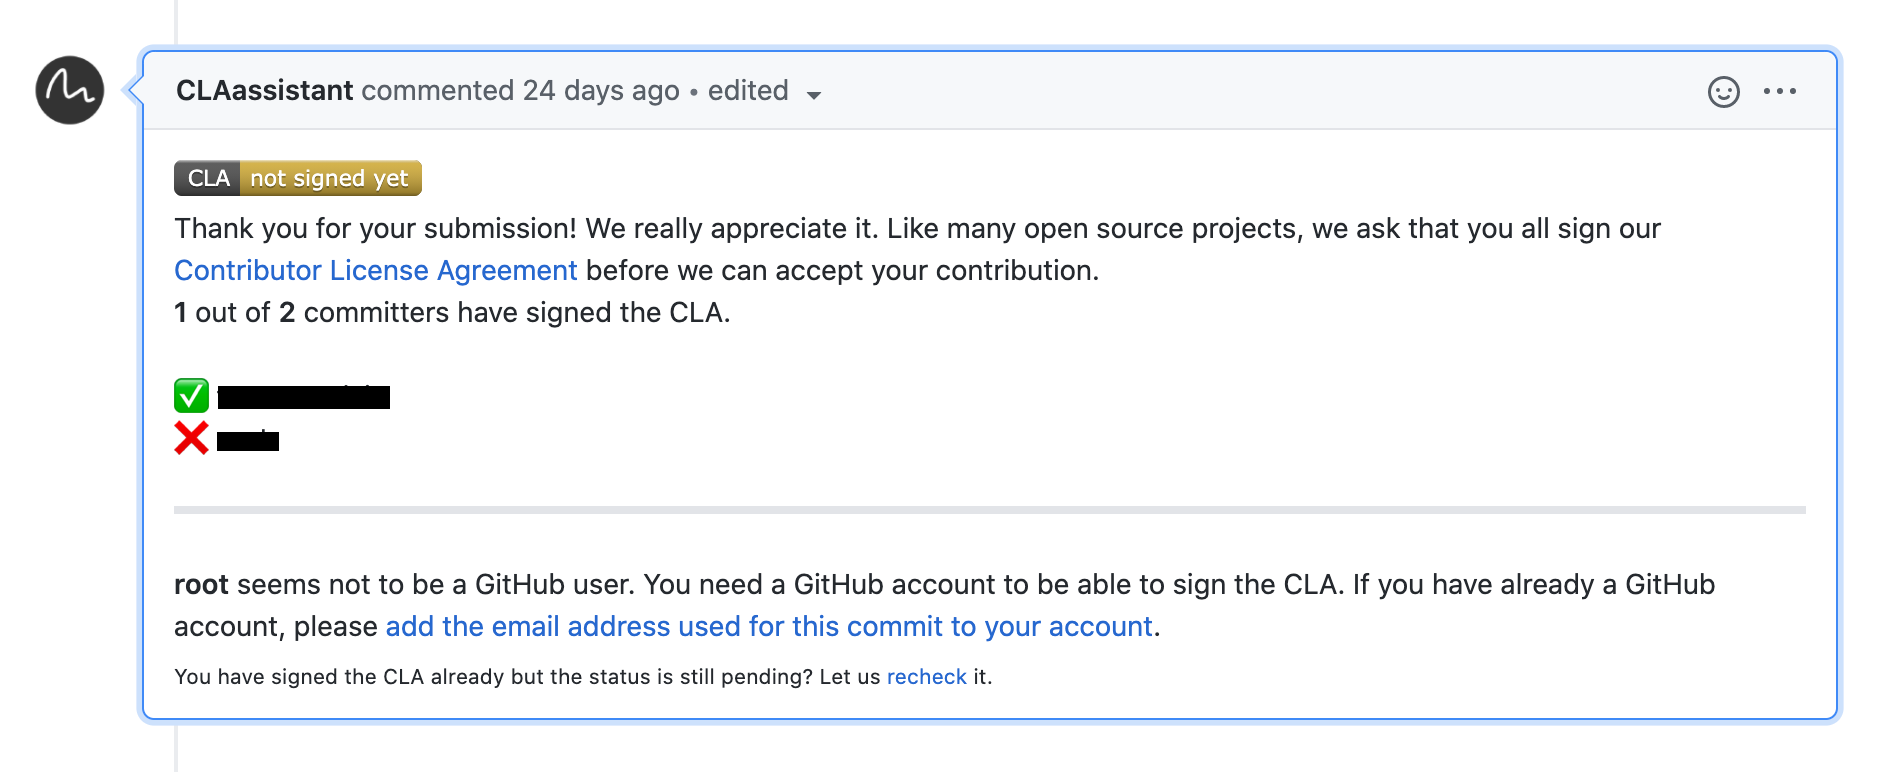
- Provide the content team with a recorded demo session that demonstrates your changes. Add the link to the contribution registration form.
- Check the status of the build of your PR once it is completed. If the build includes errors, try to solve them. For more information, see the build process.
-
During the review process, monitor your PR. Your reviewer may add comments to the PR, asking questions and requesting changes. To expedite the review process for your contribution, respond to the reviewer's code review and apply the required changes within 14 days. Stale pull requests can be closed.
Note
Once your pull request is reviewed, only add or update content items that were requested during the review process. If you have new content items to add, open a new pull request. If you are not sure whether to open a new pull request, consult the reviewer.
- If your contribution includes changes in an Cortex XSIAM supported content pack, you must conform to the Cortex XSIAM code and documentation standards, and add unit tests and a test-playbook to test your code. For more information see Python code conventions, Documentation, Unit testing, and Test playbooks.
While the content team tries to merge and publish your changes as quickly as possible, the duration of the review process depends on many factors including the level of support of the edited content pack, the number and complexity of changes, and various validations and security tests.