Test playbooks ↗
Use test playbooks to check integrations and scripts. Test playbooks provide full end-to-end testing. For testing small units of code, use unit testing. Test playbooks are run using the CI framework. They are run both as part of the build process and on a nightly basis.
Note
By default, test playbooks do not run in the CI for packs that are not supported by Cortex XSIAM. For content packs not supported by Cortex XSIAM, test playbooks are not required unless specifically requested by Cortex XSIAM.
A test playbook has several steps, including testing commands, verifying the results, and closing the investigation.
The naming convention for playbook tests is: Integration_Name_Test.
Generate a test playbook
To auto generate a test playbook based on an integration or script use the demisto-sdk generate-test-playbook command. You can then import the playbook and modify it to meet your needs. You can also manually create a test playbook, by navigating to Playbooks in the UI and clicking New Playbook.
Add DeleteContext
When creating a test playbook, we recommend for the first step to be DeleteContext, which deletes all of the context data. While not always necessary, this ensures that a test playbook has a clean beginning to test from without conflicting data. This can be useful while rerunning a playbook during the development process and can prevent existing data from creating unrelated issues.
- Search for
deletecontextin the Task Library and add theDeleteContextutility task to the playbook. - On the Inputs tab, for all ,select yes.
-
Click OK and connect the
DeleteContexttask to thePlaybook Triggeredtask.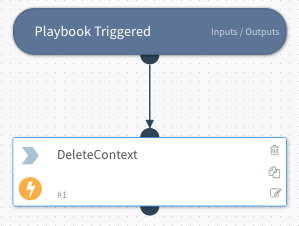
Test a command
We recommend testing as many commands of the integration as possible as tasks. Each command should have a task. For this example we will look at the integration IPInfo v2, which accepts only one command called !ip.
- Navigate to Playbooks and click New Playbook.
- In the Task Library, search for
ipinfo. - Add the IPinfo v2 task to your playbook.
- Enter an IP address in the ip field. This should be an entity that will produce consistent results, such as
8.8.8.8, the Google DNS server. - Click OK to save your changes.
- Connect the DeleteContext task to the ip task
Verify command results
After you run the command, you should verify you have received the expected results.
- Open the Task Library and Create Task.
-
Configure the task:
Option Configuration Conditional Select the Conditional task option Task Name Verify Command Results Condition for: Above From previous tasks, click {} to display the Select source options. Click the #2 ip task that you created. IPinfo.IP Click Address and close the window. IPinfo.IP.Address is now displayed. This is the context path. From previous tasks Wrap the context path using the format ${IP.Address}. Wrapping the context path tells Cortex XSIAM to retrieve the value located in the curly brackets.As value Type 8.8.8.8 and click the checkmark. Note
If you need to edit the value in a field, you can click on the value and edit it. For example, click on the value in the From previous tasks field and edit the ${IP.Address} value.
- (Optional) - If you need to filter or format the result, click Filters and Operations located in the Select source dialog box.
- Click OK.
- Connect the ip task to the Verify Command Results task.
Close the investigation
- In the Task Library, search for
closeinvestigation. - Add the closeInvestigation task found under Builtin Commands.
- Connect the Verify Command Results task to the closeInvestigation task.
- In the pop up dialog box, select yes.
Name and export the playbook
Cortex XSIAM uses a standard naming convention for playbook tests that follows this format: Integration_Name_Test.
- Save Playbook.
- Close the playbook editor.
- Download the playbook from the more options icon.
Add the playbook to your project
- Save your newly created test playbook to the
TestPlaybooksdirectory in your content pack. - In the playbook YAML file that you created, edit the
idso that it is identical to thenamefield. - Change the value in the
versionfield to-1to prevent user changes. -
Using the example above, the beginning of your YAML file should look like this:
id: IPInfo_Test
version: -1
name: IPInfo_Test
-
Add the ID of the test playbook to the YAML of your content-item under the
testskey.tests: - Test Playbook Name
Add tests to conf.json
To associate integrations with a test playbook, we create or update a conf.json file (at the root of the repository). The conf.json file is located in the Tests directory.
The following is an example of a conf.json entry for an integration.:
        {
            "integrations": "Forcepoint",
            "playbookID": "Forcepoint_Test",
            "timeout": 500,
            "nightly": true
        },
The following table describes the fields:
| Name | Description |
|---|---|
| integrations | The ID of the integration that you are testing. |
| playbookID | The ID of the test playbook that you are running. |
| timeout | (Optional) - The time in seconds to extend the timeout to. |
| nightly | (Optional) - Boolean that indicates if the test should be part of only the nightly tests. |
