Generate issues from indicators using indicator rules for prevention and detection ↗
Indicator rules allow you to utilize indicators in the system for detection and prevention. These rules allow you to select indicators or indicator traits to be detected by the tenant and prevented by the endpoint. Indicator rules marked for detection and prevention generate issues that you can then track and investigate.
Note
Indicators should be present in the Threat Intelligence database (Threat Management → Threat Intelligence → Indicators) before creating detection and prevention rules.
Indicator rules can be used for the following:
- Real-time prevention on the agent
Create an indicator rule for a Restrictions profile on the Agent using filters applied on file (SHA256 and MD5) indicators. A Restrictions profile limits the locations from which executables can run on an endpoint. When the Cortex XDR agent detects behavior that matches a rule defined in your profile, the Cortex XDR agent applies the security profile that is attached to the rule for further inspection. An issue is then generated in Cortex XSIAM (source is XDR Agent). For more information about the Restrictions profile, see Set up restrictions prevention profiles.
-
Cortex XSIAM tenant (server-side) detection
Create rules based on filters that are applied to a file (SHA256, MD5) an IP address, and a domain. If an indicator rule applies, an issue is generated in Cortex XSIAM (source is Threat Intelligence).
Note
Although you can create IOC rules for detection, indicator rules are designed to leverage threat intelligence indicators like MD5 and SHA256 hashes that are present in your TIM library. These rules directly integrate with and rely on the indicators ingested and managed by TIM. Indicators must be in the TIM database before creating these rules.
For more information about IOC rules, see What's an IOC?
Create a Prevention Rule
Prevention Rules are created based on the file (SHA256 and MD5) indicator type.
- Create a Restrictions Profile.
- Select Inventory → Endpoints → Policy Management → Prevention → Profiles → Add Profile → Create New.
- Select one of the following Platforms.
- Windows
- MacOS
- Linx
- Select Restrictions.
-
From the Custom Indicator Prevention Rules section, in the Action Mode field, select Enabled.
You will see that there are no custom prevention rules defined. After you create an indicator rule, you will need to edit this profile and select the indicator rule.
- Add the parameters as required. For more information, see Set up restrictions prevention profiles.
- Create the Profile.
- Create the Indicator Rule.
- Select Threat Management → Detection Rules → Indicator Rules → Add Rule → Prevention Rule.
-
From the Create New Prevention Rule wizard, in the General section, add the following parameters:
Parameter Description Rule Name Add a meaningful name. Select Profiles for Prevention (To block files) <p>Select the Retentions profile you created in step 1.</p><p>For the profile to appear, when defining the Retentions profile, the Custom Indicator Prevention Rules section must be set to Enabled.</p> Severity Defines the severity of the issue. Description Add a meaningful description. - Click Next.
-
In the Target section, use the filters and/or select the file indicators to which to apply the rule.
Note
You can't change the Preventable = True, Status = Active and Type = File filters, which comply with the requirements of the supported indicator type for Prevention on the Agent.
Filter Description Value The hash value of the field (SHA256 or MD5). Verdict The reputation of the indicator: Malicious, Suspicious, Benign, Unknown Has Related Issues Whether the indicator has related issues. Campaign Whether the indicator is part of an existing campaign. Mitre ID Mitre ID associated with the related issues. Mitre Tactic Mitra Tactic associated with the related issues. Tags The tags applied to indicators. Confidence The level of confidence. Aggregated Reliability The reliability score such as A - Completely reliable. Feed The source (script, manual, etc.) that last set the indicator's expiration status. - Click Next and then save the rule.
- Add the indicator rule to the Restrictions Profile.
- Go to Inventory → Endpoints → Policy Management → Prevention → Profiles.
- Edit the Restrictions Profile you created in step 1.
- In the Custom Indicator Prevention Rules tab, select the indicator rule you created in step 2.
- Save the Profile.
Example 192. Create a prevention rule blocking indicators from a feed
In this example, create an Indicator Prevention rule, which blocks file indicators using the Unit 42 Feed and then generates an issue.
Before you begin create a Restrictions Profile called JC-Win-R-O1, with the Custom Indicator Prevention Rules section set to Enabled.
-
Create a Prevention Indicator Rule and in the General section, add the following parameters.
Field Value Rule Name JC-IR-Prevent-02 Select Profiles For Prevention (To Block Their Files) JC-WIN-R-01 Severity Medium Description To raise prevention on IOCs from Unit 42 Feed -
In the Target Section, select the
Feed=Unit 42filter.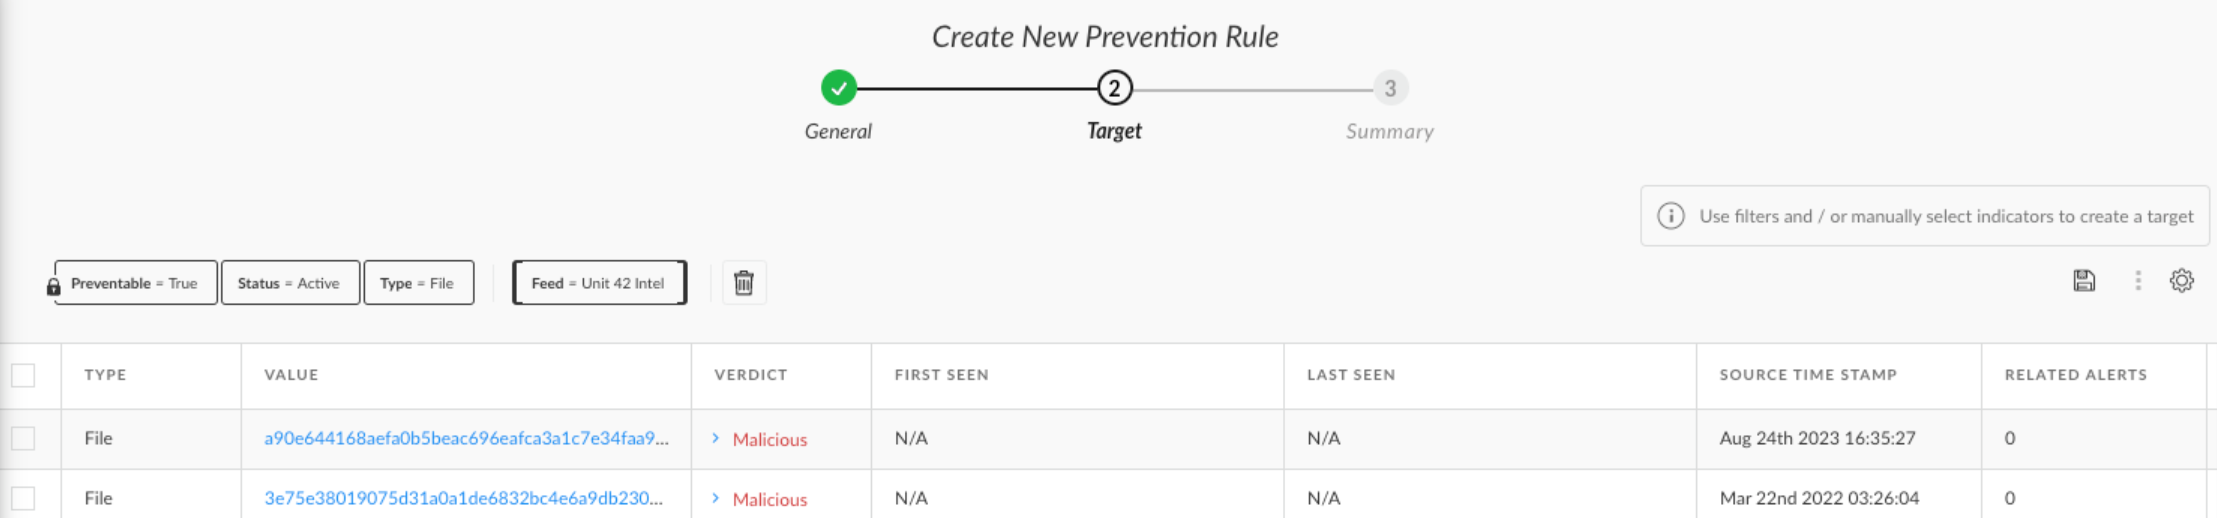
-
In the Restrictions Profile, add the indicator rule.
When a file indicator from Unit 42 feed is found, the XDR Agent blocks the indicator.
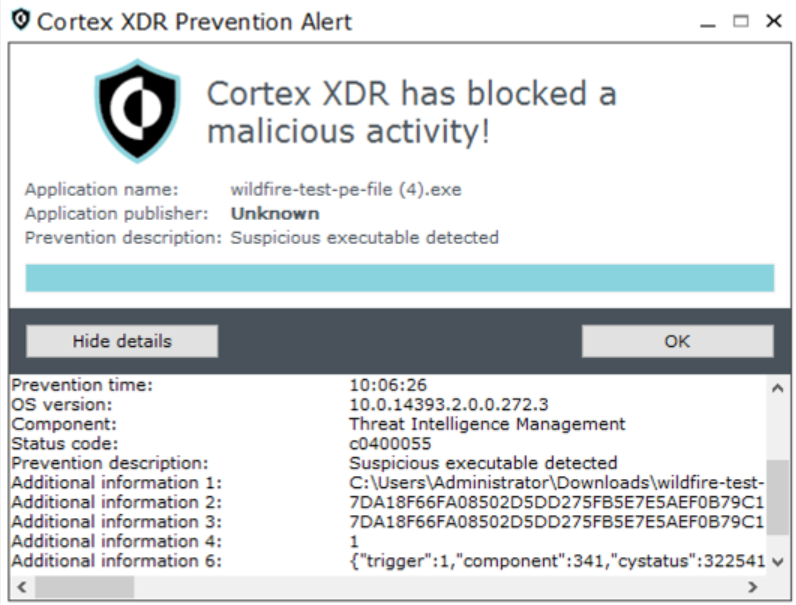
An issue is generated in Cortex XSIAM. The Issue Source is XDR Agent, severity is medium and the Action is Prevented (Blocked).

Note
The Indicator Rule shows the number of issues generated by the rule. You can view the issues that were generated using the Indicator rule by right-clicking the rule and select View related issues.
Create a Detection rule
After you create a detection rule, Cortex XSIAM searches indicators in your tenant and raises an issue if a match is detected. Detection rules apply for File, Domain, and IP Address indicator types.
- Select Threat Management → Detection Rules → Indicator Rules → Add Rule → Detection Rule.
-
From the Create New Detection Rule wizard, in the General section, add the following parameters:
Parameter Description Rule Name Add a meaningful name. Severity Defines the severity of the issue. Description Add a meaningful description. - Click Next.
-
In the Target section, use the filters and/or select the file indicators to which to apply the rule.
Note
You can't change the Detectable = True and Status = Active filters, which comply with the requirements of the supported indicator type for detection.
Filter Description Value The hash value of the field (SHA256 or MD5), IP address, or domain. Verdict The reputation of the indicator: Malicious, Suspicious, Benign, Unknown Has Related Issues Whether the indicator has related issues. Campaign Whether the indicator is part of an existing campaign. Mitre ID Mitre ID associated with the related issues. Mitre Tactic Mitra Tactic associated with the related issues. Tags The tags applied to indicators. Confidence The level of confidence. Aggregated Reliability The reliability score such as A - Completely reliable. Feed The source (script, manual, etc.) that last set the indicator's expiration status. Type The indicator type (Domain, File, IP) - Click Next and then save the rule.
- If the indicator rule has generated issues, right-click the rule and select View related issues.
Example 193. Create a detection rule from feeds
In this example, create a detection rule from many feeds, such as Unit 42, AzureRiskyUsers, and Mail-Sender that returns a malicious verdict.
-
In the General section, add the following parameters.
Field Value Rule Name JC-IR-Prevent-01 Severity Medium Description To raise detection on all indicators uploaded from feeds with a malicious verdict. -
In the Target Section, select Feed (Select All) and Verdict = Malicious.
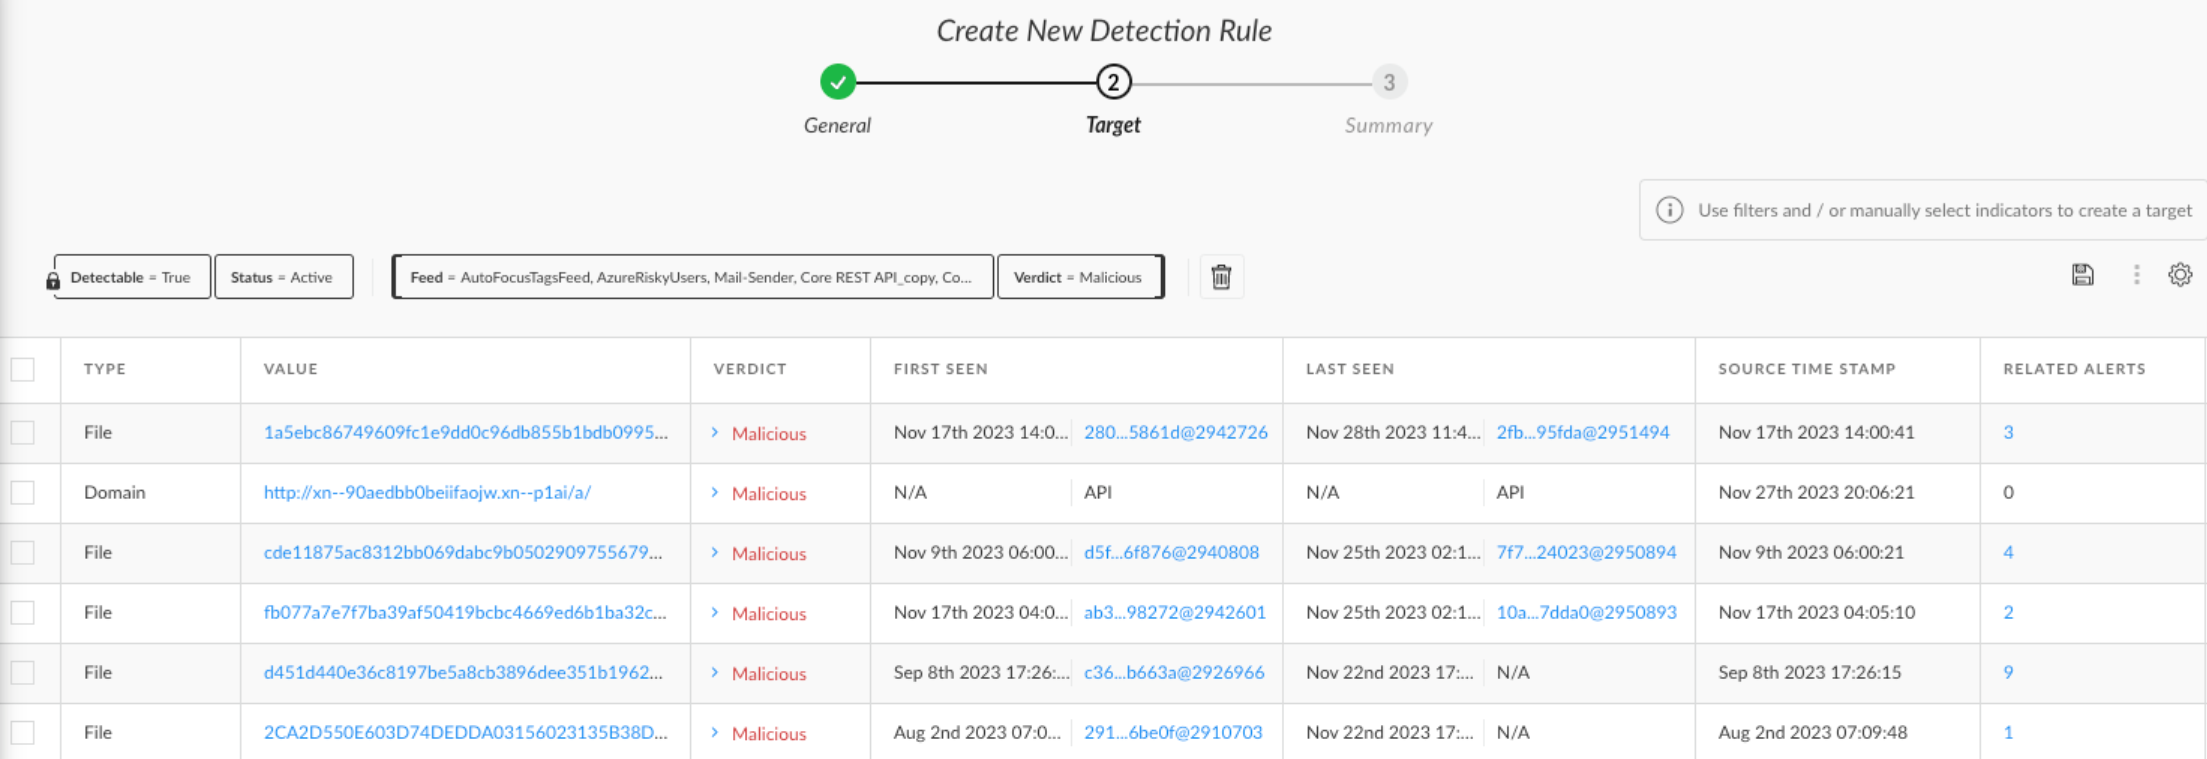
When a malicious verdict is found from the feed, an issue is generated. The Issue Source is Threat Intelligence, severity is medium and the Action is Detected.

Note
The Issue source is Threat Intelligence.
Manage Indicator Rules
The Indicator Rules page displays the following fields for each rule:
| Field | Description |
|---|---|
| Rule ID | Unique identifier for the rule. |
| Creation Date | Timestamp of when the rule was created. |
| Modification Date | Timestamp when the rule was edited. |
| Name | Name of the rule. |
| Type | Whether the rule is a Prevention or Detection type rule. |
| Target | Hash, IP address, File, or domain value associated with the rule. |
| Severity | Level of severity associated with the rule. |
| # of issues | Number of issues generated by the rule. |
| Created by | The email address of the user who created the rule. |
| Description | An optional description associated with the rule. |
| Status | Whether the rule is Enabled or Disabled. |
| Used in profiles | Cortex XDR agent Restriction Profile associated with the rule. |
Note
If an indicator matches multiple indicator rules, the highest severity rule is used. If all have the same severity, the rules are used by the first created.
In the Indicator Rules table, right-click a rule to perform actions, including the following:
| Action | Description |
|---|---|
| View related issues | View issues generated by the rule. |
| Disable/Enable | Depending on the current status, Disable or Enable the rule. |
| Edit Rule | Modify the rule. |
| Save as new | Create a new rule using the current rule configurations. |
| Delete | Delete the rule. |